Table of Contents
Advertisement
Quick Links
Advertisement
Table of Contents

Related Manuals for AUDAC R2


Summary of Contents for AUDAC R2
- Page 1 User Manual www.audac.eu...
-
Page 3: Table Of Contents
Audio in- and outputs Priority, S/PDIF & Fiber link inputs Peripheral interfaces Control ports Chapter 3: Wire up the system Chapter 4: R2 Quick start guide Connecting the R2 Configuring the R2 Chapter 5: User interface & configuration Open the user interface... - Page 4 Chapter 6: Peripheral interfaces Wall mounted control panels DW3018/4018 Basic wall panel DW5065 All-in-one wall panel Connection possibilities Chapter 7: Paging Chapter 8: Cascading the R2 Principle Fiber audio flow Setting up the project Connection possibilities Chapter 9: Additional information...
-
Page 5: Introduction
Introduction Multi-Zone Audio Matrix System... -
Page 7: Environment
Environment... -
Page 9: Safety Requirements
Safety requirements CAUTION - SERVICING NOTE 5 99... -
Page 11: Chapter 1: Pin Connections And Connectors
Chapter 1 Pin connections and connectors inch (RCA): Sleeve White RJ45 (RS485, Digital Audio, +24V DC): Pin 1 Pin 2 Pin 3 Pin 4 Pin 5 Pin 6 Pin 7 Pin 8 ATTENTION RS232 (serial connection interface): Connection PIN 2 PIN 3 PIN 5 Settings... -
Page 13: Chapter 2: Overview Front And Rear Panel
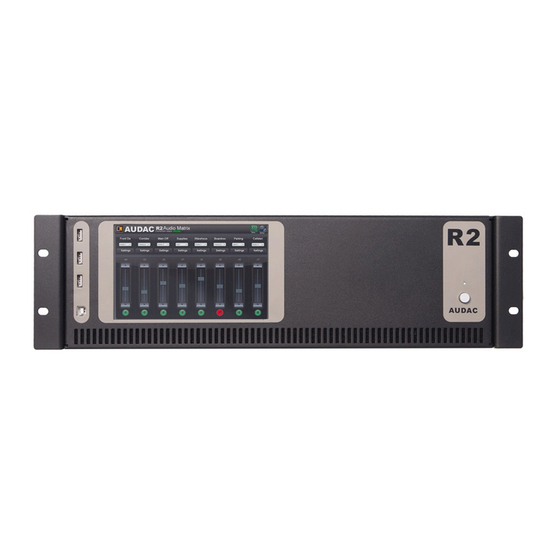
Chapter 2 Overview front & rear panel Front... -
Page 14: Rear Description
Rear Audio in- and outputs Priority, S/PDIF & Fiber... -
Page 15: Peripheral Interfaces
Peripheral interfaces Control ports Chapter 3 Wire up the system... -
Page 16: Chapter 4: R2 Quick Start Guide
Chapter 4 R2 Quick start guide This chapter guides you through the setup process of a basic project with one R2 audio matrix and 8 standard DW3018/4018 wall panels. Prog. Prog. Prog. Prog. Prog. Prog. Prog. Prog. Overview of the R2 setup... -
Page 17: Configuring The R2
Configuring the R2 1) Changing the IP address 2) Changing the password 3) Configuring wall panels and sources Ready... -
Page 19: Chapter 5: User Interface & Configuration
Start your default web browser and enter in the address bar the IP address of the embedded web server of the R2. (The factory default IP address is http://192.168.0.191). If multiple R2’s are cascased with each other through the fiber interconnection interface, first a selection screen will be displayed whereby the R2 should be selected which you want to control. -
Page 20: Main Screen
Main screen Volume control Assign zone names Connection status Input channel selection Configuration menu Main screen... -
Page 21: Zone Settings
Zone settings Input channel selection Back Save zone settings Zone settings... -
Page 22: Sound Settings
Zone settings >> Sound settings Digital Filter Two band tone control Back Sound settings... -
Page 23: Test Signals
Zone settings >> Test signals Signal Selection Back Test signals... -
Page 24: Zone Linking
Zone settings >> Zone linking Linking Linked by priority contact Fixed Linked Slave Back Zone linking... -
Page 25: Input Selection
Zone settings >> Input selection Selection Back Input selection... -
Page 26: Configuration Settings Screen
Configuration settings screen Save configuration Back Settings Settings >> Digital input selection Back R2 Digital Input Settings... -
Page 27: Timer Settings
Digital Input Settings Settings >> Timer Settings Change Routing Change Volume Single and recurring Back... -
Page 28: Time Settings
Timer settings Settings >> Time settings Time Settings... -
Page 29: Network Settings
Settings >> Network settings 55 55 55 Be aware: Network Settings Settings >> Paging settings ∞ Back... -
Page 30: Priority Settings
Paging Settings Settings >> Priority settings Priority input selection HARDIN - FADEOUT... -
Page 31: System Configuration
Priority Settings Settings >> System configuration Chapter 6: Peripheral Interfaces Back... -
Page 32: R2 Address Settings
System configuration Settings >> R2 Address settings Address Settings... -
Page 33: Fiber Settings
Settings >> Fiber settings NOTE Chapter 8: Cascading the R2 Fiber Settings... -
Page 34: Amplifier Bridging
Settings >> Amplifier bridging Amplifier Bridging Settings >> Password settings Administrator User User... -
Page 35: Factory Settings
R2 Password Settings Settings >> Factory settings ATTENTION BE CAREFULL Restore Factory Settings... - Page 36 Lite User Interface Lite User Interface >> Login screen Lite User Interface >> Main screen Small user interface for mobile devices...
-
Page 37: Iphone + Ipad
iPhone + iPad... -
Page 38: Chapter 6: Peripheral Interfaces
Chapter 6 Peripheral interfaces Devices possible to connect to the PI ports: DW3018/4018 Basic wall panel with routing and volume control DW5065 Advanced wall panel with graphic display stereo line input and microphone input APM Paging system Connection possibilities Important... -
Page 39: Wall Mounted Control Panels
Wall mounted control panels Prog. LINE IN MIC IN AUDAC DW3018/4018 (Left) & DW5065 (Right) Wall panels DW3018/4018 Basic wall panel Functions Change routing Change volume Configuration... -
Page 40: Dw5065 All-In-One Wall Panel
Maximum cable length No. of DW3018/4018 Wall panels Maximum cable length DW5065 All-in-one wall panel Functions Configuration... -
Page 41: Connection Possibilities
Maximum cable length for DW5065 Connection possibilities Prog. Prog. Prog. Multiple DW3018/4018 Wall panels on one PI Port (PI1 to PI10) Prog. Prog. LINE IN MIC IN AUDAC Multiple DW3018/4018 and one DW5065 Wall panel on one PI Port (PI1 to PI8) -
Page 43: Chapter 7: Paging
Chapter 7 Paging 1 Zone paging example 8 Zone paging example Priority Connection possibilities... - Page 44 Paging over fiber Limits Connection limits summary...
- Page 45 Configuration Paging volume APM configuration...
- Page 46 Zone Select:...
- Page 47 Play message:...
-
Page 49: Chapter 8: Cascading The R2
Chapter 8 Cascading the R2 Principle... -
Page 50: Fiber Audio Flow
Fiber audio flow Diagram R001 Fb 1 Fb 2 Fb 3 Fb 4 Fb 5 Fb 6 Fb 7 Fb 8 Channel R002 Fb 1 Fb 2 Fb 3 Fb 4 Fb 5 Fb 6 Fb 7 Fb 8 Channel R003 Fb 1 Fb 2... - Page 51 Diagram explanation - Fiber channel 1 (Fb 1): - Fiber channel 2 (Fb 2): - Fiber channel 3 (Fb 3) - Fiber channel 4 (Fb 4): - Fiber channel 5 (Fb 5): - Fiber channel 6 (Fb 6): -Fiber channel 7 (Fb 7): - Fiber channel 8 (Fb 8)
-
Page 52: Setting Up The Project
Setting up the project NOTE 1) Configuration of R2 Address Method 1: Method 2:... - Page 53 R001 R001 R002 R002 R003 R003 R004 R004 R005 R005 Example setup with 5 R2’s, on the left side with only one Ethernet connection (Method 1) while on the right side every R2 has a separate ethernet connection (Method 2)
- Page 54 2) Configuration of Fiber channels 3) Set passwords 4) Connecting sources 5) Connecting wallpanels 6) Ready...
- Page 55 Chapter 9 Additional information IP Basics Example: 192.168.000.001 192.168.000.002 192.16 8.001.003 Summary...
-
Page 56: Updating The R2
Updating the R2 Overview Required software Step 1: DSP update Step 2: FPGA update Step 3: Website update... -
Page 57: Technical Specifications
Technical specifications... - Page 58 Notes...
- Page 59 Notes...
- Page 60 Notes...
Need help?
Do you have a question about the R2 and is the answer not in the manual?
Questions and answers