Table of Contents
Advertisement
Available languages
Available languages
Advertisement
Chapters
Table of Contents

Related Manuals for Klarstein 10032506


Summary of Contents for Klarstein 10032506
- Page 1 Mobile Klimaanlage Mobile Air Conditioner 10032506 10032507 10032508 10032509...
-
Page 3: Table Of Contents
Sehr geehrter Kunde, wir gratulieren Ihnen zum Erwerb Ihres Gerätes. Lesen Sie die folgenden Hinweise sorgfältig durch und befolgen Sie diese, um möglichen Schäden vorzubeugen. Für Schäden, die durch Missachtung der Hinweise und unsachgemäßen Gebrauch entstehen, übernehmen wir keine Haftung. INHALT Technische Daten 4 Sicherheitshinweise 5... -
Page 4: Technische Daten
TECHNISCHE DATEN Artikelnummer 10032506, 10032507, 10032508, 10032509 Stromversorung 220-240 V~ 50 Hz... -
Page 5: Sicherheitshinweise
SICHERHEITSHINWEISE • Lesen Sie die Bedienungsanleitung vor der Verwendung des Geräts sorgfältig durch. Bewahren Sie die Bedienungsanleitung für den zukünftigen Gebrauch auf. • Das Gerät ist nur für die Verwendung im Innenbereich ausgelegt. • Verwenden Sie das Gerät nur für seinen vorgesehenen Verwendungszweck. •... - Page 6 physischen, sensorischen oder mentalen Fähigkeiten verwendet werden, insofern diese von einer für Sie verantwortlichen Person beaufsichtigt werden oder von dieser in das Gerät eingewiesen wurden und die mit der Verwendung des Geräts verbundenen Risiken verstanden haben. • Die Klimaanlage darf nicht als Spielzeug verwendet werden.
-
Page 7: Geräteübersicht
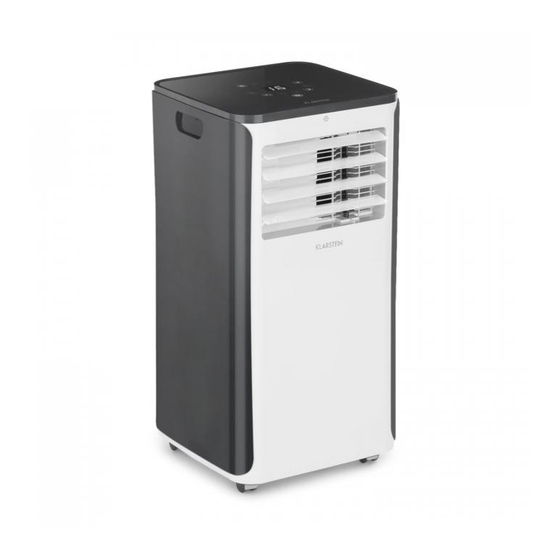
GERÄTEÜBERSICHT Obere Abdeckung Bodenplatte Bedienfeld EVA-Filter Seitenverkleidung B 10 Kontinuierliches Wasserablaufventil Belüftungsöffnung/ Lüftungsschlitz 1 1 Kabelhalter Vordere Abdeckung B 12 Belüftungsöffnung Hintere Abdeckung B 13 Filter Rolle 14 Wasserablaufventil... -
Page 8: Aufstellung
AUFSTELLUNG Bevor Sie das Gerät nutzen, muss es mindestens 2 Stunden aufrecht gestanden haben. Das Klimagerät kann im Zimmer ganz einfach umgestellt werden. Achten Sie beim Umstellen darauf, dass das Gerät aufrecht auf einer ebenen Fläche steht. Stellen Sie die Klimaalage nich in einem Badezimmer oder feuchten Umgebung auf. -
Page 9: Bedienung
BEDIENUNG Bedienfeld Ein/Aus Luftentfeuchtungsmodus Hoch Kühlungsmodus Runter 10 LED-Bildschirm Schlaffunktion 1 1 Wassertank voll Hohe Ventilatorgeschwindigkeit 12 Timer Niedrige Ventilatorgeschwindigkeit Ventilatormodus... - Page 10 1. Erstes Einschalten Wenn Sie den Netzstecker des Geräts zum ersten Mal in die Steckdose stecken, wird ein summendes Geräusch ertönen und das Gerät wird automatisch in den Standby-Modus wechseln. 2. Ein- und Ausschalten Drücken Sie die Taste , um das Gerät ein- und auszuschalten. 3.
- Page 11 Fernbedienung Tasten der Fernbedienung 1. Drücken Sie die Taste zum Ein- und Ausschalten der Klimaanlage. 2. Drücken Sie die Taste zum Einstellen der Zeit bis zum automatischen Ausschalten. 3. Drücken Sie die Taste zum Reduzieren der Temperatur und der Zeiteinstellung. 4.
-
Page 12: Schutzfunktionen
SCHUTZFUNKTIONEN Frostschutz Wenn die Temperatur des EVA-Rohr-Sensors bei der Kühlung zu niedrig ist, wird das Gerät automatisch den Frostschutz aktivieren. Wenn die Temperatur des Sensors wieder aus eine adäquate Temperatur ansteigt, nimmt die Klimaanlage den normalen Betrieb automatisch wieder auf. Überlaufschutz Wenn das Wasser im Wasserbehälter eine bestimmte Höhe übersteigt, gibt das Gerät automatisch ein Warnsignal ab und die Wassertank-Voll-Anzeige wird blinken. -
Page 13: Wasser Ablassen
WASSER ABLASSEN Manuelles Wasser ablassen 1. Schalten Sie das Gerät aus, wenn die Wassertank-Voll-Anzeige erscheint und ziehen Sie den Netzstecker aus der Steckdose. HINWEIS Bitte bewegen Sie das Gerät vorsichtig, so dass Sie das Wasser im Wassertank an der Unterseite des Geräts nicht verschütten. 2. - Page 14 Siebfilterreinigung Wenn der Siebfilter mit Staub verschmutzt ist, nimmt die Effektivität der Klimaanlage ab. Reinigen Sie den Siebfilter einmal alle 2 Wochen. Ergreifen Sie die Drucksperre des EVA-Siebfilterrahmens mit den Händen. Drücken Sie diese von außen herunter, um den Rahmen zu entfernen. Lösen Sie die vier Schrauben, die den Siebfilter fixieren und die hintere Abdeckung, um den Filter zu entnehmen (vgl.
-
Page 15: Fehlersuche Und Fehlerbehebung
FEHLERSUCHE UND FEHLERBEHEBUNG Versuchen Sie keinesfalls die Klimaanlage selbst zu reparieren oder auseinanderzubauen. Eine nicht fachgerechte Reparatur führt zu einem Verfall der Garantie und kann zu Sach- und/der Personenschäden führen. Probleme Mögliche Gründe Mögliche Lösungen 1. Kein Strom. 1. Schalten Sie das Gerät ein, Klimaanlage 2. - Page 16 Probleme Mögliche Gründe Mögliche Lösungen Der Kompressor 1. Der Frostschutz hat sich Warten Sie 3 Minuten, bis läuft nicht. aktiviert. sich die Temperatur wieder 2. Der Überhitzungsschutz hat normalisiert hat und starten sich aktiviert Sie das Gerät dann neu. 1. Der Abstand zwischen 1.
-
Page 17: Hinweise Zur Entsorgung
HINWEISE ZUR ENTSORGUNG Befindet sich die linke Abbildung (durchgestrichene Mülltonne auf Rädern) auf dem Produkt, gilt die Europäische Richtlinie 2012/19/EU. Diese Produkte dürfen nicht mit dem normalen Hausmüll entsorgt werden. Informieren Sie sich über die örtlichen Regelungen zur getrennten Sammlung elektrischer und elektronischer Gerätschaften. - Page 18 Dear Customer, Congratulations on purchasing this equipment. Please read this manual carefully and take care of the following hints on installation and use to avoid technical damages. Any failure caused by ignoring the items and cautions mentioned in the operation and installation instructions are not covered by our warranty and any liability CONTENTS Technical Data 19...
-
Page 19: Technical Data
TECHNICAL DATA Item number 10032506, 10032507, 10032508, 10032509 Power supply 220-240 V~ 50 Hz... -
Page 20: Safety Instructions
SAFETY INSTRUCTIONS • The air conditioning is only suitable for indoor use, and is not suitable for other applications. • Follow local grid interconnection rules while installing the air conditioning and ensure that it is properly grounded. If you have any question on electrical installation, follow the instructions of the manufacturer, and if necessary, ask a professional electrician to install it. -
Page 21: Device Overview
DEVICE OVERVIEW Top cover Base plate Control panel EVA filter Side panel B 10 Continuous drainage hole Air outlet 1 1 Wrapping post Front housing 12 Air vent Rear housing 13 CON filter Caster... -
Page 22: Installation
INSTALLATION Before using the mobile air conditioning, keep it upright for at least two hours. The air conditioning can be easily moved in the room. In the moving process, ensure that the air conditioning is in the upright position and the air conditioning should be placed on a flat surface. -
Page 23: Operation
OPERATION Control panel Power Dehumidifying mode Cooling mode Down 10 LED display Sleep 1 1 Water full High fan speed 12 Timer Low fan speed Fan mode... - Page 24 1. First operation When the machine is powered on for the first time, the buzzer will shout, and then the machine will get into standby status. 2. Power Key Press the key to turn on and turn off the machine. In the case of power on, press the key to turn off the machine;...
- Page 25 Remote Control Modes 1. Power: Press the key to turn on or turn off the machine. 2. Timer: press the key to set timing. 3. Down: press the key to reduce temperature and timing set value. 4. Mode: press the MODE key to switch between cooling, dehumidifying, fan mode. 5.
-
Page 26: Protection Functions
PROTECTION FUNCTIONS Frost Protection Function In cooling, if the temperature of the EVA pipe sensor is too low, the machine will automatically enter protection status; if the temperature of the EVA pipe sensor rises to a certain temperature, it can automatically revert to normal operation. Overflow Protection Function When water in the water pan exceeds the warning level, the machine will automatically sound an alarm, and the W.F indicator will flash. -
Page 27: Drainage Instructions
DRAINAGE INSTRUCTIONS Manual drainage 1. When the machine stops after the water is full, turn off the machine power and unplug the power plug. Notes: Please move the machine carefully, so as not to spill the water in the water pan at the bottom of the body. - Page 28 from the outside to remove the EVA filter screen frame. Unscrew four screws fixing the EVA filter screen and the rear housing to remove the EVA filter screen (as shown in the above figure) . 2. Put the EVA filter screen into warm water with neutral detergent (about 40 °C / 104 °F) and dry it in the shade after rinsing clean.
-
Page 29: Troubleshooting
TROUBLESHOOTING Do not repair or disassemble the air conditioning by yourself. Unqualified repair will lead to failure of the warranty card, and may cause damage to users or their properties. Problems Reasons Solutions The air There is no electricity. Turn it on after connecting it to conditioning The water-full indicator will a socket with electricity. - Page 30 Problems Reasons Solutions The remote The distance between the Let the remote control get control does machine and the remote close to the air conditioning, not work. control is too far. and make sure that the remote The remote control is not control directly faces to the aligned with the direction of direction of the remote control...
-
Page 31: Disposal Considerations
DISPOSAL CONSIDERATIONS According to the European waste regulation 2012/19/EU this symbol on the product or on its packaging indicates that this product may not be treated as household waste. Instead it should be taken to the appropriate collection point for the recycling of electrical and electronic equipment.
Need help?
Do you have a question about the 10032506 and is the answer not in the manual?
Questions and answers