Table of Contents
Advertisement
Quick Links
Advertisement
Table of Contents

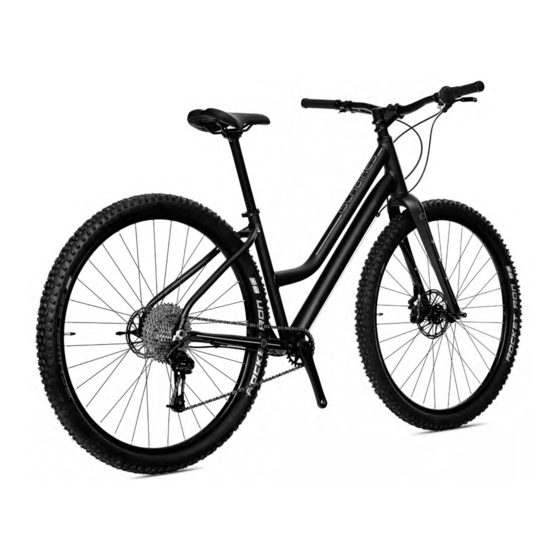
Summary of Contents for ISLABIKES Icons Jimi
- Page 1 Icons Jimi Owner’s manual www.islabikes.co.uk...
- Page 2 Brake levers Saddle clamp Brake calipers Stem Rotors Stem bolts Saddle 10. Headset Seatpost 11. Headset spacers Seatpost clamp 12. Headset adjuster bolt 13. Handlebars 19. Rear derailleur 14. Grip shift 20. Cassette 15. Rim 21. Frame 16. Spokes 22. Forks 17.
- Page 3 Setting up your Islabike Step 1 of 6: Remove front wheel and fork packaging Remove front wheel Remove brake caliper spacer protection packaging. DO NOT PULL BRAKE when caliper spacer is removed. Please keep caliper spacer for transportation when wheel is removed. www.islabikes.co.uk...
- Page 4 Step 2 of 6: Place front wheel in fork and install the thru axle Place the front wheel into the fork dropouts. Push the thru axle through the clearance hole in the right (driveside) leg of the forks and through the wheel hub up until the axle reaches the thread in the opposite fork leg.
- Page 5 Secondly, push and pull the wheel from side to side. If there is no movement from either of these actions the wheel is installed correctly. We strongly recommend routinely checking that the thru axle is still tight. www.islabikes.co.uk...
- Page 6 Failure to correctly tighten stem clamp bolt may result in serious injury or death. If in doubt, please consult our technical support team on +44 (0)800 008 6297 or email techsupport@islabikes.co.uk. Before riding check front brake operation is correct. To check this, apply both the front and rear brake, they should feel the same.
- Page 7 Tighten b. Right pedal Tighten Left pedal: Rotate pedal axle clockwise towards front of bike Right pedal: Rotate pedal axle anti-clockwise towards front of bike Tighten max. 30Nm Please ensure you identify the left and right pedals before installing. www.islabikes.co.uk...
- Page 8 Step 5 of 6: Adjust saddle height Tighten Loosen seatpost-clamp Move to desired height Tighten clockwise max. 4Nm Seatposts are clearly marked with minimum insertion mark. Please do not raise saddle above this line. Icons - Jimi...
- Page 9 Important: do not lock up the wheels at any point during the bed-in procedure. Allow the brakes to cool prior to any additional riding. If you require further information about your brakes, contact our technical support team on +44 (0)800 008 6297 or email techsupport@islabikes.co.uk. www.islabikes.co.uk...
- Page 10 Ready to ride Safety first Before you head off please read our advice for safe cycling. Ensure that your helmet is adjusted correctly in accordance with the manufacturer’s instructions. Ensure you are wearing sturdy footwear and nothing can become entangled in the pedal or drivetrain. Ensure that you familiarise yourself with your new bicycle in a safe environment.
- Page 11 Handlebar ends can become exposed from repeated contact with the ground or heavy fall. Never ride a bike with an unplugged handlebar end. You can buy replacement handlebar grips on our website www.islabikes.co.uk or call +44 (0)800 008 6297. www.islabikes.co.uk...
-
Page 12: Usage Guidelines
Usage guidelines Your Jimi has been designed to be ridden on rough trails, rough unpaved roads and rough terrain that require technical skill. Jumps and drops are intended to be less than 61cm (24 inches). The maximum safe combined rider and luggage weight limits are as follows: Jimi S/M/L = 125Kg Nothing lasts forever, including your bike. - Page 13 If in any doubt, please contact our technical support team on +44 (0)800 008 6297 or email techsupport@islabikes.co.uk. Or take it to a qualified cycle mechanic for inspection.
- Page 14 Discontinue use immediately if anything untoward is spotted and contact our technical support team on +44 (0)800 008 6297 or email techsupport@islabikes.co.uk. Icons - Jimi...
-
Page 15: Maintenance
Of course, if you are unsure of anything we strongly recommend you seek professional advice or contact our technical support team on +44 (0)800 008 6297 or email techsupport@islabikes.co.uk. Firstly, moving parts on your bicycle will need lubricating from time to time. -
Page 16: Disc Brakes
+44 (0)800 008 6297 or email techsupport@islabikes.co.uk. Brake pad wear and replacement – Brake pads do not last forever. - Page 17 Wheels Rim trueness – Depending on the type of riding you do your Islabikes bikes wheels may become untrue or damaged when riding. This means they will not spin straight and will wobble. If for any reason they are untrue our wheels can be easily repaired, please contact our technical support team on +44 (0)800 008 6297 or email techsupport@islabikes.co.uk.
-
Page 18: Tyres And Tubes
Inflate to correct pressure and then carefully re-tighten to close the valve. Use our guide to inflate your tyres, https://www.islabikes.co.uk/knowledge/ technical-support/maintaining-your-islabike/ Valve closed... - Page 19 Place your Islabike in gear 1 or the biggest sprocket and look from the rear. Look out to see if the rear derailleur is fouling the spokes or looks twisted. If the gears are not working correctly contact our technical support team on +44 (0)800 008 6297 or email techsupport@islabikes.co.uk. www.islabikes.co.uk...
-
Page 20: Recommended Torque Settings
If you can’t find what you are looking for or are unsure of any compatibility for older models, please contact our technical support team by phone or email. techsupport@islabikes.co.uk +44 (0)800 008 6297 For technical support and cycling advise please see the knowledge area of our website. www.islabikes.co.uk/knowledge/ Icons - Jimi... -
Page 21: Frame Number
Please make a record of your frame number. This is a combination of letters and numbers unique to your bike stamped to the underside of the frame. This is required by police and insurance companies in case of loss. Frame number www.islabikes.co.uk... - Page 22 Icons - Jimi...
- Page 23 www.islabikes.co.uk...
- Page 24 www.islabikes.co.uk...


Need help?
Do you have a question about the Icons Jimi and is the answer not in the manual?
Questions and answers