Table of Contents
Advertisement
Advertisement
Table of Contents

Subscribe to Our Youtube Channel
Related Manuals for 3nStar PPT305


Summary of Contents for 3nStar PPT305
- Page 1 PPT305 Portable Printer User Manual http://www.3nStar.com...
-
Page 2: Table Of Contents
Contents I. Overview..................................1 1.1 Introduction..............................1 1.2 Parameters of product............................2 1.3 General specification............................3 1.4 Printing specification............................3 1.5 Paper specification............................4 II. Product..................................5 2.1 Unpacking and inspection..........................5 2.2 Printer components............................6 III. Installation..................................9 3.1 Install the printer.............................. 9 3.2 Install the paper roll............................10 It is recommended that you shall calibrate the sensor again when you replace with different types of label paper.10 IV. - Page 3 Copyright statement Information in this subject to change without notice and does not represent a commitment on the part. No part of this manual may be reproduced or transmitted in any form by any means, for any purpose other than the purchaser’s personal use, without the expressed written permission.The picture below is for reference only, and the appearance is subject to the product purchased.
-
Page 4: Overview
I. Overview 1.1 Introduction Thank you for purchasing the portable barcode printer made by our company. This model simultaneously supports two modes including labels and bills, so as to deal with different usage scenarios. In addition, this model has a built-in high-quality and efficient “True Type Font”... -
Page 5: Parameters Of Product
1.2 Parameters of product Standard configuration 203 dpi Standard configuration of product Thermal printing ○ Two-color plastic case ○ Adjustable gap sensor/penetration type ○ Adjustable black mark sensor/reflection type ○ Printhead open sensor ○ USB 2.0 communication interface ○ 8 MB SDRAM memory ○... -
Page 6: General Specification
Optional accessories Optional accessories of product Optional by Optional by Optional by customer distributor manufacturer Wireless network communication interface ○ 1.3 General specification General specification Volume and dimensions of 124 mm (D) x 108 mm (W) x61 mm (H) printer Weight of printer 0.357 kg Internal voltage automatic switching power supply... -
Page 7: Paper Specification
1.5 Paper specification Paper specification 203 dpi Paper bin capacity 50 mm OD Type of paper Continuous paper, gap paper, black mark paper, perforated paper Winding type of paper Outward winding of printing surface Width of paper (label + Maximum 76 mm (3”) body paper) Minimum 25.4 mm (1.0”) Thickness of paper (label... -
Page 8: Product
II. Product 2.1 Unpacking and inspection This printer is specially packaged to protect against possible damage in transit. However, since the printer may still be subjected to unexpected damage during transportation, you are kindly required to check the packaging and all units carefully when receiving the printer. In case of obvious damage, please contact the sales dealer directly and indicate the severity of the damage. -
Page 9: Printer Components
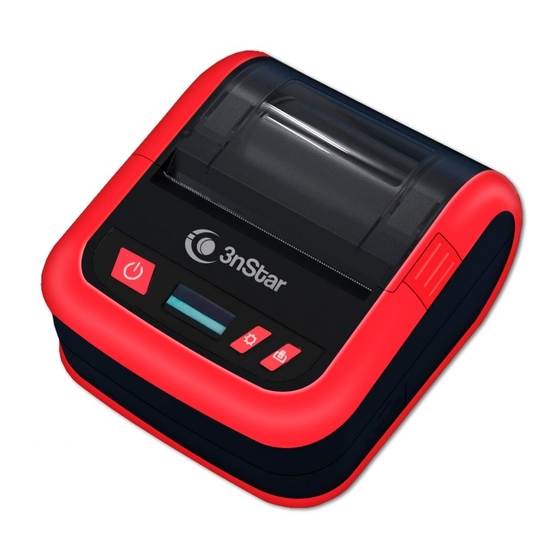
2.2 Printer components Appearance 1. Paper exit 2. Power on/off button 3. Clamshell 4. Display screen 5. Clamshell switch 6. Transparent clamshell lens 7. Medium frame 8. Paper feeding button 9. Base 10. Menu button... - Page 10 Interior 1. Printing rubber roller 2. Print head 3. Battery...
- Page 11 Side 1. Power interface 2. Type C interface Note: The transmission interface of the printer as shown in the picture will vary depending on the type of the printer purchased by you. Please refer to the catalog and specification of the product for the actual transmission interface.
-
Page 12: Installation
III. Installation 3.1 Install the printer 1. Connect the adapter cable to the power interface of the printer. 2. Connect the interface cable to the user’s equipment. (Connect to the printer via mobile phone Bluetooth / WIFI) Note: * Please turn off the power switch of the printer, and insert the power cable into the power socket of the printer. -
Page 13: Install The Paper Roll
3.2 Install the paper roll 3.2.1 Install the paper roll 1. When installing the printing paper roll, put the paper roll into the label supply shaft and use the paper roll fixing sheet to fix the paper roll at the supply shaft position. 2. -
Page 14: Display Screen And Button Functions
IV. Display Screen and Button Functions 4.1 Button names and display screen: (1) POWER button A. Power-on: In the power-off state, press and hold the POWER button for 2S, and the printer enters the working state. B. Power-off: In the power-on state, press and hold the POWER button for 2S, and the printer is power off. - Page 15 values to the factory default values. 4.2.2 Detection by gap/black mark sensor, printing of self-test page, and entry into debugging mode By this test, the sensor will be calibrated first after the printer is powered on, and the internal set values of the printer will be printed, and the printer will enter the debugging mode.
- Page 16 Internal settings of printer printed in the self-test mode Print head check sample Model & firmware version Machine serial number Print head mileage Check code Serial port setting Character set Country code Printing speed Printing density Paper size (width, height) Black mark or gap size (vertical gap, offset) Sensor strength...
- Page 17 Hexadecimal value ASCII string data corresponding to the ASCII string listed on the left Note: 1. Label paper of 3" wide is required to print all the debugging mode data. 2. Turn off and on the power to leave the debugging mode and return to the normal printing mode, or press the FEED button to return to the standby state.
-
Page 18: Switching Between Barcode/Bill Mode
4.2.3 Printer initialization The printer initialization function is to clear the downloaded files in the memory (DRAM) and restore the print parameters to the factory default settings. After enabling the printer initialization function, the printer will reset. After initialization, the printer configuration is restored to its default values as follows: Parameters Defaults Speed. -
Page 19: Lcd Operation Panel
V. LCD Operation Panel The LCD display screen version of this printer has four operation buttons including menu, scroll up, scroll down, and feed; the menu button and feed button shall be used as the OK button and backspace button respectively after entering the menu. List of Main Menu Functions Main menu Printer... -
Page 20: Setting
5.1 Setting Setting Exit Printing setting Sensor setting Date/time Printing speed State Date Printing density Sensor calibration Time Exit Exit Printing direction Printing mode Offset X printing line adjustment Y printing line adjustment X axis reference point Y axis reference point Character set Country code Exit... - Page 21 5.1.1 Printing setting 1 -3 Printing speed 0-15 Printing density Printing direction Printing setting Printing mode Tear-off mode Batch cutting mode Stripping mode -999 ~ +999 Offset adjustment -999 ~ +999 X printing line adjustment -999 ~ +999 Y printing line adjustment 000 ~ +999 X axis reference point 000 ~ +999...
- Page 22 5.1.1- 1.1 Setting of printing speed Use this option to set the printing speed of the printer. The adjustment ranges from 1 to 3 ips; The gap of increase and decrease is 1 ips each time. Press FEED to select the value. Press MENU to confirm the setting.
- Page 23 5.1.1 - 1.4 Printing mode Use this option to set the printout mode of the printer. When entering this option, the icon “>” refers to the mode set currently. Press FEED to move the cursor. Press MENU to complete the selection. Press POWER to cancel the setting and return to the previous menu.
- Page 24 Use this option to adjust the printing position and the stop position of the label. Press MENU to move the cursor to the right side. Press FEED to set + - or the value from 0 to 9. Press POWER to cancel the setting and return to the previous menu. 5.1.1 - 1.7 Reference point Use this option to adjust the reference coordinates on the label paper relative to the origin point.
- Page 25 Use this option to set the country code of the printer. When entering this option, the icon “>” refers to the mode set currently. Press FEED to select the mode to be set. Press MENU to complete the setting. Press POWER to cancel the setting and return to the previous menu. 5.1.2 Sensor setting Sensor setting Exit...
- Page 26 Press MENU to complete the setting. Press POWER to cancel the setting and return to the previous menu. Automatic gap calibration When entering this option, the above message will appear, and the printer will feed 2-3 sheets of label paper for calibration of the sensor. When the calibration is completed, it will return to the previous menu.
-
Page 27: File Management
C. Continuous paper mode Press SCROLL UP and SCROLL DOWN to select the type of sensor, and press MENU to complete the setting. Automatic calibration of continuous paper When entering this option, the above message will be viewed, and the printer will automatically calibrate the sensor for the paper. - Page 28 5.2.1 List of files This option can be used to display, delete, and execute (.BAS) the files stored in the memory. Display of files: Delete file: Press SCROLL DOWN to delete the file. Execute file: Press MENU to execute the file. 5.2.2 Memory space This option can be used to check the residual memory space.
-
Page 29: Printing Debugging
5.3 Printing debugging Printing debugging Debugging mode Printing self-test page Exit 5.3.1 Printing self-test page After selecting “Printing self-test page”, the printer will automatically print out the internal settings of the printer. 5.3.2 Debugging mode After this function is selected, the printer will enter the debugging mode. Note: The “Printing self-test page”... -
Page 30: Printer Information
Press MENU to complete the setting. Press POWER to cancel the setting and return to the previous menu. 5.5 Printer information Printer information Initialization Mileage Serial No. This option can be used to initialize the printer or check the serial number and the mileage printed. Press FEED to select the mode to be set. -
Page 31: Diagnostic Tool
VI. Diagnostic Tool Diagnostic Tool is an easy-to-use window-type utility program that allows you to check the current status and settings of the printer, download graphic files, programs, font files, etc., and complete firmware updates according to the actual need. Moreover, it supports creation and download of dot-matrix fonts, transmission of commands or files and so on. -
Page 32: Printer Settings
6.2 Printer settings 1. Select the connection interface between your computer and the printer. The default communication interface of the Diagnostic Tool program is USB, so if the computer is connected through USB cable for transmission, no changes need to be made to the settings. -
Page 33: Calibrate The Paper Sensor With The Diagnostic Tool
6.3 Calibrate the paper sensor with the Diagnostic Tool 6.3.1 Automatic calibration 1. Make sure that the paper is installed correctly and the print head is closed. Remark: The gap sensor and black mark sensor of the printer are not movable, so as to ensure that the paper gap or black mark passes through the gap sensor or black mark sensor. -
Page 34: Troubleshooting
VII. Troubleshooting 7.1 Common problems The table below shows the common problems the printer operators normally meet and the solutions to them; if you have tried the troubleshooting in the ways we suggest but the printer is still not working properly, please contact the customer service department of the vendor for more assistance. - Page 35 Problem Possible cause Solution * Check whether the battery has sufficient - Unable to electricity. * Low battery print * Charge the printer. * Check whether the battery is damaged. * Clear unnecessary files inside FLASH/DRAM. - The memory * The DRAM can store up to 256 files. space is full.
- Page 36 Problem Possible cause Solution * The label sensor setting is * Recalibrate the label sensor. incorrect. * Set the correct volume label size and * The label size setting is volume label gap size. incorrect. * If the BarTender software is used, set * The vertical offset setting the vertical offset in the printer driver.
-
Page 37: Simple Maintenance Of The Printer
VIII. Simple Maintenance of the Printer The simple maintenance procedures aim to ensure the printing quality and extend the life of the printer. Below are some of our recommended maintenance procedures. 1. Clean and maintain your printer by using the tools listed below: Cotton swab Cotton cloth Vacuum cleaner or air brush... -
Page 38: Update History
Update history Date Content Editor July 8, 2019 Issue...
Need help?
Do you have a question about the PPT305 and is the answer not in the manual?
Questions and answers