Compaq Evo D500 Hardware Reference Manual
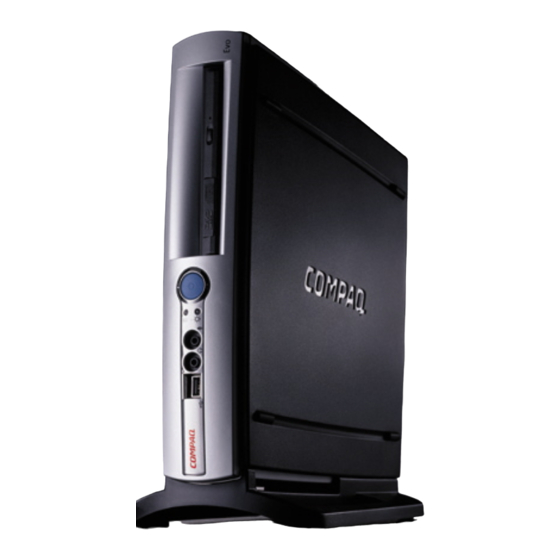
Ultra-slim desktop
Hide thumbs
Also See for Evo D500:
- Technical reference manual (236 pages) ,
- Software manual (4 pages) ,
- Troubleshooting manual (83 pages)
Table of Contents
Advertisement
Quick Links
b
Hardware Reference Guide
Evo D500 Ultra-Slim Desktop
Document Part Number: 250853-001
November 2001
This book provides more detailed information on the features and use
of the Compaq Evo D500 Ultra-Slim Desktop personal computer, and
includes instructions for removing and replacing internal
components.
Advertisement
Table of Contents

Related Manuals for Compaq Evo D500


Summary of Contents for Compaq Evo D500
- Page 1 Hardware Reference Guide Evo D500 Ultra-Slim Desktop Document Part Number: 250853-001 November 2001 This book provides more detailed information on the features and use of the Compaq Evo D500 Ultra-Slim Desktop personal computer, and includes instructions for removing and replacing internal components.
- Page 2 All other product names mentioned herein may be trademarks of their respective companies. Compaq shall not be liable for technical or editorial errors or omissions contained herein. The information in this document is provided “as is” without warranty of any kind and is subject to change without notice. The warranties for Compaq products are set forth in the express limited warranty statements accompanying such products.
-
Page 3: Table Of Contents
Removing the Rear Panel Cover 4–2 Connecting the Legacy Module 4–3 Removing the Legacy Module 4–4 5 Using the MultiPort What is a Wireless LAN? 5–1 What is the Compaq Evo MultiPort? 5–1 Installing and Using a MultiPort Module 5–1 Hardware Reference Guide... - Page 4 A Specifications B Battery Replacement C Electrostatic Discharge Preventing Electrostatic Damage C–1 Grounding Methods C–1 D Routine Care & Shipping Information Routine Care D–1 CD-ROM Drive Precautions D–2 Operation D–2 Cleaning D–2 Safety D–2 Shipping Preparation D–2 Index Hardware Reference Guide...
-
Page 5: Working With The Keyboard And Mouse
Internet. It is very similar to the path and file name used to point to a file on the Personal Computer’s hard drive. For example, the URL that points to the Compaq Web site is http://www.compaq.com. -
Page 6: Windows Logo Key
Working with the Keyboard and Mouse Windows Logo Key Use the Windows Logo Key in combination with other keys to perform certain functions available in the Windows operating systems. Windows Logo Key + Displays a pop-up menu for the selected object Windows Logo Key + Activates the next Taskbar button... -
Page 7: Working With The Multibay
Working with the MultiBay The MultiBay is located on the left side of the Evo D500 Ultra-Slim Desktop personal computer. It is a special drive bay that supports a variety of optional 12.7-mm removable drives, including: MultiBay 24X Max CD-ROM Drive... -
Page 8: Hot-Plugging" Or "Hot-Swapping" Multibay Drives
Internet Device before inserting or removing any drive. If the personal computer is running a preinstalled operating system supplied by Compaq, you can insert or remove any drive except a hard drive while the personal computer is on, off, or in Standby. 2–2... -
Page 9: Partitioning And Formatting A Multibay Hard Drive
Working with the MultiBay Partitioning and Formatting a MultiBay Hard Drive 1. Exit all software applications, shut down the operating system software, and turn off the personal computer. 2. Insert the hard drive into the MultiBay as shown in “Inserting a Drive into the MultiBay”... -
Page 10: Uninstalling The Multibay Security Screw
Working with the MultiBay Uninstalling the MultiBay Security Screw When installed, the MultiBay security screw disables the MultiBay eject lever, so that a drive installed in the MultiBay cannot be removed. To remove a drive installed in the MultiBay, you must first remove the security screw, if installed, using the special Torx screwdriver (provided). -
Page 11: Inserting A Drive Into The Multibay
Working with the MultiBay Inserting a Drive into the MultiBay ✎ If the personal computer did not ship with a MultiBay drive, there will be a drive blank in the MultiBay. Refer to “Removing a Drive from the MultiBay” on page 2-6 for instructions on removing the drive blank. -
Page 12: Removing A Drive From The Multibay
If the device does not start, ensure that the necessary device drivers are installed on the system. If they are not available, they may be downloaded, at no cost, from the Compaq Web site at www.compaq.com. Removing a Drive from the MultiBay 1. - Page 13 Working with the MultiBay 3. Pull the eject lever towards the front of the personal computer to eject the drive from the MultiBay. Removing a Drive from the MultiBay ✎ If the personal computer did not ship with a drive in the MultiBay, there will be a drive blank in the MultiBay.
- Page 14 Working with the MultiBay 2–8 Hardware Reference Guide...
-
Page 15: Adding System Memory And Upgrading The Internal Hard Drive
Adding System Memory and Upgrading the Internal Hard Drive General Precautions Before adding system memory or upgrading the hard drive be sure to carefully read all of the applicable instructions, cautions, and warnings in this guide. Å WARNING: To reduce the risk of personal injury from electrical shock and/or hot surfaces, be sure to disconnect the power cord from the wall outlet, and allow the internal system components to cool before touching. - Page 16 Adding System Memory and Upgrading the Internal Hard Drive ✎ An optional cable lock may be used to secure the access panel, preventing removal of the interior components, the rear panel cover or the Legacy Module (if installed). It may also be used to secure the personal computer to a fixed object.
-
Page 17: Adding System Memory
Adding System Memory and Upgrading the Internal Hard Drive Removing the Access Panel 4. To replace the access panel, ensure that it is aligned properly, then slide it toward the front of the personal computer and tighten the two thumbscrews to secure it. 5. -
Page 18: Adding Or Removing A Memory Module
Adding System Memory and Upgrading the Internal Hard Drive For proper system operation, the DIMMs must be industry-standard 168-pin, 100 MHz, unbuffered, PC100-compliant SDRAM DIMMs, or 133 MHz, unbuffered, PC133-compliant SDRAM DIMMs. If two DIMMs are installed, they must be the same speed. This computer comes equipped with 133 MHz DIMMs. - Page 19 Adding System Memory and Upgrading the Internal Hard Drive Locating the DIMM Slots Å WARNING: To reduce the risk of personal injury from hot surfaces, allow the internal system components to cool before touching. 3. To remove a module, press out on both latches 1 of the DIMM socket at the same time.
- Page 20 Adding System Memory and Upgrading the Internal Hard Drive Adding or Removing Memory Modules 5. To install a memory module, press out on both latches 1 of the DIMM socket at the same time. Match the notch on the module with the tab on the memory socket.
-
Page 21: Upgrading The Primary Hard Drive
Adding System Memory and Upgrading the Internal Hard Drive Upgrading the Primary Hard Drive The primary hard drive is a 3.5-inch hard drive located on the right side of the personal computer, over the MultiBay. 1. Exit all software applications, shut down the operating system software, turn off the personal computer and any external devices, then disconnect the power cord from the power outlet. - Page 22 Adding System Memory and Upgrading the Internal Hard Drive 5. Disconnect the flat ribbon data cable 1 from the hard drive by pulling up on the green tab on the cable end. 6. Disconnect the power cable 2 from the hard drive by pulling up on the connector.
-
Page 23: Using The Legacy Module
Using the Legacy Module The optional Legacy Module provides connectors for parallel 1 and serial 2 devices, PS/2 keyboard 3, and PS/2 mouse 4. Hardware Reference Guide 4–1... -
Page 24: Removing The Rear Panel Cover
Using the Legacy Module Removing the Rear Panel Cover You must remove the rear panel cover, if installed, before installing the Legacy Module. 1. Exit all software applications, shut down the operating system software, turn off the personal computer and any external devices, then disconnect the power cord from the power outlet. -
Page 25: Connecting The Legacy Module
Using the Legacy Module Connecting the Legacy Module 1. Remove the access panel. Refer to “Removing and Replacing the Access Panel” on page 3-1. 2. Remove the rear panel cover. Refer to “Removing the Rear Panel Cover” on page 4-2. 3. -
Page 26: Removing The Legacy Module
Using the Legacy Module Removing the Legacy Module 1. Exit all software applications, shut down the operating system software, turn off the personal computer and any external devices, then disconnect the power cord from the power outlet. 2. Remove the access panel. Refer to “Removing and Replacing the Access Panel”... -
Page 27: Using The Multiport
MultiPort on select Compaq Evo Notebooks. Visit the Compaq Web site at www.compaq.com, where you will find technology overview white papers and additional information on the Compaq Evo MultiPort. - Page 28 Using the MultiPort 5–2 Hardware Reference Guide...
- Page 29 Specifications Compaq Evo D500 Ultra-Slim Desktop Personal Computer Desktop Dimensions (in the minitower position; weight is with MultiBay drive installed) Height 12.40 in 315 mm Width 2.7 in 69 mm Depth 12.8 in 325 mm Approximate Weight 11.7 lb 5.3 kg...
- Page 30 Compaq Evo D500 Ultra-Slim Desktop Personal Computer (Continued) Maximum Altitude (unpressurized) Operating 10,000 ft. 3048 m Nonoperating 30,000 ft. 9144 m Power Supply Operating Voltage 90-264 VAC 90-264 VAC Range Rated Voltage Range 100-240 VAC 100-240 VAC Rated Line Frequency50-60 Hz...
-
Page 31: B Battery Replacement
Do not expose to temperatures higher than 60°C (140ºF). Do not disassemble, crush, puncture, short external contacts, or dispose of in fire or water. Replace the battery only with the Compaq spare designated for this product. Ä CAUTION: Before replacing the battery, it is important to back up the computer CMOS settings. - Page 32 Battery Replacement Ä CAUTION: Static electricity can damage the electronic components of the computer or optional equipment. Before beginning these procedures, ensure that you are discharged of static electricity by briefly touching a grounded metal object. 1. Exit all software applications, shut down the operating system software, turn off the personal computer and any external devices, then disconnect the power cord from the power outlet.
- Page 33 Battery Replacement Type 1 a. Lift the battery out of its holder. Removing a Coin Cell Battery (Type 1) b. Slide the replacement battery into position, positive side up. The battery holder automatically secures the battery in the proper position. Type 2 a.
- Page 34 Battery Replacement Removing a Coin Cell Battery (Type 2) B–4 Hardware Reference Guide...
- Page 35 5. Replace the access panel. 6. Plug in the computer and turn on power to the computer. 7. Reset the date and time, your passwords, and any special system setups, using Compaq Computer Setup. Refer to the Computer Setup Guide. Hardware Reference Guide...
- Page 36 Battery Replacement B–6 Hardware Reference Guide...
-
Page 37: C Electrostatic Discharge
Electrostatic Discharge A discharge of static electricity from a finger or other conductor may damage system boards or other static-sensitive devices. This type of damage may reduce the life expectancy of the device. Preventing Electrostatic Damage To prevent electrostatic damage, observe the following precautions: Avoid hand contact by transporting and storing products in static-safe containers. - Page 38 Use a portable field service kit with a folding static-dissipating work mat. If you do not have any of the suggested equipment for proper grounding, contact your Compaq authorized service provider. ✎ For more information on static electricity, contact your Compaq authorized service provider. C–2 Hardware Reference Guide...
-
Page 39: D Routine Care & Shipping Information
Routine Care & Shipping Information Routine Care Follow these suggestions to take care of your personal computer and monitor: Operate the personal computer on a sturdy, level surface. Leave a 3-inch (7.6-cm) clearance at the back of the system unit and above the monitor to permit the required airflow. -
Page 40: Cd-Rom Drive Precautions
Safety If any object or liquid falls into the drive, immediately unplug the personal computer and have it checked by an authorized Compaq service provider. Shipping Preparation Follow these suggestions when preparing to ship your personal computer: 1. - Page 41 Routine Care & Shipping Information ✎ The hard drive locks automatically when the system power is turned off. 2. Remove and store separately any removable media and MultiBay drives. 3. Turn off the personal computer and external devices. 4. Disconnect the power cord from the electrical outlet, then from the personal computer.
- Page 42 Routine Care & Shipping Information D–4 Hardware Reference Guide...
-
Page 43: Index
Index 1.44-MB diskette drive 2–1 Easy Access Keyboard 1–1 802.11b 5–1 electrostatic discharge C–1 Enhanced Keyboard 1–1 access panels. See access panels formatting a MultiBay hard drive 2–3 battery replacement B–1 grounding methods C–1 care of equipment D–1 caring for MultiBay drives 2–1 hard drive 3–1 cautions MultiBay 2–1... - Page 44 Index hot-plugging or hot-swapping drives 2–2 rear panel components 4–1 inserting drives 2–5 removable drives, optional 2–1 partitioning and formatting a hard drive 2–3 shipping guidelines D–2 removable drives 2–1 side access panels removing drives 2–6 removing and replacing 3–1 MultiPort 5–1 SMART hard drive 2–1 specifications A–1...
Need help?
Do you have a question about the Evo D500 and is the answer not in the manual?
Questions and answers