
Related Manuals for PBteen CORALINE CANOPY QUEEN


Summary of Contents for PBteen CORALINE CANOPY QUEEN
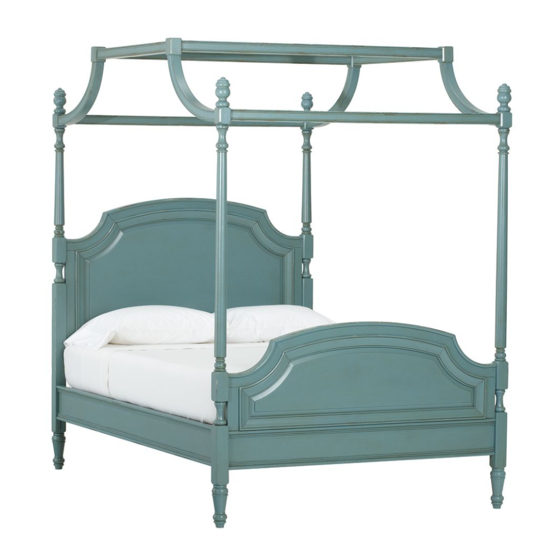
- Page 1 CORALINE CANOPY – QUEEN ASSEMBLY INSTRUCTIONS Date: 2013-Jun.-13 Rev: 2013-Jun.-21 www.pbteen.com Page 1 of 6...
- Page 2 (L) Long Bolt Ø5/16”x5” - 4x (M) Ball Tip Allen Key (N) Allen Bolt Ø1/4”x2-1/4” (O) Spring Washer Ø ¼”– 8x M5 x 114 x 31mm– 1x (P) Half Moon Washer – 8x Tools Required (not included): Philips Head Screwdriver Date: 2013-Jun.-13 Rev: 2013-Jun.-21 www.pbteen.com Page 2 of 6...
- Page 3 9. Attach 1 Finial (F) to each Long and Short Post (A&B) by turning the Finial clockwise, as shown in the illustration below. NOTE: Keep the Finials of the Bed for future use. Date: 2013-Jun.-13 Rev: 2013-Jun.-21 www.pbteen.com Page 3 of 6...
- Page 4 17. Insert 1 set of Bolt (N), Spring Washer (O) and Half Moon Washer (P) into each pre-drilled holes on Long Horizontal Rail (E) the pre-fixed insert nut on Curved Rail (C1&C2) as seen in illustration below. Date: 2013-Jun.-13 Rev: 2013-Jun.-21 www.pbteen.com Page 4 of 6...
- Page 5 23. Slide the 4 corners of the Canopy through the Long Bolt (L) of each Post (A&B), as seen in the illustration below. 24. Attach Finial (F) onto the Canopy and secure each of them onto Long Bolt (L). 25. Tighten by hand until snug. Date: 2013-Jun.-13 Rev: 2013-Jun.-21 www.pbteen.com Page 5 of 6...
- Page 6 We do not recommend the use of chemical cleansers, abrasives, or furniture polish on our lacquered finish. • Hardware may loosen over time. Periodically check to make sure all connections are tight. Re-tighten if necessary. Date: 2013-Jun.-13 Rev: 2013-Jun.-21 www.pbteen.com Page 6 of 6...
Need help?
Do you have a question about the CORALINE CANOPY QUEEN and is the answer not in the manual?
Questions and answers