Table of Contents
Advertisement
Quick Links
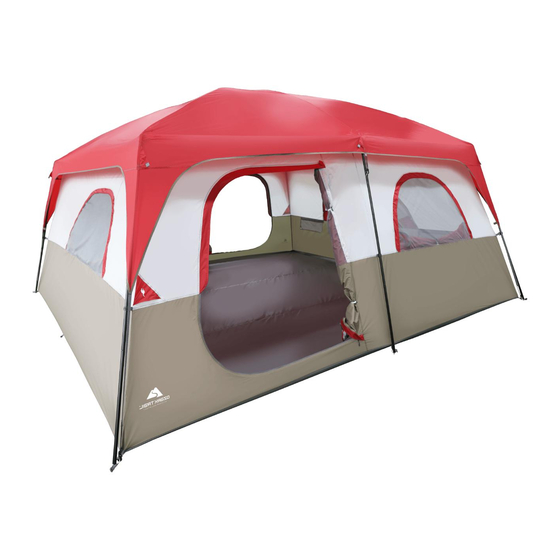
MODEL # WF-141484 14 PERSON TENT
14ft x 14ft x 84in/4.27m x 4.27m x 2.13m
Fabric BODY:
1
Tent Body
Tent Fly
1
Fiberglass, Tent Roof Pole, Black
2
1
Fiberglass, Center Roof Pole, Red
4
Steel, chain-corded Side Leg Pole, Black
Steel, chain-corded Center Leg Pole w/D-ring, Black
2
Carry Bag
1
UNIVERSAL PARTS (some attached to fabric)
6
Elbow connector, 140 Dgr
Pole Bag
1
1
Stake Bag
Guy Ropes: φ3mm, 3m
6
STAKES:
Steel stake
14
Review your parts list above to make sure all parts listed above have included in your package.
Call our toll free number:1-877-579-1550 Monday-Friday 8:30 am - 5:30 pm EST
ASSEMBLY INSTRUCTIONS
STEP 2: Install the Tent Poles
A
Select a smooth level site and spread out you tent.
Extend poles and sort into groups. Take the Center Roof Pole
B
(FCPL-370RD) and slide it into the middle roof sleeves of
corresponding color; finish securing by inserting both pole ends to
the ribbed side of center elbow connector.
A
C
Take Roof Poles (FRPL-499BK) and slide into the crossing sleeves.
Insert one end of each pole into the ribbed side of elbow connectors
at the corners. Gently flex the poles and secure the opposite side into
the ribbed side of elbow connectors. Poles will cross at the center.
D
Slide one end of a Center steel leg pole (SCPL-172BK) into the smooth
end of elbow connector, then secure the other end of the pole into
the pin-rings at base of the tent, repeat for the other center leg pole.
Slide one end of a side steel leg pole (SLPL-177BK) into the smooth end
E
of Elbow Connector, then secure the other end of the pole onto the
pin-rings at base of the tent, repeat for the other side leg poles.
F
Attach the plastic hooks on the tent to the leg poles.
E
Attach the rainfly
STEP 3:
Position rainfly over tent .Connect S-HOOK on the rainfly onto the D-
A
rings located at the top of the each leg pole.
Fasten the hook-and-loop tabs located on the rainfly onto
B
corresponding tent poles.
A
N/A
N/A
FRPL-499BK
STEP 4:
Stake the Tent
FCPL-370RD
A
Stake tent by driving stakes through the webbing loops
SLPL-177BK
and pin rings on tent base.
SCPL-172BK
B
To secure guy lines, find the guy line plastic slider and
lock for the portion of the line opposite the knot. Pull
N/A
this portion forming a loop (works like a slip knot). Extend
guy line to ground and stake. Repeat with remaining guy lines.
EC-2W140
N/A
Stakes provided are for solid ground. Camping in
N/A
sand? We suggest corkscrew style. Check favorite retailer for
GROPE-3M-3
availability.
STS-180
STEP 5:
Add Accessories
A
Attach the divider by pushing the
toggle through the fabric loops sewn
on the inside tent.
B
Attach Gear loft by using the plastic
S-hooks to hook into the fabric loops sewn on
the inside of the tent.
Gear loft is for storing light
weight items only.
DISASSEMBLY INSTRUCTIONS
STEP 1: Take Down Accessories
Detach Gear Loft by unhooking S-Hooks from fabric loops. Fold Gear Loft
for storage. Remove Divider Curtain by detaching toggles from fabric
loops. Fold for storage.
STEP 2: Remove Rainfly
Detach S-Hooks and nylon fasteners that hold down rainfly. Fold rainfly
storage.
STEP 3: Remove the Stakes
Carefully remove stakes by pulling out the hook ends. Do not pull or tug
at the stake loops sewn onto the fabric body. Remove excess soil from
the stakes and store them in their bag.
STEP 4: Take Down Tent
A) Unfasten clips from the tent poles.
B) Remove poles from the pin-ring at base of tent and/or out of
grommets. Slide pole out carefully, pushing it through the sleeve away
from the end at which you are standing. By following these instructions
you minimize the risk of damaging the poles. Repeat for each pole.
C) Carefully fold poles and store them in the pole bag.
STEP 5: Fold the Tent
Fold tent into a rectangular shape the same width as pole bag. Lay pole
bag at one end of fabric and roll tightly together, slowly squeezing air out
as you go. (Following these instructions will make it easier to fit tent into
bag.) Store tent in carry bag provided.
E
F
A
A
A
B
Advertisement
Table of Contents

Subscribe to Our Youtube Channel
Related Manuals for Ozark Trail WF-141484


Summary of Contents for Ozark Trail WF-141484
- Page 1 Slide one end of a side steel leg pole (SLPL-177BK) into the smooth end MODEL # WF-141484 14 PERSON TENT of Elbow Connector, then secure the other end of the pole onto the 14ft x 14ft x 84in/4.27m x 4.27m x 2.13m pin-rings at base of the tent, repeat for the other side leg poles.
Need help?
Do you have a question about the WF-141484 and is the answer not in the manual?
Questions and answers