Advertisement
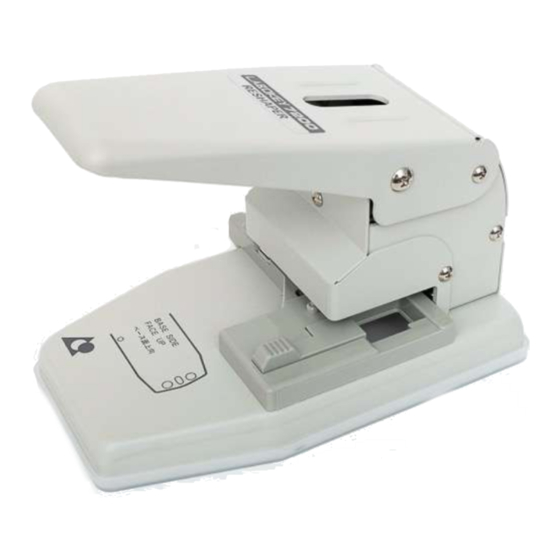
LABOKEY 7200 RESHAPER/HOW TO CHANGE BLADE
Be careful not to touch front/rear blade when changing the blade so as to avoid unexpected accident.
N.B. Screw Driver with magnet is recommendable, enabling easy operation to secure screws
when attaching the blade unit.
1.How to change front/rear blade of LABOKEY 7200
1-1 How to detach the Blade Unit Cover
Remove screws(3pcs) and detach the Blade Unit Cover as illustrated below.
Fixing Screws(3pcs) Blade Unit Cover
1-2 How to detach the Fixing Screws of Blade Unit
You can see the fixing screws(2pcs) from the top(as shown on the left picture)
Slightly push down the Lever and detach the screws(2pcs)of Blade Unit while gently fitting the Blade
Unit with the Blade Receptacle Board of the Film Guide Section(as shown on the right picture)
Blade Unit will be fit into the Film Guide Section.
Fixing Screws(2pcs) of Blade Unit
1-3 How to detach Film Guide Section and Blade Unit
Detach the Bottom Cover and remove fixing screws(4pcs)of Film Guide Section(as shown on the left
picture), then remove the Film Guide Section and the Blade Unit.
Fixing Screws(4pcs)of Film Guide Section
Lever
Blade Unit
- 1 -
Film Guide Section
Advertisement
Table of Contents

Subscribe to Our Youtube Channel
Summary of Contents for Labokey 7200
- Page 1 LABOKEY 7200 RESHAPER/HOW TO CHANGE BLADE Be careful not to touch front/rear blade when changing the blade so as to avoid unexpected accident. N.B. Screw Driver with magnet is recommendable, enabling easy operation to secure screws when attaching the blade unit. 1.How to change front/rear blade of LABOKEY 7200 1-1 How to detach the Blade Unit Cover Remove screws(3pcs) and detach the Blade Unit Cover as illustrated below. Fixing Screws(3pcs) Blade Unit Cover 1-2 How to detach the Fixing Screws of Blade Unit You can see the fixing screws(2pcs) from the top(as shown on the left picture) Slightly push down the Lever and detach the screws(2pcs)of Blade Unit while gently fitting the Blade Unit with the Blade Receptacle Board of the Film Guide Section(as shown on the right picture) Blade Unit will be fit into the Film Guide Section. Lever Fixing Screws(2pcs) of Blade Unit Blade Unit Film Guide Section 1-3 How to detach Film Guide Section and Blade Unit Detach the Bottom Cover and remove fixing screws(4pcs)of Film Guide Section(as shown on the left picture), then remove the Film Guide Section and the Blade Unit. Fixing Screws(4pcs)of Film Guide Section - 1 -...
- Page 2 2. How to change the Front Blade Unit 2-1 Prepare new Front Blade Set(L720FB1A) to replace with the one removed. Removed Front Blade Unit New Front Blade Set(L720FB1A) 2-2 How to change the Blade Receptacle Plate As shown in the below picture, remove Entry Guide(2screws), Film Press Plate(2screws) and Blade Receptacle Plate(1screw) Pull out the Blade Receptacle Plate by lifting it up towards the back. Entry Guide・Film Press Plate・Blade Recep. Plate Blade Receptacle Plate 2-3 How to assemble Film Guide Section N.B. 1.Assemble to the Film Guide Section with care. Be sure on the matching pitches of screws. Assemble it in the reversed order of detaching. When attaching the Film Press Plate, adjust the holes of Blade Receptacle Plate and Film Press Plate. Assemble the Entry Guide by sliding it from the left of the Film Press Plate.(Below, arrow marked) After assembling, check whether or not the Film Positioning Plunger will return to the original position by pushing the Film Positioning Plunger(click-stopped) and Lock Pin. Entry Guide Holes of Blade Receptacle Lock Pin Film Positioning Plunger Plate and Film Press Plate - 2 -...
- Page 3 2-4 How to assemble with the Unit Slightly insert the Front Blade Unit into the Film Guide Section and set. Fix gently the Film Guide Section assembled with Front Blade Unit with fixing screws(4pcs) Screws(4pcs) Then, fix the Blade Unit with blade unit fixing screws(2pcs)by pushing the Lever down. After fixing the Blade Unit, fix tightly the Film Guide Section with fixing screws(4pcs) Screws(4pcs) After assembling, fix the bottom of the Unit and adjust the Front Blade Set by lifting the Lever up and down several times. You may feel tight first, but will become smooth shortly. 3. How to change the Rear Blade Unit 3-1 Prepare new Rear Blade Set(L720RB2A) to replace with the one removed. Removed Rear Blade Unit New Rear Blade Set(L720RB2A) - 3 -...
- Page 4 3-2 How to change the Blade Receptacle Plate As shown in the below picture, remove Entry Guide(2screws), Front Fixing Plate(2screws) and Film Press Plate(2screws) Entry Guide・Front Fixing Plate・Film Press Plate Then, untighten screws(4pcs)of the Film Guide Section(Below, left) N.B. Do not attempt to remove the screws, otherwise the inner springs may be off. Remove the fixing screws(2pcs)of the Blade Receptacle Plate and pull out it by lifting up towards the back. Untighten 4 screws Blade Receptacle Plate 3-3 How to assemble the Film Guide Section N.B. 1. Assemble to the Film Guide Section with care. Be sure on the matching pitches of screws. Assemble it in the reversed order of detaching. Fix the Blade Receptacle Plate and tighten 4 screws of the Film Guide Section. When attaching the Film Press Plate, adjust the holes of Blade Receptacle Plate and Film Press Plate. Be careful to attach the Front Fixing Plate so as not to override the hole of Blade Receptacle Plate. Assemble the Entry Guide by sliding it from the left of the Film Press Plate.(Below right, arrow marked) After assembling, check whether or not the Film Positioning Plunger will return to the original position by pushing the Film Positioning Plunger(click-stopped) and Lock Pin. Holes of Blade Receptacle Entry Guide Film Positioning Plunger Plate & Film Press Plate Holes of Blade Receptacle Lock Pin Plate(3pcs) - 4 -...
- Page 5 3-4 How to assemble with the Unit Slightly insert the Rear Blade Unit into the Film Guide Section and set. N.B. Rest assured of the combination of punched blade(4pcs)and guidance poles(2pcs) Fix gently the Film Guide Section assembled with Rear Blade Unit with fixing screws(4pcs) Then, attach the Blade Unit with fixing screws(2pcs) by pushing the Lever down. Screws(4pcs) Fix the Film Guide Section with fixing screws(4pcs) tightly while pushing the Lever down. After assembling, fix the bottom of the Unit and adjust the Rear Blade Set by lifting the Lever up and down several times. You may feel tight first, but will become smooth shortly. - 5 -...
Need help?
Do you have a question about the 7200 and is the answer not in the manual?
Questions and answers