Table of Contents

Related Manuals for Tregaskiss TOUGH GUN CA3 Series


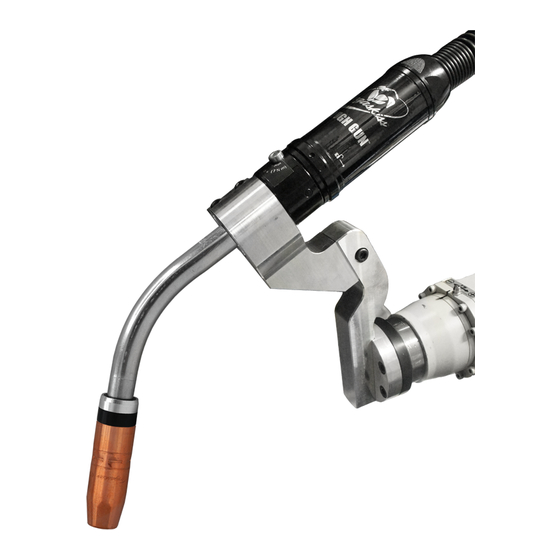
Summary of Contents for Tregaskiss TOUGH GUN CA3 Series
- Page 1 ® TOUGH GUN CA3 Robotic Air-Cooled MIG Gun OWNER'S MANUAL OM-CA3-1.9 August 2020 Robotic, Air-Cooled, Conventional MIG (GMAW) Welding Gun Tregaskiss.com/TechnicalSupport 1-855-MIGWELD (644-9353) (US & Canada) +1-519-737-3000 (International)
- Page 2 Thank You for Choosing Tregaskiss Thank you for selecting a Tregaskiss product. The MIG gun you have purchased has been carefully assembled and is ready to weld and factory tested prior to shipment to ensure high performance. Before installing, compare the equipment received against the invoice to verify that the shipment is complete and undamaged.
-
Page 3: Table Of Contents
TABLE OF CONTENTS DECLARATION OF CONFORMITY SECTION 1 — SAFETY PRECAUTIONS — READ BEFORE USING 1-1 Symbol Usage 1-2 Arc Welding Hazards 1-3 Additional Symbols For Installation, Operation, And Maintenance 1-4 California Proposition 65 Warnings 1-5 EMF Information 1-6 Principal Safety Standards 1-7 Commercial Warranty SECTION 2 —... -
Page 4: Declaration Of Conformity
DECLARATION OF CONFORMITY for European Community (CE marked) products Tregaskiss, 2570 North Talbot Rd., Oldcastle, Ontario N0R 1L0 Canada declares that the product(s) identified in this declaration conform to the essential requirements and provisions of the stated Council Directive(s) and Standard(s). -
Page 5: Section 1 - Safety Precautions - Read Before Using
SECTION 1 — SAFETY PRECAUTIONS — READ BEFORE USING Protect yourself and others from injury – read, follow, and save these important safety precautions ELECTRIC SHOCK can kill. and operating instructions. Touching live electrical parts can cause fatal shocks or severe burns. The electrode and work 1-1 Symbol Usage circuit is electrically live whenever the output is on. - Page 6 Turn off all equipment when not in use. Read and understand the Safety Data Sheets (SDSs) and the Do not use worn, damaged, undersized, or repaired cables. manufacturer's instructions for adhesives, coatings, Do not drape cables over your body. cleaners, consumables, coolants, degreasers, fluxes, and If earth grounding of the workpiece is required, ground it metals.
- Page 7 Be alert that welding sparks and hot materials from welding ELECTRIC AND MAGNETIC FIELDS (EMF) can can easily go through small cracks and openings to adjacent affect Implanted Medical Devices. areas. Watch for fire, and keep a fire extinguisher nearby. Wearers of Pacemakers and other Implanted Be aware that welding on a ceiling, floor, bulkhead, or Medical Devices should keep away.
-
Page 8: Additional Symbols For Installation, Operation, And Maintenance
MOVING PARTS can injure. 1-3 Additional Symbols For Installation, Operation, And Maintenance Keep away from moving parts. Keep away from pinch points such as drive rolls. FIRE OR EXPLOSION hazard. WELDING WIRE can injure. Do not install or place unit on, over, or near combustible surfaces. - Page 9 READ INSTRUCTIONS. Read and follow all labels and the Owner's Manual carefully before installing, operating, or servicing unit. Read the safety information at the beginning of the Manual and in each section. Use only genuine replacement parts from the manufacturer. Perform installation, maintenance, and service according to the Owner's Manuals, industry standards, and national, state, and local codes.
-
Page 10: California Proposition 65 Warnings
1-4 California Proposition 65 Warnings WARNING: This product can expose you to chemicals including lead, which are known to the state of California to cause cancer and birth defects or other reproductive harm. For more information, go to www.P65Warnings.ca.gov. 1-5 EMF Information Electric current flowing through any conductor causes localized 3. -
Page 11: Commercial Warranty
1-7 Commercial Warranty Product is warranted to be free from defects in material and Tregaskiss reserves the right to repair, replace, or refund the workmanship for the period specified below after the sale by an purchase price of non-conforming product. Product found not authorized Buyer. -
Page 12: Section 2 - Specifications
SECTION 2 — SPECIFICATIONS 2-1 System Components Robotic MIG Gun for GMAW Welding Duty Cycle Rating: 100%: 385 amps with Mixed Gases For complete parts list, please see Section 6 — Parts List on page 23. OM-CA3-1.9... -
Page 13: Section 3 - Installation
SECTION 3 — INSTALLATION 3-1 Installing Gun to Robot Figure 3-A Figure 3-B A. Installing Disc to Robot 1. Bring robot to service position. 2. Align the dowel in the wrist with the dowel hole in the insulating disc and fully seat the disc on the robot wrist. NOTE: Dowel not provided. - Page 14 C. Installing Clutch or Solid Mount Clamp to Figure 3-E Figure 3-D Mounting Arm 1. Remove the fastener and the locking pin from the mounting arm. 2. Insert the clutch / solid mount stud into the mounting arm on the robot until it bottoms out. 3.
-
Page 15: Installing Gun To Wire Feeder
Figure 3-J D. Installing Gun to Gun Mount 1. Loosen clamp screws in mounting clamp. 2. Fully insert gun into the clamp, aligning the key on the gun with the keyway on the clamp. 3. Tighten the 6 mm SHCS using a 5 mm Allen wrench to secure the gun in place. -
Page 16: Installing Clutch Cable To Gun
3-3 Installing Clutch Cable to Gun Figure 3-L 1. Connect cable supplied with clutch mount to the receptacle on the gun body. 2. Tighten securely by hand. 3-4 Connecting Wire Brake and/or Air Blast A. Wire Brake 1. Route wire brake air line to designated control valve in your facility (not provided). 2. -
Page 17: Section 4 - Replacement
1. Thread the contact tip into the retaining head / diffuser. 2. Torque to 30 in-lbs (3.5 Nm). D. Changing the Neck Insulator 3. The Tregaskiss Tip Tool (part #450-18 for TOUGH LOCK heavy duty tips, or part # T-ALTOOL for AccuLock tips) or a 1. Remove front-end consumables. -
Page 18: Changing The Neck
4-2 Changing the Neck Figure 4-B 1. Remove front-end consumables (see section 4-1 Changing Consumables on page 13). 2. Remove liner (see section 4-4 Changing the Liner on page 16). 3. Using a 5 mm Allen wrench, loosen screw 1/4 turn to remove the neck. - Page 19 4. Loosen neck bolt (4-2 Changing the Neck on page 14). Figure 4-D 5. Remove TOUGH GUN I.C.E. components / neck assembly. NOTE: If existing clamping device on arm has 2 bolts, remove only the front bolt and snug the rear bolt. 6.
-
Page 20: Changing The Liner
4-4 Changing the Liner ® Figure 4-G A. Changing QUICK LOAD Liner NOTE: Ensure power supply is off before proceeding. 1. Remove consumables (nozzle, contact tip and retaining head / diffuser) (see section 4-1 Changing Consumables on page 13). 2. Remove existing QUICK LOAD Liner by pulling it out from the Figure 4-H neck. -
Page 21: Changing The Power Pin Or Autolength™ Pin
B. Changing QUICK LOAD Liner in the AutoLength System NOTE: Ensure power supply is off before proceeding. 1. Remove consumables (nozzle, contact tip and retaining head / diffuser) (see section 4-1 Changing Consumables on page 13). 2. Remove existing QUICK LOAD Liner by pulling it out from the neck. 3. -
Page 22: Changing The Replaceable Unicable
4-6 Changing the Replaceable Unicable Figure 4-K 1. Remove nozzle, retaining head / diffuser and liner. 2. FOR CLUTCH MODELS ONLY: Disconnect external clutch cable from the clutch connector housing. 3. Loosen cable guide. Figure 4-L 4. FOR CLUTCH MODELS ONLY: Remove clutch connector housing and disconnect internal wiring (see Figure 4-L). -
Page 23: Replacing The Wire Brake
7. Release cable assembly by turning a 1/4 turn Figure 4-N counterclockwise (see Figure 4-N). 8. Remove unicable. 9. Remove connector from cable assembly. Connector should be kept for the replacement unicable. 10. Remove power pin from unicable. 11. Discard old unicable and liner. NOTE: You will need to install a new liner to avoid discrepancies between the new unicable length and the length of the liner. - Page 24 6. Unthread and remove the wire brake pushing unit to allow the wire guide to be released (see Figure 4-R). 7. Carefully slide the wire guide using the wire guide tool out of the gun body (see Figure 4-S). 8. Inspect for wear and swap for proper wire size as required. NOTE: 0.035”-0.045”...
-
Page 25: Section 5 - Technical Data
SECTION 5 — TECHNICAL DATA 5-1 Wiring Diagram 1. White +24 VDC (Input) 5. Green (Not Used) 2. Brown +24 VDC (Output) 6. Red (Not Used) 3. Yellow (Voltage Sense) 7. Pink (Not Used) 4. Blue 0 Volts DC (Common) 8. -
Page 26: Center Of Mass Coordinates
5-2 Center of Mass Coordinates Standard Configurations - Clutch Mount 22 Degree Weight 316 mm TCP (405-22QC + CA2201) -0.50 mm 150.30 mm 6.47 mm 2.98 kg 350 mm TCP (405-22QCL + CA2202) -0.46 mm 165.80 mm -0.26 mm 3.09 kg 400 mm TCP (405-22QCL + CA2203) -0.48 mm 165.34 mm... -
Page 27: Section 6 - Parts List
SECTION 6 — PARTS LIST ITEM PART # DESCRIPTION See SP-CA3 Nozzle See SP-CA3 Contact Tip See SP-CA3 Retaining Head / Diffuser 405-22QC Neck, 22 degree, short length 405-22QCL Neck, 22 degree, medium length 405-45QC Neck, 45 degree, short length 405-45QCL Neck, 45 degree, medium length 405-45QCL1... -
Page 28: Section 7 - Troubleshooting
1. Replace with proper size. 2. Electrode eroding contact tip. 2. Inspect and/or change drive rolls. 3. Exceeding duty cycle. 3. Replace with properly rated Tregaskiss MIG Gun. 5. Erratic arc. 1. Worn contact tip. 1. Replace contact tip. 2. Buildup inside of liner. - Page 29 See Section 4 — Replacement on page 13. 9. Gun running hot. 1. Exceeding duty cycle. 1. a. Replace with properly rated Tregaskiss MIG Gun. b. Decrease parameters to within gun rating. 2. Loose or poor power connection. 2. a. Clean, tighten or replace cable grounding connection.
-
Page 30: Additional Support Materials
ADDITIONAL SUPPORT MATERIALS For additional support materials such as Spec Sheets, troubleshooting information, how-to guides and videos, animations, online configurators and much more, please visit Tregaskiss. Scan the QR Code with your smart phone for immediate access to Tregaskiss.com/TechnicalSupport. Scan to view the TOUGH GUN ®...
Need help?
Do you have a question about the TOUGH GUN CA3 Series and is the answer not in the manual?
Questions and answers