
Subscribe to Our Youtube Channel
Related Manuals for 3M SCOTT AIR-PAK X3 PRO


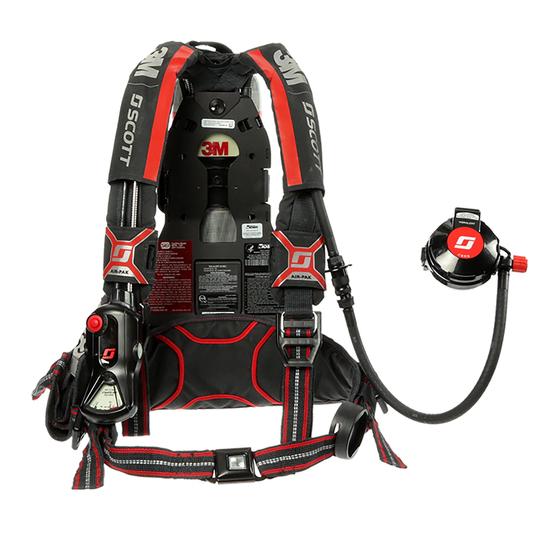
Summary of Contents for 3M SCOTT AIR-PAK X3 PRO
- Page 1 INSPECTION & CLEANING INSTRUCTIONS 3M™ SCOTT™ AIR-PAK™ X3 PRO Self-Contained Breathing Apparatus (SCBA) CGA & SNAP-CHANGE Pressures 2.2, 4.5, 5.5 READ ALL INSTRUCTIONS BEFORE USE P/N 595360-01 Rev G 202004...
- Page 2 If you have any questions or concerns regarding these regulations, contact 3M at 1-800-247-7257 (704-291-8300 outside the continental United States). Questions or Concerns If you have any questions or concerns regarding use of this equipment, contact your authorized 3M distributor, or contact 3M at 1-800-247-7257 (704-291-8300 outside the continental United States) or ScottTechSupport@mmm.com.
-
Page 3: Table Of Contents
Maintenance and Repairs ........................6 Respirator Testing ..........................6 Retirement Criteria and Considerations ..................7 Safety Information ........................9 All 3M Scott Fire & Safety Products...................... 9 3M Scott Air-Pak SCBAs..........................9 Chapter 1 Inspecting the Respirator ......................11 Before You Begin ............................11 Inspecting the Respirator Components....................12... - Page 4 P/N 595360-01 Rev G 202004...
-
Page 5: About This Manual
3M provides manuals for individuals with different levels of training. This manual is written for Trained Operators. • A Trained Operator is an individual who has had minimum-level training in the use of 3M Scott Fire & Safety equipment in an immediately dangerous to life or health (IDLH) environment. This individual is often a firefighter or the wearer of an SCBA. -
Page 6: Before You Begin
Acquire all tools and materials listed before beginning any procedure. When performing any maintenance checks or services on any 3M Scott Fire & Safety product or device, proceed only as far as necessary and as instructed by this manual. -
Page 7: Retirement Criteria And Considerations
BEFORE YOU BEGIN Retirement Criteria and Considerations Retirement criteria and considerations to be determined by technicians with Certified Technician II qualifications in accordance with NFPA 1852. P/N 595360-01 Rev G 202004... - Page 8 P/N 595360-01 Rev G 202004...
-
Page 9: Safety Information
If a discrepancy or malfunction cannot be corrected using the procedures contained within this manual, the product must be tagged to indicate that it is unserviceable and referred to a 3M Certified Technician II for evaluation and repair. - Page 10 and maintain this respirator. Read and understand all instructions before attempting to operate or service this equipment. • The information in this instruction is meant to supplement — not replace — the instructions, training, supervision, maintenance, and other elements of your organized respiratory protection program. •...
-
Page 11: Chapter 1 Inspecting The Respirator
INSPECTING THE RESPIRATOR This chapter describes how to perform a regular operational inspection of a 3M Scott Air-Pak X3 Pro SCBA. Follow the procedures in this chapter when you first receive the SCBA and during daily or periodic inspection of the SCBA: •... -
Page 12: Inspecting The Respirator Components
INSPECTING THE RESPIRATOR WARNING Clean and inspect the respirator before storing it. Do not store a respirator with worn or damaged components. Replace worn or damaged components during inspection or remove the respirator from service and tag it for repair by authorized personnel. Use of a respirator with worn or damaged components may result in serious injury or death. -
Page 13: Inspecting The Breathing Air Cylinder
The date of manufacture marked on the cylinder is also the date of the first hydrostatic test. All breathing air cyl- inders used with 3M Scott Air-Pak SCBAs must be visually inspected regularly and hydrostatically tested at the required intervals by a licensed cylinder re-tester. For more information about hydrostatic testing, see “Respirator... -
Page 14: Inspecting The Ric/Uac Connection
89080-01). Inspecting the RIC/UAC Connection 3M Scott Air-Pak X3 Pro respirators are fitted with a Rapid Intervention Crew/Company Universal Air Connection (RIC/UAC) system to provide emergency replenishment of an approved SCBA breathing air supply cylinder from an approved air supply source. -
Page 15: Inspecting The Facepiece
INSPECTING THE RESPIRATOR COMPONENTS Inspecting the Facepiece Remove and keep the protective static cling label attached to the lens of a new facepiece; the label may be re-used during storage of the facepiece. The facepiece must be complete and in serviceable condition with no worn, loose, or damaged components. See the main components of the facepiece in c. - Page 16 If you remove the nose cup for inspection, be sure to reassemble it correctly. CAUTION Always verify that the proper nose cup is installed prior to donning the 3M Scott AV-3000 HT facepiece. Facepieces equipped with a 3M Scott Sight imaging system assembly (part number 201448-01, 201448-02, or 201448-03) use an alternate style nose cup to accommodate the In-Mask Display (IMD).
-
Page 17: Inspecting The Regulator
INSPECTING THE RESPIRATOR COMPONENTS Inspecting the Regulator Inspection of the mask-mounted regulator includes checking the regulator gasket, purge valve, Heads-Up Display (HUD), regulator hose, and quick-disconnect. To inspect the regulator Verify that the purge valve (red knob) is not damaged and turns smoothly one-half turn from stop to stop. See Figure 1-5. - Page 18 INSPECTING THE RESPIRATOR WARNING If the coating is worn through and bare metal is showing on the male quick-disconnect locking ridge, remove the regulator assembly from service and tag it for replacement. Use of a worn quick-disconnect locking ridge may result in a malfunction, leading to a loss of breathing air, exposure to harmful substances, serious injury, or death.
-
Page 19: Performing Operational Testing
PERFORMING OPERATIONAL TESTING 7 Verify that a full cylinder is properly installed in the backframe and that the reducer hose coupling is hand-tightened to the cylinder valve outlet. CAUTION Do not use tools to tighten the hose couping, Over-tightening the hose coupling may damage the gasket seal. -
Page 20: Testing The Regulator
INSPECTING THE RESPIRATOR 6 Fully depress the center of the air saver/donning switch on the top of the E-Z Flo+ regulator or firmly pull the auto air-saver switch on the E-Z Flo C5 regulator latch and release. The flow of air from the facepiece will stop. 7 Examine the complete respirator for air leaks. -
Page 21: Testing The Heads-Up Display
PERFORMING OPERATIONAL TESTING 8 When air flow stops completely, close the purge valve (the pointer on the knob points up). 9 Stop the electronic end-of-service time indicator by pressing the manual reset (yellow) button on the control console twice and then twice again after the flashing green light sequence. Testing the Heads-Up Display The Heads-Up Display (HUD) provides a visual monitor of the air supply in the cylinder and valve assembly. - Page 22 INSPECTING THE RESPIRATOR WARNING When an end-of-service indicator alarm actuates, leave the area requiring respiratory protection immediately. Actuation of any end of service indicator alarm indicates that approximately 33% of full pressure remains in the air supply cylinder (i.e., approximately 2/3 of the total air supply has been used) or that there is a malfunction in the respirator.
-
Page 23: Testing The Sensor Module Lights
PERFORMING OPERATIONAL TESTING Testing the Sensor Module Lights When performing operational testing on respirator units equipped with a PASS device (distress alarm), verify that the sensor module lights are operating properly. Figure 1-10 shows the sensor modules on the respirator, and Table 1-2 on page 23 describes how the lights behave for particular actions or situations. -
Page 24: Testing The Batteries
• Red lights on the control console and sensor module indicate that the batteries are low and must be replaced before the respirator is used again. 3M recommends replacing all batteries before the respirator is used again. “Chapter 4: Replacing Batteries”... -
Page 25: Chapter 2 Soft Goods Assembly & Disassembly
To detach the shoulder harness from the backframe NOTE If you have installed the 3M Scott Air-Pak X3 Pro SCBA chest strap accessory, uninstall it as directed in Chest Strap Accessory for the 3M Scott Air-Pak X3 Pro SCBA: Installation and Use Instructions (P/N 595366-01) before detaching the shoulder harness from the backframe. - Page 26 SOFT GOODS ASSEMBLY & DISASSEMBLY 2 Unsnap the drag rescue loop from the shoulder pad. See Figure 2-2. Drag rescue loop Figure 2-2 Unsnapping the drag rescue loop from the shoulder pad 3 At the top of the shoulder harness, unsnap the straps securing the cable, gaugeline, and regulator hose.
- Page 27 DETACHING THE SHOULDER HARNESS AND WAIST PAD 6 Unsnap the 2 regulator hose retaining straps. See Figure 2-5. Lower regulator hose retaining strap Figure 2-5 Unsnapping the regulator hose retaining strap 7 Detach the waist-to-shoulder straps from the buckles at the bottom of the shoulder harness. See Figure 2-6.
- Page 28 SOFT GOODS ASSEMBLY & DISASSEMBLY 9 Position the drag rescue loop so that its snaps line up with the center of the upper slot of the clevis. Carefully, pull the loop through the slot, taking care not to damage the snaps. See Figure 2-8.
- Page 29 B) on the back of the pouch, C) on the pouch flap, and D) on the strap securing the UEBSS or dual EBSS hose. 1. UEBSS is compatible with 3M Scott Air-Pak SCBAs manufactured in accordance with the NFPA 1981, 2018 edition standard.
- Page 30 SOFT GOODS ASSEMBLY & DISASSEMBLY 3 Unsnap the waist pad retaining strap using either of the following methods: • Method 1: Unsnap both ends to fully remove the waist pad retaining strap from the waist pad. Locate the two snaps securing the ends of the waist pad retaining strap to the waist pad. Insert one or more fingers between the two snaps at each end and pull up to unsnap.
- Page 31 DETACHING THE SHOULDER HARNESS AND WAIST PAD Pull the waist pad retaining strap through the opening in the backframe and set aside. See Figure 2-13. Pull the waist pad Backframe opening for the waist pad retaining strap retaining strap through the backframe opening Figure 2-13 Pulling the waist pad retaining strap through the backframe opening...
-
Page 32: Attaching The Shoulder Harness And Waist Pad
SOFT GOODS ASSEMBLY & DISASSEMBLY 5 Remove the waist-to-shoulder straps from each side of the backframe and set aside. a From the rear of the backframe, locate the tri-slide securing the waist-to-shoulder straps to the backframe. b Pull the tri-slide away from the backframe until the opposite end of the waist-to-shoulder strap can be fed through the backframe slot. - Page 33 ATTACHING THE SHOULDER HARNESS AND WAIST PAD Feed strap through backframe slot Tri-slide is flush against the backframe Figure 2-17 Feeding the waist-to-shoulder strap through the backframe slots. c Tug on the waist-to-shoulder strap to ensure a secure attachment. d Repeat steps a-c for the other waist-to-shoulder strap. 2 Feed one end of the waist pad retaining strap through the backframe opening with the fasteners facing up.
- Page 34 SOFT GOODS ASSEMBLY & DISASSEMBLY 3 On the waist pad, locate the webbing attached to the metal I-bar. a Insert the metal I-bar into the slot at the base of the backframe and rotate it 90 degrees clockwise or counterclockwise to “lock” it in place. See Figure 2-19 for proper orientation of the I-bar.
- Page 35 ATTACHING THE SHOULDER HARNESS AND WAIST PAD NOTE The snaps attaching the waist pad retaining strap and waist pad are directional snap fasteners. To snap closed, align the two sides of the fastener and press from the end opposite the dot toward the end with the dot until you hear a “snap.”...
- Page 36 SOFT GOODS ASSEMBLY & DISASSEMBLY Feed strap through loop on UEBSS or dual EBSS pouch Figure 2-22 A) Fastening the snaps attaching the UEBSS or dual EBSS pouch to the waist pad. B) Attaching the waist-to-shoulder straps. To attach the shoulder harness to the backframe Pass the lower metal slide and webbing through the lower slot of the clevis (see Figure 2-23).
- Page 37 ATTACHING THE SHOULDER HARNESS AND WAIST PAD Pull drag rescue loop through slot Pass metal slide through slot Figure 2-24 Passing the drag rescue loop through the upper slot of the clevis: A) Lining up the snaps. B) Passing the metal slide through the clevis.
- Page 38 SOFT GOODS ASSEMBLY & DISASSEMBLY Lower regulator hose retaining strap Figure 2-26 Securing the regulator hose 5 Attach the lower cable routing clamp to the shoulder pad webbing by folding the edges of the webbing together to form a “V” and sliding the edges into the clamp opening. See Figure 2-27.
- Page 39 ATTACHING THE SHOULDER HARNESS AND WAIST PAD The drag rescue loop snaps between the cable and gaugeline on the shoulder pad. Cable Gaugeline Figure 2-29 Securing the drag rescue loop 8 Wrap the upper and lower flaps around the shoulder pads and snap them closed. Ensure that the regulator hose is not secured under the lower flap.
- Page 40 SOFT GOODS ASSEMBLY & DISASSEMBLY P/N 595360-01 Rev G 202004...
-
Page 41: Chapter 3 Cleaning & Storing The Respirator
CHAPTER 3 P/N 595360-01 CLEANING & STORING THE RESPIRATOR This chapter provides instructions for cleaning and storing the 3M Scott Air-Pak X3 Pro SCBA. Detailed instructions for cleaning the facepiece, mask-mounted regulator, shoulder harness, and waist pad are also provided. •... -
Page 42: Cleaning The Respirator
Cleaning the Facepiece CAUTION Remove any 3M Scott Sight In-Mask Display (IMD) components prior to cleaning the AV-3000 HT facepiece. IMD components are factory-sealed to protect the optics and electronics from dirt and moisture. Clean these components when necessary using a cloth dampened with a solution of mild detergent and water. - Page 43 -OR- • Clean the facepiece using 3M-approved cleaning wipes. 3 To sanitize or disinfect the facepiece, use a spray bottle to apply the recommended sanitizing or disinfecting cleaner to all surfaces of facepiece. Be sure to cover all surfaces completely with the cleaning solution.
-
Page 44: Cleaning The Mask-Mounted Regulator
You will need the following supplies: • Sanitizing or disinfecting cleaner. 3M recommends a properly diluted hypochlorite solution or aqueous solution of iodine: – Hypochlorite solution (50 ppm of chlorine) made by adding approximately one milliliter (1 mL) of laundry bleach to one liter (1 L) of water at 110°... - Page 45 CLEANING THE RESPIRATOR Wet all areas within the circle Wet all areas within the circle Regulator Regulator opening opening Auto air-saver switch/Regulator latch E-Z FLO+ E-Z FLO C5 Figure 3-1 Cleaning the mask-mounted regulator NOTE Follow the user instructions for the cleaner. A specific contact time may be required for sanitizing or disinfecting before rinsing.
- Page 46 CLEANING & STORING THE RESPIRATOR To perform a regulator check NOTE The regulator check is not intended to be a complete functional check of the respirator. Before your next Chapter 1: Inspecting the use of the respirator, perform a regular operational inspection as described in “ Respirator ”...
-
Page 47: Cleaning The Shoulder Harness And Waist Pad
Cleaning the Shoulder Harness and Waist Pad You may clean the 3M Scott Air-Pak X3 Pro soft goods — shoulder harness, waist pad, UEBSS or dual EBSS pouch (if installed), and straps — using a sponge and/or scrub brush (for spot cleaning) or in an extractor or commercial washing machine (for machine washing). -
Page 48: Machine Washing The Shoulder Harness And Waist Pad
Avoid using home or public machines to prevent spread of the contaminants. • Clean your 3M Scott Air-Pak X3 Pro soft goods at least once every year. • Place all soft goods in a mesh bag (P/N 31004024) before machine washing. -
Page 49: Drying The Shoulder Harness And Waist Pad
7 Inspect the soft goods and rewash them if necessary. Drying the Shoulder Harness and Waist Pad 3M recommends air-drying the shoulder harness, waist pad, and straps. Machine drying — even using the dryer’s “air dry” or “no heat” setting — is not recommended. -
Page 50: Storing The Respirator
CLEANING & STORING THE RESPIRATOR Storing the Respirator Respirators intended for routine use and respirators not routinely used but kept for emergency use must be stored in areas where the temperature is maintained above freezing (32° F / 0° C). If it is necessary to store the respirator at a temperature at or below freezing before its next use, you must take special care to verify that all components of the respirator are thoroughly dried. -
Page 51: Chapter 4 Replacing Batteries
CHAPTER 4 P/N 595360-01 REPLACING BATTERIES This chapter provides instructions for changing the batteries in an 3M Scott Air-Pak X3 Pro SCBA with a Personal Alert Safety System (PASS) device, also known as a distress alarm. Before You Begin Because certain accessories and features require batteries for operation, always verify that this equipment and its accessories have fresh batteries before use. - Page 52 REPLACING BATTERIES CAUTION Always ensure that the cylinder value is off and the PASS device is completely inactive before changing batteries. Never remove or replace batteries within a pressurized system, as damage to the electronic components may occur. 4 Remove the cylinder. Replace the batteries.
- Page 53 NOTES...
- Page 54 NOTES...
- Page 56 4320 Goldmine Road Monroe, NC 28110 Telephone: (704) 291-8300 Technical Support: (800) 247-7257 Web: www.3MScott.com ©3M 2020. All rights reserved. 3M and Scott are trademarks of 3M.
Need help?
Do you have a question about the SCOTT AIR-PAK X3 PRO and is the answer not in the manual?
Questions and answers