Advertisement
Table of Contents
- 1 Table of Contents
- 2 Important Precautions
- 3 Before You Begin
- 4 Assembly
- 5 How to Use the Elliptical Exerciser
- 6 Battery Replacement
- 7 Maintenance and Troubleshooting
- 8 To Adjust the Resistance Strap
- 9 Conditioning Guidelines
- 10 Part List
- 11 Exploded Drawing
- 12 Full 90 Day Warranty
- Download this manual
Model No. 831.28540.0
Serial No.
Serial Number
Decal
• Assembly
• Operation
• Maintenance
• Part List and Drawing
CAUTION
Read all precautions and instruc-
tions in this manual before using
this equipment. Keep this manu-
al for future reference.
ELLIPTICAL EXERCISER
Sears, Roebuck and Co., Hoffman Estates, IL 60179
User's Manual
Patent Pending
Advertisement
Table of Contents

Summary of Contents for Weslo MOMENTUM 730 ELLIPTICAL EXERCISER 831.28540.0
- Page 1 Model No. 831.28540.0 Serial No. Serial Number Decal • Assembly • Operation • Maintenance • Part List and Drawing CAUTION Read all precautions and instruc- tions in this manual before using this equipment. Keep this manu- al for future reference. ELLIPTICAL EXERCISER Patent Pending Sears, Roebuck and Co., Hoffman Estates, IL 60179...
-
Page 2: Table Of Contents
IMPORTANT PRECAUTIONS ..............2 BEFORE YOU BEGIN . -
Page 3: Before You Begin
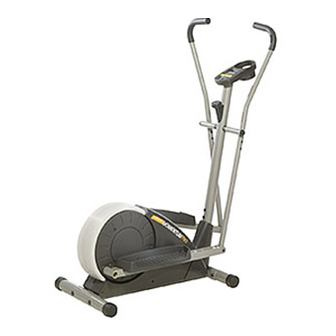
Congratulations for selecting the new WESLO MOMENTUM 730 elliptical exerciser. The MOMEN- TUM 730 elliptical exerciser is an incredibly smooth exerciser that moves your feet in a natural elliptical path, minimizing the impact on your knees and ankles. And the unique MOMENTUM 730 features adjustable resistance and a simple-to-use console to help you get the most from your exercise. -
Page 4: Assembly
Assembly requires two persons. Place all parts of the elliptical exerciser in a cleared area and remove the packing materials. Do not dispose of the packing materials until assembly is completed. In addition to the included allen wrenches, assembly requires a Phillips screwdriver wrench , and a rubber mallet As you assemble the elliptical exerciser, use the drawings below to identify small parts. - Page 5 2. While another person lifts the back of the Frame (1), attach the Rear Stabilizer (28) to the Frame with two M10 x 72mm Carriage Bolts (34) and two M10 Nylon Locknuts (33). 3. The Console (23) requires three “AA” batteries (not included);...
- Page 6 6. Identify the Left Handlebar (6), which is marked with a sticker. Insert the Left Handlebar into one of the Handlebar Arms (5); make sure that the Handlebar Arm is turned so the hexagonal holes are on the indicated side. Attach the Left Handlebar to the Handlebar Arm with two M6 x 38mm Button Bolts (50) and two M6 Nylon Locknuts (27).
- Page 7 Disc Crossbar (16). Slide the Left Pedal Arm (11) onto the axle, and place a Wave Washer (64) on the end of the axle. Next, slide an M10 Washer (35) onto an M10 x 25mm Patch Screw (22), and tighten the Patch Screw into the axle.
-
Page 8: How To Use The Elliptical Exerciser
HOW TO EXERCISE ON THE ELLIPTICAL EXERCISER To mount the elliptical exerciser, hold the handlebars and step onto the pedal that is in the lowest position. Then, step onto the other pedal. Push the pedals until they begin to move with a continuous motion. Note: The pedal disks can turn in either direction. - Page 9 FEATURES OF THE CONSOLE The console features a selection of modes that pro- vide instant exercise feedback during your workouts. The modes are described below. • Speed—This mode displays your pedaling speed, in miles per hour or kilometers per hour. •...
- Page 10 3. Measure your heart rate, if desired. To measure your heart rate, stop pedaling and place your thumb on the pulse sen- sor as shown. Do not press too hard, or the cir- culation in your thumb will be restricted and Pulse Sensor your pulse will not be detected.
-
Page 11: Battery Replacement
Inspect and tighten all parts of the elliptical exerciser regularly. Replace any worn parts immediately. To clean the elliptical exerciser, use a damp cloth and a small amount of mild soap. Important: Keep liq- uids away from the console, place only a sealed water bottle in the water bottle holder, and keep the console out of direct sunlight. -
Page 12: To Adjust The Resistance Strap
HOW TO ADJUST THE RESISTANCE STRAP If the resistance knob is turned to the highest setting and there is not enough pedaling resistance, the resistance strap can be adjusted. To adjust the resis- tance strap, first remove the left side shield (see HOW TO ADJUST THE REED SWITCH on page 11). -
Page 13: Conditioning Guidelines
The following guidelines will help you to plan your exercise program. Remember that proper nutrition and adequate rest are essential for successful results. WARNING: Before beginning this or any exercise program, consult your physician. This is especially important for persons over the age of 35 or persons with pre-existing health problems. -
Page 14: Part List
Key No. Qty. Description Frame Upright Left Side Shield Right Side Shield Handlebar Arm Left Handlebar Idler Assembly Right Handlebar Hook Front Stabilizer Left Pedal Arm Right Pedal Arm Pedal Axle Cap Pedal Disc Disc Crossbar Flywheel Resistance Strap Drive Belt Cable Clamp Endcap M10 x 25mm Patch Screw... -
Page 15: Exploded Drawing
51 15 R0305A... -
Page 16: Full 90 Day Warranty
FULL 90 DAY WARRANTY For 90 days from the date of purchase, if failure occurs due to defect in material or workmanship in this Sears Elliptical Exerciser, contact the nearest Sears Service Center throughout the United States and Sears will repair or replace the Elliptical Exerciser, free of charge. This warranty does not apply when the Elliptical Exerciser is used commercially or for rental purposes.


Need help?
Do you have a question about the MOMENTUM 730 ELLIPTICAL EXERCISER 831.28540.0 and is the answer not in the manual?
Questions and answers