
Related Manuals for Raymarine LightHouse Sport


Summary of Contents for Raymarine LightHouse Sport
- Page 1 3.9.98 Basic operation instructions English (en-US) Date: 06-2019 Document number: 81384-3 © 2019 Raymarine UK Limited...
- Page 2 Tip: If you own a smartphone or tablet with a camera you can use the QR code shown above to visit the “LightHouse Sport Manuals and documents" area of the website directly. To use this code, download a free “QR barcode scanner” app from the Apple or Android appstore and then point the camera at the QR code on this page.
- Page 3 Technical accuracy To the best of our knowledge, the information in this document was correct at the time it was produced. However, Raymarine cannot accept liability for any inaccuracies or omissions it may contain. In addition, our policy of continuous product improvement may change specifications without notice.
-
Page 5: Table Of Contents
Contents Chapter 1 Important information ..........8 Disclaimers ................8 Chapter 2 Set up ................ - Page 6 4.1 Waypoints................32 Placing a waypoint (Quick method).
- Page 7 9.1 Raymarine product support and servicing ....... . . 69...
-
Page 8: Chapter 1 Important Information
Raymarine product. Disclaimers Raymarine does not warrant that this product is error-free or that it is compatible with products manufactured by any person or entity other than Raymarine. This product uses digital chart data, and electronic information from Global Navigation Satellite Systems (GNSS) which may contain errors. -
Page 9: Chapter 2 Set Up
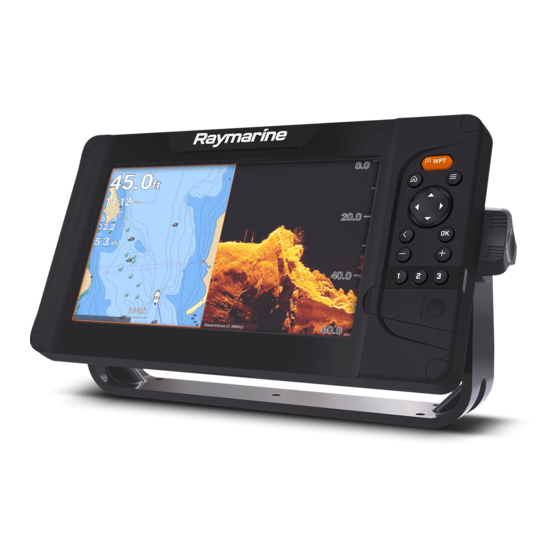
Chapter 2: Set up 2.1 Getting started Display controls The buttons available on Element™ displays and their function are detailed below. Waypoint • Press to place a waypoint at your vessel’s position (unless cursor mode is active in the Chart or Fishfinder app). •... -
Page 10: Startup Wizard
• Return to previous menu or dialog. 6. OK — Confirms menu selections, opens context menus • Press to confirm a currently highlighted option. • Press to open context sensitive menus in the Chart and Fishfinder apps. Minus (Zoom / Range out) •... -
Page 11: First Power Up Limitation On Use Acknowledgement
– Number of tanks – Number of batteries – Sonar transducer selection – Radar selection Follow the onscreen instructions to configure the relevant settings. Important: • Ensure you select the correct type of transducer, an incorrect selection will require a factory reset to correct. •... -
Page 12: Identifying Engines
1. Select Transducer from the Fishfinder app’s Settings menu: Menu > Settings > Transducer 2. If your installation required you to install an all-in-one transducer backwards (e.g.: this may occur when connecting the transducer to a trolling motor), then select Backwards from the HV transducer alignment option. -
Page 13: Performing A Settings Or Factory Reset
1. Ensure the correct number of engines is selected in the Num of Engines: box. 2. Select Identify engines. 3. Follow the onscreen prompts to complete the engine identification wizard. Performing a settings or factory reset Performing a Factory reset will erase ALL user data and reset the display’s settings to their Factory default values. -
Page 14: Switching Active App
Note: • If no controls are pressed, the Shortcuts menu will automatically close after approximately 5 seconds. • Radar transmission controls are only available when the display is paired with a compatible radar scanner. 2.3 Switching active app On app pages that contain more than 1 app you can select which app has the current focus (i.e.: which app responds to your control). -
Page 15: Memory Card Compatibility
2.4 Memory card compatibility MicroSD memory cards can be used to backup / archive data (e.g. Waypoints, Routes and Tracks). Once data is backed up to a memory card, old data can be deleted from the system. The archived data can be retrieved at any time. -
Page 16: Inserting A Microsd Card
Inserting a MicroSD card 1. Open the card reader door. 2. Ensuring correct orientation (contacts facing down), insert the MicroSD card into the card reader slot. 3. Close the card reader door, ensuring that the edges of the door are flush. Removing the MicroSD card 1. -
Page 17: Data Sources Menu
2.5 Data sources menu When a network / system includes multiple sources of the same data type, such as GPS / GNSS position data, the display will choose the most appropriate source for the data. If you prefer, you can manually select your own source for the data. -
Page 18: Heading Sensor
EV-1. 2.7 Software updates Raymarine® regularly issues software updates for its products which provide new and enhanced features and improved performance and usability. It is important to ensure that you have the latest software for your products by regularly checking the Raymarine®... -
Page 19: Updating Display Software Using A Memory Card
Follow the steps below to update the software on your display. 1. Check the product hardware variant and the software version of the products you want to update. 2. Go to the Raymarine website: (www.raymarine.com > Support > Software Updates). 3. Browse for your product. -
Page 20: Updating Software Using An Internet Connection
Software update list example 9. Select each device that you want to update. If a notification is displayed asking if you want to reinstall the current software version, unless you are experiencing problems with the product select No, otherwise select Yes and the current version of software will be reinstalled. - Page 21 2. Select Check online from the pop-over menu. If you do not have an active internet connection then you will be requested to create one. 3. To set up a Wi-Fi connection select Wi-Fi settings and connect to the required Wi-Fi access point/hotspot. 4.
-
Page 22: User Data Import And Export
Save. 5. Select OK to return to the Import/export menu, or select Eject card to safely remove the memory card. The user data file is saved to the ‘\Raymarine\My Data\’ directory of your memory card in gpx format. -
Page 23: Importing User Data
Importing user data You can import user data (i.e.: GPX format Waypoints, Routes and Tracks) to your display. 1. Insert the MicroSD card that contains your user data files into the memory card reader on your display. 2. Select Import from card from the Import/export menu: (Homescreen >... -
Page 24: Chapter 3 Homescreen
Chapter 3: Homescreen 3.1 Homescreen overview All settings and apps can be accessed from the Homescreen. Position/fix details — Shows your vessel’s current position coordinates. Select the area to view fix accuracy and to access position settings. 2. Supply voltage — Shows the display’s supply voltage. The Voltage reading is colored Red if the current supply voltage is lower than the value specified in the Low voltage threshold alarm setting: Homescreen >... -
Page 25: Available Apps
6. Routes & Tracks — Select to view the Routes and Tracks lists. Settings — Select to view the display’s Settings menu. Note: The combination of the selected Activity and Transducer selection during the Start up wizard determines the default app page icons displayed on the Homescreen. -
Page 26: Assigning App Pages To Quicklaunch Buttons
Dashboard — The Dashboard app provides data readings from connected sensors and equipment. Note: The Dashboard app is only available in splitscreen app pages. For detailed information about the Dashboard app refer to: Dashboard app (p.57) Radar — The Radar app is a situational awareness aid that displays a graphical representation of your surroundings in relation to your vessel using the echo/target returns from a connected Quantum radar... -
Page 27: Customizing App
2. Press and hold the relevant Quicklaunch button until the ‘Quicklaunch button configured’ message is displayed. The app page icon is updated to show the associated Quicklaunch button number in the top right corner of the icon. 3. Repeat steps 1 and 2 for the remaining Quicklaunch buttons, if required. - Page 28 Settings • Hardware and software information about your Getting started display. • Update display software. • Change the user interface language. • Enable/disable Retail/demo mode (Simulator mode). • Choose a Demo type. • Enable/disable Demo movie. • View the Terms of Use disclaimer. •...
-
Page 29: Alarms
3.4 Alarms Alarms are used to alert you to a hazard or situation requiring your attention. Alarms are triggered based on their specified thresholds. The following alarms can be configured on your display: • Dangerous AIS targets • Shallow depth •... -
Page 30: Position Settings
Notification example Blue — is used to signify information requiring user acknowledgement. Information notifications may self dismiss after 3 seconds, unless they require user interaction. Information notifications are not accompanied by an audible tone. 3.5 Position settings The details and settings for your display’s internal GNSS (GPS) receiver can be accessed from the Homescreen. -
Page 31: Timer
3.6 Timer A timer is provided in the homescreen status area. The timer can be used as a countdown timer or as a count-up (stopwatch). Whilst the countdown or count-up timer is in use it is displayed in the status area, below the current time. -
Page 32: Chapter 4 Waypoints, Routes And Tracks
Chapter 4: Waypoints, Routes and Tracks 4.1 Waypoints Waypoints are used to mark specific locations or points of interest. Waypoints can be used in the Chart and Fishfinder apps. Your display can store up to 5,000 waypoints, which can be sorted in up to 200 waypoint groups. -
Page 33: Waypoint Management
Waypoint management Waypoints are sorted and displayed in waypoint groups menu. Waypoint groups menu Waypoints can be viewed from the waypoint menu which can be accessed from the Homescreen (Homescreen > Waypoints) and from the Chart app (Chart app > Menu > Waypoints). Waypoints will be saved to the same group as the last waypoint you created. - Page 34 Waypoint groups Selecting ALL WAYPOINTS , TODAYS WAYPOINTS , UNSORTED or a user created waypoint group will display a list of all the waypoints in that group / category. With a list of waypoint displayed you can: • Find waypoints located in the area covered by the LiveView pane. •...
- Page 35 Waypoint details Selecting a waypoint from the list displays customizable details for that waypoint. The waypoint’s location is also displayed in the LiveView pane on the right side of the screen With the waypoint details displayed you can: • Edit the waypoint’s Name. Note: Waypoint names can be any combination of letters, numbers, symbols and special characters and can include up to 16 characters.
-
Page 36: Routes
4.2 Routes Routes are used to plan your journey in advance. You can plan your journey directly on your display, or at home using software capable of exporting waypoints and routes in standard .gpx format. Routes consist of a number of waypoints. Your display can store up to 50 routes, each route consisting of up to 250 waypoints. -
Page 37: Route Management
3. Select the location for the second waypoint. The 2 waypoints will be joined by a line, creating the first leg of your route. 4. Select the location for the subsequent waypoints, required to complete your route. 5. When your route is complete press and hold the OK button and then select Finish build from the context menu. - Page 38 Routes menu From the route menu you can Delete routes, create a New route using existing waypoints or Show/hide routes. To view the route plan, select a route and choose View route plan from the pop-over menu. Route plan The route plan displays a list of all waypoints in the route and includes a LiveView pane showing the route’s location.
-
Page 39: Tracks
• change the route direction by selecting Reverse • add an existing waypoint to the route by selecting Add waypoint • change route options, such as route name, route color, route hide or delete the route by selecting the relevant option from the Route options pop-over menu. -
Page 40: Creating A Track
Creating a track You can record your vessel’s voyage using Tracks. Once a Track is saved it can be converted to a route so that the same passage may be followed again at a later date. With the Chart app displayed: 1. - Page 41 Track menu From the tracks menu you can: • Start or Stop tracks recording. • Change track recording settings. • Delete tracks. • Show or hide tracks. By selecting a track from the list you can use the pop-over menu to: •...
-
Page 42: Chapter 5 Chart App
Chapter 5: Chart app 5.1 Chart app overview The Chart app displays a representation of your vessel in relation to land masses and other charted objects, which enables you to plan and navigate to your desired destination. The Chart app requires a GNSS (GPS) position fix in order to display your vessel at the correct location on a world map. -
Page 43: Chart App Controls
Databoxes Databoxes display key information that is available on your system. You can configure which data is shown in each databox or the databoxes can be hidden. Destination line During a go to, a dashed line connects your vessel to the destination point. -
Page 44: Selecting A Chart Card
• Pressing the Waypoint button will place a waypoint at the cursor’s location. • Pressing the Plus or Minus buttons will range in and range out respectively, centered around the cursor position. • Pressing the Back button will re-center the vessel icon and switch back to Motion mode. -
Page 45: Chart Modes
Chart modes The Chart app provides preset modes that can be used to quickly set up the Chart app for your intended use. To change chart mode select the required mode from the app menu. SIMPLE Simple mode suppresses chart detail to provide a clearer, simpler view for general orientation. -
Page 46: Navigation
Navigation Navigating to a waypoint or point of interest You can perform a “Goto” to a Waypoint or to a specific location. 1. Select the waypoint or point of interest and select Goto from the context menu. You can stop the Goto at any time by selecting Stop from the context menu, or by selecting another Goto. - Page 47 1. Select Settings. 2. Select the Alarms tab. 3. Select the Arrival radius: setting field. 4. Adjust the distance to the desired value. 5. Press the Back button to return to the alarms menu. Note: The waypoint arrival alarm can be disabled or enabled using the Waypoint arrival: toggle switch.
- Page 48 For more information on routes and route management refer to: Routes Following a route from a specified waypoint You can start following a route from any waypoint in that route. From the Chart app, with the route displayed onscreen: 1. Select the waypoint that you want to start following your route from. The route context menu is displayed.
-
Page 49: Autopilot Command
• For information on Evolution™ autopilot systems and required system components refer to the Evolution installation instructions document number: 87180 which is available to download from the Raymarine website: www.raymarine.com Goto, Follow and Stop commands initiated on the Element™ display are sent to the autopilot controller for acknowledgement. -
Page 50: Realbathy
5. Safe distance ring — A ring can be displayed which represents the dangerous target Safe distance. RealBathy™ You can create precise personal bathymetric charts in real time using Raymarine’s RealBathy™ feature. Note: RealBathy™ requires compatible LightHouse™ NC2 charts and a MicroSD card with sufficient free space to record depth and bathymetry data. -
Page 51: Chapter 6 Fishfinder App
Chapter 6: Fishfinder app 6.1 Fishfinder app overview The Fishfinder app displays a visualization of the echoes received from the transducer connected to your display and builds an underwater scrolling view of bottom structure and targets that pass under your transducer. -
Page 52: Fishfinder Channels - Element™ Hv Displays
Example — Element S display For each instance of the Fishfinder app that is available on the homescreen you can select which fishfinder channel that you want to use. The channel selection will persist over a power cycle. Fishfinder channels — Element™ HV displays The following fishfinder channels are available on Element™... -
Page 53: Fishfinder Channels - Element™ S Displays
Switching fishfinder channel frequency On Element™ HV variant displays DownVision™, SideVision™ and RealVision™ 3D channels are available in both 350 kHz (Standard) and 1.2 MHz (Hyper) frequencies. With either DownVision™, SideVision™ or RealVision™ 3D channel displayed: 1. Press the Menu button. 2. - Page 54 • Pressing any button on the Directional pad will switch to pause / playback mode. Pause / Playback mode In pause / playback mode the image is temporarily paused and the cursor can be moved around the screen. Control behavior: •...
-
Page 55: Placing A Waypoint In The Fishfinder App
Scrolling mode Scrolling mode is the default mode when the Fishfinder app is opened. In scrolling mode an image is displayed which scrolls across the screen. Control behavior: • Pressing the Plus or Minus buttons will increase and decrease the zoom level. - Page 56 2. Press the Waypoint button and, if required enter relevant waypoint details. Scrolling will resume automatically if no buttons are pressed for approximately 15 seconds.
-
Page 57: Chapter 7 Dashboard App
Chapter 7: Dashboard app 7.1 Dashboard app overview The Dashboard app enables you to view system data. System data may be generated by your display or by devices connected to your display via SeaTalkng ® / NMEA 2000. Note: For data to be available in the Dashboard app it must be transmitted to your display from compatible hardware using supported protocols and messages. -
Page 58: Hiding And Showing Data Pages
Alternatively, you can select a page you want to display using the page icons found in the app menu. Hiding and showing data pages With the Dashboard app displayed and active: 1. Press the Menu button. 2. Select the Settings icon. The menu is opened on the Pages tab. -
Page 59: Rolling Road
Navigation dial — The navigation dial provides a full compass with Heading read out, COG indicator and destination waypoint indicator. 2. Sailing dial — The sailing dial provides a full compass with wind speed read out and wind angle indicator. The sailing dial can be switched between displaying True wind and Apparent wind. - Page 60 Goto cursor / Goto waypoint Follow route The rolling road graphic represents a width of water, equal to the limit specified in the cross track error (XTE) alarm, on each side of your vessel. The Cross track error alarm can be configured from the alarms menu: Homescreen >...
-
Page 61: Chapter 8 Radar App
Chapter 8: Radar app 8.1 Adding the Radar app icon to the homescreen If the Radar app icon is not displayed on the homescreen it can be added manually following the steps below. From the homescreen: 1. Using the Directional pad, highlight a blank space on the homescreen. -
Page 62: Opening The Radar App
Radar app. Pre-requisites: Ensure your radar scanner is compatible, check the latest details available on the Raymarine website, if in doubt please contact an authorized Raymarine dealer for advice. 2. Ensure you have installed your radar scanner in accordance with the documentation that was supplied with your Radar. - Page 63 Off/Not Connected If the ‘Off/Not Connected’ message is displayed then the display cannot establish a connection with your radar scanner: Ensure that your display and radar scanner are paired correctly and then select On to power up your radar. If the ‘Radar not found’ message is displayed then power cycle your system and perform the pairing procedure again.
-
Page 64: Putting The Radar Into Standby
Transmitting If your radar scanner is connected, powered up and transmitting then the radar image is displayed and echoes returns are displayed onscreen. Putting the radar into standby With your selected radar displayed onscreen: 1. Select Transmit from the main menu. The radar scanner will stop transmitting and is put into standby mode. -
Page 65: Radar Modes
8.3 Radar modes The Radar app provides preset modes that can be used to quickly achieve the best picture depending on your current situation. Only Radar modes supported by your Radar scanner are shown. To change radar mode select the required mode from the Radar app menu. -
Page 66: Range And Bearing
AIS target icon — Example of an AIS target icon. 2. AIS Infobox — Information can be displayed for each AIS target. 3. Dangerous AIS target icon — Example of an AIS target icon that is dangerous. 4. Safe distance ring — A ring can be displayed which represents the dangerous AIS target alarm’s Safe distance. -
Page 67: Guard Zone Alarm
North indicator (Always points north). 2. SHM (Ships Heading Marker). 3. Bearing indicator ring (White). 4. Range rings with range indicator (Green). 5. Vessel position. 6. Current displayed bearing and range ring separation distance (Range: identifies the distance from your vessel to the bearing indicator ring. - Page 68 If required, the sensitivity of the guard zone can be adjusted using the Sensitivity: field. Sensitivity determines the size at which objects will trigger the alarm. A Higher sensitivity setting will detected smaller objects than a lower sensitivity setting.
-
Page 69: Chapter 9 Technical Support
You can obtain this product information using diagnostic pages of the connected MFD. Servicing and warranty Raymarine offers dedicated service departments for warranty, service, and repairs. Don’t forget to visit the Raymarine website to register your product for extended warranty benefits: http://www.raymarine.co.uk/dis- play/?id=788. Region Contact •... - Page 70 • Tel: +1 (603) 324 7900 (Toll -free: +800 539 5539) Australia and New • E-Mail: aus.support@raymarine.com Zealand • Tel: +61 2 8977 0300 (Raymarine subsidiary) France • E-Mail: support.fr@raymarine.com (Raymarine subsidiary) • Tel: +33 (0)1 46 49 72 30 • E-Mail: support.de@raymarine.com...
-
Page 71: Identify Display Variant And Software Version
Identify display variant and software version Refer to the Getting started menu: Homescreen > Settings > Getting started on your display to identify product variant and current software version. Viewing product information You can view detailed product information about your display. 1. - Page 72 2. Enter a filename for the data using the onscreen keyboard, or keep the default filename. 3. Select Save. 4. Select Eject card to safely remove the memory card, or select OK to return to the Product information page. Viewing information about networked products Product information for networked products can be viewed from the Networked devices list.
-
Page 73: Learning Resources
Technical support forum You can use the Technical support forum to ask a technical question about a Raymarine product or to find out how other customers are using their Raymarine equipment. The resource is regularly updated with contributions from Raymarine customers and staff: •... - Page 76 Raymarine Marine House, Cartwright Drive, Fareham, Hampshire. PO15 5RJ. United Kingdom. Tel: +44 (0)1329 246 700 www.raymarine.com a brand by...
Need help?
Do you have a question about the LightHouse Sport and is the answer not in the manual?
Questions and answers