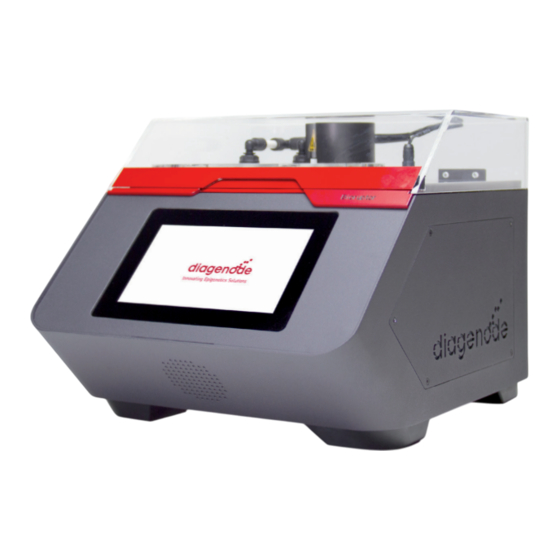
diagenode Bioruptor Pico Manual
Elegant, precise, advanced your best shearing device
Hide thumbs
Also See for Bioruptor Pico:
- User manual (48 pages) ,
- User manual (28 pages) ,
- User manual (28 pages)
Table of Contents
Advertisement
Quick Links
Advertisement
Table of Contents

Summary of Contents for diagenode Bioruptor Pico
- Page 1 Bioruptor Pico ® Elegant, Precise, Advanced Your best shearing device...
- Page 2 Dear Customer, Thank you for choosing our device and for your confidence in Diagenode. We have designed this device using our expertise in shearing so that it exceeds your expectations. This device will serve your research needs for many years and will provide the best experience with sample preparation.
-
Page 3: Intended Use
INTENDED USE The Bioruptor Pico is intended for laboratory use. It is not suitable for clinical use. Use of the Bioruptor Pico in any manner other than as directed herein could cause harm to persons and may void the warranty. Diagenode will not be responsible for injury or damage resulting from improper use of the Bioruptor Pico. -
Page 4: Technical Specifications
TECHNICAL SPECIFICATIONS Maximum Relative Input Voltage Range 100 – 240 V Humidity Input Frequency Range 50-60 Hz Altitude Up to 2,000 meters Maximum Electrical 4.2 A Degree of protection IP31 Consumption Shearing Accessories • Tube holder for 0.2 ml tubes Ultrasonic Wave Frequency 20 –... - Page 5 Cat. No. C30010016 Fragment Length 150 – 1,000 bp • 15 ml Bioruptor Pico Tubes Range Achievable Cat. No. C30010017 • 15 ml Bioruptor Pico Tubes & Working Temperature 2 - 20°C sonication beads Range Cat. No. C01020031 Time ON, Time OFF,...
- Page 6 Motorized lid Touch screen Sonication water bath Led light bar Tube holder Valve connection cable for Bioruptor ® Cooler Dock Tubing Power cord BIORUPTOR ® COOLER BIORUPTOR PICO ® Speaker...
-
Page 7: Led Light Bar
LED LIGHT BAR The LED light bar allows the tracking of the processing of your samples. blue light means the system is waiting for the operator. progressive green light indicates the progression of the shearing process. green light indicates the end of the shearing process. orange light means the protocol is on pause. - Page 8 INTERFACE Go & Shear: Start a new shearing Settings: Visualize and change the protocol parameters of your Bioruptor Pico Sound: Adjust the sound level User protocols: Record your protocol Brightness: Adjust the brightness of Guidelines: Read Diagenode the screen recommendations for your applications...
- Page 9 Diagenode dots: Go back administrators to the top menu Technical Support: Diagenode Information: General information contact information for technical about your Bioruptor Pico questions Commercial Support: Diagenode Edit: Edit the parameter contact information for commercial questions Question mark: Some notes to guide you...
- Page 10 Start the sonicator Check if water is in the sonication water bath and the cooler Level indicator on the cooler Maximum volume Minimum volume If not, fill the sonication water bath with ~ 700 ml of deionized or distilled water and the cooling system with 2-3 liters of deionized or distilled water.
- Page 11 Start the cooling system, set the temperature to Start a new shearing experiment 4°C and let the water cool down PROTOCOLS A. Press ENTER button to reach set point menu B. Select a set point temperature (4°C) using the Or find your pre-recorded shearing arrow buttons protocol on User protocols C.
- Page 12 Select your mode Select parameters (Time ON, Time OFF, # cycles, type of tube or level of frequency)* GO AND SHEAR GO AND SHEAR (easy mode) seconds seconds cycles Choose validated Choose your level protocols of frequency seconds Find validated parameters on the Easy Mode *Visit our Guidelines folder to get or optimize your protocol with different levels...
- Page 13 Fill the sonication tubes Vortex and then spin your samples with same volume of sample* *Use the recommended tubes and sample volumes for optimal shearing efficiency. Visit our Guidelines folder for more information.
- Page 14 Fill all positions of the tube holder Close the lid with your samples* and place it on the motorized lid *or with water of same volume...
- Page 15 Start the protocol Let your Bioruptor run GO AND SHEAR (easy mode) seconds seconds cycles seconds...
- Page 16 Collect your samples...
- Page 17 If you have any questions, please contact a specialist at www.diagenode.com/en/pages/support...
-
Page 18: Equipment Care
BUT be careful to not turn ON the instrument without water. MANUAL Read the full manual “ https://www.diagenode.com/en/documents/bioruptor2-manual ” - Tab Documents SAFETY APPROVAL Bioruptor has been assessed and certified under the standards. -
Page 19: Warranty
WARRANTY Diagenode guarantees the Bioruptor Pico from any manufacturing defects as we rigorously test it to meet strict quality standards. Diagenode warrants that all standard components of the instrument will be free of defects in materials and workmanship for a period of five (5) years or for maximum 210 hours of total running time* from the date that the warranty period begins, unless the original quotation or accompanying documentation states a different warranty period. - Page 20 © 2020 Diagenode, Inc. All rights reserved. The content of this document cannot be reproduced without prior permission of the authors.


Need help?
Do you have a question about the Bioruptor Pico and is the answer not in the manual?
Questions and answers