OCULUS PENTACAM Instruction Manual
System for measuring and analysing the front part of the eye
Hide thumbs
Also See for PENTACAM:
- User manual ,
- Interpretation manual (216 pages) ,
- Instruction manual (74 pages)

Related Manuals for OCULUS PENTACAM


Summary of Contents for OCULUS PENTACAM
- Page 1 OCULUS ® PENTACAM ® PENTACAM HR INSTRUCTION MANUAL System for measuring and analysing the front part of the eye...
- Page 2 Notes on this instruction manual Thank you for your purchase and the trust you have placed in this OCULUS product. The ® ® Pentacam / Pentacam HR has been manufactured and tested according to strict qual- ity criteria. You have selected a modern and well-engineered product.
-
Page 3: Table Of Contents
Scope of Delivery............................1 Safety instructions........................... 2 Safety instructions concerning organisation ..............2 Pictogram definitions ....................... 2 Safety instructions regarding the use of the Pentacam..........3 Proper Usage.............................. 4 Transportation and Disposal........................ 4 Transport and storage instructions ..................4 Disposal of used devices ......................5 Device Description ........................... - Page 4 16.2 Assumption of liability for functions and damage............ 25 16.3 Address of the manufacturer and service department..........26 17 Declaration of Conformity......................... 27 18 Technical Specifications / Minimum PC Requirements ............28 iii / iii Instruction Manual Pentacam® / Pentacam HR® (G/70700/0109/en)
-
Page 5: Scope Of Delivery
Component Order number Pentacam 70700 Pentacam HR 70900 Pentacam mounted on an x-y-z mobile unit 70518 Head and chin rest Plate for mounting on a refraction unit or table 70517-01-006 (Dimensions 28 cm x 36 cm) Power supply, input 100 V-240 V, output 24 V, 2.1 A, Hitron HES 49... -
Page 6: Safety Instructions
The Pentacam is a high-quality technical product. To ensure that it functions correctly and safely we recommend the following: Have the Pentacam checked by our service per- sonnel or an authorised dealer every two years. If an error occurs which you are unable to correct, label the device as "out of order"... -
Page 7: Safety Instructions Regarding The Use Of The Pentacam
Safety instructions regarding the use of the Pentacam Note Before you use the Pentacam for the first time you must be instructed either by us or an authorised dealer. Attention No modifications may be made to this device without the permission of the manufacturer. -
Page 8: Proper Usage
Proper Usage The OCULUS Pentacam is a measuring device for examining the front part of the eye and may only be used for the purpose described in this instruction manual. The OCULUS Pentacam is designed for use in clinics and by eye specialists and opticians. -
Page 9: Disposal Of Used Devices
27 January 2003, and in accordance with German law governing the circulation, return and environmentally friendly disposal of used electrical and electronic devices, such ap- pliances must be recycled and may not be discarded as household waste. Instruction Manual Pentacam® / Pentacam HR® (G/70700/0109/en) 5 / 29... -
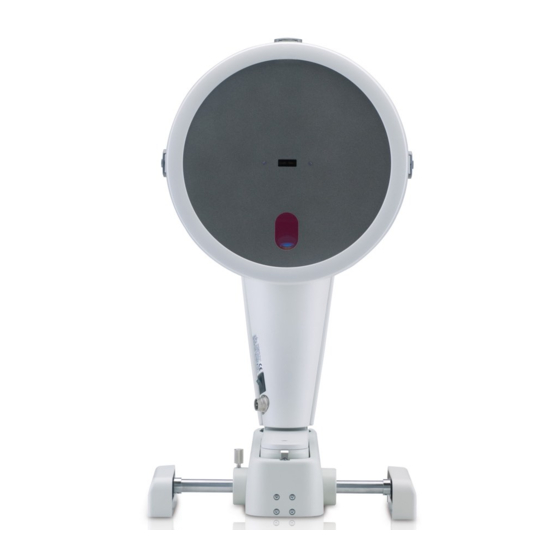
Page 10: Device Description
Fig. 5-1: Device components How the Pentacam works While rotating around the eye, the Pentacam creates Scheimpflug images of the front part of the eye through varying axes. The images which this rotation produces are the basis for calculating height data which is used to extrapolate all other results and to cre- ate a 3D model. -
Page 11: Operation
Wait approx. 3-4 hours after transport before operating the Pentacam. If the Pentacam was stored in a cold room or vehicle during the cold time of the year, a significant change in temperature may cause condensation to appear on optical parts in the Pentacam. -
Page 12: Switching The Pentacam Off
4 [Export] button 8 "Patient" group box Fig. 7-1: Patient Data Management To enter the Pentacam program, you must either enter a new patient (8) into the "Patient" group box or select an existing patient (2) from the list. 8 / 29... -
Page 13: Entering New Patients
Optionally you can enter an ID number for the patient. To accept the entries you have made, click [Save]. The patient you have just entered now appears in the patient list. Select this new patient from the patient list and start the Pentacam program (sect. 7.4, page 10). -
Page 14: Starting The Pentacam Program
Note As this instruction manual focuses on the Pentacam operating concept, the description of Pentacam program functions is limited to starting the measuring process and loading previous examinations. The Reference manual contains detailed information on the functions of the Pentacam program. -
Page 15: Scan Menu
The eye currently being examined is detected automatically and is displayed in the "Eye" field (1). The Pupil Image (2) shows the vertical / horizontal positioning of the Pentacam. The object is to position the yellow dot marking the apex of the cornea in the centre of Instruction Manual Pentacam®... -
Page 16: Scheimpflug Image Settings
Inside the adjustment window (7), there are arrows showing you the direction in which you must move the Pentacam to activate automatic measurement (Automatic Release). The "Fixation Target" setting (8) is a parameter used only on the Pentacam HR (sect. 9.1.2, page 13). -
Page 17: Parameters Applicable Only To The Pentacam Hr
Parameters applicable only to the Pentacam HR Note The parameters described below apply only to the Pentacam HR. The Pentacam HR has additional options for selecting image types. You can find these exclusive parameters in the "Image Options" box (3). "Cornea Fine" group box Select this option for a more detailed image of the cornea. -
Page 18: Information For Recording Scheimpflug Images
Type of examination Examination mode Images Automatic measure- Notes ment IOLs, ICLs, PIOLs 3D scan for PIOLs, possi- 25-50 If the pupil is insufficiently dilated, apply bly longer exposure mydriatic drops 14 / 29 Instruction Manual Pentacam® / Pentacam HR® (G/70700/0109/en) -
Page 19: Measuring Procedure
The patient is positioned correctly when chin and forehead touch the rests and the eyes are level with the marking. 1 Marking (black ring) 2 Twist grip Fig. 10-1: Rough adjustment of the chin and forehead rest Instruction Manual Pentacam® / Pentacam HR® (G/70700/0109/en) 15 / 29... - Page 20 Look at the patient’s eye you are examining from one side and make sure that the blue slit light illuminates the cornea. If necessary, adjust the position of the cross slide to the left or right. Fig. 10-3: Slit light on the cornea 16 / 29 Instruction Manual Pentacam® / Pentacam HR® (G/70700/0109/en)
- Page 21 The image is sharpest when the red dot coincides with the red line in the Sche- impflug image. Focus the pupil image by moving the joystick towards the Pentacam or away from it. Adjust the left/right position of the Pentacam and its height setting.
- Page 22 Fig. 10-5: Adjustment window When you have achieved a sufficiently accurate position, a black cross will appear in the centre of the ring, surrounded by four black lines. The Pentacam will automati- cally begin measuring, alternately you can start the measuring procedure manually.
-
Page 23: Quality Specifications
11 Quality Specifications 11 Quality Specifications After you have begun measuring either automatically or manually, the Pentacam program opens. The "QS" button appears in a field below the patient data. 1 "QS" button Fig. 11-1: Pentacam program with "QS" button If the "QS"... - Page 24 If one of these values exceeds the permissible threshold, you may have moved the cross slide at the moment you began measuring. Eye Movement If this value exceeds the permissible threshold, it is possible that fixation of the pa- tient is inadequate. 20 / 29 Instruction Manual Pentacam® / Pentacam HR® (G/70700/0109/en)
-
Page 25: Transferring Measurement Results
If required, delete the measurement if the image is inadequate. Terminate the current examination which has been saved. If required, make preparations to examine another patient. In the "Pentacam" over- view, select the "Examination" menu and click [New Patient/End]. 12 Transferring Measurement... -
Page 26: Importing Patient Data
A software licence purchased from an authorised dealer. This licence includes instal- lation instructions and a Licence-Key. The Pentacam program must be installed on the other PC. If the program is updated on the Pentacam PC (sender), the program on the other PC (recipient) must also be updated. -
Page 27: Test Measurements With The Pentacam
10). Check whether the USB connector is properly inserted. Switch the Pentacam off and restart the PC. Switch the Pentacam on as soon as Pa- tient Data Management becomes active. When you start the Pentacam program, the message, "Load Bootloader" must appear. -
Page 28: Cleaning And Care
It is best to clean the housing surfaces with a soft cloth and an antistatic cleaning agent. Wipe any residual particles using a mixture containing equal parts of spirits and dis- tilled water, and add a dash of household washing up liquid. 24 / 29 Instruction Manual Pentacam® / Pentacam HR® (G/70700/0109/en) -
Page 29: Terms Of Warranty And Servicing
Prior to and while operating the device it is important that you observe the instruction manual and safety instructions. The Pentacam carries a warranty to which you are entitled in accordance with the legal provisions. If any unauthorised persons interfere with the Pentacam, all warranty entitlements shall be void. -
Page 30: Address Of The Manufacturer And Service Department
Münchholzhäuser Straße 29 35582 Wetzlar, Germany Tel.: 0641/2005-0 Fax: 0641/2005-255 E-mail: sales@oculus.de www.oculus.de USA: OCULUS Inc. 2125 196 Street SW Suite 112 Lynnwood, WA 98036 Tel.: 425-670-9977 E-mail: oculusincusa msn.com 26 / 29 Instruction Manual Pentacam® / Pentacam HR® (G/70700/0109/en) -
Page 31: Declaration Of Conformity
17 Declaration of Conformity 17 Declaration of Conformity Instruction Manual Pentacam® / Pentacam HR® (G/70700/0109/en) 27 / 29... -
Page 32: Technical Specifications / Minimum Pc Requirements
100 - 240 V AC, 50 - 60 Hz Power input 60 W Power output 24 V, 2.1 A Fuses Integrated overcurrent shut-off Other information CE marking CE 0123 Contraindications None noted Lifecycle expectancy Up to 10 years 28 / 29 Instruction Manual Pentacam® / Pentacam HR® (G/70700/0109/en) - Page 33 Pentium Intel Centrino 1.4 GHz Pentium Intel Pentium 2.4 GHz Operating system Windows™ XP SP2 Microsoft.NET Framework, version 2.0 1 GB RAM Graphics card ATI Radeon 9200 SE 128 MB Instruction Manual Pentacam® / Pentacam HR® (G/70700/0109/en) 29 / 29...
Need help?
Do you have a question about the PENTACAM and is the answer not in the manual?
Questions and answers