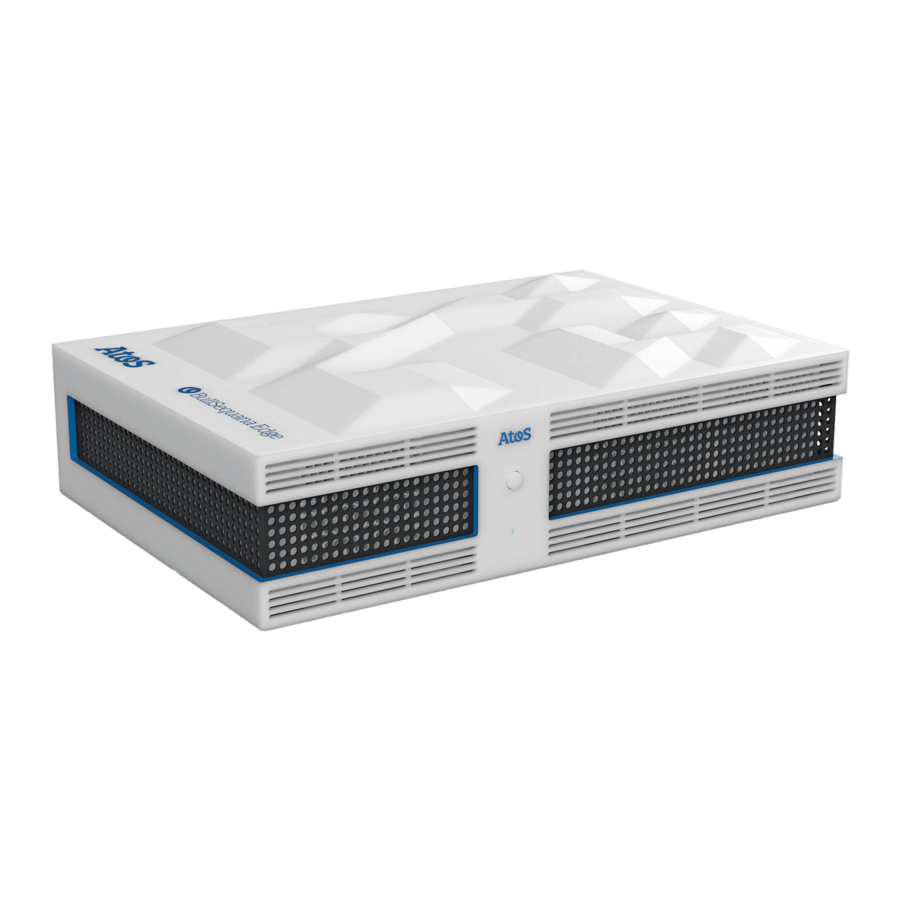
Atos BullSequana Edge Customer Service Manual
Hide thumbs
Also See for BullSequana Edge:
- Installation manual (34 pages) ,
- Customer service manual (104 pages)
Table of Contents
Advertisement
Quick Links
Advertisement
Table of Contents

Subscribe to Our Youtube Channel
Related Manuals for Atos BullSequana Edge


Summary of Contents for Atos BullSequana Edge
- Page 1 BullSequana Edge Customer Service Guide 86 A1 93FR 01 - September 2019...
- Page 2 The following copyright notice protects this book under Copyright laws which prohibit such actions as, but not limited to, copying, distributing, modifying, and making derivative works. Copyright ©Bull SAS 2019 Printed in France Trademarks and Acknowledgements We acknowledge the right of proprietors of trademarks mentioned in this manual. All brand names and software and hardware product names are subject to trademark and/or patent protection.
-
Page 3: Table Of Contents
Table of Contents Preface ................p‐1 Intended Readers . -
Page 5: Preface
Preface This guide explains how to replace the Customer Replaceable Units (CRU). The Bull support web site for the most uptodate product information, documentation, firmware updates, software fixes and service offers: http://support.bull.com Important ATTENTION: Please read carefully the safety instructions before you perform the procedures described in this manual. -
Page 7: Servicing A Fan
Take additional care when you handle devices during cold weather. Heating reduces indoor humidity and increases static electricity. BullSequana Edge Description Guide, 86 A1 65FR to locate the fan. Chapter 1. Servicing a fan... -
Page 8: Removing A Fan
1.1. Removing a fan Required Tools None Procedure 1. Unpack the new component on a clean ESD-protected work surface 2. Power off the server Push the power On/Off button (A) to power off the server. Front view Customer Service Guide... - Page 9 3. Disconnect the power supply cable Rear view 4. Rotate external antenna 1 down To allow the removal of the top cover, the external antenna 1 must be rotated down to the left. Rear view Chapter 1. Servicing a fan...
- Page 10 5. Unlock the cover latch Use a flat screwdriver to unlock the latch. Front view Customer Service Guide...
- Page 11 6. Pull the latch up Side view 7. Remove the cover Front view Chapter 1. Servicing a fan...
- Page 12 8. Remove the fan 1. Press the fan latch (A) in. 2. Pull the fan up. Front view Customer Service Guide...
-
Page 13: Installing A Fan
1.2. Installing a fan Required Tools None Procedure 1. Take hold of the new component 2. Install the fan Front view Chapter 1. Servicing a fan... - Page 14 3. Install the cover Front view 4. Close the latch Side view Customer Service Guide...
- Page 15 5. Lock the latch to secure the cover in place Use a flat screwdriver to lock the latch. Front view 6. Restore external antenna 1 back into position Rear view Chapter 1. Servicing a fan...
- Page 16 7. Connect the power supply cable Rear view 8. Power on the server Push the power On/Off button (A) to power on the server. Front view 1-10 Customer Service Guide...
-
Page 17: Servicing A Processor Air Duct
Take additional care when you handle devices during cold weather. Heating reduces indoor humidity and increases static electricity. BullSequana Edge Description Guide, 86 A1 65FR to locate the processor air duct. Chapter 2. -
Page 18: Removing A Processor Air Duct
2.1. Removing a processor air duct Required Tools None Procedure 1. Unpack the new component on a clean ESD-protected work surface 2. Power off the server Push the power On/Off button (A) to power off the server. Front view Customer Service Guide... - Page 19 3. Disconnect the power supply cable Rear view 4. Rotate external antenna 1 down To allow the removal of the top cover, the external antenna 1 must be rotated down to the left. Rear view Chapter 2. Servicing a processor air duct...
- Page 20 5. Unlock the cover latch Use a flat screwdriver to unlock the latch. Front view Customer Service Guide...
- Page 21 6. Pull the latch up Side view 7. Remove the cover Front view Chapter 2. Servicing a processor air duct...
- Page 22 8. Remove the processor air duct Front view Customer Service Guide...
-
Page 23: Installing A Processor Air Duct
2.2. Installing a processor air duct Required Tools None Procedure 1. Take hold of the new component 2. Install the processor air duct Front view Chapter 2. Servicing a processor air duct... - Page 24 3. Install the cover Front view 4. Close the latch Side view Customer Service Guide...
- Page 25 5. Lock the latch to secure the cover in place Use a flat screwdriver to lock the latch. Front view 6. Restore external antenna 1 back into position Rear view Chapter 2. Servicing a processor air duct...
- Page 26 7. Connect the power supply cable Rear view 8. Power on the server Push the power On/Off button (A) to power on the server. Front view 2-10 Customer Service Guide...
-
Page 27: Servicing A Memory Module
Take additional care when you handle devices during cold weather. Heating reduces indoor humidity and increases static electricity. BullSequana Edge Description Guide, 86 A1 65FR to locate the memory module. Chapter 3. -
Page 28: Removing A Memory Module
3.1. Removing a memory module Required Tools None Procedure 1. Unpack the new component on a clean ESD-protected work surface 2. Power off the server Push the power On/Off button (A) to power off the server. Front view Customer Service Guide... - Page 29 3. Disconnect the power supply cable Rear view 4. Rotate external antenna 1 down To allow the removal of the top cover, the external antenna 1 must be rotated down to the left. Rear view Chapter 3. Servicing a memory module...
- Page 30 5. Unlock the cover latch Use a flat screwdriver to unlock the latch. Front view Customer Service Guide...
- Page 31 6. Pull the latch up Side view 7. Remove the cover Front view Chapter 3. Servicing a memory module...
- Page 32 8. Remove the processor air duct Front view Customer Service Guide...
- Page 33 9. Remove the memory module 1. Press the retention latches down to release the memory module Chapter 3. Servicing a memory module...
- Page 34 2. Remove the memory module Important Always hold the module by the edges to avoid electrical and structural damage. Front view Customer Service Guide...
-
Page 35: Installing A Memory Module
3.2. Installing a memory module Required Tools None Procedure 1. Take hold of the new component 2. Install the memory module Important Always hold the module by the edges to avoid electrical and structural damage. 1. Make sure that the retention latches at both ends of the memory module connector are pushed outward to the open position. - Page 36 2. Carefully push down on each side of the memory module until it sits in the slot and the retention latches close. Front view 3-10 Customer Service Guide...
- Page 37 3. Install the processor air duct Front view Chapter 3. Servicing a memory module 3-11...
- Page 38 4. Install the cover Front view 5. Close the latch Side view 3-12 Customer Service Guide...
- Page 39 6. Lock the latch to secure the cover in place Use a flat screwdriver to lock the latch. Front view 7. Restore external antenna 1 back into position Rear view Chapter 3. Servicing a memory module 3-13...
- Page 40 8. Connect the power supply cable Rear view 9. Power on the server Push the power On/Off button (A) to power on the server. Front view 3-14 Customer Service Guide...
-
Page 41: Servicing A Graphic Processing Unit (Gpu)
Take additional care when you handle devices during cold weather. Heating reduces indoor humidity and increases static electricity. BullSequana Edge Description Guide, 86 A1 65FR to locate the GPU. Chapter 4. Servicing a Graphic Processing Unit (GPU) -
Page 42: Removing A Gpu
4.1. Removing a GPU Required Tools T10 Torx screwdriver Procedure 1. Unpack the new component on a clean ESD-protected work surface 2. Power off the server Push the power On/Off button (A) to power off the server. Front view Customer Service Guide... - Page 43 3. Disconnect the power supply cable Rear view 4. Rotate external antenna 1 down To allow the removal of the top cover, the external antenna 1 must be rotated down to the left. Rear view Chapter 4. Servicing a Graphic Processing Unit (GPU)
- Page 44 5. Unlock the cover latch Use a flat screwdriver to unlock the latch. Front view Customer Service Guide...
- Page 45 6. Pull the latch up Side view 7. Remove the cover Front view Chapter 4. Servicing a Graphic Processing Unit (GPU)
- Page 46 8. Remove the GPU air duct Front view 9. Remove the GPU 1. Loosen the screw. Customer Service Guide...
- Page 47 2. Pull the GPU out. Front view Chapter 4. Servicing a Graphic Processing Unit (GPU)
-
Page 48: Installing A Gpu
4.2. Installing a GPU Required Tools T10 Torx screwdriver Procedure 1. Take hold of the new component 2. Install the GPU 1. Position the GPU. 2. Tighten the screw. Top view Customer Service Guide... - Page 49 3. Install the GPU air duct Front view Chapter 4. Servicing a Graphic Processing Unit (GPU)
- Page 50 4. Install the cover Front view 5. Close the latch Side view 4-10 Customer Service Guide...
- Page 51 6. Lock the latch to secure the cover in place Use a flat screwdriver to lock the latch. Front view 7. Restore external antenna 1 back into position Rear view Chapter 4. Servicing a Graphic Processing Unit (GPU) 4-11...
- Page 52 8. Connect the power supply cable Rear view 9. Power on the server Push the power On/Off button (A) to power on the server. Front view 4-12 Customer Service Guide...
-
Page 53: Servicing A 2.5" Disk
Take additional care when you handle devices during cold weather. Heating reduces indoor humidity and increases static electricity. BullSequana Edge Description Guide, 86 A1 65FR to locate the disk. Chapter 5. Servicing a 2.5" disk... -
Page 54: Removing A 2.5" Disk
5.1. Removing a 2.5" disk Required Tools Flat screwdriver Procedure 1. Unpack the new component on a clean ESD-protected work surface 2. Power off the server Push the power On/Off button (A) to power off the server. Front view Customer Service Guide... - Page 55 3. Disconnect the power supply cable Rear view 4. Rotate external antenna 1 down To allow the removal of the top cover, the external antenna 1 must be rotated down to the left. Rear view Chapter 5. Servicing a 2.5" disk...
- Page 56 5. Unlock the cover latch Use a flat screwdriver to unlock the latch. Front view Customer Service Guide...
- Page 57 6. Pull the latch up Side view 7. Remove the cover Front view Chapter 5. Servicing a 2.5" disk...
- Page 58 8. Disconnect the power cable and the signal cable from the disk 9. Unlock the disk cage assembly 1. Push in the latches on either side of the disk cage assembly. 2. Pull the disk cage assembly out to unlock it. Customer Service Guide...
- Page 59 10. Remove the disk cage assembly 11. Turn the disk cage assembly upside down Chapter 5. Servicing a 2.5" disk...
- Page 60 12. Remove the 2.5” disk 1. Unscrew the disk cage screws. 2. Remove the disk. Customer Service Guide...
-
Page 61: Installing A 2.5" Disk
5.2. Installing a 2.5" disk Required Tools Flat screwdriver Procedure 1. Take hold of the new component 2. Attach the 2.5” disk to the disk cage 1. Position the disk cage on top of the disk. 2. Tighten the screws. Chapter 5. - Page 62 3. Turn the disk cage assembly over 4. Locate the three guide pins 5-10 Customer Service Guide...
- Page 63 5. Put the disk cage assembly into place Chapter 5. Servicing a 2.5" disk 5-11...
- Page 64 6. Lock the disk cage assembly into place 1. Push in the latches on either side of the disk cage assembly. 2. Push the disk cage assembly until it locks into place. 5-12 Customer Service Guide...
- Page 65 7. Connect the power cable and the signal cable to the disk 8. Install the cover Front view Chapter 5. Servicing a 2.5" disk 5-13...
- Page 66 9. Close the latch Side view 5-14 Customer Service Guide...
- Page 67 10. Lock the latch to secure the cover in place Use a flat screwdriver to lock the latch. Front view 11. Restore external antenna 1 back into position Rear view Chapter 5. Servicing a 2.5" disk 5-15...
- Page 68 12. Connect the power supply cable Rear view 13. Power on the server Push the power On/Off button (A) to power on the server. Front view 5-16 Customer Service Guide...
-
Page 69: Servicing A 3.5" Disk
Take additional care when you handle devices during cold weather. Heating reduces indoor humidity and increases static electricity. BullSequana Edge Description Guide, 86 A1 65FR to locate the disk. Chapter 6. Servicing a 3.5” disk... -
Page 70: Removing A 3.5" Disk
6.1. Removing a 3.5" disk Required Tools Phillips screwdriver Procedure 1. Unpack the new component on a clean ESD-protected work surface 2. Power off the server Push the power On/Off button (A) to power off the server. Front view Customer Service Guide... - Page 71 3. Disconnect the power supply cable Rear view 4. Rotate external antenna 1 down To allow the removal of the top cover, the external antenna 1 must be rotated down to the left. Rear view Chapter 6. Servicing a 3.5” disk...
- Page 72 5. Unlock the cover latch Use a flat screwdriver to unlock the latch. Front view Customer Service Guide...
- Page 73 6. Pull the latch up Side view 7. Remove the cover Front view Chapter 6. Servicing a 3.5” disk...
- Page 74 8. Disconnect the power cable and the signal cable from the disk 9. Unlock the disk cage assembly 1. Push in the latches on either side of the disk cage assembly. 2. Pull the disk cage assembly out to unlock it. Customer Service Guide...
- Page 75 10. Remove the disk cage assembly 11. Turn the disk cage assembly upside down Chapter 6. Servicing a 3.5” disk...
- Page 76 12. Remove the 3.5” disk 1. Unscrew the disk cage screws. 2. Remove the disk. Customer Service Guide...
-
Page 77: Installing A 3.5" Disk
6.2. Installing a 3.5" disk Required Tools Phillips screwdriver Procedure 1. Take hold of the new component 2. Attach the the 3.5” disk to the disk cage 1. Position the disk cage on top of the disk. 2. Tighten the screws. Chapter 6. - Page 78 3. Turn the disk cage assembly over 4. Repair the three gudgeon 6-10 Customer Service Guide...
- Page 79 5. Put the disk cage assembly into place Chapter 6. Servicing a 3.5” disk 6-11...
- Page 80 6. Lock the disk cage assembly into place 1. Push in the latches on either side of the disk cage assembly. 2. Push the disk cage assembly until it locks into place. 6-12 Customer Service Guide...
- Page 81 7. Connect the power cable and the signal cable to the disk 8. Install the cover Front view Chapter 6. Servicing a 3.5” disk 6-13...
- Page 82 9. Close the latch Side view 6-14 Customer Service Guide...
- Page 83 10. Lock the latch to secure the cover in place Use a flat screwdriver to lock the latch. Front view 11. Restore external antenna 1 back into position Rear view Chapter 6. Servicing a 3.5” disk 6-15...
- Page 84 12. Connect the power supply cable Rear view 13. Power on the server Push the power On/Off button (A) to power on the server. Front view 6-16 Customer Service Guide...
- Page 86 Bull Cedoc 357 avenue Patton BP 20845 49008 Angers Cedex 01 FRANCE...
Need help?
Do you have a question about the BullSequana Edge and is the answer not in the manual?
Questions and answers