Advertisement
Advertisement
Table of Contents

Related Manuals for Cooke & Lewis CLDW601W-C


Summary of Contents for Cooke & Lewis CLDW601W-C
- Page 1 CLDW601W-C Barcode 5052931055630...
- Page 2 [01] x 1 [02] x 1 [03] x 1 [04] x 1 [05] x 1 [06] x 1 [07] x 1 Parts not supplied...
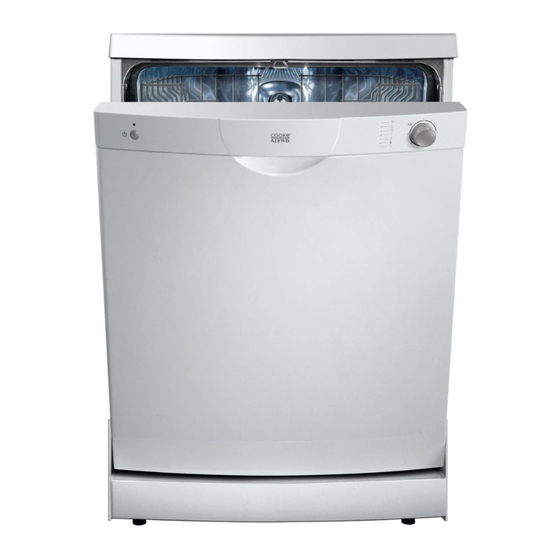
- Page 3 CLDW601W-C Freestanding 60cm Dishwasher Installation...
-
Page 4: Table Of Contents
Let's get started... started... Getting Before you start Safety more detail... Product functions Operation Care and maintenance Troubleshooting Recycling and disposal Technical and legal information Guarantee CE Declaration of conformity Appendix Installation... -
Page 5: Getting Started
Getting Started... Before you start Safety... -
Page 6: Before You Start
Before you start Before you start To avoid the risks that are always present when you use an electrical appliance it is important that this appliance is installed correctly and that you read the safety instructions carefully to avoid misuse and hazards. Please keep this instruction booklet for future reference and pass it on to any future owners. - Page 7 Before you start Your product 1. Upper rack 8. Drain hose 2. Top spray arm 9. Power supply cord 3. Lower rack 10. Washing filter 4. Cuttery basket 11. Detergent and rinse aid dispenser 5. Bottom spray arm 12. Plastic funnel 6.
- Page 8 Safety These instructions are for your safety. Please read through them thoroughly prior to installation and retain them for future reference. • All installation work must be carried out by a competent person or qualified electrician. • This appliance must be installed correctly by a suitably qualified person, strictly following the manufacturer’s instructions.
- Page 9 Safety We also recommend that great care be taken during use and cleaning. Read the cleaning and maintenance sections for this appliance carefully. A steam cleaner is not to be used. The appliance is not intended to be operated by means of external timer or separated remote-control system.
-
Page 10: In More Detail
more detail... Product functions Operation Care and maintenance Troubleshooting Recycling and disposal Technical and legal information Guarantee CE Declaration of conformity... -
Page 11: Product Functions
Product functions Product functions Knob for selecting cycle ON / OFF indicator ON / OFF button Programme overview Wash Type of Type of Amount Condition Description of cycle Program crockery food of food of food remains remains remains Intensive Pre-wash with warm Wash water. - Page 12 Product functions Detergent Delayed Duration in Rinse Aid Prewash Extended Start minutes Wash ● 25 g • ● 25 g ● 25 g • ● 15 g ● 15 g ● 15 g ● ●...
-
Page 13: Operation
Operation Operation Warning: If the appliance is not operating properly or maintenance must be performed, disconnect the appliance from the power supply. Arranging crockery, glasses, etc. in the dishwasher Before placing the dishes in the dishwasher, remove larger food particles to prevent the filter from becoming clogged, which results in reduced performance. - Page 14 Operation • Pots, serving bowls, etc. must always be placed face down. • Deep pots should be slanted to allow the water to flow out. How to use the upper rack The upper rack is designed to hold more delicate and lighter objects, such as glasses, cups and saucers, plates, small bowls and shallow pans (provided they are not too dirty).
- Page 15 Operation Position the dishes and cookware so that they do not get moved by the spray of water. The upper rack can be height-adjusted using the knobs on both sides of the rack itself. Adjust the upper basket to the higher level for more space to accommodate taller pans and trays in the lower basket.
- Page 16 Operation Program selection Warning: When the dishwasher power is on, the program that the knob indicates cannot be performed. Rotate the knob to another program and then back to the one required. The most appropriate program can be identified by comparing the type of crockery, cutlery, etc.
- Page 17 Operation Switching the dishwasher OFF Caution: When the appliance is already running, press button "B" for 3 seconds and all of the settings will be cancelled. Several minutes after the program has ended: • Set On-Off button to Off. • Open the door. •...
- Page 18 Operation Reset drain function You can use the Reset drain function to stop the washing cycle running by turning the knob to -RESET- and the appliance will stop the drain phase after a few minutes. º - º - RESET COLD º...
-
Page 19: Care And Maintenance
Care and maintenance Care Damaged power cables must be replaced by a competent person or qualified electrician. For indoor use only. Tips for saving energy If only a small number of dishes have been loaded into the dishwasher, selecting a program that operates at the next lowest temperature, as this should be sufficient. - Page 20 Care and maintenance The dishwasher is designed to allow for the amount of salt consumed to be adjusted based on the hardness of the water used. This is intended to optimise and customise the level of salt consumption so that it remains at a minimum. To adjust salt consumption, proceed as follows: •...
- Page 21 Care and maintenance Regardless of the type of detergent dispenser installed in your appliance, you must proceed as indicated below when loading the rinse aid. 1.To open the dispenser, turn cap -1- in a anti-clockwise direction and then pour in the rinse aid, making sure not to overfill.
- Page 22 Care and maintenance What you should not put into the dishwasher Cutlery and tableware manufactured entirely or partly from wood. They become faded and unsightly. Delicate decorative glassware and vases, special antiques or irreplaceable china. The decorative patterns on these items are not dishwasher-proof. Copper and pewter utensils are also not suitable.
- Page 23 Care and maintenance This will help the seals last longer and prevent odours from forming inside the appliance. No solvents or abrasive cleaning products Do not use solvents or abrasive cleaning products to clean the exterior and rubber parts of the dishwasher. Instead use only a soft cloth and warm soapy water and wipe dry with clean soft cloths.
- Page 24 Care and maintenance Cleaning the filter Caution: The filter must be in place or it may lead to leakage. Place a container under the drain pump filter to collect any excess water that may be released from the drain pump when the filter is removed. Filters -7- and -8- prevent larger particles of food in the water from reaching the pump.
- Page 25 Care and maintenance Anti-Flooding protection The dishwasher is equipped with a system that stops the supply of water in the event of a problem with the water supply hose or leaks within the unit, in order to prevent damage to your home. If for any reason the box containing the electrical components happens to be damaged, turn off the power supply and immediately remove the plug for the appliance from the socket.
-
Page 26: Troubleshooting
Troubleshooting Troubleshooting Experience has shown that you can resolve most problems that arise during normal daily usage yourself, without having to call out customer services. Not only does this save costs, but it also means that the appliance is available for use again that much sooner. - Page 27 Troubleshooting Fault Cause Solution Rattling sound Crockery has not been Reload the crockery can be heard stacked properly inside while washing the appliance is taking place (during washing) White stains Not enough detergent If you used a phosphate- are left on added to dispenser free detergent, try a crockery, glasses...
- Page 28 Troubleshooting Fault Cause Solution Dishes, cutlery, Amount of rinse-aid set Alter the amount of etc. have not too low rinse-aid been dried Items removed from Program must complete| dishwasher too soon its cycle Glasses have a Amount of rinse-aid set Alter the amount of dull appearance too low...
- Page 29 Troubleshooting Fault Cause Solution Remnants of Compartment was damp Clean, dry and refill detergent stuck when it was filled up with inside dispenser detergent. Compartment must be dry before detergent is added Water remains Blockage or kink in Check drainage hose for inside appliance drainage hose bloackage and reposition...
- Page 30 Troubleshooting Display codes Potential cause Corrective action When the The water is turned on See installation buzzer emits 5 and the hose is connected short warning properly signal every 30 The water supply to the seconds house is on and has sufficient pressure The water supply hose is crimped or bent...
-
Page 31: Recycling And Disposal
Recycling and disposal Recycling and disposal Environmental protection Waste electrical products should not be disposed of with household waste. Please recycle where facilities exist. Check with your Local Authority or retailer for recycling advice. The symbol on the product or its packaging indicates that this product cannot be treated as normal household waste. -
Page 32: Technical And Legal Information
Technical and legal information Technical and legal information Technical data Power supply 220-240 V~/50 Hz Total absorbed power See nameplate Maximum current intensity Capacity 12 (Standard place settings) Mains water pressure See nameplate Dimensions (HxDxW) 850x600x600mm Net weight 43 kg Legal information The Manufacturer declines all liability for damage caused to persons and objects due to incorrect or improper installation of the... -
Page 33: Guarantee
Guarantee Manufacturer's Guarantee This appliance is covered by a full manufacturer’s 24 month parts and labour guarantee and covers all parts and labour costs associated with the repair of the appliance in a domestic environment. We will repair any defect that arises due to faulty materials or workmanship and use genuine manufacturers parts. - Page 34 Guarantee Exclusions to the guarantee (continued) Claims arising from non-domestic use or commercial environment. Any gas appliance not fitted by a gas safe qualified installer. If no fault is found then GAA reserves the right to charge for the call out at the going rate of £55.00 plus VAT.
-
Page 35: Ce Declaration Of Conformity
CE Declaration of conformity CE Declaration of conformity M A N U F A C T U R E R : C A T A C/ Ter nº 2, Torelló 08570 - Barcelona (Spain) A D D R E S S : W e hereb y certify that the mentio ned acces s o ry co mp lies with the es s ential req uirements o f the E uro p ean D irectives ap p licab le, includ ing their mo d ificatio ns and the ... - Page 36 Appendix... Installation...
- Page 37 Installation Caution: Do not place the dishwasher directly on a carpet or close to a wall or furniture. Remove all the packing materials to prevent unsteadiness, including the polystyrene base. On opening the package, water droplets may be seen on the plastic bag and the base. This is normal phenomenon resulting from water tests in the factory.
- Page 38 Water connection - cold fill Warning: The appliance is to be connected to the water mains using new hose sets. Old hose sets should not be reused. [05] [05] 1. Connect the hose to the outlet of the machine. 2. Connect the water supply hose to a threaded 3/4 BSP connector on the water supply, making sure that it is fastened tightly in place.
- Page 39 Positioning the appliance Position the appliance in the desired location. The dishwasher is equipped with a water supply and drain hoses that can be positioned to the right or the left to facilitate installation. Note: For electrical connection see Technical and legal information section...
- Page 40 B&Q plc Chandlers Ford, Hants SO53 3LE United Kingdom www.diy.com Castorama Parc d'Activités B.P.101 59175 Templemars - France 0 810 104 104 www.castorama.fr...
Need help?
Do you have a question about the CLDW601W-C and is the answer not in the manual?
Questions and answers