
Related Manuals for Cooke & Lewis BDW60MCL


Summary of Contents for Cooke & Lewis BDW60MCL
- Page 1 Built-in dishwasher GB IE Dishwasher - Barcode: 5052931465385 Warning! Read the instructions before using the appliance. BDW60MCL-C&L-IM-V01-EN.indd 1 12/19/14 2:45 PM...
-
Page 2: Bdw60Mcl-C&L-Im-V01-En.indd
Your Product [A] x 1 [B] x 1 [C] x 1 [D] x 1 [A] Main unit with cutlery rack and upper rack [C] Water inlet hose [B] Lower rack [D] Plastic funnel BDW60MCL Dishwasher BDW60MCL-C&L-IM-V01-EN.indd 2 12/19/14 2:45 PM... - Page 3 [02] Screws (4x) (ST3.5 x 45 mm) [07] Top brackets (2x) [03] Screws (2x) (ST3.5 x 25 mm) [08] Hooks (2x) [04] Brackets (2x) [09] Covers (2x) [05] Screws (2x) (ST4 x 16 mm) [10] Installation guide sheet BDW60MCL Dishwasher BDW60MCL-C&L-IM-V01-EN.indd 3 12/19/14 2:45 PM...
-
Page 4: Table Of Contents
Getting started… Safety Your product Before you start detail… more Operation Care and maintenance Troubleshooting Recycling and disposal Technical and legal information Guarantee CE declaration of conformity Appendix... Installation BDW60MCL-C&L-IM-V01-EN.indd 4 12/19/14 2:45 PM... -
Page 5: Getting Started
Safety BDW60MCL Dishwasher These instructions are for your safety. Please read through them thoroughly prior to installation and retain them for future reference. All installation work must be carried out by a competent person or qualified electrician. This appliance must be installed correctly by a qualified person, strictly following the manufacturer’s... - Page 6 Safety BDW60MCL Dishwasher This appliance can be used by children aged from 8 years and above and persons with reduced physical, sensory or mental capabilities or lack of experience and knowledge if they have been given supervision or instruction concerning use of the appliance in a safe way and understand the hazards involved.
- Page 7 Safety BDW60MCL Dishwasher Make sure that the power cord is not caught under or in the appliance and avoid damage to the power cable. Do not allow the power cord to touch the hot parts of the appliance. Regularly check the power plug and power cord for damage.
- Page 8 Safety BDW60MCL Dishwasher The manufacturer declines all liability for personal or material damage as a result of misuse or incorrect installation of this appliance. Keep away from heat sources and direct sun light to prevent plastic and rubber components from ageing.
- Page 9 Safety BDW60MCL Dishwasher Do not connect the dishwasher to the electricity supply via an extension cable. After the appliance has been installed, the mains plug should still be easily accessible. During installation, the power supply cord must not be excessively or dangerously bent or flattened.
- Page 10 Safety BDW60MCL Dishwasher Warning! Knives and other utensils with sharp points must be loaded in the basket with their points down or placed in a horizontal position. Open the door very carefully if the dishwasher is operating, there is a risk of water squirting out.
-
Page 11: Your Product
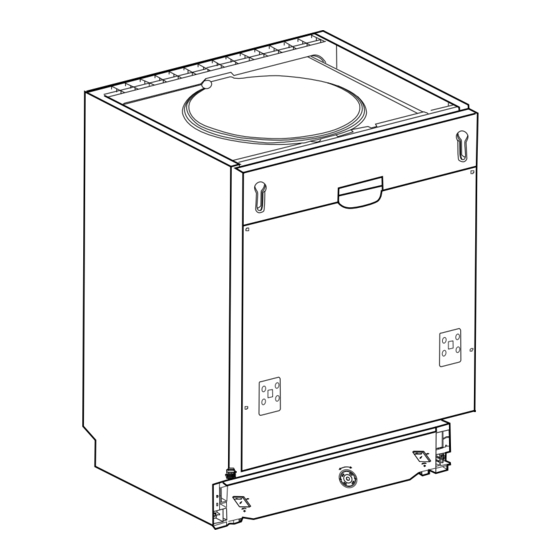
Your product BDW60MCL Dishwasher Your product Front view Cutlery rack Door Upper rack Control panel Upper spray arm Display Lower spray arm Detergent dispenser Filter assembly Salt container cap Rinse aid dispenser BDW60MCL-C&L-IM-V01-EN.indd 11 12/19/14 2:45 PM... - Page 12 Your product BDW60MCL Dishwasher Your product Control panel 16 17 14 13 Time indicator Upper rack indicator 18 Alt Lower rack indicator Wash zone selector button Salt indicator Delay button Program indicators 20 P Program button Rinse aid indicator On/off button...
- Page 13 Your product BDW60MCL Dishwasher Your product Accessories Lower rack Water inlet hose Plastic funnel BDW60MCL-C&L-IM-V01-EN.indd 13 12/19/14 2:45 PM...
-
Page 14: Before You Start
Before you start BDW60MCL Dishwasher You will need (not supplied) Installation guide located at the end of the guidebook Things to check before you start To avoid the risks that are always present when you use an electrical appliance it is important that this appliance is installed correctly and that you read the safety instructions carefully to avoid misuse and hazards. -
Page 15: In More Detail
Operation BDW60MCL Dishwasher Before first use Water softener The appliance is equipped with a special softener that uses a salt specifically designed to eliminate lime and minerals from the water. Adjust the water softener according to the hardness of the water in your area. -
Page 16: Before First Use
Operation BDW60MCL Dishwasher Before first use Loading the salt container Warning! • Only use salt intended for use with dishwashers. Every other type of salt, especially table salt, will damage the water softener. • Add salt just before starting a wash cycle. Otherwise the filter system, pump or other parts of the appliance may be damaged by salty water. - Page 17 Operation BDW60MCL Dishwasher Before first use Caution! • After adding the salt, a washing program should be immediately started. We suggest the selection of the rapid wash program. • The salt container must only be refilled when the salt indicator on the control panel comes on.
- Page 18 Operation BDW60MCL Dishwasher Before first use To fill the rinse aid dispenser, proceed as below: 1. Turn the cap anti-clockwise to the "open" position and lift it out. 2. Regulating the amount of rinse aid for each cycle: Turn the dosage adjusting arrow with a screwdriver.
- Page 19 Operation BDW60MCL Dishwasher Before first use Loading the detergent dispenser Warning! • Only use detergent specifically intended for dishwashers. Every other type of detergent will damage the appliance. • Always add the detergent before starting each wash cycle following the instructions in the "Program overview".
- Page 20 Operation BDW60MCL Dishwasher Tips on loading the dishwasher racks Tips! • Purchase table or kitchenware which are identified as dishwasher-proof. • Use a mild detergent that is described as "kind to dishes". If necessary, seek further information from the detergent manufacturers.
-
Page 21: Loading The Lower Rack
Operation BDW60MCL Dishwasher Loading the lower rack Note: The lower rack is featured with foldable spikes for loading larger or more pots/pants. • Place the most difficult-to-clean items on the lower rack: pots, pans, lids, serving dishes and bowls. Place them top down. -
Page 22: Loading The Upper Rack
Operation BDW60MCL Dishwasher Loading the upper rack Note: The upper rack is featured with foldable cup shelves for loading larger or more dishes. • The upper rack is designed to hold more delicate and lighter dishware such as glasses, coffee and tea cups and saucers, as well as plates, small bowls and shallow pans (as long as they are not too dirty). -
Page 23: Loading The Cutlery Rack
Operation BDW60MCL Dishwasher Loading the cutlery rack Caution! Knives and other silverware with sharp tips should be placed on the cutlery rack horizontally. • Position the silverware so that they do not nest together. • Items with long handles, e.g. knives, soup spoons, should be positioned in the middle of the cutlery rack. -
Page 24: Program Overview
Operation BDW60MCL Dishwasher Program overview Program Intended task Description of Detergent Time Rinse cycle amount (Min.) (pre/main) Intensive For heaviest 1. Pre-wash soiled crockery, (50 °C) and normally 2. Wash (65 °C) 5/30 g soiled pots, 3. Rinse (Or 3 in 1) pans, 4. - Page 25 Operation BDW60MCL Dishwasher Switching on the dishwasher 1. Open the door. 2. Draw out the racks. Load them with dishes and push them back. It is commended to load the lower rack first ( Loading the dishwasher racks). 3. Load the dispensers ( Loading the rinse aid dispenser &...
-
Page 26: Changing The Program
Operation BDW60MCL Dishwasher Using the delay function The appliance can start automatically after the desired delay time. 1. Switching on: Press the on/off button on the control panel. 2. Selecting program: Press the program button P repeatedly. 3. Selecting delay time: Press the delay button repeatedly (Range: 1 - 24 hours). -
Page 27: Care And Maintenance
Care and maintenance BDW60MCL Dishwasher Maintenance Warning! Always switch off the electricity supply and unplug before performing cleaning and maintenance work. FUSE In the event of a fault, contact customer services. Warning! Danger of explosion. Do not use solvents of any kind inside your dishwasher. - Page 28 Care and maintenance BDW60MCL Dishwasher Cleaning Door • To clean the edge around the door, use a soft, damp cloth. To avoid water penetration into the door locking mechanism and electrical components, do not use a spray cleaner of any kind.
- Page 29 Care and maintenance BDW60MCL Dishwasher Cleaning Filter assembly Caution! • Do not use the appliance without the filter assembly in place! Otherwise, leakage and/or blockage will occur. • Improper replacement of the filters may reduce the dishwasher's performance and cause damages to dishes and utensils.
- Page 30 Care and maintenance BDW60MCL Dishwasher Cleaning Filter removal and cleaning 1. Turn the coarse filter anti-clockwise to release it. 2. Remove the coarse filter and main filter. Then, remove the fine filer. 3. Remove food remnants. 4. Clean the filters under running water with a soft brush.
- Page 31 Care and maintenance BDW60MCL Dishwasher Cleaning Spray arms Lime scale and remains of food in the washing water can block the nozzles in the spray arms and the arm mountings. 1. The upper spray arm is pre-assembled onto the upper rack using a nut. To remove it, hold the nut with one hand and rotate the spray arm.
-
Page 32: Troubleshooting
Troubleshooting BDW60MCL Dishwasher Troubleshooting Fault Cause Solution Appliance does Fault with fuse in mains Disconnect from the mains and not start after electricity supply. check the fuse. the appliance is Plug not inserted in Plug appliance and make sure switched on. - Page 33 Troubleshooting BDW60MCL Dishwasher Troubleshooting Fault Cause Solution White stains left Not enough detergent If you used a phosphate-free on crockery. added to dispenser detergent, try a detergent compartment. containing phosphates and compare results. Amount of rinse-aid set Adjust rinse-aid to a higher too low.
- Page 34 Troubleshooting BDW60MCL Dishwasher Troubleshooting Fault Cause Solution Glasses Amount of rinse-aid set Alter the amount of rinse-aid. have a dull too low. appearance. Tea stains or Detergent has insufficient Use a more powerful detergent. traces of lipstick bleaching effect. have not been Washing temperature set Set to a high temperature.
- Page 35 Troubleshooting BDW60MCL Dishwasher Troubleshooting Error codes When some malfunctions come on, the appliance will display error codes. Display codes Meaning Possible causes Extended water inlet time. Water tap is not opened. Water inlet hose is crimped or bent. The filter for the water supply hose is clogged.
-
Page 36: Recycling And Disposal
Recycling and disposal BDW60MCL Dishwasher Recycling and disposal Environmental protection Waste electrical products should not be disposed of with household waste. Please recycle where facilities exist. Check with your Local Authority or retailer for recycling advice. The symbol on the product or its packaging indicates that this product cannot be treated as normal household waste. -
Page 37: Technical And Legal Information
Technical and legal information BDW60MCL Dishwasher Technical data Type / Description BDW60MCL Standard place settings Energy efficiency class* Annual energy consumption* 266 kWh Energy consumption of the standard 0.93 kWh cleaning cycle Power consumption in off-mode 0.45 W Power consumption in left-on mode 0.49 W... -
Page 38: Technical Data
Technical and legal information BDW60MCL Dishwasher Technical data The device meets the European standards and the directives in the current version at delivery: • LVD 2006/95/EC • EMC2004/108/EC • ErP 2009/125/EC The above values have been measured in accordance with standards under specified operating conditions. -
Page 39: Guarantee
Guarantee BDW60MCL Dishwasher Guarantee This appliance is covered by a full manufacturer’s year parts and year labour guarantee and covers all parts and labour costs associated with the repair of the appliance in a domestic environment. We will repair any defect that arises due to faulty materials or workmanship and use genuine manufacturers parts. - Page 40 Guarantee BDW60MCL Dishwasher Guarantee Exclusions to the guarantee This guarantee does NOT cover: Appliances that have been damaged or neglected as a result of failure to store, assemble, install, use or care of the products in accordance with the manufacturer’s instructions - GAA will not accept responsibility under this guarantee if a product is damaged or becomes defective due to, misuse, neglect, wilful or accidental damage or act of god.
-
Page 41: Ce Declaration Of Conformity
CE declaration of conformity BDW60MCL Dishwasher CE declaration of conformity MANUFACTURER: CATA ADDRESS: C/ Ter nº 2, Torelló 08570 - Barcelona (Spain) We hereby certify that the mentioned accessory complies with the essential requirements of the European Directives applicable, including their modifications and the corresponding transpositions from the national law. -
Page 42: Installation
This appliance is intended to be fitted under the work surface in a built under housing unit. ≥ 820 mm ≥ 580 mm ≥ 600 mm 598 mm 550 mm 815 mm Note! The appliance must be housed in heat-resistant cabinet. BDW60MCL-C&L-IM-V01-EN.indd 42 12/19/14 2:45 PM... - Page 43 Note! The dishwasher is equipped with a water inlet hose and drain hose that can be positioned to the right or the left to facilitate installation. [C] x 1 Connect the water inlet hose [C] to the inlet socket on the dishwasher back. Then, screw tightly. BDW60MCL-C&L-IM-V01-EN.indd 43 12/19/14 2:45 PM...
- Page 44 For wooden work surface, securing the appliance top to it using 2 top brackets [07] and 2 screws [01]. Locating the appliance into place Place the appliance into the cabinet gently. Do not force it inside. BDW60MCL-C&L-IM-V01-EN.indd 44 12/19/14 2:45 PM...
- Page 45 Levelling the appliance 1. Adjusting the 2 front feet: Adjust directly with a flat screwdriver. 2. Adjusting the rear foot: Adjust the screw with Allen key. Check the appliance for thorough levelness with a spirit level. BDW60MCL-C&L-IM-V01-EN.indd 45 12/19/14 2:45 PM...
- Page 46 589 mm ≤ 7 kg Prepare an aesthetic wooden panel (not provided), following all the dimensions as shown above. Max. load for the panel: 7 kg Panel thickness: 15 mm Mark the locations for holes drilling. BDW60MCL-C&L-IM-V01-EN.indd 46 12/19/14 2:45 PM...
- Page 47 [04] x 2 [01] [03] x 2 [08] x 2 [04] Attach the hooks [08] to the panel and secure with 2 screws [03]. Attach the brackets [04] to the panel and secure with 8 screws [01]. BDW60MCL-C&L-IM-V01-EN.indd 47 12/19/14 2:45 PM...
- Page 48 Fix a handle (not provided) onto the aesthetic panel. Door [08] [04] Panel Hang the aesthetic panel onto the dishwasher door, using 2 hooks [08] 2 brackets [04]. BDW60MCL-C&L-IM-V01-EN.indd 48 12/19/14 2:45 PM...
- Page 49 [02] x 4 [02] [02] Fix the dishwasher door to the aesthetic wooden panel using the 4 long screws [02]. 1. Remove 4 pre-assembled short screws. 2. Insert 4 long screws [02] and tighten properly. BDW60MCL-C&L-IM-V01-EN.indd 49 12/19/14 2:45 PM...
- Page 50 3. Open and close the door to check the tension. • If the door springs tensioned properly, the door will remain horizontal in the fully opened position. • If not, the door will rise to close with a slight lift of a finger. BDW60MCL-C&L-IM-V01-EN.indd 50 12/19/14 2:45 PM...
- Page 51 For marble or granite work surface, secure the appliance sides to the cabinet housing using 2 screws [05] and 2 covers [09]. 1. Remove the cover [09]. 2. Insert the screw [05] and tighten with a screwdriver. 3. Re-insert the cover [09]. BDW60MCL-C&L-IM-V01-EN.indd 51 12/19/14 2:45 PM...
- Page 52 • If a drain hose extension absolutely needed, make sure to use a similar one no longer than metres. Otherwise the cleaning effect will be affected. BDW60MCL-C&L-IM-V01-EN.indd 52 12/19/14 2:45 PM...
- Page 53 If this precaution is not taken, there is a risk that the water inlet may become blocked and damage the appliance. BDW60MCL-C&L-IM-V01-EN.indd 53 12/19/14 2:45 PM...
- Page 54 Do not connect the dishwasher to the mains supply via an extension cable. After the appliance has been installed, the mains plug should still be easily accessible. During installation, the power cord must not be or bent or flattened. BDW60MCL-C&L-IM-V01-EN.indd 54 12/19/14 2:45 PM...
- Page 55 The appliance is now installed completely and ready for use. BDW60MCL-C&L-IM-V01-EN.indd 55 12/19/14 2:45 PM...
- Page 56 B&Q plc, Chandlers Ford, Hants, SO53 3LE United Kingdom www.diy.com BDW60MCL-C&L-IM-V01-EN.indd 56 12/19/14 2:45 PM...
Need help?
Do you have a question about the BDW60MCL and is the answer not in the manual?
Questions and answers