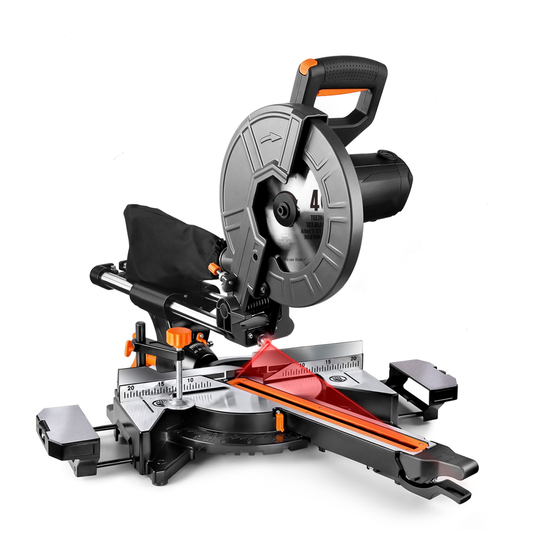
Summary of Contents for TACKLIFE PMS01X
- Page 1 User Manual Miter saw in ch 12 14 16 LASER GUIDE Model:PMS01X...
-
Page 2: General Power Tool Safety Warnings
Safety Information Warning Symbols To reduce the risk of injury, Please read the instruction manual Warning Wear ear protection Wear eye protection Wear dust mask Double insulation RCM approval mark General Power Tool Safety Warnings WARNING: When using electric tools basic safety precautions should always be followed to reduce the risk of fire, electric shock and personal injury including the following. - Page 3 - Wear protective hair covering to contain long hair. - Use protective equipment - Use safety glasses. - Use face or dust mask if working operations create dust. - Connect dust extraction equipment - If the tool is provided for the connection of dust extraction and collecting equipment, ensure these are connected and properly used.
-
Page 4: Additional Safety Rules
- If the replacement of the supply cord is necessary, this has to be done by the manufacturer or his agent in order to avoid a safety hazard. - For tools intended to be connected to a water supply: - Replacement of the plug or the supply cord shall always be carried out by the manufacturer of the tool ... - Page 5 Additional Safety Instructions For Your Mitre Saw Remove the plug from the socket before carrying out any adjustment, servicing or maintenance. Only wood or products such as medium density fibre board can be cut with this saw. Other materials may shatter or cause the blade to grab. Never fit substandard blades.
- Page 6 In The Box Parts 1. Handle 12. Work clamp 2. Safety release lever 13. Dust bag 3. Carbon brush cap 14. Upper blade guard 4. Retractable safety guard 15. Transportation handle 5. Fence 16. Dust extraction port (See Fig. A) 6. ...
- Page 7 Assembly Instructions NOTE: Before using the tool, read the instruction book carefully. Intended Use This tool is intended as a stationary machine for making straight lengthways and crossways cuts in wood. Horizontal mitre angles of -45° to +45° as well as vertical bevel angles of 0° to +45° are possible. ASSEMBLY WARNING: To prevent accidental starting that could cause possible serious personal injury, ALWAYS assemble all parts to your saw BEFORE connecting it to the power supply.
- Page 8 2. THE SUPPORT STAND (SEE FIG B1, B2) Pull the support stand to its extreme, as shown in Fig B1, B2. WARNING: Always keep the support stand at its extreme out position when using the product. 3. WORK CLAMP (SEE FIG C) 1) The work clamp can be fitted on either side of the saw and is fully adjustable to suit thesize of the workpiece.
-
Page 9: Operation
Operation 1. RELEASING THE SAW HEAD (SEE FIG E1, E2) When boxed or during storage, transportation, the saw head is locked in the down position. To release the head ready for operation, apply downward pressure and pull out the lock pin The head will be raised gently to upper position. - Page 10 4. CROSS PULL CUT (SEE FIG H1, H2) A mitre cut is made at 0° bevel and any mitre angle in the range from 45° left to 45° right. It can be made as a chop cut. For most convenient operation, your sliding mitre saw is equipped with mitre detents for fast and accurate mitre cuts of common mitre angles (Left:G1 45°, 30°, 22.5°, 15°;0°;...
-
Page 11: Maintenance
Maintenance WARNING: Remove the plug from the socket before carrying out any adjustment, servicing or maintenance. When all the adjustments, settings or maintenance have been done, make sure that all keys and wrenches have been removed and that all screws, bolts and other fittings are securely tightened. There are no user serviceable parts in your power tool. - Page 12 2. CHANGING THE SAW BLADE (SEE FIG 1-L5) 1) Disconnect the saw from the power supply 2) Remove the linkage screw with a screwdriver. 3) Press the blade spindle lock (21) and rotate the blade until it is locked, then rotate clockwise to loosen and remove the blade securing bolt、the outer flange with the hex key.
-
Page 13: Moving The Saw
Maintenance Check the carbon brushes regularly. If the carbon brushes are worn down to about 4mm, replace them with the new set (not supplied). It must be replaced in pairs. With a suitable slotted screwdriver turn the cap anti-clockwise until the carbon brush is released, replace the brush and make sure that they locate well and are secured within the brush retainer. -
Page 14: Troubleshooting
Trouble Shooting Problem Probable cause Suggested remedy Motor will not run 1.Switch in OFF position 1.Make sure saw is plugged in 2.No electrical power at wall and switch is pressed outlet 2.Check circuit breaker or fuse 3.Switch broke down at electrical panel. 4. -
Page 15: Technical Data
Technical Data Technical Data Table Rated voltage 230V~240V 50Hz(UK) 120V~60Hz(US) Rated Input power 1500W No load speed 4500 /min Bevel capacity 0-45° Mitre capacity 0-45° L&R Blade size 210 mm Protection class Machine weight 6.52 kg Cutting parameters 0°x0º 60 * 300mm 45°X 0°... - Page 16 Shenzhen Take Tools Co., Ltd Web: www.tacklifetools.com Facebook: www.facebook.com/Tacklife.US/ E-mail: support@tacklife.net ADD: Longhuaqu minzhijiedao niulanqiandaxia B714 518000 shenzhen guangdong...


Need help?
Do you have a question about the PMS01X and is the answer not in the manual?
Questions and answers