Asus TurboDrive BW-16D1H-U PRO Quick Installation Manual
External 16x blu-ray writer external blu-ray writer
Hide thumbs
Also See for TurboDrive BW-16D1H-U PRO:
- Installation manual ,
- Quick installation manual (32 pages) ,
- Quick installation manual (28 pages)
Advertisement
Quick Links
External Blu-ray Writer
Q
uick Installation Guide
English
繁體中文
簡体中文
български
Česky
Dansk
Deutsch
Model / нормативная модель : BW-16D1H-U
V 1.6 Published June 2018
Copyright © 2018 ASUSTeK Computer Inc. All Rights Reserved.
15060-34440500
Ελληνικά
Italiano
Español
日本語
Eesti
Қазақ
Suomi
Lietuvių
Français
Latviski
Magyar
Bahasa Malaysia
Bahasa Indonesia
Nederlands
Turbo
Drive
Exter nal 16 X B l u-r ay Wr iter
BW-16D1H-U
In 35 Languages
Norsk
Polski
Português
Română
Русский
Slovensky
Slovenščina
PRO
Svenska
ไทย
Türkçe
(Kurulum Kılavuzu)
Tiếng Việt
Українська
عربي
فارسی
Advertisement

Related Manuals for Asus TurboDrive BW-16D1H-U PRO


Summary of Contents for Asus TurboDrive BW-16D1H-U PRO
- Page 1 Turbo Drive Exter nal 16 X B l u-r ay Wr iter BW-16D1H-U External Blu-ray Writer uick Installation Guide In 35 Languages English Ελληνικά Italiano Norsk Svenska Español Polski ไทย 繁體中文 日本語 Eesti 簡体中文 Қазақ Português Türkçe (Kurulum Kılavuzu) български Suomi Lietuvių...
-
Page 2: Safety Information
Safety Information • Do not place damaged discs inside the device. A damaged disc may break while in use and damage the device. • Use of any controls, adjustments, or procedures other than those specified in this manual may result to hazardous radiation exposure. •... -
Page 3: Australia Statement Notice
○ not amount to a major failure. 主軸馬達 - ○ ○ ○ ○ ○ If you require assistance please call ASUS Customer Service 1300 2787 88 or visit us at 其他及其配件 - ○ ○ ○ ○ ○ http://support.asus.com. 備考 1. “○”係指該項限用物質之百分比含量未超出百分比含量基準值。... -
Page 4: Package Contents
Compliance Statement of Innovation, Science and Economic Package Contents Development Canada (ISED) 包裝內容 This device complies with Innovation, Science, and Economic Development Canada licence exempt RSS standard(s). Operation is subject to the following two conditions: (1) this device may not cause interference, and (2) this device must accept any interference, including interference that may cause undesired operation of the device. - Page 5 4. Drag the files that you wish to burn into the application. ASUS BW-16D1H-U 5. Click Burn. •Mac OS supports DVD burning and playback. NOTES •Mac OS supports burning to a Blu-ray disc. You need to purchase third-party software if you want to play movies from Blu-ray discs.
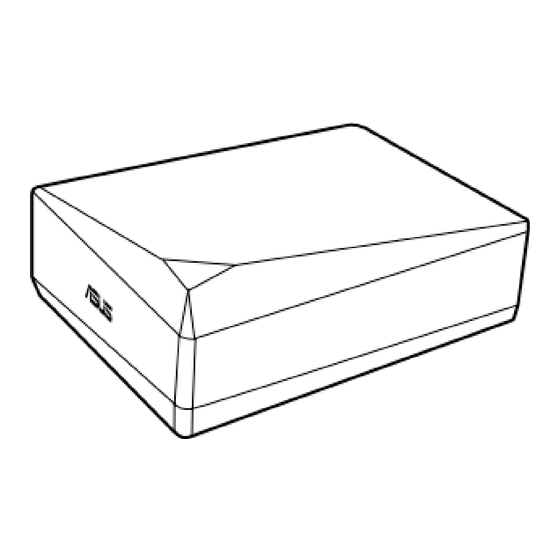
- Page 6 Place the optical drive on a stable surface NOTE You can either lay the optical drive horizontally on a stable surface, or use it with the bundled stand. To install the optical drive onto the vertical stand: 1. Place the vertical stand on a stable surface.
- Page 7 Поместите оптический привод на устойчивую Поставете оптичното устройство на стабилна Az optikai meghajtót helyezze stabil felületre. Meletakkan optical drive (penggerak optik) pada поверхность. повърхност. MEGJEGYZÉS: Az optikai meghajtót helyezheti stabil, permukaan datar. Примечание: Вы можете установить оптический ЗАБЕЛЕЖКА: Можете или да поставите оптичното vízszintes felületre, vagy használhatja a mellékelt PERHATIAN: Anda juga bisa meletakkan optical...
- Page 8 Aşezaţi drive-ul optic pe o suprafaţă stabilă. Optickú mechaniku umiestnite na stabilný povrch. 请将光驱放置在稳定的平面上。 光学ドライブを水平で安定した場所に置く . NOTĂ: Puteţi fie aşeza orizontal drive-ul optic pe o POZNÁMKA:Optickú mechaniku môžete položiť na 注意:您可以将光驱水平放置在稳定的平面,也可以 スタンドを使用して光学ドライブを設置する suprafaţă stabilă, sau să-l folosiţi cu un suport. stabilný...
- Page 9 Connect the optical drive to your computer. 1. Connect one end of the bundled USB 3.0 cable to your computer. 2. Connect the other end of the bundled USB 3.0 cable to the optical drive. NOTE Please use USB 3.0 cable to reach the maximum data transfer rate.
- Page 10 Подключение оптического привода к Свържете оптичното устройство с компютъра. Az optikai meghajtót csatlakoztassa a Menyambungkan optical drive pada komputer. компьютеру. 1. Свържете единия край на включения в számítógéphez. 1. Sambungkan salah satu konektor kabel USB 3.0 1. Подключите один конец поставляемого в комплекта...
- Page 11 Conectarea drive-ului optic la computerul dvs. Pripojte optickú mechaniku ku svojmu počítaču. 将光驱连接到您的电脑。 光学ドライブをコンピュータに接続する 1. Conectaţi un capăt al cablului USB 3.0 inclus în 1. Pripojte jeden koniec dodávaného USB 3.0 kábla k 1. 将附带的 USB 3.0 排线的一端连接到电脑。 1.同梱の USB3.0 ケーブルの一方の端を、コンピューター pachet la computer.
- Page 12 Windows 10 / 8.1 / 8 Click and then click ASUS BW-16D1H-U Device Manager. In Device Manager, click next to DVD/CD-ROM drives to expand the list. If the external optical drive is detected properly, the name of the drive is displayed on the list.
- Page 13 Убедитесь, что система обнаружила внешний Уверете се, че системата е открила външното оптично Varmista, että järjestelmäsi havaitsee ulkoisen Σιγουρευτείτε ότι το σύστημά σας μπορεί να ανιχνεύσει оптический привод. устройство. optisen aseman. την εξωτερική οπτική μονάδα. Для проверки наличия оптического привода в Проверка...
- Page 14 Pastikan bahawa sistem anda mengesan pemacu Kontroller at systemet oppdager den eksterne optiske Prepričajte se, da je vaš operacijski sistem zaznal Se till att ditt system upptäcker den externa optiska optik luaran. stasjonen. zunanji optični gonilnik. enheten. Untuk memeriksa sama ada pemacu optik dikesan Slik kan du sjekke om den optiske stasjonen er registrert Če želite preveriti ali je optični pogon zaznan, För att kontrollera att den optiska enheten hittas använd...
- Page 15 请确认您的系统已侦测到外接光驱。 システムが光学ドライブを正常に認識していることを確認する 使用设备管理器检测光驱: 手順: Windows ® スタートメニューでコンピューター ( マイコンピュータ ) を Windows ® 右击【我的电脑】,然后点击【属性】>【硬 XP / Vista / 7 右クリックし、「管理」をクリックします。表示された「コ 件】>【设备管理器】。 XP SP3 ンピューターの管理」ウィンドウのコンソールツリーから ® Windows 点击【开始】,然后右击【我的电脑】, 「デバイス マネージャー」をクリックします。 点击【属性】>【设备管理器】。 Vista / 7 SP1 Windows ® + <X> を押して、「デバイスマネジャー」をクリック ® 10 / 8.1 / 8 Windows 點擊...
- Page 16 Безопасное извлечение внешнего оптического Безопасно премахване на външно оптично Safely Remove the External Optical Drive. привода. устройство Внешний оптический привод поддерживает Plug Външното оптично устройство поддържа Plug & & Play. Для отключения устройства выполните Play. За безопасно премахване на устройството: The external optical drive supports Plug &...
- Page 17 Αφαιρέστε με ασφάλεια την εξωτερική οπτική Trygg fjerning av den eksterne optiske stasjonen. Tanggalkan Pemacu Optik Luaran Dengan Selamat. Poista ulkoinen optinen asema. μονάδα. Pemacu optik luaran menyokong Palam & Main. Untuk Den eksterne optiske stasjonen støtter Plug & Play. Ulkoinen optinen asema tukee Plug &...
- Page 18 Varno odstranite zunanji optični gonilnik. Ta bort den externa optiska enheten på ett säkert 外付け光学ドライブを安全に取り外す。 安全从系统移除光驱。 Zunanji optični gonilnik podpira funkcijo »vstavi in sätt. 外接光驱支持即插即用功能。 请依照以下步骤移除光驱。 外付け光学ドライブはプラグアンドプレイに対応しています。次 poženi«. Varna odstranitev gonilnika: Den externa optiska enheten stöder Plug & Play. För の方法でドライブを安全に取り外すことができます。...
-
Page 19: Troubleshooting
2. Check if the USB 3.0 cable is connected properly. See Step 2 Connect the optical drive to your computer for details. 3. Turn on your computer. NOTE For more technical service, contact your retailer or the ASUS Technical Support. Dépannage Fehlerbehebung Si votre ordinateur ne parviens pas à détecter le... - Page 20 Tehniskā servisa pakalpojumiem sazinieties PASTABA: Jei reikia daugiau techninės pagalbos, obraťte se na prodejce nebo na odbornou pomoc forhandler eller ASUS Teknisk Hjælp. ar jūsu izplatītāju vai ar ASUS tehnisko atbalstu. susisiekite su pardavėju arba ASUS techniniu společnosti ASUS. aptarnavimu. Probleemoplossing Tõrkeotsing...
- Page 21 LƯU Ý: Để được hỗ trợ thêm về dịch vụ kỹ thuật, hãy үшін сатушыға немесе ASUS компаниясының kontaktirajte vašega prodajalca ali ASUS tehnično liên hệ với cửa hàng bán sản phẩm hoặc Bộ phận hỗ техникалық қолдау қызметіне хабарласыңыз.
- Page 22 Turbo Drive E x ter n a l 16 X B l u- R ay Wr i ter BW-16D1H-U...
Need help?
Do you have a question about the TurboDrive BW-16D1H-U PRO and is the answer not in the manual?
Questions and answers