Table of Contents
Advertisement
Quick Links
INSTALLATION INSTRUCTIONS
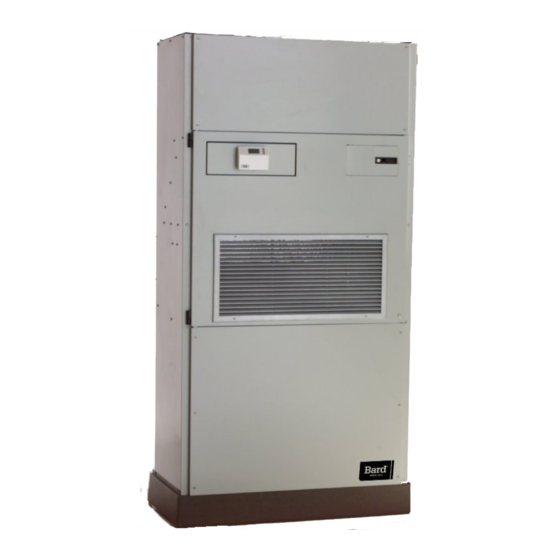
QW Series Geothermal R-410A
Staged Capacity Packaged Heat Pump
QW2S3DA
QW2S3DB
QW2S3DC
Earth Loop Fluid
Temperatures 25 – 110
Ground Water Temperature 45 – 75
Bard Manufacturing Company, Inc.
Bryan, Ohio 43506
www.bardhvac.com
Models:
QW3S3DA
QW4S3DA
QW3S3DB
QW4S3DB
QW3S3DC
QW4S3DC
QW5S3DA
QW5S3DB
QW5S3DC
MIS-2736
MIS-2736
Manual No.:
2100-738C
Supersedes:
2100-738B
Date:
9-16-20
Page
1 of 73
Advertisement
Table of Contents
Troubleshooting

Related Manuals for Bard QW2S3DA


Summary of Contents for Bard QW2S3DA
- Page 1 QW4S3DB QW5S3DB QW2S3DC QW3S3DC QW4S3DC QW5S3DC Earth Loop Fluid Temperatures 25 – 110 Ground Water Temperature 45 – 75 MIS-2736 MIS-2736 Bard Manufacturing Company, Inc. Manual No.: 2100-738C Bryan, Ohio 43506 Supersedes: 2100-738B Date: 9-16-20 www.bardhvac.com Page 1 of 73...
-
Page 2: Table Of Contents
CONTENTS Getting Other Information and Publications Closed Loop (Earth Coupled Ground Loop Applications) For more information, contact these publishers: ..4 Circulation System Design ........54 QW General Information Copper Water Coil Application ......54 QW Model Nomenclature........5 Start Up Procedure for Closed Loop System ..54 Shipping Damage .......... - Page 3 Figures Figure 40 Water Source H/P Heating Cycle ..63 Figure 1 Unit Dimensions ........8 Figure 41 LED Fault Illumination ....... 65 Figure 2 Removal of Unit From Skid ....9 Figure 42 iSeries Smart Actuator ......65 Figure 43 Modulating Water Line Control Board ... 67 Figure 3 Proper Handling of Unit After Removal from Skid ..........
-
Page 4: Getting Other Information And Publications For More Information, Contact These Publishers
GETTING OTHER INFORMATION AND PUBLICATIONS For more information, contact these publishers: These publications can help with installing the heat pump. They can usually be found at the local library ACCA Air Conditioning Contractors of America or purchased directly from the publisher. Be sure to 1712 New Hampshire Avenue consult current edition of each standard. -
Page 5: Qw General Information Qw Model Nomenclature
QW SERIES GEOTHERMAL R-410A STAGED CAPACITY GENERAL INFORMATION MODEL NUMBER | COIL OPTIONS FILTER OPTIONS Q-TEC™ Model C – Copper Coaxial Coil 0Z – OKW X – 2-Inch Pleated N – Cupronickel Coaxial (MERV8) CAPACITY | Coil 2 – 2 Ton NOTE: Copper coils 3 –... -
Page 6: Table 1A Electrical Specifications
TABLE 1A Electrical Specifications Specifications - 2 and 3 Ton MODELS QW2S3-A QW2S3-B QW2S3-C QW3S3-A QW3S3-B QW3S3-C Electrical Rating - 60 Hertz 230/208-1 230/208-3 460-3 230/208-1 230/208-3 460-3 Operating Voltage Range 253-197 VAC 414-506 VAC 253-197 VAC 414-506 VAC Minimum Circuit Ampacity ++ Delay Fuse or Circuit Breaker Max COMPRESSOR - CIRCUIT A Voltage... -
Page 7: Table 1B Electrical Specifications
TABLE 1B Electrical Specifications MAXIMUM MINIMUM NO. FIELD EXTERNAL FUSE FIELD POWER GROUND RATED VOLTS, CIRCUIT Model POWER OR CIRCUIT WIRE SIZE WIRE SIZE Hz & PHASE AMPACITY CIRCUITS BREAKER QW2S3DA0Z 230/208-60-1 QW2S3DB0Z 230/208-60-3 QW2S3DC0Z 460-60-3 QW3S3DA0Z 230/208-60-1 QW3S3DB0Z 230/208-60-3 QW3S3DC0Z... -
Page 8: Figure 1 Unit Dimensions
Manual 2100-738C Page 8 of 73... -
Page 9: Shipping Damage
Shipping Damage Handling Unit after Removal from Skid Upon receipt of equipment, the carton should be checked for external signs of shipping damage. The skid WARNING must remain attached to the unit until the unit is ready for installation. If damage is found, the receiving party Exercise extreme caution when pushing the must contact the last carrier immediately, preferably in unit on the rollers. -
Page 10: Removal Of Wall Bracket From Shipping Location
FIGURE 3 Proper Handling of Unit after Removal from Skid Q-TEC UNIT (RIGHT SIDE) STRAP APPLIANCE CART COMPRESSOR Removal of Wall Bracket from Shipping air conditioning system should be carefully read before beginning the installation. Note particularly “Start Location Procedure” and any tags and/or labels attached to the Units without Vent Options equipment. -
Page 11: Minimum Installation Height
FIGURE 4 Installation of Unit through Wall with Wall Sleeve 14" to 5" WALL SLEEVE VENTILATION AIR DIVIDER QW2S, QW3S - 42.000" QW4S, QW5S - 48.000" 33 7/8" SUPPLY AIR 28 7/8" 18 9/16" OPTIONAL FREE BLOW PLENUM BOX HIGH VOLTAGE ELECTRICAL ENTRANCE (TOP-REAR-SIDE) 17 9/16"... -
Page 12: Figure 5 Shipping Assembly - Bracket Locations
FIGURE 5 Shipping Assembly – Bracket Locations BACK VIEW Q-SERIES WALL BRACKETS(2) PART #112-289 ATTACHED TO BACK OF UNIT NOTE: FOR USE WITH BLANK-OFF PLATE OPTION ONLY Q-SERIES SLEEVE MOUNTING BRACKETS (2). ATTACHED TO SHIPPING PALLET. SMALL CABINET PART #112-289 (2 PLACES) LARGE CABINET PART #113-387 (2 PLACES) NOTE: NOT A PICTORIAL REPRESENTATION... -
Page 13: Figure 6 Installation Of Qw Wall Sleeve Through A Window Opening
FIGURE 6 Installation of QW Wall Sleeve Through a Window Opening UNIT Mounting Bracket Where Used Bard P/N WALL SLEEVE 112-234 Small Cabinet Models SHOWN WITHOUT 113-387 Large Cabinet Models OUTSIDE GRILLE INSULATION SLEEVE SPACER FOR GRILLE CLEARANCE 2.500 *32.750... -
Page 14: Figure 7 Installation With Free Blow Plenum
FIGURE 7 Installation with Free Blow Plenum 8 FT. - 9 IN. 8 FT. - 8 IN. MINIMUM REQUIRED INSTALLATION HEIGHT FLOOR MIS-2740 FIGURE 8 Ducted Application SUSPENDED CEILING MODEL "A" DUCT FIXED CEILING QW2S, QW3S 25" "A" DUCT FLANGE QW4S, QW5S 30"... -
Page 15: Duct Work
Duct Work When used with a ducted supply, a QCX cabinet extension can be used to conceal the duct work above Any heat pump is more critical of proper operating the unit to the ceiling. This extends 20" above the charge and an adequate duct system than a straight air unit for a total height above the floor of 10'-7/8". -
Page 16: Figure 10A Condensate Drain
FIGURE 10A Condensate Drain LOOP TO FORM A "P" TRAP DRAIN HOSE EXTERNAL DRAIN TUBE ALTERNATE DRAINING FLOOR OPTION FRONT VIEW WITH CONDENSER DOOR REMOVED MIS-2743 The drain can be routed through the floor or through the wall. If the drain is to be routed through an unconditioned space, it must be protected from freezing. -
Page 17: Mist Eliminator Service
The rear drain can be used with wall thickness of up Mist Eliminator Service to 10" where a water trap can be installed between the (Optional – only used with one of the vent options) unit and the interior wall (see Figure 10B). The trap cannot extend beyond the edge of the unit or it will A mist eliminator is supplied with the wall sleeve. -
Page 18: Figure 11 Removal Of Q-Tec Erv
Q-TEC Energy Recovery Ventilator Option plug must be squeezed to release the plug. While squeezing the tabs, pull the plug out of the socket. Before starting the removal make sure that the power has been turned off. The hinged return air grille panel 4. -
Page 19: Installation
INSTALLATION Mounting the Unit enclose the gap behind the unit. The short pieces are to fill the gap behind the cabinet extension or When installing a QW unit near an interior wall on the the free blow plenum box. They may be cut to suit left side, a minimum of 8"... -
Page 20: Figure 13 Unit Mounting Without Wall Sleeve
FIGURE 13 Unit Mounting without Ventilation Wall Sleeve SIDE TRIM CUT TO LENGTH WALL MOUNTING BRACKET 41" ADJUSTABLE SIDE TRIM EXTENSION KIT -ORDERED SEPARATELY BASE TRIM SIDE TRIM EXTENSION BASE TRIM EXTENSION MIS-2744 A Manual 2100-738C Page 20 of 73... -
Page 21: Figure 14 Component Location
FIGURE 14 Component Location SIDE FIELD WIRE ENTRANCE REMOTE THERMOSTAT TERMINAL BLOCK INDOOR DUAL BLOWERS CONTROL BOX/ CIRCUIT BREAKER PANEL MIS-2745 Manual 2100-738C Page 21 of 73... -
Page 22: Wiring - Main Power
Wiring – Main Power The standard Climate Control Option X is a remote thermostat connection terminal block. See Figure 16 Refer to the unit rating plate and/or Table 1B (page 7) on page 24 for wiring diagram. Compatible thermostats for wire sizing information and maximum fuse or circuit are listed in Table 3. -
Page 23: Low Voltage Connections
Low Voltage Connections The “L” terminal is used as an input terminal when a CS2000 infrared occupancy device is used. It feeds The “R” terminal is the 24 VAC hot terminal and is through Pin #12 of Plug P2. supplied through Pin #10 of Plug P2. The “D”... -
Page 24: Figure 16 Remote Thermostat Wiring "X" Option
FIGURE 16 Remote Thermostat Wiring Diagram “X” Option Temp. and Humidity Temp. and Humidity Controller Controller Low Voltage Part #8403-081 Part #8403-060 Terminal Strip Red/Yellow W1/E Purple Brown/White PLUG #2 Orange Yellow Blue Brown Red/White Black/White Pink D/YO CO2 Controller Terminal PLUG #1 Part #8403-067... -
Page 25: Figure 17 Factory Mounted T-Stat Wiring "D" Option
FIGURE 17 Factory-Mounted Thermostat Wiring Diagram “D” Thermostat Option Purple/White D/YO Red/Yellow W1/E Purple Brown/White PLUG #2 Orange Yellow Blue Brown Red/White Black/White Pink Temp. and Humidity Controller Part #8403-060 4115-100 A Manual 2100-738C Page 25 of 73... - Page 26 FIGURE 18 Factory-Mounted Thermostat and CO Vent Control Wiring Diagram “H” Thermostat Option Purple/White D/YO Red/Yellow W1/E Purple Brown/White PLUG #2 Orange Temp. and Humidity Controller Yellow Part #8403-060 Blue Brown Red/White Black/White Pink CO2 Controller Part #8403-067 PLUG #1 24VAC Black Black...
-
Page 27: Figure 18 Factory Mounted T-Stat Wiring "H" Opt . 26 Figure 19 Remote Thermostat Wiring "K" Option
FIGURE 19 Remote Thermostat with Mounted/Wired CO Control Wiring Diagram “K” Thermostat Option Low Voltage Terminal Strip Red/Yellow Purple Brown/White PLUG #2 Orange Yellow Blue Brown Red/White Black/White Pink CO2 Controller Part #8403-067 PLUG #1 24VAC Black Black Yellow CO2-OUT Yellow Orange Green... -
Page 28: Figure 20 Fact. Mounted Completestat™ "1" & "3" Opt
Temperature/Humidity Control "1" & "3" Option Wiring Diagram Plug #2 9 Purple/White Brown/White Brown W1/E Red/Yellow Purple Yellow Blue Orange Red/White Black/White Black/White Gray Pink Gray COMPLETESTAT TEMPERATURE, HUMIDITY, AND OCCUPANCY CONTROLLER. BARD PART# CS9B-THO ALARM RELAY OR CS9BE-THO 4115-108 Manual 2100-738C Page 28 of 73... -
Page 29: Figure 21 Fact. Mounted Completestat™ "2" & "4" Opt
Control "2" & "4" Option Wiring Diagram Plug #2 9 Purple/White Brown/White Brown W1/E Red/Yellow Purple Yellow Blue Orange Red/White Black/White Black/White Gray Pink Gray COMPLETESTAT TEMPERATURE, HUMIDITY, OCCUPENCY, AND CO2 CONTROLLER. BARD PART# CS9B-THOC ALARM RELAY OR CS9BE-THOC 4115-109 Manual 2100-738C Page 29 of 73... -
Page 30: Figure 22 Fact. Mounted Completestat™ "1" & "3" Opt. And "2" & "4" Opt
Red/White Black/White Pink Notes: COMPLETESTAT TEMPERATURE, HUMIDITY, AND OCCUPANCY CONTROLLER. BARD PART# CS9B-THOA OR CS9BE-THOA COMPLETESTAT TEMPERATURE, HUMIDITY, OCCUPANCY, AND CO2 CONTROLLER. BARD PART# CS9B-THOCA OR CS9BE-THOCA Either THOA or THOCA version can be used. For THOA, vent output “A” limits vent operation to occupied periods. -
Page 31: Valve And Actuator Installation/Removal
VALVE AND ACTUATOR INSTALLATION/REMOVAL Valve Installation FIGURE 24 iSeries Smart Actuator Removal 1. The valve body may be installed in any orientation, as shown in Figure 23. However, the 3-way actuator’s power connections must be over the closed off port to ensure proper function and flow direction. -
Page 32: Start Up
START UP Description of Standard Equipment Geothermal Compressor Control Module When the green status light blinks, this indicates that Low Pressure Switch 24 volt power is applied to the board and the controller NOTE This unit is supplied with two low pressure is running in normal operation. -
Page 33: Important Installer Note
Important Installer Note Intelligent Reset The compressor logic control board has an intelligent For improved start up performance, wash the indoor reset feature after a safety control is activated. The coil with dishwashing detergent. controller locks out the unit for 5 minutes; at the end Phase Monitor of this period, the controller checks to verify that all faults have been cleared. -
Page 34: Adjustments
Adjustments FIGURE 26 Control Configuration PRESS UP AND DOWN ARROWS TO ENTER CONFIGURATION MODE USE ARROWS TO SELECT SETTING. PUSH MIDDLE BUTTON TO CHANGE. CONTROLLER WILL SHOW SET. NOTE: MENU JUMPER MUST JUMPERS MUST BE BE SET TO "ON" POSITIONED AS SHOWN TO CHANGE ANY FOR PROPER OPERATION SETTINGS WITH... -
Page 35: Pressure Service Ports
System Start Up Pressure Service Ports Step 1 – Close disconnect switch(es) and set the High and low pressure service ports are installed on thermostat to cool and temperature to the all units so that the system operating pressures can be highest setting. -
Page 36: Figure 27 Fluid Connections W/Ventilation Wall Sleeve
FIGURE 27 Fluid Connections on Unit with Ventilation Wall Sleeve SIDE TRIM PIECES (SHIPPED WITH UNIT) IF THE WALL THICKNESS IS LESS THAN 14" BUT GREATER THAN 8", SIDE TRIM PEICES A SIDE TRIM EXTENSION KIT (SHIPPED WITH UNIT) QSTX42 IS REQUIRED. REFER TO UNIT SPEC. -
Page 37: Figure 28 Fluid Connections W/O Ventilation Wall Sleeve
FIGURE 28 Fluid Connections on Unit without Ventilation Wall Sleeve TOP VIEW WALL BRACKET WALL BRACKET 4" WATER LINES WALL LOCATION BACK OF UNIT FLUID ACCESS FROM TOP 66 1/2" OPENING IN WALL BRACKET REAR OF UNIT (LEFT BRACKET 3" x 8" REMOVED FOR CLARITY) 8 1/2"... -
Page 38: Table 5 Pressure Table
TABLE 5 Pressure Table Return Air FULL LOAD COOLING – Fluid Temperature Entering Water Coil °F Model Pressure Temperature 30°F 35°F 40°F 45°F 50°F 55°F 60°F 65°F 70°F 75°F 80°F 85°F 90°F 95°F 100°F 105°F 110°F 75° DB Low Side 62°... -
Page 39: Table 6 Optional Accessories
Manual 2100-738C Page 39 of 73... -
Page 40: Sequence Of Operation Cooling
SEQUENCE OF OPERATION Cooling Alarm Output The L terminal has 24 volts applied when a hard A 24V solenoid coil on the reversing valve controls lockout occurs. This can be used to drive a fault light the cooling cycle operation. There are two different or low voltage relay. -
Page 41: Modulating Water Line Control
Modulating Water Line Control compressor operation will be terminated; red fault light illuminated. Logic control will then go through On a call for cooling or heat pump (Y signal from 5-minute delay on break plus random start sequence. thermostat), the Y terminal has 24 volts applied and If no fault occurs on next run cycle, compressor will YO output is energized. -
Page 42: Iseries Smart Actuator
iSERIES Smart Actuator Setpoint As previously mentioned, the iSeries Smart Actuator Power Up and Dehum Request operates the valve to maintain a fixed setpoint. The Whenever the iSeries-S is powered up, the LED turns setpoint temperature is set using the setpoint dial green and the control starts operation (see Figure located on top of the actuator. -
Page 43: Dehumidification
DEHUMIDIFICATION Model Features The dehumidification refrigerant reheat circuit is controlled by a 3-way valve in the refrigeration These models provide a unique dehumidification circuit, directing the refrigerant gas to the normal circuit for periods of high indoor humidity conditions. water condenser during periods when standard air Additionally, an “energy recovery ventilator”... -
Page 44: Figure 34 Cooling Mode And Dehumidification Mode Circuit Diagrams
FIGURE 34 Cooling Mode and Dehumidification Mode Circuit Diagrams BULB HEAT PUMP COOLING MODE CIRCUIT DIAGRAM INDOOR COIL DISTRIBUTOR EXPANSION VALVE FILTER/ DRIER REHEAT COIL EXPANSION VALVE 4 WAY VALVE CHECK VALVE CHECK VALVE WATER OPEN CIRCUIT WATER 4 WAY COIL VALVE BULB... -
Page 45: Table 7A Qw2S3D Dehumidification Performance Cooling Full Load
TABLE 7A QW2S3D Dehumidification Performance – Cooling Full Load (Full Load Capacities Based Upon Rated Flow of 7 GPM of 15% Methanol/Mass at 950 CFM Airflow) Pounds of Entering Total Sensible Latent Approximate Supply Air Entering Air Water per Sensible to Fluid Capacity Capacity... -
Page 46: Table 7B Qw2S3D Dehumidification Performance Dehumidification Full Load
TABLE 7B QW2S3D Dehumidification Performance – Dehumidification Full Load (Full Load Capacities Based Upon Rated Flow of 7 GPM of 15% Methanol/Mass at 950 CFM Airflow) Pounds of Entering Total Sensible Latent Approximate Supply Air Entering Air Water per Fluid Temp. Capacity Capacity Capacity... -
Page 47: Table 8A Qw3S3D Dehumidification Performance Cooling Full Load
TABLE 8A QW3S3D Dehumidification Performance – Cooling Full Load (Full Load Capacities Based Upon Rated Flow of 8 GPM of 15% Methanol/Mass at 1150 CFM Airflow) Pounds of Entering Total Sensible Latent Approximate Supply Air Entering Air Water per Sensible to Fluid Temp. -
Page 48: Table 8B Qw3S3D Dehumidification Performance Dehumidification Full Load
TABLE 8B QW3S3D Dehumidification Performance – Dehumidification Full Load (Full Load Capacities Based Upon Rated Flow of 8 GPM of 15% Methanol/Mass at 1150 CFM Airflow) Pounds of Entering Total Sensible Latent Approximate Supply Air Entering Air Water per Fluid Temp. Capacity Capacity Capacity... -
Page 49: Table 9A Qw4S3D Dehumidification Performance Cooling Full Load
TABLE 9A QW4S3D Dehumidification Performance – Cooling Full Load (Full Load Capacities Based Upon Rated Flow of 9 GPM of 15% Methanol/Mass at 1650 CFM Airflow) Pounds of Entering Total Sensible Latent Approximate Supply Air Entering Air Water per Sensible to Fluid Temp. -
Page 50: Table 9B Qw4S3D Dehumidification Performance Dehumidification Full Load
TABLE 9B QW4S3D Dehumidification Performance – Dehumidification Full Load (Full Load Capacities Based Upon Rated Flow of 9 GPM of 15% Methanol/Mass at 1650 CFM Airflow) Pounds of Entering Total Sensible Latent Approximate Supply Air Entering Air Water per Fluid Temp. Capacity Capacity Capacity... -
Page 51: Table 10A Qw5S3D Dehumidification Performance Cooling Full Load
TABLE 10A QW5S3D Dehumidification Performance – Cooling Full Load (Full Load Capacities Based Upon Rated Flow of 9 GPM of 15% Methanol/Mass at 1650 CFM Airflow) Pounds of Entering Total Sensible Latent Approximate Supply Air Entering Air Water per Sensible to Fluid Temp. -
Page 52: Table 10B Qw5S3D Dehumidification Performance Dehumidification Full Load
TABLE 10B QW5S3D Dehumidification Performance – Dehumidification Full Load (Full Load Capacities Based Upon Rated Flow of 9 GPM of 15% Methanol/Mass at 1650 CFM Airflow) Pounds of Entering Total Sensible Latent Approximate Supply Air Entering Air Water per Fluid Temp. Capacity Capacity Capacity... -
Page 53: Table 11 Dehumidification Relay Logic Board
Table 11 Dehumidification Relay Logic Board Inputs to the Board Outputs from the Board Energize on Unit Occupied/ Mode RAT Y B W2 A1 D G G1 BK RV TWV W YO A2 Terminal Strip Unoccupied Blower Unoccupied G, A Blower Occupied Y1, O, G... -
Page 54: Closed Loop
7. Check fluid flow using a direct reading flow meter Bard supplies a work sheet to simplify head loss or a single water pressure gauge; measure the calculations and circulator selection. Refer to pressure drop at the pressure/temperature plugs “Circulating Pump Work sheet”... -
Page 55: Figure 35 Water Temperature And Pressure Test Procedure
NOTE If a charge problem is determined (high or low): A. Check for possible refrigerant leaks. B. Recover all remaining refrigerant from unit and repair leak. C. Evacuate unit down to 29" of vacuum D. Recharge the unit with refrigerant by weight. This is the only way to ensure a proper charge. -
Page 56: Open Loop (Well System Applications)
OPEN LOOP (Well System Applications) NOTE It is highly recommended on ground water such cleaning be required. See Water Corrosion systems (pump & dump) that a cupronickel section on page 58. coaxial coil is utilized on the source side of Drain cock (12) provides access to the system to check the system. -
Page 57: Well Pump Sizing
Well Pump Sizing B. Check the water flow rate through constant flow valve to be sure it is the same as the unit Strictly speaking, sizing the well pump is the is rated for. responsibility of the well drilling contractor. It is C. -
Page 58: Water Corrosion
Water Corrosion Cupronickel coil) through the water system will reduce corrosion problems significantly. Two concerns will immediately come to light when 4. Scale Formation considering a water source heat pump, whether for ground water or for a closed loop application: Will there Of all the water problems, the formation of scale by be enough water? And, how will the water quality affect ground water is by far the most common. -
Page 59: Lake And Pond Installations
FIGURE 37 Cleaning Water Coil Hose Bib (B) Isolation Valve Hose Bib (A) TO WATER COIL Pump FROM WATER COIL MIS-2750 Lake and Pond Installations D. Size the pump to provide necessary GPM for the ground water heat pump. A 12 GPM or greater Lakes and ponds can provide a low cost source of water water flow rate is required on all modes when used for heating and cooling with a ground water heat pump. -
Page 60: Figure 38 Water Well System
Manual 2100-738C Page 60 of 73... -
Page 61: Cooling Tower/Boiler Application
In the heating mode, heat is absorbed from the source WARNING water loop. A boiler can be utilized to maintain the loop at the desired temperature. In milder climates a “flooded tower” concept is often used. This concept Thin ice may result in the vicinity of the involves adding makeup water to the cooling tower discharge line. -
Page 62: Figure 39 Water Source H/P Cooling Cycle
FIGURE 39 Water Source Heat Pump Cooling Cycle Manual 2100-738C Page 62 of 73... -
Page 63: Figure 40 Water Source H/P Heating Cycle
FIGURE 40 Water Source Heat Pump Heating Cycle Manual 2100-738C Page 63 of 73... -
Page 64: Service
If any of the four switches fault, their corresponding light will blink and initialize The Bard QW*S3D Series is equipped with a high a soft lockout of the compressor circuit. If recurrence pressure switch, low pressure switch and flow switch. -
Page 65: Troubleshooting Water Modulating Actuator Diagnostics
Troubleshooting Water Modulating Flash (System Protection Activated) Actuator Diagnostics Flash, Pause, System Supply Sensor Fault The Bard QW*S3D Series is equipped with a water Flash, Pause, The iSeries-S operates at a modulating actuator. The water modulation is achieved Flash, ... fixed output through the operation of a TACO iSeries Smart Actuator, attached to a TACO 3-way valve. -
Page 66: Table 15 Temperature F Vs. Resistance R Of Temperature Sensor
Actuator. Using the information found in Table 15, defective sensor. If the resistance is very low, the wiring estimate the temperature measured by the sensor. The may be shorted, there may be moisture in the sensor sensor and thermometer readings should be close. or the sensor may be defective. -
Page 67: Troubleshooting Modulating Water Line Control Board
* Not a designed operation mode. If there is a TWV input to the modulating water line control board without a "D" call, the valve/actuator combination will continue to modulate, causing a fault with the flow switch. Troubleshooting should start by referencing the dehumidification relay logic board (Bard P/N 8201-133). See Table 11 on page 53. -
Page 68: Compressor Solenoid
Compressor Solenoid A nominal 24-volt direct current coil activates the internal compressor solenoid. The input control circuit voltage must be 18 to 28 volt ac. The coil power requirement is 20 VA. The external electrical connection is made with a molded plug assembly. This plug contains a full wave rectifier to supply direct current to the unloader coil. -
Page 69: Troubleshooting Ge Ecm™ Blower Motors
TROUBLESHOOTING GE ECM 5.0 MOTORS ™ CAUTION: Symptom Cause/Procedure • Noisy blower or cabinet • Check for loose blower housing, panels, etc. Disconnect power from unit before removing or replacing • High static creating high blower speed? connectors, or servicing motor. To avoid electric shock - Check for air whistling through seams in ducts, cabinets or panels from the motor’s capacitors, disconnect power and wait... -
Page 70: Figure 44 Control Disassembly
Replacing ECM Control Module replacement list. USING THE WRONG CONTROL WILL RESULT IN IMPROPER OR NO BLOWER OPERATION. To replace the control module for the GE variable-speed indoor Orient the control module so that the 3-wire motor plug blower motor you need to take the following steps: can be inserted into the socket in the control. -
Page 71: Quick Reference Troubleshooting Chart For Water To Air Heat Pump
Manual 2100-532G Page 46 of 48 Manual 2100-738C Page 71 of 73... -
Page 72: Ground Source Heat Pump Performance Report
Ground Source Heat Pump Performance Report Date: ____________________ Technician: __________________________________________ Company Reporting: ________________________ Contact Phone: ____________________________ Owner’s Name: ____________________________ Owner’s Address: ___________________________ 1. Model/Serial Numbers: (For 3‐Pc. Geo‐Trio system, include coil/compressor/blower information) Model Number(s): ______________________________________________________________ Serial Number(s): _______________________________________________________________ 2. Accessory Information: Thermostat Mfgr. _____________________ Model/Part Number: ___________________ Flow‐Center* Mfgr. _____________________ Model/Part Number: ___________________ *if applicable 3. Open‐Loop Water Source Information: Where/how is water discharged ___________________________________________________ 4. Closed‐Loop Water Source Information: Horizontal Trenches ... - Page 73 The following information is needed to verify performance of the system. Note: Before testing, disable desuperheater, auxiliary electric heat, and any ventilation equipment that may allow outdoor air into the system. Measurements should be taken after a minimum 10 min. run time to ensure “steady‐state” of operation. Temperature and pressure measurements should be taken with a single thermometer and pressure gauge to eliminate discrepancies between multiple devices. Fluid Data: Stg. Cool Stg. Cool Stg. Heat Stg. Heat 5. Entering Fluid Temperature °F __________ __________ __________ __________ 6. Leaving Fluid Temperature °F __________ __________ __________ __________ 7. Entering Fluid Pressure psi __________ __________ __________ __________ 8. Leaving Fluid Pressure psi __________ __________ __________ __________ 9. Pressure Drop through coil (psi) __________ ...
Need help?
Do you have a question about the QW2S3DA and is the answer not in the manual?
Questions and answers