Table of Contents
Advertisement
Quick Links
Advertisement
Table of Contents
Troubleshooting

Related Manuals for Kinoton DCP 30 LX


Summary of Contents for Kinoton DCP 30 LX
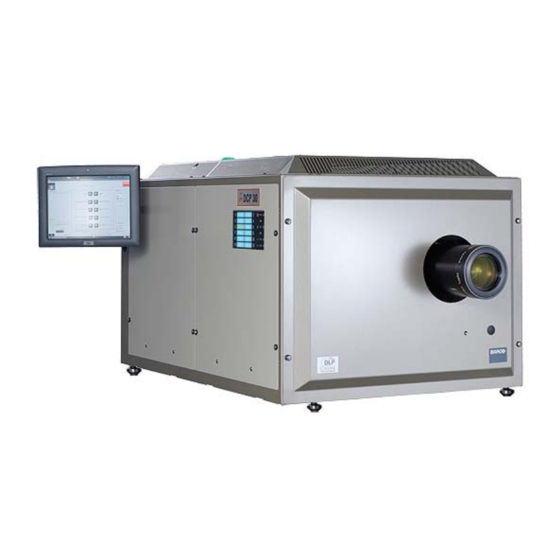
- Page 1 DCP 30 LX / DCP 30 SX Digital Cinema Projector DCP 30 LX/SX (en)
- Page 2 This operating manual – even in extracts – may only be reprinted or otherwise copied with special, written permission from KINOTON GmbH. Editor responsible for the contents: KINOTON GmbH Editing and layout: Carmen Auer - KINOTON GmbH CineBlack, CineCanvas, CineLink II and CinePalette are trademarks of Texas Instruments.
- Page 3 It does not substitute for, but supports, a thorough training period. All information in this manual is correct to the best of our knowledge and has been checked carefully. However, KINOTON accepts no liability for the accuracy of this information.
- Page 4 DCP 30 LX / DCP 30 SX Changes / Additions / Notes Issue of this manual: November 2009 Software version of the DCP Communicator: 3.3.10 or higher...
-
Page 5: Table Of Contents
DCP 30 LX / DCP 30 SX Contents Safety . . . . . . . . . . . . . . . . . . . . . . . . . . . . . . . . . . . . . . . . .1 Safety Notes . - Page 6 Rectifier Connection ........13 2.3.4 Connecting the Water Cooling in a DCP 30 LX ....14 2.3.5 Mains Connection .
- Page 7 DCP 30 LX / DCP 30 SX Operating Elements....... . . 28 3.8.1...
- Page 8 DCP 30 LX / DCP 30 SX Menu - Control........48 5.2.1...
- Page 9 DCP 30 LX / DCP 30 SX Menu - Installation ........71 5.5.1...
- Page 10 (DCP 30 LX) ........
-
Page 11: Safety
DCP 30 LX / DCP 30 SX Safety 1 .1 Safety Notes General Hints • This operating manual is to be kept with the digital projector at all times. • For safe and trouble free operation of the projector a good working knowledge of basic safety regulations and the projector’s correct use is required. -
Page 12: Important Safety Instructions For Us Customers
Intended Purpose The DCP digital cinema projector can project any digital content with 2K resolution. Any other or further use is not classified as an “intended purpose”. KINOTON cannot be held liable for any damage resulting from different or extended operation. -
Page 13: Explanations Of Symbols And Notes
DCP 30 LX / DCP 30 SX • To reduce the risk of electric shock, do not disassemble this equipment, but call in qualified personnel when service or repair work is required. Incorrect reassembly can cause electric shock when the appliance is used subsequently. -
Page 14: Safety Door Switches In The Lamphouse
DCP 30 LX / DCP 30 SX 1 .4 .2 Safety Door Switches in the Lamphouse Door switches (black arrow) are mount- ed behind the inner cover plates. The xenon lamp does only ignite if these covers are mounted (switch contact). -
Page 15: Special Hazard Points And Safety Hints
Therefore, avoid touching the coated lens surface. To remove dust on the lens, use a soft dry cloth (Cleaning set from Kinoton). Do not use a damp cloth, detergent solutions or thinner. Issue: 11/2009... -
Page 16: Lamphouse
DCP 30 LX / DCP 30 SX 1 .5 .4 Lamphouse Mechanical danger by broken glass flying around: - when operating the xenon lamp - when changing the xenon bulb - when disposing of the xenon bulb DANGER OF EXPLOSION S Never bypass the door switch. -
Page 17: Warning Risk Of Fire
S In the event of fire, use sand, CO , or dry powder fire extinguishers; never use water on an electrical fire. S Always have service on this projector performed by Kinoton authorized service personnel. 1 .5 .6 Danger because of Errors and Malfunctions DANGER S Make sure that nobody starts the projector while anyone is working on it. -
Page 18: Cleaning The Projector Housing
DCP 30 LX / DCP 30 SX 1 .5 .8 Cleaning the Projector Housing ATTENTION U Always switch off main switch (position 0 OFF), before cleaning the projector hous- ing. U To keep the cabinet looking brand-new, periodically clean it with a soft cloth. -
Page 19: Protection Against Pirate Copies
If the electronics box is opened or the light engine is removed the projector indicates a security error. The result is you are not able to project protected films. Via a hardware key and a code the Kinoton service person can re-activate the system. 1 .7... - Page 20 DCP 30 LX / DCP 30 SX Issue: 11/2009...
-
Page 21: Transport And Installation / Mounting
- The Light Engine and the accessories are packed in a box. - Weight (gross): about 100 kg (220.5 lbs) 2 .2 Scope of Delivery and Equipment Variations DCP 30 LX / DCP 30 SX Digital Cinema Projector • DLP Cinema Light Engine with 2K DLP Cinema technology ®... -
Page 22: Installation
DCP 30 LX / DCP 30 SX • Anamorphic lens holder (option) 9 manually adjustable 9 remotely adjustable 9 Anamorphic lens • Rectifier 9 KEX 110 9 KEX 170 • Button panel mounted in side or rear projector panel • Touch panel PC (option) •... -
Page 23: Dimensions
DCP 30 LX / DCP 30 SX 2 .3 .2 Dimensions 1050/41.3‘‘ 750/29.5‘‘ 262/10.3‘‘ 250/9.8‘‘ optical axis 2 .3 .3 Rectifier Connection The DC cables between rectifier and lamphouse must only be connected by a service technician. NOTE Z The figure shows the connection in a DCP 30 LX. -
Page 24: Connecting The Water Cooling In A Dcp 30 Lx
2 .3 .4 Connecting the Water Cooling in a DCP 30 LX The DCP 30 LX projector is externally supplied with coolant by a KWK-DCP water cooling unit. • Connect the forerun hose (blue arrow) coming from the water cooling to the Light Engine. -
Page 25: Connecting Panel (Inputs)
DCP 30 LX / DCP 30 SX 2 .4 Connecting Panel (Inputs) 2 .4 .1 Inputs for D-Cinema “VIDEO IN” BNC connector “SMPTE 292 IN” (A & B): Inputs for D-Cinema server with HD /SDI out (single or dual link) ... - Page 26 DCP 30 LX / DCP 30 SX Issue: 11/2009...
-
Page 27: Function, Description And Components
• The lamphouse is power supplied (DC) by an external rectifier (KEX 110 G for DCP 30 SX and KEX 170 G for DCP 30 LX). • The DCP 30 LX version has the Light Engine cooled by an external water cooling system (KWK-DCP). -
Page 28: Components Overview
DCP 30 LX / DCP 30 SX 3 .3 Components Overview The optional touch panel PC is pivoting fastened on the right upper edge of the projector head. The button panel can either be positioned on the right side or on the backside of the projector head (depends on customers order). -
Page 29: Projector Head
S Always switch off the main switch (position 0 OFF), before removing any cover plate or grille, e. g. when cleaning the filters or connecting a D-Cinema server. S All installation, adjustment and service work must be carried out by Kinoton trained service personnel. -
Page 30: Lamphouse
DCP 30 LX / DCP 30 SX 3 .4 .2 Lamphouse Xenon bulb Main reflector  Ignition base with anode connector, ignition coil, ignition switch and stabilization magnet Anode cable Bulb stay Opening window ... -
Page 31: Reflection Mirror And Uv Filter / Correcting Lens
- Xenon unit 3,000 W to 7,000 W: Ø 340 mm ATTENTION U Do not touch the inside of the main reflector with bare hands. If necessary carefully remove fingerprints with an alcohol-soaked cloth. U The main reflector should only be changed by Kinoton service technicians. Issue: 11/2009... -
Page 32: Elca Box - Electronic Control Unit
DCP 30 LX / DCP 30 SX 3 .4 .3 ELCA Box - Electronic Control Unit The ELCA box is secured by an electronic access control system. If the ELCA box is opened the system will be locked. Projecting of encrypted content is not pos- sible any more. - Page 33 DCP 30 LX / DCP 30 SX • 1 fan to cool the integrator rod (arrow, right lower figure) • 1 fan to cool the reflection mirror • 2 fans to cool the electronic control box Issue: 11/2009...
-
Page 34: Internal Water Cooling Unit (Only Dcp 30 Sx)
Internal Water Cooling Unit (only DCP 30 SX) The Light Engine and the integrator are water-cooled. The DCP 30 SX is cooled via an internal water cooling system and the DCP 30 LX by an external KWK-DCP. NOTE See also operating manual of the KWK-DCP water cooling system. -
Page 35: 19" Rack (Server, Scaler, 3D Control Device) (Option)
DCP 30 LX / DCP 30 SX 3 .4 .6 19” Rack (Server, Scaler, 3D Control Device) (Option) Servers, audio and automation systems and also other digital devises can be positioned in an external rack. NOTE See the corresponding operating manual for more information. -
Page 36: Basic Lens
DCP 30 LX / DCP 30 SX 3 .6 Basic Lens The basic lens or lens holder can be adjusted manually or remotely. The figure shows a remotely con- trolled lens holder and lens. You can adjust 9 Focus 9 Shift (horizontal, vertical) 9 Zoom. -
Page 37: Anamorphic Lens (Option)
DCP 30 LX / DCP 30 SX 3 .7 Anamorphic Lens (option) An anamorphic lens is need for cinemascope projection at full image size and resolution. Setting the cinemascope format in the DCP Communicator without using an anamorphic lens results in loss of pixels, half resolution and smaller images. -
Page 38: Operating Elements
DCP 30 LX / DCP 30 SX 3 .8 Operating Elements 3 .8 .1 Main Switc Main switch on position I => the projector is switched on. Main switch on position O => the projector is switched off. NOTE In case of an emergency, you can switch off the projector by the main switch (console back). - Page 39 DCP 30 LX / DCP 30 SX Xenon lamp ON/OFF • Pressing switches on or off the xenon lamp. $- If the button is operated, it illuminates violet for a short time. - If the xenon lamp is ON, the button illuminates green.
-
Page 40: Status Leds
DCP 30 LX / DCP 30 SX Lens FOCUSING (option with motorized focusing) • Pushing allows you focusing the lens. $ The button illuminates green when activated. Lens ZOOM (option with motorized zoom lens and prepared lens holder) • Pushing allows you to zoom the lens. -
Page 41: Hardware Key (Dallas Key) And Authorizing
DCP 30 LX / DCP 30 SX 3 .8 .4 Hardware Key (Dallas Key) and Authorizing Beside the button panel you will find the socket for the Dallas key. To avoid pirate copies the projector is equipped with a security system which monitors all critical components. -
Page 42: Communicator Software
DCP 30 LX / DCP 30 SX 3 .8 .6 Communicator Software The Communicator can be installed on any computer to control and configure the DCP projector. The computer can be linked to the projector by using a Ethernet or serial connection. -
Page 43: Cinema Projection And Lens Settings
DCP 30 L/LX / DCP 30 S/SX Cinema Projection and Lens Settings 4 .1 Starting the Cinema Projection • Switch on the projector by turning the main switch (I ON). $The right status LED (arrow) under the button panel illuminates red. $The status lamp on the top of the projector head blinks red. -
Page 44: Starting The Projection Via The Communicator Software
DCP 30 L/LX / DCP 30 S/SX NOTE The macro buttons 1 to 12 can be occupied with several functions (e. g. format selec- tion, input selection). The functions can be set via the Communicator software. Example for the assignment of the macro buttons: Button Macro Button... -
Page 45: Stopping / Ending The Cinema Projection Manually
DCP 30 L/LX / DCP 30 S/SX • Push on the click button Dowser. $The dowser opens. The click button appears blue. • Push on the click button Lamp. $The xenon lamp is switched on. The click button appears blue. $The cinema projection starts. -
Page 46: Lens Adjustments
DCP 30/70 L / DCP 30/70 S / DCP 30 LX/SX 4 .3 Lens Adjustments With a remotely controlled lens, holder and anamorphic lens, the associated settings (lens file) and the functions of the anamorphic lens (pivot in or out) can be loaded by activating a macro. -
Page 47: Zooming
DCP 30/70 L / DCP 30/70 S / DCP 30 LX/SX 4 .3 .1 .1 Zooming Zooming remotely the optional zoom lens with integrated zoom motor is necessary. Zooming manually is not possible any more. Preparation for zooming: • Switch on projector and xenon lamp. -
Page 48: Focusing
DCP 30/70 L / DCP 30/70 S / DCP 30 LX/SX 4 .3 .1 .2 Focusing Focusing can be done manually or remotely. Focusing remotely is only possible if the lens holder is equipped with a focus motor (red arrow in lower figure). -
Page 49: Shifting
DCP 30/70 L / DCP 30/70 S / DCP 30 LX/SX • Push the fokus button (+ or-) on the button panel. $The focus motor (in lens holder) moves the lens to the selected direction. Loading a lens file from the DCP Communicator software •... - Page 50 DCP 30/70 L / DCP 30/70 S / DCP 30 LX/SX Setting the horizontal shift manually (see-saw) • Turn the corresponding adjusting screw with a screw driver (clockwise or counterclockwise) (see figure). Setting the vertical shift manually (up + down) •...
- Page 51 DCP 30/70 L / DCP 30/70 S / DCP 30 LX/SX • Press the corresponding Ssift button (to right or to left or to the top or to the bot- tom) on the button panel. $The corresponding shifting motor moves the lens holder to the selected direction.
-
Page 52: Anamorphic Lens (Option)
DCP 30/70 L / DCP 30/70 S / DCP 30 LX/SX 4 .3 .2 Anamorphic Lens (option) For cinemascope projection the lens holder with the anamorphic lens can be swivelled manually or remotely in front of the main lens. The position of the holder can be set via adjusting screws. -
Page 53: Dcp Communicator Software
DCP 30/70 L / DCP 30/70 S / DCP 30 LX/SX DCP Communicator Software 5 .1 General The DCP Communicator is a software tool to control and configure DCP projectors. The user interface is displayed and operative via an optional touch panel PC or any external Notebook/PC. -
Page 54: Starting The Dcp Communicator
DCP 30/70 L / DCP 30/70 S / DCP 30 LX/SX 5 .1 .1 Starting the DCP Communicator $On the optional touch panel the Communicator starts automatically with the projector. • The program can also be started by double-clicking on the program icon on the desktop. -
Page 55: Changing The Window Array
DCP 30/70 L / DCP 30/70 S / DCP 30 LX/SX $After the connection has been established, the Control window appears. NOTE The software starts always with the default user and the last window array. 5 .1 .1 .1 Changing the Window Array Some arrays of the windows can be separated from the main window (e. -
Page 56: Activating The Keyboard On The Optional Touch Panel Pc
DCP 30/70 L / DCP 30/70 S / DCP 30 LX/SX 5 .1 .1 .2 Activating the Keyboard on the optional Touch Panel PC To enable the input of letters and numbers a virtual keyboard can be activated on the touch panel PC. -
Page 57: Status Window
DCP 30/70 L / DCP 30/70 S / DCP 30 LX/SX 5 .1 .2 .1 Status Window The status window can be swivelled in and out. • Double-click on the logo area / projector name to swivel the status window in. -
Page 58: Menu - Control
DCP 30/70 L / DCP 30/70 S / DCP 30 LX/SX 5 .2 Menu - Control Overview • Presets • Test Patterns • Service (only for Service mode) 5 .2 .1 Presets In the window Presets you will find: • The preset Macro click buttons and the macro names 8 click buttons per register can be selected. -
Page 59: Executing A Preset Macro
DCP 30/70 L / DCP 30/70 S / DCP 30 LX/SX 5 .2 .1 .1 Executing a Preset Macro Macro data include a sequence of projector functions (program run) => automating of several projector settings. Typical functions are: - Selection of the input source - Selection of the PCF (Projector Configuration File) - Selection of the Screen file. -
Page 60: Test Patterns
DCP 30/70 L / DCP 30/70 S / DCP 30 LX/SX 5 .2 .2 Test Patterns Test patterns will be used to adjust the projector. Diverse test patterns can be loaded from a list. the most important 10 test patterns can be activated by clicking on the corresponding shortcut. - Page 61 DCP 30/70 L / DCP 30/70 S / DCP 30 LX/SX 5 .2 .2 .1 Selecting and Activating Extended Test Patterns • Click on $A dialogue box opens containing a list of test patterns. $A dialogue box opens with a list of test patterns.
-
Page 62: Service
DCP 30/70 L / DCP 30/70 S / DCP 30 LX/SX 5 .2 .2 .3 Shortcuts for Test Patterns With the aid of shortcuts the most important 10 test patterns can be projected immediately. • For activation, click on one of the shortcuts. -
Page 63: Menu - Configuration
DCP 30/70 L / DCP 30/70 S / DCP 30 LX/SX 5 .3 Menu - Configuration This menu allows you to activate manually predefined macros, projector configuration files (PCF), projector SCREEN files and extra configuration files. NOTE Changes on above files can only be carried out by service personnel. -
Page 64: Loading / Executing Macros
DCP 30/70 L / DCP 30/70 S / DCP 30 LX/SX 5 .3 .2 Loading / Executing Macros This menu allows you to execute an available macros. These can also be macros which are stored on the hard disk but not preset to a button. -
Page 65: Image Settings
DCP 30/70 L / DCP 30/70 S / DCP 30 LX/SX 5 .3 .3 Loading and Activating a PCF File (Projector Configuration File) - Image Settings Image files (PCF) contain information about the input signal. They describe resolution, pixel geometry, color space, offset, etc. Depending on the content the corresponding PCF has to be loaded. -
Page 66: Loading And Activating Of Screen Files
DCP 30/70 L / DCP 30/70 S / DCP 30 LX/SX 5 .3 .4 Loading and Activating of Screen Files SCREEN files determine the area on screen which is available for the projected picture. The screen file contains screen specific adaptations like:... -
Page 67: Loading And Activating Of Other Files (Extra)
DCP 30/70 L / DCP 30/70 S / DCP 30 LX/SX 5 .3 .5 Loading and Activating of Other Files (EXTRA) EXTRA configuration files can contain: - 3D settings (test patterns, 3D mode) - Selection and mode of the input... -
Page 68: Loading/Activating Of Lens Setting Files
DCP 30/70 L / DCP 30/70 S / DCP 30 LX/SX 5 .3 .6 Loading/Activating of Lens Setting Files The lens file stores the settings of the motorized lens holder. Therefore it is possible to activate different lens settings by a macro. -
Page 69: Menu - Diagnostics
DCP 30/70 L / DCP 30/70 S / DCP 30 LX/SX 5 .4 Menu - Diagnostics This menu allows you to read out the projector log files, the current system status, temperature and voltage values and the rotation speed of the fans. Furthermore error messages and version information will be indicated. -
Page 70: Error Messages
DCP 30/70 L / DCP 30/70 S / DCP 30 LX/SX 5 .4 .1 .1 Error Messages The Error messages window gives you an overview of performed errors in the projec- tor. 5 .4 .1 .2 Cinema Front End (TI components) •... - Page 71 DCP 30/70 L / DCP 30/70 S / DCP 30 LX/SX Voltage Values • Click on to get a list of voltage values of different components. $If one of the values exceeds a limit, this value appears red. • By clicking on + the directory tree...
-
Page 72: History
DCP 30/70 L / DCP 30/70 S / DCP 30 LX/SX 5 .4 .2 History This window allows you to get access to the log files. • Click on History. $A window with three click buttons opens: 5 .4 .2 .1 Reading and Saving the TI Cinema Boards Log File beside Cinema front end (TI). -
Page 73: Reading And Saving The Oem Projector Boards Log File
DCP 30/70 L / DCP 30/70 S / DCP 30 LX/SX $The list with maximum 144 files opens. $To get the complete log file list click on • The log files can be saved on the hard disk, therefore click on $The file manager opens. -
Page 74: Reading And Saving The Security Log File
DCP 30/70 L / DCP 30/70 S / DCP 30 LX/SX 5 .4 .2 .3 Reading and Saving the Security Log File The security log file saves all security relevant actions of the projector. That can be: - Removing a lateral cover which is secured with a switch... -
Page 75: Version Information
DCP 30/70 L / DCP 30/70 S / DCP 30 LX/SX 5 .4 .3 Version Information Here you can get information about OEM and TI firmware versions. • Therefore click on Version info. $A list opens which consists the firmware version information of the boards. -
Page 76: Creating A Diagnosis Package
DCP 30/70 L / DCP 30/70 S / DCP 30 LX/SX 5 .4 .4 Creating a Diagnosis Package By using this function you can create a zip file which includes all relevant projector log files. This package can be sent to the service for error analysis purpose. -
Page 77: Tests
DCP 30/70 L / DCP 30/70 S / DCP 30 LX/SX 5 .4 .5 Tests The tests area gives you an overview about: 9 Synchronous errors on input Port 292 A or B 9 A tool for testing the GPOs (General Purpose Outputs) -
Page 78: Port 292 Error Counts
DCP 30/70 L / DCP 30/70 S / DCP 30 LX/SX 5 .4 .5 .1 Port 292 Error Counts • Click on $An sync. error overview on Port 292 A and B opens. - Total error Count includes all sync. errors which has been occurred since the last switching on. -
Page 79: Cinecanvastm
DCP 30/70 L / DCP 30/70 S / DCP 30 LX/SX 5 .4 .6 CineCanvasTM CineCanvas is a TI technology to overlay subtitles and graphics coming from a server on the projected picture. CineCanvas also provides electronic masking and high- quality picture scaling. - Page 80 DCP 30/70 L / DCP 30/70 S / DCP 30 LX/SX The following picture shows the mode of operation for subtitles coming from the server: $The picture and audio data reach the server. $The server separately stores multi-lingual subtitles. $The projectionist selects the movie and the additional subtitles from the server.
-
Page 81: Menu - Installation
DCP 30/70 L / DCP 30/70 S / DCP 30 LX/SX 5 .5 Menu - Installation The installation menu and its submenus give you information about the network ad- dresses, color calibration and used Dallas keys. Furthermore you can set the system time and enter the pin codes of the Dallas keys. -
Page 82: Lamp
DCP 30/70 L / DCP 30/70 S / DCP 30 LX/SX 5 .5 .2 Lamp NOTE Actually not used for Kinoton DCP projectors. 5 .5 .3 Color Calibration The submenu is suitable to give you information about the measured color values and the verification of the measured colors. -
Page 83: Automation
DCP 30/70 L / DCP 30/70 S / DCP 30 LX/SX • Click on to get the measured values of the native colors. • Click on to get the values of the verified colors. 5 .5 .4 Automation In this menu area the GPIs (inputs) can be configured by the service. -
Page 84: Advanced
DCP 30/70 L / DCP 30/70 S / DCP 30 LX/SX 5 .5 .5 Advanced This menu allows to: 9 set the system time (only service) 9 manage the Dallas keys NOTE All other functions like file management, functionality keys, SNMP and certificates are only accessible by the service. -
Page 85: Managing The Dallas Keys
DCP 30/70 L / DCP 30/70 S / DCP 30 LX/SX 5 .5 .5 .2 Managing the Dallas Keys This area allows you to get a list of the registered Dallas keys and to add further keys. Getting an overview list •... -
Page 86: Menu - Communicator
DCP 30/70 L / DCP 30/70 S / DCP 30 LX/SX 5 .6 Menu - Communicator This menu is mainly used by the service. Menus 9 User (only for Service) 9 International (only for Service) 9 Diagnostics 5 .6 .1... -
Page 87: Diagnosis
DCP 30/70 L / DCP 30/70 S / DCP 30 LX/SX 5 .6 .2 Diagnosis This menu gives you access to the log files of the Communicator software. This log files also contains the version information. • Click on Diagnostics to open a window with the following information. - Page 88 DCP 30/70 L / DCP 30/70 S / DCP 30 LX/SX Issue: 11/2009...
-
Page 89: Cleaning, Maintenance And Troubleshooting
DCP 30 LX / DCP 30 SX Cleaning, Maintenance and Troubleshooting 6 .1 General Hints ATTENTION U Any work on electric supply wiring must be carried out by competent electricians. U Make sure that nobody starts projector while you are working on it. For all mainte- nance, cleaning and repair you must disconnect the projector from its power supply (switch off the main switch). -
Page 90: Dust Filter On The Projector's Top
DCP 30 LX / DCP 30 SX 6 .2 .2 Dust Filter on the Projector’s Top To guarantee optimal ventilation of the system, the dust filters (on projector top) should be cleaned about once a week (the frequency depends on the environment). -
Page 91: Fans In The Lamphouse
DCP 30 LX / DCP 30 SX 6 .2 .3 .2 Fans in the Lamphouse • Remove the lamphouse outer cover plates (Allen key 4 mm) to reach the fans. • Use a vacuum cleaner to remove the loose dust on the blower impeller of the two fans (arrows) and on the inner cover plates. -
Page 92: Cleaning The Heat Exchanger
DCP 30 LX / DCP 30 SX 6 .2 .4 Cleaning the Heat Exchanger • To reach the heat exchanger, remove the cover plate (Allen key 4 mm). • The fins (arrow) of the air condenser should be cleaned weekly with a fine brush or a vacuum cleaner. -
Page 93: Removing The Xenon Bulb
DCP 30 LX / DCP 30 SX • Remove the outer back lamphouse cover plate (Allen key 4 mm). • Lift up the cover plates from the guide rails. $The inner cover plates are visible. • Remove the screws (Torx wrench 3 mm) (black arrows) on the inner cover plate. -
Page 94: Inserting The Xenon Bulb
DCP 30 LX / DCP 30 SX • Loosen the anode cable on the connecting bolt (wrench 17 mm). • Loosen the Allen screw, which fasten the bulb, by using a long Allen key (5 mm) from the right outside of the lamphouse (see figure). - Page 95 DCP 30 LX / DCP 30 SX Inserting the xenon bulb • Carefully guide the xenon bulb‘s cathode base through the opening in the mirror. ATTENTION Do not bump the reflector - carefully guide bulb around the corner. • Fasten the xenon bulb from the...
-
Page 96: Adjusting The Screen Illumination / Xenon Bulb Position
DCP 30 LX / DCP 30 SX Removing the protective coat / Mounting the cover plate • Remove the protective bonded fabric. • Mount the inner cover plate for adjusting the illumination of the screen. ATTENTION The inner cover plates must be closed, for safety reasons and for having an adequate cooling for the xenon bulb. - Page 97 DCP 30 LX / DCP 30 SX Basic Adjustment • Switch on the projector and the xenon lamp. Immediately check the lamp current. • First of all adjust the lamp current to minimum (see the manufacturer’s data sheet). • Adjust the bulb position and therefore the illumination of the screen to the maximum...
- Page 98 DCP 30 LX / DCP 30 SX Fine Adjustment (CLO sensor) $Wait at least 15 minutes for a stabilized light arc. $Again adjust the illumination of screen by turning the adjustment screws (see figures). $The easiest way is to watch the CLO value in DCP Communicator under Installation - Lamp - and adjust the CLO value to maximum.
-
Page 99: Changing The Uv Filter / Correcting Lens
DCP 30 LX / DCP 30 SX Positioning the bulb stay • Wait at least 10 minutes so the lamp can cool down. • Remove the inner cover plate again. • Adjust the bulb support to the anode base. $The bulb support should barely touch... -
Page 100: Correcting Lens With Uv Filter
DCP 30 LX / DCP 30 SX 6 .3 .2 .1 Correcting Lens with UV Filter (DCP 30 LX) • Loosen the fixing screws on both upper lens clips. • Push the clips away from the lens so the lens can be taken away. -
Page 101: Refilling /Changing The Cooling Fluid / D-Aerating The System
• Remove the left side cover in front of the projector (Allen key 4 mm). NOTE Z DCP 30 SX is equipped with an internal water cooling system. DCP 30 LX is equipped with an external water cooling system, therefore see KWK-DCP operating manual. -
Page 102: Aerating The Cooling System
DCP 30 LX / DCP 30 SX 6 .3 .3 .3 De-Aerating the Cooling System • Open the projector head cover to reach the Light Engine. • To de-aerate the system on a projector first of all cut the Light Engine from of the... -
Page 103: Troubleshooting
DCP 30 LX / DCP 30 SX 6 .4 Troubleshooting The following pages describe first activities which can be carried out in case of errors. If the error cannot be cleared by yourself please, call service. 6 .4 .1 Projector Electronic... -
Page 104: Water Cooling
DCP 30 LX / DCP 30 SX 6 .4 .2 Water Cooling Error Possible Reasons Clearing Flow Error - There is not enough cooling fluid. Refill with original coolant. Lamp switches off The system is not correctly De-aerate the system. -
Page 105: Technical Data
12 RU rack space Xenon Lamp 2000 W - 7000 W Electronic Rectifier DCP 30 LX DCP 30 SL: 85 A - 170 A DCP 30 SX: 65 A - 110 A Overall Weight approx. 225 kg (496 lbs) Issue: 11/2009... -
Page 106: Environment Requirements
DCP 30 LX / DCP 30 SX 7 .4 Environment Requirements Ambient Temperature at operation: 10° C (50° F) - 35° C (95° F) otherwise: -15° C (5° F) - 60° C (140° F) Humidity at operation: 5% - 85%... - Page 107 EC Declaration of Conformity Kinoton GmbH Company name Address: Industriestr. 20a, D-82110 Germering Machine designation: Digital Cinema Projector DCP 30 LX / DCP 30 SX Machine type: Maschine serial number: KXL0105 / KXS0105 Relevant EC stipulations: Machine regulation 2006/42/EG (98/37/EG)
Need help?
Do you have a question about the DCP 30 LX and is the answer not in the manual?
Questions and answers