Table of Contents
Advertisement
Quick Links
Advertisement
Table of Contents

Related Manuals for fantastic furniture TATE


Summary of Contents for fantastic furniture TATE
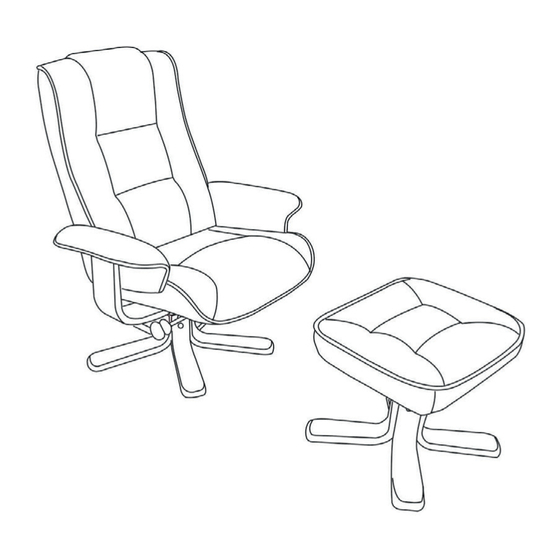
- Page 1 Version 1.0 TATE Recliner + Foot Stool www.fantasticfurniture.com.au...
- Page 2 CAUTION: Use this product for seating one person at a time. Do not stand on, or use this chair as a step ladder. Do not rock on chair as this may result in injury. This product should be checked periodically to ensure alle components are secure and all hardware is tight.
- Page 3 Assembly checklist Read through the instructions carefully Make sure you have all the required tools. before you begin. Never use power tools unless instructed. Identify and lay out all of the components Unless instructed, do not fully tighten before you begin assembly. screws until the item is fully assembled.
- Page 4 What you need to assemble the product (P2L) (P2R) Seat/Back Armrests Chair leg Footstool cushion Footstool leg 1 x (P1) (P2L), (P2R) 5 x (P3) 1 x (P4) 4 x (P5) Parts list Box 1: Seat/Back (P1); Armrests (P2); Chair leg (P3); Footstool cushion (P4); Footstool leg (P5).
- Page 5 Step 1 You will need 10 x H1 10 x H5 1 x H6 1 x H9 Attach 5xP3 (chair leg) to H6 (Leg mount for chair) by using 10 x bolt H1, 10 x washer H5 and Allen key H9 tighten each bolt H1to 80% at beginning, when all legs are level and flat on the floor, tighten all bolts H1 to 100% Step 2...
- Page 6 Step 3 You will need 2 x H3 2 x H4 Using 1 x lock pin (H3) to connect the back to the seat base then lock the pin (H3) into position with 1 x clip (H4). Repeat this for both sides. Step 4 You will need 4 x H2...
- Page 7 Step 5 You will need 4 x H2 1 x H9 Attach footstool cushion (P4) to leg mount for footstool (H8) by using 4 x small bolts (H2) and allen key (H9). Step 6 Bolts Brackets (H7) (H9) Washer (H5) Use 2 x Bolts (H1) to connect 1 x Bracket (H7) to the footstool leg (P5) as shown.
- Page 8 Step 7 Job Complete! In the interest of our environment please dispose of all packaging thoughtfully. www.fantasticfurniture.com.au PAGE 8...
Need help?
Do you have a question about the TATE and is the answer not in the manual?
Questions and answers