
Related Manuals for Stihl RMA 339


Summary of Contents for Stihl RMA 339
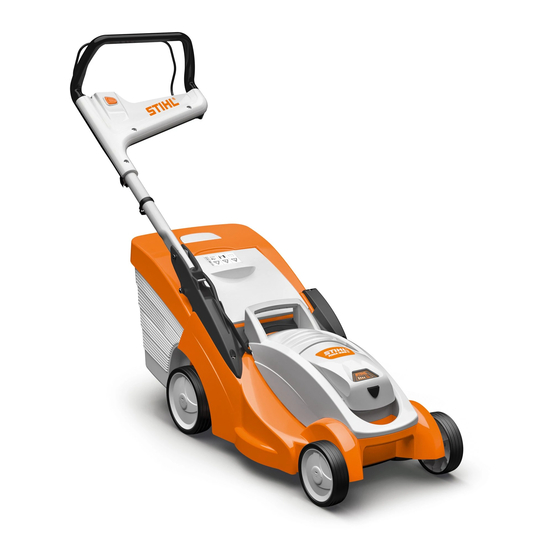
- Page 1 STIHL RMA 339, RMA 339 C Instruction manual RMA 339.0 RMA 339.0 C...
- Page 2 0478 131 8327 B. E20 © 2020 STIHL Tirol GmbH...
- Page 3 0478 131 8327 B...
- Page 4 0478 131 8327 B...
-
Page 5: Table Of Contents
Dear Customer, Removing/inserting the battery Thank you for choosing STIHL. We Charging the battery 1. Table of contents develop and manufacture our quality LEDs on the battery products to meet our customers' LED on the charger Notes on the instruction manual requirements. -
Page 6: Notes On The Instruction Manual
EC Directive 2006/42/EC. The instructions described can be identified as in the following examples. STIHL is continually striving to further develop its range of products; we therefore Operating steps which require intervention reserve the right to make alterations to the... -
Page 7: Country-Specific Versions
2.3 Country-specific versions STIHL supplies chargers with different plugs and switches, depending on the country of sale. Chargers with European plugs are shown in the illustrations. Chargers with other types of plug are connected to the mains in a similar way. -
Page 8: Machine Overview
3. Machine overview 0478 131 8327 B - EN... -
Page 9: For Your Safety
The machine is intended for private use. operation. The user must receive 13 Handlebar detent lever (RMA 339 C) Caution – risk of accident: instruction on safe use of the machine 14 Level indicator (grass catcher box) The machine is only intended for mowing from the vendor or another expert. -
Page 10: Clothing And Equipment
● Do not throw the battery into a from your STIHL specialist dealer. fire. In particular, any tampering with the ● Observe the permissible 4.2 Clothing and equipment... -
Page 11: Charger
The battery can not operate safely if it is If not in good operating condition, not in good operating condition. There is a components can no longer operate 4.4 Charger risk of serious injury to persons. correctly and safety devices may be dis Children cannot recognise or evaluate the abled. -
Page 12: Transporting The Machine
A damaged or defective charger may emit always transport STIHL batteries either in a strange odour or smoke. Persons could Avoid contact with the mowing blade when the undamaged original packaging or in be injured or property damaged. -
Page 13: Working With Your Machine
STIHL specialist has a supply of Only work during the day or with good Place the machine on an even surface replacement stickers and all the other artificial light. before switching it on. spare parts. Do not operate the machine in the rain or... -
Page 14: Maintenance, Cleaning, Repairs And Storage
Never run over any such foreign objects. These can damage plastics and metals, must be checked for possible damage impairing the safe operation of your STIHL If the cutting tool or the machine hits an and loose parts. Damaged parts must machine. -
Page 15: Storage For Prolonged Periods Without Operation
Genuine STIHL spare parts Store the cooled machine, the battery and can be recognised by the STIHL spare the safety plug separately from each other parts number, by the STIHL lettering and, in a dry and locked room that is... - Page 16 RMA 339 C: Start the motor. RMA 339 C: Switch off the motor. Battery is overheated. Charging starts after the cooling-down period or the battery can only be used after the cooling- down period. The battery is faulty and must be replaced.
-
Page 17: Standard Equipment
6. Standard equipment RMA 339 C: The standard equipment may vary Item Designation Qty. depending on the country where Basic unit Sleeve sold and version type. Upper part of grass catcher Bolt Washer Lower part of grass catcher RMA 339:... -
Page 18: Preparing The Machine For Operation
● 4 Insert nut (H) into the bracket as 7. Preparing the machine for shown. 7.2 Installing the mono handlebar operation (RMA 339 C) ● 5 Insert bolt (F) from the outside inwards through the bores in handlebar (1) and in bracket (2). 7.1 General points ●... -
Page 19: Installing The Dual Handlebar (Rma 339)
Installing cable clip: 7.3 Installing the dual handlebar ● Install cable clip (4) on the upper (RMA 339) handlebar. Insert electric cable (1) as shown. ● Close tab (5) and allow it to engage. Distance between the cable clip and... -
Page 20: Battery And Charger
9.2) and hold the battery compartment cover in the 8.1 General open position. The RMA 339, RMA 339 C lawn mowers are operated with rechargeable STIHL AK type lithium-ion batteries only. The batteries supplied are optimally adapted to the intended purpose, however, all STIHL AK type batteries can be used. -
Page 21: Charging The Battery
● Remove the battery from the charger may differ from the specified charging and insert it in the battery compartment. time. Please refer to 8.3) www.stihl.com/charging-times for charging times. Once the battery has been inserted in the charger, charging starts automatically. When the battery is fully charged, the charger switches off automatically. -
Page 22: Led On The Charger
4 LEDs flash red: The LED illuminates green The battery is faulty. and the LEDs on the battery illuminate or flash green: The battery is charging. The LED flashes red: 1 LED illuminates red: There is no electrical contact The battery is too warm or too between the battery and the cold. -
Page 23: Eco Mode Switch
● Move switch to position 0. ensure that the handlebar is fully engaged. Height adjustment: 9.4 Adjusting the mono handlebar (RMA 339 C) The height of the mono handlebar can be adjusted to 2 levels: Danger of pinching! When operating the detent lever, ●... -
Page 24: Central Cutting Height Adjustment
9.7 Grass catcher box Transport position (for cleaning, for space-saving transport and for storage of the machine): ● Loosen rotary handles (1) until they turn Setting the cutting height: freely. ● 1 Push height adjustment lever (1) ● Fold down upper handlebar (2) away from the lawn mower slightly until forwards. -
Page 25: Level Indicator
– Allowing the lawn to dry before mowing. The flow of air that is created by the rotary movement of the mowing blade and is If required, additional STIHL lithium ion responsible for filling the grass catcher box batteries can be purchased (special ●... -
Page 26: Correct Motor Load
If a safety device is found to be be measured using a stopwatch. 10.2) defective, the machine must not be operated. Consult a specialist dealer; STIHL recommends STIHL 12. Operating the machine 10.5 If the mowing blade blocks specialist dealers. Switch off the motor immediately and disconnect the safety plug. -
Page 27: Switching The Lawn Mower Off
12.3 Switching the lawn mower off ● 1 Press and hold ON button (1). ● 2 Pull motorstop lever (2) to the ● Detach the grass catcher box. ( 9.7) handlebar and hold. ● Open the grass catcher box at tab (1). ●... -
Page 28: Maintenance
Cleaning position RMA 339 C: ● Hold the machine with your right hand on the front handle and tilt it rearwards 13. Maintenance slowly until the handlebar is in contact with the ground as shown. ● Release discharge flap (1) and detent 13.1 General... -
Page 29: Electric Motor And Wheels
● If necessary, use a special cleaner (e.g. STIHL special cleaner). 13.6 Checking blade wear Maintenance interval: Before each use 13.3 Electric motor and wheels Risk of injury! The electric motor is maintenance-free. Blades are subjected to differing degrees of wear depending on the The wheel bearings are maintenance-free. -
Page 30: Removing And Installing The Mowing Blade
(22 mm) for the blade sharpened by a specialist dealer loosening and tightening. (STIHL recommends STIHL specialist dealers). 1 Removing: Operation of the machine is impaired in the case of an incorrectly sharpened mowing blade (incorrect sharpening angle, imbalance, etc.), the cutting performance... -
Page 31: Transport
Only store the lawn mower in good ● Store the charger separately from the Carrying the machine: operating condition, fold down the battery in a dry, locked and dust-free handlebar if necessary. room. Ensure that it is protected from unauthorised use (e.g. by children). Keep all nuts, pins and bolts tightly Do not suspend the charger from the fastened, replace danger signs and... -
Page 32: Transporting The Battery
(STIHL RMA) – The use of tools or accessories which are not approved or suitable for the STIHL assumes no liability for material or machine, or are of inferior quality. personal damage caused by the non- observance of information contained in the –... -
Page 33: Environmental Protection
If these operations are neglected, faults Always dispose of batteries RMA 339.0, RMA 339.0 C may arise which are the responsibility of properly – observe local Wheel diameter the user. regulations. Do not dispose of (front) 150 mm batteries with domestic waste,... -
Page 34: Stihl Ak Battery
8.3) – Electrical connection interrupted – Insert safety plug ( 9.2) between lawn mower and battery 18.2 STIHL charger AL 101 – Adapt cutting height and mowing speed – Motor is overloaded because grass is to mowing conditions ( 9.6) - Page 35 Fault: Fault: Fault: Poor cut, lawn turning yellow Discharge chute blocked Battery is not charged although the green LED on the charger illuminates green Possible cause: Possible cause: – Mowing blade is blunt or worn, – Mowing blade is worn Possible cause: –...
-
Page 36: Service Schedule
– Check battery, replace if necessary ( ) – Check charger, replace if necessary 20.2 Service confirmation Please hand this instruction manual to your STIHL specialist dealer in the case of maintenance operations. He will confirm the service operations performed in the pre-printed boxes. - Page 37 0478 131 8327 B - EN...
- Page 38 STIHL RMA 339, RMA 339 C 0478 131 8327 B...
Need help?
Do you have a question about the RMA 339 and is the answer not in the manual?
Questions and answers