Table of Contents
Advertisement
Quick Links
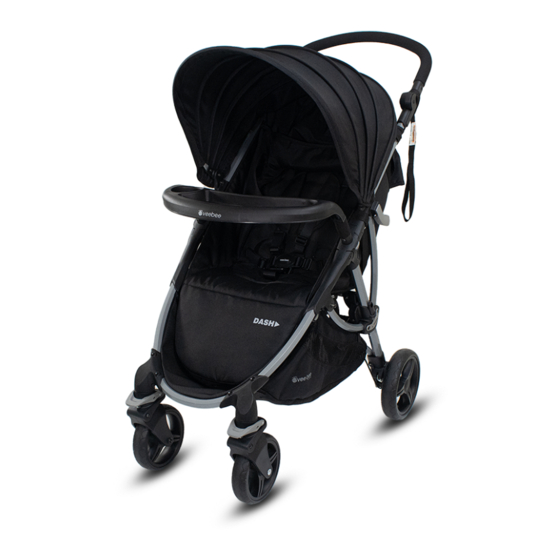
DASH
Stroller
PRODUCT REFERENCE GUIDE
Thank you for purchasing a quality VEE BEE product.
Please read and follow the instructions outlined in this
guide carefully. Familiarise yourself with the construction
and safety features; be sure that you understand all the
warnings and safety guidelines before use.
Important: Please read the following instructions
carefully before assembling this product. Retain this
guide in a safe place for future reference.
DISCLAIMER
Due to our policy of continuous product development,
this product is constantly evolving. It is possible that
some features or procedures outlined here have changed
since this document was written. If you are unsure of
any procedure shown here, please contact us via the
web at info@valco.com.au to obtain the most up to date
information before use. Include the batch number, which
can be found on a sticker on the frame.
All pictures and diagrams herein are provided for
illustration purposes only. Actual product, colour or fabric
may vary. VALCO BABY reserves the right to modify or alter
any specification or colour without notice or obligation to
modify any product previously purchased
1>PARTS LIST
Stroller frame
& seat with
FURTHER INFORMATION
In Australia/New Zealand
www.veebee.com.au
© Copyright VB 2016
vs100216
DashIM_190718.indd 1
by valco baby
2x rear
Wheels
2x front
Wheels
PAGE 1
19/7/18 4:20 pm
Advertisement
Table of Contents

Related Manuals for Valco baby Vee Bee Dash


Summary of Contents for Valco baby Vee Bee Dash
- Page 1 All pictures and diagrams herein are provided for illustration purposes only. Actual product, colour or fabric may vary. VALCO BABY reserves the right to modify or alter any specification or colour without notice or obligation to modify any product previously purchased 1>PARTS LIST...
- Page 2 2>OPEN 3>FRONT WHEELS CLICK 4>REAR WHEELS PRESS CLICK PAGE 2 DashIM_190718.indd 2 19/7/18 4:20 pm...
- Page 3 5>HOOD TO ATTACH 6>BUMPER BAR 8>BRAKE CLICK CLICK PRESS 7>HANDLE BAR PRESS PRESS WARNING: BE SURE BRAKE IS APPLIED WHENEVER STROLLER IS STATIONARY. PAGE 3 DashIM_190718.indd 3 19/7/18 4:20 pm...
- Page 4 9>FOLDING 1.FOLD HOOD 2. INCLINE SEAT 4. LIFT PRESS 3. UNLOCK 5. FOLDED 10>SEAT RECLINE 11>FOOTREST RECLINE INCLINE RAISE PRESS LOWER SQUEEZE SQUEEZE & PULL & PULL PAGE 4 DashIM_190718.indd 4 19/7/18 4:20 pm...
- Page 5 12>HARNESS CLICK ‘PRESS’ ALWAYS USE THE RESTRAINT SYSTEM PAGE 5 DashIM_190718.indd 5 19/7/18 4:20 pm...
- Page 6 13>TETHER STRAP WARNING: ALWAYS WEAR THIS STRAP TO STOP THE PRAM/STROLLER ROLLING AWAY IMPORTANT WARNING: ALWAYS INSTRUCTIONS TEST THAT WHEELS ARE SECURELY ENGAGED IN EACH WHEEL MOUNT BEFORE 1>PARTS LIST USE. 1x hood, 2x rear wheels, 2x front wheels, 4>REAR WHEELS stroller frame/seat.
- Page 7 each corresponding hole in the frame. on the footrest. To remove the bumper bar: reverse the To raise the footrest, simply lift it with your hand. above steps. Always test that bumper bar is 12>HARNESS securely engaged before use. Your stroller harness specifically...
- Page 8 SUCH AS RADIATORS, ETC. WHICH MAY BE IN THE IMMEDIATE VICINITY OF YOUR STROLLER. • IT MAY BE UNSAFE TO USE ANY ACCESSORIES OTHER THAN VALCO BABY APPROVED ONES. • THIS PRODUCT IS INTENDED FOR DOMESTIC USE ONLY. IT IS NOT INTENDED FOR COMMERCIAL USE.
Need help?
Do you have a question about the Vee Bee Dash and is the answer not in the manual?
Questions and answers