ZyXEL Communications GS1100 Series User Manual
Unmanaged gigabit ethernet switch
Hide thumbs
Also See for GS1100 Series:
- User manual (48 pages) ,
- Specifications (2 pages) ,
- Brochure (2 pages)

Related Manuals for ZyXEL Communications GS1100 Series


Summary of Contents for ZyXEL Communications GS1100 Series
- Page 1 User’s Guide GS1100 Series Unmanaged Gigabit Ethernet Switch Version 1.00 Edition 6, 08/2020 Copyright © 2020 Zyxel Communications Corporation...
- Page 2 Every effort has been made to ensure that the information in this manual is accurate. • More Information Go to https://businessforum.zyxel.com for product discussions. Go to support.zyxel.com to find other information on the Switch GS1100 Series User’s Guide...
- Page 3 Figures in this user guide may use the following generic icons. The Switch icon is not an exact representation of your device. Switch Generic Router Wireless Router / Access Point Generic Switch Smart TV Desktop Laptop IP Camera Printer Server GS1100 Series User’s Guide...
-
Page 4: Table Of Contents
Contents Overview Contents Overview User’s Guide ............................7 Getting to Know Your Switch ........................ 8 Hardware Installation and Connection ..................... 12 Hardware Panels ..........................19 Troubleshooting ............................ 28 GS1100 Series User’s Guide... - Page 5 3.1.3 Gigabit Ethernet Ports ......................20 3.1.4 PoE (GS1100-10HP) ........................ 21 3.1.5 SFP Slots (GS1100-24 and GS1100-10HP) ................21 3.2 Rear Panel ............................23 3.2.1 Grounding (GS1100-10HP) ....................24 3.2.2 Power Connection ........................ 26 3.2.3 LEDs ............................26 GS1100 Series User’s Guide...
- Page 6 Table of Contents Chapter 4 Troubleshooting..........................28 4.1 Power, Hardware Connections, and LEDs ................... 28 4.2 Improper Network Cabling and Topology .................. 29 Appendix A Customer Support ....................... 31 Appendix B Legal Information ......................37 Index ..............................47 GS1100 Series User’s Guide...
-
Page 7: User's Guide
User’s Guide... -
Page 8: Getting To Know Your Switch
H A P T E R Getting to Know Your Switch 1.1 Introduction The GS1100 Series consists of the following models: • GS1100-10HP • GS1100-16 • GS1100-24E • GS1100-24 The Switch is a 10/100/1000 Mbps multi-port switch that can be used to build high-performance switched workgroup networks. -
Page 9: Features
Ports 1 to 8 on the GS1100-10HP support both the IEEE 802.3af Power over Ethernet and IEEE 802.3at High Power over Ethernet standards. The ports supply power of up to 30W per Ethernet port and up to the total PoE power budget per Switch. GS1100 Series User’s Guide... -
Page 10: Backbone Example Application
It can alleviate bandwidth contention and eliminate server and network bottlenecks. All users that need high bandwidth can connect to high-speed department servers via the Switch. You can provide a super-fast uplink connection by using a Gigabit Ethernet or SFP port on the Switch. GS1100 Series User’s Guide... - Page 11 Chapter 1 Getting to Know Your Switch Figure 3 Bridging Example Application GS1100 Series User’s Guide...
-
Page 12: Hardware Installation And Connection
• The Switches with fans are not suitable for use in locations where children are likely to be present. To start using the Switch, simply connect the power cables and turn it on. 2.2 Hardware Installation See the following table for a comparison of the hardware installation methods of each GS1100 model: GS1100 Series User’s Guide... -
Page 13: Desktop Installation Procedure
Chapter 2 Hardware Installation and Connection Table 2 GS1100 Series Installation Comparison Table MODEL FEATURE GS1100-10HP GS1100-16 GS1100-24E GS1100-24 Desktop Device Wall-mountable Rack-mountable For GS1100-10HP, GS1100-16 and GS110-24E, you can place the Switch directly on top of your desk or have it wall-mounted. -
Page 14: Wall Mounting
GS1100-24E 120 mm 2.4.1 Installation Requirements • Distance above the floor: At least 1.8 m (5.9 feet) • Two M4 screws and a #2 Philips screwdriver • Two screw anchors (optional) Figure 5 GS1100-10HP screw specs GS1100 Series User’s Guide... - Page 15 Align the holes on the back of the Switch with the screws on the wall. Hang the Switch on the screws. Note: Make sure there is enough clearance between the wall and the Switch to allow ventilation. GS1100 Series User’s Guide...
-
Page 16: Rack Mounting
8). Follow the steps below to mount your Switch on a standard EIA rack using a rack-mounting kit. Note: Make sure there is enough clearance between each equipment on the rack for air circulation. 2.5.1 Installation Requirements • Two mounting brackets. GS1100 Series User’s Guide... -
Page 17: Precautions
Position a mounting bracket (that is already attached to the Switch) on one side of the rack, lining up the two screw holes on the bracket with the screw holes on the side of the rack. GS1100 Series User’s Guide... - Page 18 Using a #2 Philips screwdriver, install the M5 flat head screws through the mounting bracket holes into the rack. Note: Make sure you tighten all the four screws to prevent the Switch from getting slanted. Repeat steps to attach the second mounting bracket on the other side of the rack. GS1100 Series User’s Guide...
-
Page 19: Hardware Panels
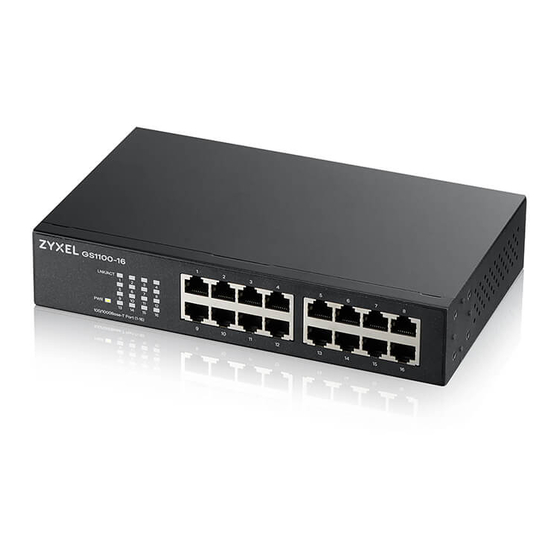
The GS1100-24 and GS1100-10HP have two SFP slots. Refer to Section 3.1.5 on page 21 for more information. The following figures show the front panels of the Switch. Figure 11 Front Panel GS1100-10HP GS1100-16 GS1100-24E GS1100-24 GS1100 Series User’s Guide... -
Page 20: Auto-Negotiating Ports
An auto-negotiating port can detect and adjust to the optimum Ethernet speed (10/100/1000 Mbps) and duplex mode (full duplex) of the connected device. An auto-crossover (auto-MDI/MDI-X) port automatically works with a straight-through or crossover Ethernet cable. GS1100 Series User’s Guide... -
Page 21: Poe (Gs1100-10Hp)
3.1.5.1 Transceiver Installation Use the following steps to install a transceiver. Attach an ESD preventive wrist strap to your wrist and to a bare metal surface. Align the transceiver in front of the slot opening. GS1100 Series User’s Guide... - Page 22 Note: Make sure the transceiver’s latch is pushed all the way down, so the transceiver can be pulled out successfully. Pull the latch, or use your thumb and index finger to grasp the tabs on both sides of the transceiver, and carefully slide it out of the slot. GS1100 Series User’s Guide...
-
Page 23: Rear Panel
3.2 Rear Panel The following figures show the rear panels of the Switch. The rear panels contain: The power receptacle is located on the rear panel of the Switch. Refer to the power supply requirements on the panel. GS1100 Series User’s Guide... -
Page 24: Grounding (Gs1100-10Hp)
Note: The specification for surge or ESD protection assumes that the Switch is properly grounded. Remove the M4 ground screw from the Switch’s rear panel. Secure a green or yellow ground cable (16 AWG or smaller) to the Switch's rear panel using the M4 ground screw. GS1100 Series User’s Guide... - Page 25 Make sure the grounding terminal is connected to the buildings grounding electrode and has an earth resistance of less than 10 ohms, or according to your country’s electrical regulations. Figure 21 Connecting to the Building’s Main Grounding Electrode GS1100 Series User’s Guide...
-
Page 26: Power Connection
Table 6 LED Descriptions: GS1100-10HP COLOR STATUS DESCRIPTION Green The Switch is receiving power from the power module in the power slot. The Switch is not receiving power from the power module in the power slot. GS1100 Series User’s Guide... - Page 27 There is no link or port, or the uplink port is shut down. Amber The uplink port is linking at 100 Mbps. Blinking The port is receiving or transmitting data at 100 Mbps. There is no link or port, or the uplink port is shut down. GS1100 Series User’s Guide...
-
Page 28: Troubleshooting
Inspect your cables for damage. Contact the vendor to replace any damaged cables. Turn the Switch off and on. Disconnect and re-connect the power adapter or cord to the Switch. If the problem continues, contact the vendor. GS1100 Series User’s Guide... -
Page 29: Improper Network Cabling And Topology
Table 4 on page 20 for more information on network cable types. Cabling Length If you use longer cables than are needed, transmission quality may be affected. The network cables should not be longer than the limit of 100 meters. GS1100 Series User’s Guide... - Page 30 A data path loop forms when there is more than one path or route between two networked data path computers. This results in broadcast storms that will severely affect your network performance. Make sure there are no loops in your network topology. GS1100 Series User’s Guide...
-
Page 31: Appendix A Customer Support
• Brief description of the problem and the steps you took to solve it. Corporate Headquarters (Worldwide) Taiwan • Zyxel Communications Corporation • http://www.zyxel.com Asia China • Zyxel Communications (Shanghai) Corp. Zyxel Communications (Beijing) Corp. Zyxel Communications (Tianjin) Corp. • https://www.zyxel.com/cn/zh/ India • Zyxel Technology India Pvt Ltd. • https://www.zyxel.com/in/en/ Kazakhstan •... - Page 32 • Zyxel Singapore Pte Ltd. • http://www.zyxel.com.sg Taiwan • Zyxel Communications Corporation • https://www.zyxel.com/tw/zh/ Thailand • Zyxel Thailand Co., Ltd. • https://www.zyxel.com/th/th/ Vietnam • Zyxel Communications Corporation-Vietnam Office • https://www.zyxel.com/vn/vi Europe Belarus • Zyxel BY • https://www.zyxel.by Belgium • Zyxel Communications B.V. • https://www.zyxel.com/be/nl/...
- Page 33 Appendix A Customer Support • https://www.zyxel.com/be/fr/ Bulgaria • Zyxel България • https://www.zyxel.com/bg/bg/ Czech Republic • Zyxel Communications Czech s.r.o • https://www.zyxel.com/cz/cs/ Denmark • Zyxel Communications A/S • https://www.zyxel.com/dk/da/ Estonia • Zyxel Estonia • https://www.zyxel.com/ee/et/ Finland • Zyxel Communications • https://www.zyxel.com/fi/fi/ France •...
- Page 34 • Zyxel Communications Poland • https://www.zyxel.com/pl/pl/ Romania • Zyxel Romania • https://www.zyxel.com/ro/ro Russia • Zyxel Russia • https://www.zyxel.com/ru/ru/ Slovakia • Zyxel Communications Czech s.r.o. organizacna zlozka • https://www.zyxel.com/sk/sk/ Spain • Zyxel Communications ES Ltd. • https://www.zyxel.com/es/es/ Sweden • Zyxel Communications • https://www.zyxel.com/se/sv/ Switzerland •...
- Page 35 Appendix A Customer Support Turkey • Zyxel Turkey A.S. • https://www.zyxel.com/tr/tr/ • Zyxel Communications UK Ltd. • https://www.zyxel.com/uk/en/ Ukraine • Zyxel Ukraine • http://www.ua.zyxel.com South America Argentina • Zyxel Communications Corporation • https://www.zyxel.com/co/es/ Brazil • Zyxel Communications Brasil Ltda. • https://www.zyxel.com/br/pt/ Colombia •...
- Page 36 Appendix A Customer Support Middle East • Zyxel Communications Corporation • https://www.zyxel.com/me/en/ North America • Zyxel Communications, Inc. – North America Headquarters • https://www.zyxel.com/us/en/ Oceania Australia • Zyxel Communications Corporation • https://www.zyxel.com/au/en/ Africa South Africa • Nology (Pty) Ltd. • https://www.zyxel.com/za/en/...
-
Page 37: Appendix B Legal Information
Model List: GS1100-16, GS1100-24, GS1100-24E United States of America The following information applies if you use the product within USA area. US Importer: Zyxel Communications, Inc, 1130 North Miller Street Anaheim, CA92806-2001, https://www.zyxel.com/us/en/ Federal Communications Commission (FCC) EMC Statement •... - Page 38 If your device has an earthing screw (frame ground), connect the screw to a ground terminal using an appropriate AWG ground wire. Do this before you make other connections. If your device has no earthing screw, but has a 3-prong power plug, make sure to connect the plug to a 3-hole earthed socket. GS1100 Series User’s Guide...
- Page 39 Symbolen innebär att enligt lokal lagstiftning ska produkten och/eller dess batteri kastas separat från hushållsavfallet. När den här produkten når slutet av sin livslängd ska du ta den till en återvinningsstation. Vid tiden för kasseringen bidrar du till en bättre miljö och mänsklig hälsa genom att göra dig av med den på ett återvinningsställe. GS1100 Series User’s Guide...
- Page 40 Appendix B Legal Information Environmental Product Declaration 台灣 以下訊息僅適用於產品銷售至台灣地區 • 這是甲類的資訊產品,在居住的環境中使用時,可能會造成射頻干擾,在這種情況下,使用者會被要求採取某些適當的對策。 安全警告 – 為了您的安全,請先閱讀以下警告及指示 : • 請勿將此產品接近水、火焰或放置在高溫的環境。 • 避免設備接觸 - 任何液體 - 切勿讓設備接觸水、雨水、高濕度、污水腐蝕性的液體或其他水份。 - 灰塵及污物 - 切勿接觸灰塵、污物、沙土、食物或其他不合適的材料。 • 雷雨天氣時,不要安裝,使用或維修此設備。有遭受電擊的風險。 • 切勿重摔或撞擊設備,並勿使用不正確的電源變壓器。 GS1100 Series User’s Guide...
- Page 41 Model List: GS1100-10HP United States of America The following information applies if you use the product within USA area. US Importer: Zyxel Communications, Inc, 1130 North Miller Street Anaheim, CA92806-2001, https://www.zyxel.com/us/en/ Federal Communications Commission (FCC) EMC Statement • This device complies with Part 15 of FCC rules. Operation is subject to the following two conditions: (1) This device may not cause harmful interference.
- Page 42 CLASS 1 LASER PRODUCT (for products with mini-GBIC slots or laser products, such as fiber-optic transceiver and GPON products). • PRODUCT COMPLIES WITH 21 CFR 1040.10 AND 1040.11. (for products with mini-GBIC slots or laser products, such as fiber-optic transceiver and GPON products) GS1100 Series User’s Guide...
- Page 43 Quando questo prodotto raggiunge la fine della vita di servizio portarlo a una stazione di riciclaggio. Al momento dello smaltimento, la raccolta separata del vostro prodotto e/o della sua batteria aiuta a risparmiare risorse naturali e a proteggere l'ambiente e la salute umana. GS1100 Series User’s Guide...
- Page 44 återvinningsstation. Vid tiden för kasseringen bidrar du till en bättre miljö och mänsklig hälsa genom att göra dig av med den på ett återvinningsställe. Environmental Product Declaration GS1100 Series User’s Guide...
- Page 45 Warranty Period) from the date of purchase. The Warranty Period varies by region. Check with your vendor and/or the authorized Zyxel local distributor for details about the Warranty Period of this product. During the warranty period, and upon proof of purchase, should the product GS1100 Series User’s Guide...
- Page 46 To obtain the services of this warranty, contact your vendor. You may also refer to the warranty policy for the region in which you bought the device at http://www.zyxel.com/web/support_warranty_info.php. Registration Register your product online at www.zyxel.com to receive email notices of firmware upgrades and related information. GS1100 Series User’s Guide...
-
Page 47: Index
CE EMC statement fiber cable certifications connecting viewing removal clearance freestanding installation Switch installation precautions contact information front panel customer support copyright crossover Ethernet cable customer support gigabit ports grounding for safety Data path loop disclaimer GS1100 Series User’s Guide... - Page 48 MDIX (Media Dependent Interface Crossover) mounting brackets safety precautions using the Switch safety warnings 38, 42 screw anchors using network applications SFP/SFP+ slot network cable Small Form-factor Pluggable (SFP) crossover straight-through Ethernet cable straight-through Switch GS1100 Series User’s Guide...
- Page 49 MultiSource Agreement (MSA) transceivers Troubleshooting Improper Network Cabling and Topology uplink connection super-fast ventilation holes wall mounting distance above the floor distance between holes warranty note GS1100 Series User’s Guide...
Need help?
Do you have a question about the GS1100 Series and is the answer not in the manual?
Questions and answers