Rinnai RU98i Installation Manual
Common vent installation
Hide thumbs
Also See for RU98i:
- Installation manual (32 pages) ,
- Installation and operation manual (107 pages) ,
- Service manual (60 pages)
Table of Contents
Advertisement
Available languages
Available languages
Common Vent Installation Manual
For the RU98i (REU-KB3237FFUD-US), RUC98i (REU-KBD3237FFUD-US), and
C199i (REU-KBD3237FFUDC-US) Condensing Water Heaters
This manual is a supplement to the appliance manual.
Additional information can be obtained from the Rinnai Water Heater Installation and
Operation Manual.
WARNING
— Do not store or use gasoline or other flammable vapors and liquids in the vicinity of this or any other
appliance.
— WHAT TO DO IF YOU SMELL GAS
Do not try to light any appliance.
Do not touch any electrical switch; do not use any phone in your building.
Immediately call your gas supplier from a neighbor's phone. Follow the gas supplier's instructions.
If you cannot reach your gas supplier, call the fire department.
— Installation and service must be performed by a licensed professional.
This entire manual must be left for the consumer. The consumer must read and
refer to this manual for proper operation and maintenance of the common vent system.
C
US
If the information in these instructions is not followed exactly, a fire or explosion
may result causing property damage, personal injury or death.
Certified to ANSI Z21.10.3 - CSA 4.3
For U.S. and Canadian Installations
1
Rinnai CVent
Advertisement
Chapters
Table of Contents

Related Manuals for Rinnai RU98i


Summary of Contents for Rinnai RU98i
- Page 1 For the RU98i (REU-KB3237FFUD-US), RUC98i (REU-KBD3237FFUD-US), and C199i (REU-KBD3237FFUDC-US) Condensing Water Heaters This manual is a supplement to the appliance manual. Additional information can be obtained from the Rinnai Water Heater Installation and Operation Manual. Certified to ANSI Z21.10.3 - CSA 4.3 For U.S.
-
Page 2: Table Of Contents
Canada ULC-S636-certified and tested venting (PPS) material from Ubbink, the same supplier for Rinnai's innovative line of concentric venting. The various sections are self locking and sealing and can be pushed together without use of cement or glue. -
Page 3: Safety Symbols
Specifications The RU98i and RUC98i units are certified for direct vent only. The C199i is certified for both direct vent and exhaust only with room air when installed in a commercial common vent application only. Water heaters using CVent will automatically de-rate according to the table below. -
Page 4: High Altitude Installation
1,123,440 892,800 Water Heater Installation For information regarding the installation of the RU98i (REU-KB3237FFUD-US), RUC98i (REU-KBD3237FFUD-US), and C199i (REU-KBD3237FFUDC-US) tankless water heaters, please reference the Installation and Operation Manual included with the respective tankless water heater. Set the water heater for “Long Vent” by adjusting the SW1 in DIPSW1 to the OFF Position. (Must be done on all tankless... -
Page 5: Parts/Kits
8" in-line 7 unit header kit CV8IL7USDV CV8IL7CADV 8" in-line 8 unit header kit CV8IL8USDV CV8IL8CADV Back-to-Back Configuration In-line Configuration These header kits include all of the components needed to fully assemble intake and exhaust headers. Extension kits are purchased separately. Rinnai CVent... - Page 6 8" in-line 6 unit header kit CV8IL6USRA CV8IL6CARA 8" in-line 7 unit header kit CV8IL7USRA CV8IL7CARA 8" in-line 8 unit header kit CV8IL8USRA CV8IL8CARA Back-to-Back In-line Configuration Configuration (Room air is only for C199i in Commercial Common Vent Applications) Rinnai CVent...
- Page 7 CVENT APPLIANCE ADAPTER WITH CHECK VALVE AND HOSE TRAP 790038 CVENT COMB. AIR COLLECTOR, 1 CONNECTION, D8 X L20 X D3 780044 *PPS kits and components are CVENT COMB AIR FLEX FITTING, D3 780050 certified for use in Canada CENTROCERIN LUBRICANT Rinnai CVent...
- Page 8 CVENT EXTENSION, D4 X L18 790035 CVENT APPLIANCE ADAPTER WITH CHECK VALVE AND 790038 CVENT COMB. AIR COLLECTOR, 2 CONNECTION, 780045 *PPS kits and components are CVENT COMB. AIR FLEX FITTING, D3 780050 certified for use in Canada CENTROCERIN LUBRICANT Rinnai CVent...
- Page 9 CVENT COLLECTOR, 1 CONNECTION, D8 X L20 X D4 (Exhaust) 790040 CVENT ELBOW D4 X 87° WITH CLEANOUT 790039 CVENT EXTENSION, D4 X L18 790035 *PPS kits and components are CVENT APPLIANCE ADAPTER (ROOM AIR), CHECK VALVE, HOSE TRAP certified for use in Canada CENTROCERIN LUBRICANT Rinnai CVent...
- Page 10 CVENT COLLECTOR, 2 CONNECTION, D8 X L20 790041 CVENT ELBOW D4 X 87° WITH CLEANOUT 790039 CVENT EXTENSION, D4 X L18 790035 *PPS kits and components are CVENT APPLIANCE ADAPTER (ROOM AIR), CHECK VALVE, HOSE TRAP certified for use in Canada CENTROCERIN LUBRICANT Rinnai CVent...
- Page 11 (Outer shell: available in PPtl or PPS) Cvent 8-in Wall Termination Kit (Combustion Air & Exhaust) 790004 (for use with PPtl and PPS material) Ø0.24” (Qty. 4) 31” Ø7.89” Ø12.2” Centrocerin lubricant Interior Slip (Material: Stainless Steel) Fit Wall Plate Rinnai CVent...
- Page 12 CVent 8in Vent Rain Cap CVent 8-in CVent 8in Vent (Exhaust) #790034 Bracket #790024 Distancer #790031 CVent Extension CVent Flat Roof D4xL18” #790035 / 791004PPS Flashing #790002 D8xL39” #790028 CVent 8-in Chase Cover #790030 CVent Pitched Roof Flashing (Including Storm Collar) #790003 Rinnai CVent...
-
Page 13: Sample Roof Installation
54. For clearances not specified in ANSI Z223.1/NFPA 54, clearances are in accordance with local installation codes and the requirements of the gas supplier. CVent 8-in Roof Termination Kit with PVC Adapter #7900057 / 791007PPS Cvent pitched roof moldable flashing #790003 Rinnai CVent... -
Page 14: Sample Horizontal Termination Installation
CVent Elbow D8 x 90 Field Supplied PVC Components Part Number: 790008 CVent Back-to-Back Kit Part Number: 790005 CVent Starter Kit Part Number:780037 Combustion Air PVC Adapter Kit Field Supplied PVC Components Complete Header Kit Pictured: U.S.-CV8BB8USDV Canada-CV8BB8CADV Rinnai CVent... -
Page 15: Sample Vertical Termination Installation
Complete Header Kit (B-to-B): Complete Header Kit (In-line): Vent termination per ANSI Z223.1/NFPA 54. For U.S.-CV8BB6USRA U.S.-CV8IL3USRA clearances not specified in ANSI Z223.1/NFPA 54, Canada-CV8BB6CARA Canada-CV8IL3CARA clearances are in accordance with local installation codes and the requirements of the gas supplier. Rinnai CVent... -
Page 16: Venting Guidelines
The water heater dip switch setting must always INFORMATION be set to long vent (SW1 in DIPSW1 should be set Unless recovering a tank, Rinnai recommends to OFF position). installing an MSB controller when common You must use vent components that are certified venting and where water heaters are in a manifold and listed with the water heater model. -
Page 17: Maximum Equivalent Vent Length
(REU-KBD3237FFUDC-US); Parallel Pipe Configuration RUC98i (Same Pressure Zone & Vertical or (REU-KBD3237FFUD); Face the Same Direction) Horizontal RU98i (Page 23) 2 to 7 (REU-KB3237FFUD-US) *Approved exhaust and intake diameter is 8”. CVent Termination Clearances Vertical Termination Clearances of Brackets There should be a minimum of 36” between exhaust and All supports such as wall brackets on the external intake terminations. - Page 18 NOTE: During colder weather when the exhaust temperature is much hotter than the outside air, the exhaust fumes condense producing water vapor. As a result a plume of water vapor may be seen leaving the exhaust. EXHAUST VENT MAXIMUM 20’ MINIMUM 36” COMBUSTION VENT Rinnai CVent...
-
Page 19: Combustion Air Requirements
Combustion Air Requirements (Commercial Applications with C199i Only) Common Vent Applications Utilizing Room Air Only the C199i (REU-KBD3237FFUDC-US) tankless water heater is certified to utilize room air in commercial applications using Rinnai Common Vent System. Common Vent Room Air Appliance Adapter Combustion Air Requirements This rack system requires adequate combustion air for ventilation and dilution of flue gases. - Page 20 12” (300mm) of the bottom, of clearances not specified in ANSI Z223.1/NFPA 54, the confined space. The openings shall clearances are in accordance with local installation communicate to the outside by one of two ways. codes and the requirements of the gas supplier. Rinnai CVent...
- Page 21 Note: If ducts are used, the cross sectional area of the duct must be greater than or equal to the re- quired free area of the openings to which they are connected. Rinnai CVent...
- Page 22 Option 1. Back to Back Installation Vertical Vent and Exhaust Horizontal Air Intake Common Vent Different Pressure Zone Combustion In common vent configurations utilizing different pressure zones, (roof-exhaust ATTENTION with sidewall-inlet or room air) exhaust MUST terminate vertically. Rinnai CVent...
-
Page 23: Exhaust Vent Termination Clearances
[2] Permitted only if veranda, porch, deck, or balcony is fully open on Clearance to opposite wall is 24 inches (60 cm). a minimum of two sides beneath the floor. Rinnai CVent... - Page 24 [2] Permitted only if veranda, porch, deck, or balcony is fully open on a Clearance to opposite wall is 24 inches (60 cm). minimum of two sides beneath the floor. Rinnai CVent...
- Page 25 Represents the exhaust vent of CVent common venting. (0.91 m) between 60" 36” terminals at different levels 36” (0.91 m) between terminals at same level Rinnai CVent...
-
Page 26: Cvent Maintenance Clearances
Room Air configurations will observe the same clearances referenced in these images Water Heater Clearances Follow the minimum clearances from the water heater. Indoor to top model to Non- RU98i, Combustibles Combustibles RUC98i, inches (mm) inches (mm) C199i to front Top of Heater... -
Page 27: Cvent Installation Instructions
Connect the open end of the elbow to the exhaust header. The same procedure may be used when substituting the room air adapter with the only exception being no flex connector or combustion air collector to connect when installing a C199I in a commercial common Elbow vent applications. Rinnai CVent... - Page 28 Fasten, secure, and support all vent materials using manufacturer and industry standards to avoid potential intake air leaks or blockage. Support horizontal vent runs a minimum of every 4 feet and all vertical vent runs a minimum of every 6 feet. Rinnai CVent...
- Page 29 Installation Instructions Refer to the Ubbink appendix of this manual for the vent system assembly instructions. Follow these Rinnai installation instructions in this manual in addition to the Ubbink vent system assembly instructions. Install the venting according to one of the 2 configurations below. Do not locate the common vent remotely from the water heaters.
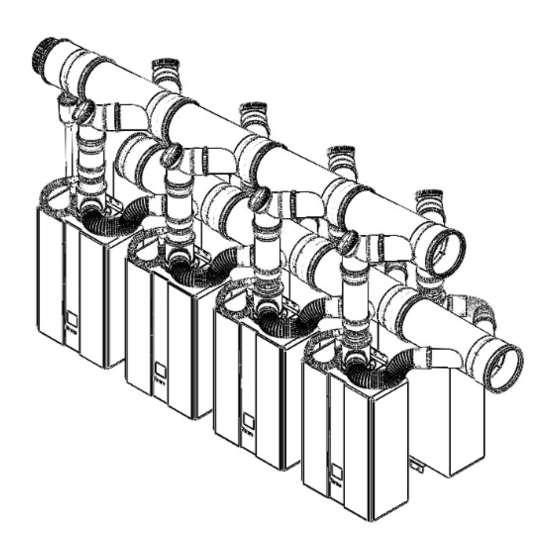
- Page 30 20.5” spacing (center line to center line) between water heaters. If a different spacing is needed, please contact Rinnai concerning your application. Rinnai recommends using our Tankless Rack System (TRS) which is designed for 20.5” spacing. Our engineered system is designed to make installation simple which greatly reduces labor time and the chance of miscalculations.
- Page 31 A condensate pump must be used if the condensate outlet is lower than the public sewage system. Rinnai recommends installing a condensate neutralizer which allows condensate to flow through neutralizing media to raise the pH of the condensate to a level that will help prevent corrosion of the drain and public sewer system.
-
Page 32: Common Header Check Valve Maintenance
When seal rings are damaged by the inspection these must be replaced, they cannot be repaired by using a silicon sealant or other. Note: Rinnai recommends replacing the check valve when replacing the water heater. Rinnai CVent... -
Page 33: Final Checklist
□ Inform the consumer if the isolation valves are not installed or if a water softening system is not installed. □ Verify that only models RU98i (REU-KB3237FFUD- US), RUC98i (REU-KBD3237FFUD-US), or C199i (REU-KBD3237FFUDC-US) are using the common vent system. □... -
Page 34: Ubbink Cvent Assembly Instructions
• Installation of components which are not part of the CVent system. • Subsequent damage, which occurred through further use of the CVent system despite known defects. • Intentional damage. These installation instructions should be kept with the appliances for maintenance Rinnai CVent... -
Page 35: A1 Preface
These installation instructions were compiled in accordance with the current state of technology and with the greatest care. They serve as a general guideline for the construction and operation of the CVent Common Vent System as supplied by Rinnai US, manufactured by Ubbink. If you have any further questions please contact our experts . -
Page 36: A2 General And Local Standards Information
All vent joints shall fully engage the male / female socket assembly • Installed vent system shall be clean and free of any foreign debris before operation. • Vent system shall be rigidly supported as instructed in this manual and include the appropriate 3° slope. Rinnai CVent... -
Page 37: A6 General Assembling Instructions
Pipes are always shortened on the male end. Never cut or modify formed vent components such as elbows or collectors. 1/4 “ ( Cut straight ,perpendicular to the tube and chamfer the edges approxi- mately 15° at 1/4”. Rinnai CVent... -
Page 38: A7 Condensate And Condensate Drain
• Conversions or change to the system components are not permissible without approval by Rinnai. • After assembly of the CVent Common Vent System a visual inspection of all seals must be completed. -
Page 39: A9 Vertical Termination Assembly
8”transparent vent pipe can be shortened using a fine tooth saw. Always deburr the edges. 8. Confirm the termination is in the vertical position then install item 7 (Termination Clamp) to the structure beneath the roof flashing. Rinnai CVent... -
Page 40: A10 Final Installation Check List
Both intake and exhaust terminations are appropriately positioned and comply with the manu- facturers installation instructions and local codes. The CVent Common Vent System Installation Instructions and the Appliance Installation In- structions have been secured to the system or provided to the end user. Rinnai CVent... -
Page 41: A11 Installation And Maintenance Of The Check Valves
The chimney is put into operation together with the heating appliance. • Regular cleaning and maintenance in accordance with valid country-specific regulations Note The check valves must be inspected for debris and checked annually, or after 4000 operation hours. Rinnai CVent... -
Page 42: A14 Application Manufacturer's Information
Nominal diameter of the selected system chimney: Constructor of the chimney with full name ((Stamp) legible and with signature): (Name) (Street address) (Signature) OEM Manufacturer identification Ubbink/Centrotherm Centrotec Sustainable AG Verhuellweg 9 6984AA Doesburg, The Netherlands Mail: rolux@ubbink.nl Rinnai CVent... - Page 43 NOTES Rinnai CVent...
-
Page 44: French Version
Manuel d’installation de ventilation commune Pour les chauffe-eau à condensation modèles RU98i (REU-KB3237FFUD-US), RUC98i (REU-KBD3237FFUD-US), et C199i (REU-KBD3237FFUDC-US) Ce manuel vient en supplément du manuel de l’appareil. Des informations supplémentaires peuvent être obtenues depuis le manuel d’installation et d’utilisation du chauffe-eau Rinnai. -
Page 45: Qualifications De L'installateur
L’installation est certifiée jusqu’à 10 200 pieds (3109 m) d’altitude. Référez-vous au manuel d’installation et d’utilisation du chauffe-eau sans réservoir (RU98i, RUC98i ou C199i) pour la sélection appropriée avec les micro-commutateurs Dip. Référez-vous à la section sur l’installation à altitude importante de ce manuel pour les valeurs de dépréciation. -
Page 46: Symboles De Sécurité
Spécifications Les produits RU98i et RUC98i sont certifiés pour une ventilation directe uniquement. Le C199i est certifié à la fois pour ventilation directe et évacuation seulement avec de l’air de la pièce en cas d’installation sur une application commerciale à ventilation commune uniquement. -
Page 47: Installations À Forte Altitude
Pour des installations de CVent à forte altitude vous devez vous assurer que les chauffe-eau sont correctement installés et configurés pour l’altitude à laquelle ils vont fonctionner. Pour avoir des informations sur la façon de configurer les chauffe-eau sans réservoir selon l’altitude, référez-vous aux manuels d’installation et d’utilisation des modèles RU98i (REU-KB3237FFUD-US), RUC98i (REU-KBD3237FFUD-US) et C199i (REU-KBD3237FFUDC-US). -
Page 48: Pièces/Kits
Configuration en ligne Ces kits de collecteur incluent tous les composants nécessaires pour réaliser totalement la mise en commun de l’admission d’air et de l’évacuation des gaz. Ces kits de ventilation commune sont achetés séparément des chauffe-eau. CVent de Rinnai... - Page 49 Kit de collecteur commun pour 7 en 8", en ligne CV8IL7USRA CV8IL7CARA Kit de collecteur commun pour 8 en 8", en ligne CV8IL8USRA CV8IL8CARA Configuration Configuration en ligne dos-à-dos (L’utilisation d’air de la pièce est uniquement pour les chauffe-eau C199i en applications commerciales avec ventilation commune) CVent de Rinnai...
- Page 50 ADAPTATEUR DE CVENT SUR CHAUFFE-EAU AVEC CLAPET ANTI-RETOUR ET PIÈGE À TUYAU 790038 une utilisation COLLECTEUR D'AIR DE COMBUSTION DE CVENT, 1 CONNEXION, D8 X L20 X D3 780044 au Canada RACCORD FLEXIBLE D’AIR DE COMBUSTION POUR CVENT, D3 780050 LUBRIFIANT CENTROCERIN CVent de Rinnai...
- Page 51 COLLECTEUR D'AIR DE COMBUSTION DE CVENT, 2 CON- *Les kits et composants en 780045 NEXIONS, D8 X L20 X D3 PPS sont certifiés pour une RACCORD FLEXIBLE D’AIR DE COMBUSTION POUR 780050 CVENT, D3 utilisation au Canada LUBRIFIANT CENTROCERIN CVent de Rinnai...
- Page 52 790040 certifiés pour COUDE DE CVENT D4 X 87° AVEC NETTOYAGE 790039 une utilisation EXTENSION DE CVENT, D4 X L18 790035 au Canada ADAPTATEUR DE CVENT SUR CHAUFFE-EAU AVEC CLAPET ANTI-RETOUR ET PIÈGE À TUYAU LUBRIFIANT CENTROCERIN CVent de Rinnai...
- Page 53 EXTENSION DE CVENT, D4 X L18 790035 *Les kits et composants en PPS ADAPTATEUR DE CVENT SUR CHAUFFE-EAU (AIR DE LA PIÈCE) AVEC sont certifiés pour une utilisation CLAPET ANTI-RETOUR ET PIÈGE À TUYAU au Canada LUBRIFIANT CENTROCERIN CVent de Rinnai...
- Page 54 Kit de terminaison de mur pour CVent 8" (Admission d’air et évacuation de combustion) 790004 (pour une utilisation avec matériau PPtl et PPS) Ø 0,24” (Qté 4) 31” Ø7,89” Ø12,2” Lubrifiant Centrocerin Lubrifiant (Matériau : Acier inox) Centrocerin CVent de Rinnai...
- Page 55 Réf. 790024 CVent 8" Réf. 790031 Extension CVent Solin CVent pour toit D4xL18” Réf. 790035 / plat Réf. 790002 791004PPS Couvercle CVent D8xL39” Réf. 790028 enchâssé Réf. 790030 Solin CVent pour toit incliné (incluant une mitre) Réf. 790003 CVent de Rinnai...
-
Page 56: Exemple D'installation Sur Toit
Z223.1/NFPA 54, ils devront être en conformité avec les normes locales d’installation et les exigences du fournisseur de gaz. Kit CVent de terminaison 8" avec adaptateur PCV Réf. 7900057 / 791007PPS Solin CVent moulable pour toit incliné (Réf. 790003 CVent de Rinnai... -
Page 57: Exemple D'installation De Terminaison Horizontale
N° de pièce : 790008 Kit CVent dos-à-dos N° de pièce : 790005 Kit de démarrage CVent N° de pièce : 780037 Kit d’adaptateur PCV d’air de combustion Composants PCV de fourniture locale Kit de collecteur complet illustré : USA-CV8BB8USDV Canada-CV8BB8CADV CVent de Rinnai... -
Page 58: Exemple D'installation De Terminaison Verticale
Terminaison de ventilation conforme ANSI Z223.1/NFPA 54. U.S.-CV8BB6USRA U.S.-CV8IL3USRA Pour des dégagements non spécifiés dans ANSI Z223.1/ Canada-CV8BB6CARA Canada-CV8IL3CARA NFPA 54, ils devront être en conformité avec les normes lo- cales d’installation et les exigences du fournisseur de gaz. CVent de Rinnai... -
Page 59: Consignes Pour La Ventilation
• La configuration de micro-commutateur Dip du chauffe-eau À moins de récupérer un réservoir, Rinnai recommande doit toujours être pour une ventilation longue (SW1 du bloc d’installer un contrôleur MSB en cas de ventilation DIPSW1 doit être positionné sur OFF). -
Page 60: Longueur De Ventilation Équivalente Maximâle
DES DEUX) ÉVACUATION - NFPA 54. Pour des dégagements non spécifiés PPTL/PPS dans ANSI Z223.1/NFPA 54, ils devront être en con- formité avec les normes locales d’installation et les exigences du fournisseur de gaz. ADMISSION - PCV CVent de Rinnai... -
Page 61: Dégagements De Terminaison Du Cvent
élevée que l’air ambiant extérieur, les fumées d’échappement provoquent une condensation formant de la vapeur d’eau. Il peut en résulter un panache de vapeur visible en sortie d’évacuation. VENTILATION D’ÉVACUATION MAXIMUM 20’ MINIMUM 36” VENTILATION D’AIR DE COMBUSTION CVent de Rinnai... - Page 62 Applications à ventilation commune utilisant l’air de la pièce Seul le chauffe-eau sans réservoir C199i (REU-KBD3237FFUDC-US) est certifié pour utiliser de l’air de la pièce dans des utilisations commerciales avec un système de ventilation commune Rinnai. Adaptateur de chauffe-eau à...
-
Page 63: Besoins En Air De Combustion
Terminaison de ventilation conforme ANSI Z223.1/NFPA 54. l’extérieur de l’une de deux façons. Pour des dégagements non spécifiés dans ANSI Z223.1/ NFPA 54, ils devront être en conformité avec les normes locales d’installation et les exigences du fournisseur de gaz. CVent de Rinnai... - Page 64 (soit 1 100 mm par kW/h) de la puissance totale mine que verticalement (Référez-vous au manuel Rinnai cumulée de tous les appareils que contient l’espace de ventilation commune pour plus de détails).
- Page 65 Air de combustion Dans les configurations de ventilation commune avec zones de pression différentes ATTENTION (évacuation par le toit / admission par mur latéral ou air de la pièce), l’évacuation DOIT se terminer verticalement. CVent de Rinnai...
-
Page 66: Dégagements De Terminaison De Ventilation D'évacuation
[2] Autorisé seulement si véranda, porche, plate-forme ou balcon ont une Le dégagement par rapport à un mur opposé est de 24 pouces (60 cm). ouverture complète au moins sur deux côtés en-dessous de l’étage. CVent de Rinnai... - Page 67 [2] Autorisé seulement si véranda, porche, plate-forme ou balcon ont une ouverture Le dégagement par rapport à un mur opposé est de 24 pouces (60 cm). complète au moins sur deux côtés en-dessous de l’étage. CVent de Rinnai...
- Page 68 Représente la ventilation d’évacuation d’une ventilation commune CVent. (0,91 m) entre des terminaisons 60" 36” à des niveaux différents 36” (0,91 m) entre des terminaisons au même niveau CVent de Rinnai...
-
Page 69: Dégagements Pour Interventions De Terminaison Du Cvent
Dégagements de chauffe-eau Respectez les dégagements minimaux pour le chauffe-eau. Modèles to top Vers le haut Par rapport à des Par rapport à des d’intérieur RU98i, combustibles, en non-combustibles, RUC98i, C199i pouces (mm) en pouces (mm) Haut du chauffe-eau 6 * (152) 2 *(51) Vers l’avant... -
Page 70: Instructions D'installation Du Cvent
à brancher pour l’installation Coude d’un C199i dans des applications commer- ciales à ventilation commune. CVent de Rinnai... - Page 71 Attachez, fixez et supportez tous les matériels de ventilation en utilisant les normes de constructeur et de l’industrie pour éviter d’avoir potentiellement pour l’admission d’air des fuites ou un blocage. Supportez les tronçons horizontaux de ventilation au moins tous les 120 cm, et tous ses tronçons verticaux au moins tous les 180 cm. CVent de Rinnai...
- Page 72 Référez-vous à Ubbink dans l’Annexe de ce manuel pour les instructions de montage du système de ventilation. Suivez ces instructions d’installation de Rinnai de ce manuel en plus des instructions de montage du système de ventilation d’Ubbink. Installez la ventilation en conformité avec l’une des deux configurations qui suivent. Ne placez pas la ventilation commune à distance des chauffe-eau (Les configurations pour air de la pièce on les mêmes instructions, sauf en ce qui concerne leur admission d’air).
- Page 73 écartement de 20,5" ou 52 cm (entraxe) d’un chauffe-eau au suivant. Si un écartement différent est nécessaire, veuillez contacter Rinnai au sujet de votre application. Rinnai recommande d’utiliser votre système TRS sans réservoir qui a été conçu pour un écartement de 20,5".
- Page 74 Une pompe à condensats doit être utilisée si la sortie des condensats est plus basse que le système d’égouts publics. Rinnai recommande d’installer un neutraliseur de condensats qui permet de leur faire traverser une couche de neutralisation afin de remonter leur pH et aider à éviter de la corrosion du drainage et du système public d’égoûts.
-
Page 75: Entretien De Clapet Anti-Retour De Collecteur Commun
Qaund des bagues d’étanchéité sont endommagées par l’inspection il faut les remplacer, on ne peut pas les réparer en utilisant du produit d’étanchéité aux silicones ou d’autres moyens. Remarque : Rinnai recommande de changer le clapet anti-retour quand vous remplacez le chauffe-eau correspondant. CVent de Rinnai... -
Page 76: Liste Des Contrôles Finaux
Si un système MSB est présent, vérifiez qu’il est correctement installé selon les consignes de d’utilisation des chauffe-eau pour les consignes Rinnai, que tous les câbles sont connectés et que permettant leur installation correcte. le positionnement des micro-commutateurs Dip est correct. -
Page 77: Instructions D'installation Du Cvent Ubbink
• Installation de composants qui ne font pas partie du système Cvent. • Dommages ultérieurs provoqués par la continuation d’utilisation du système Cvent malgré la connaissance de l’existence de défauts. • Dommages intentionnels. Ces instructions d’installation sont à conserver avec les appareils pour leur entretien. CVent de Rinnai... -
Page 78: A1 Préface
Elles servent comme guidage général pour la construction et la mise en fonctionnement du système de ventilation commune, fourni par Rinnai US et fabriqué par Ubbink. Si vous aviez des questions supplémentaires n’hésitez pas à consulter nos experts. -
Page 79: A2 Informations Sur Les Normes Générales Et Locales
Le système de ventilation installé doit être propre et exempt de tous débris étrangers avant la mise en service. • Le système de ventilation doit être supporté de façon rigide comme c’est expliqué dans ce manuel, et comporter la pente de 3° appropriée. CVent de Rinnai... -
Page 80: A6 Instructions Générales De Montage
Ne coupez ou ne modifiez jamais des composants de ventilation comme les 1/4 “ ( coudes ou collecteurs. Coupez droit, perpendiculairement au tube, et chanfreinez les bords de 15° envi- ron sur 1/4”. Biseau pour tuyau PP CVent de Rinnai... -
Page 81: A7 Condensats Et Drainage De Condensats
• Des conversions ou changements sur les composants du système ne sont pas permis sans une autorisation de Rinnai. • Après le montage du système de ventilation commune CVent, une inspection visuelle de tous les joints doit être effectuée. -
Page 82: A9 Ensemble De Terminaison Verticale
8" peut être raccourci avec une scie à dents fines. Ébarbez toujours les bords coupés. Confirmez que la terminaison est bien en position verticale puis installez la pièce (Serrage de terminaison) sur la structure en-dessous du solin de toit. CVent de Rinnai... -
Page 83: A10 Liste Des Contrôles Finaux D'installation
Les terminaisons d’admission et d’évacuation sont correctement positionnées et sont en conformité avec les instructions d’installation des constructeurs et les normes locales. Les instructions d’installation de la ventilation CVent et celles des appareils ont été apposées sur le système ou fournies à l’utilisateur final. CVent de Rinnai... -
Page 84: A11 Installation Et Entretien Des Clapets Anti-Retour
Un nettoyage et un entretien régulier sont à effectuer en conformité avec les réglementations en vigueur dans le pays. Remarque Les clapets doivent être inspectés pour la présence éventuelle de débris et vérifiés annuellement, ou après 4 000 heures de fonctionnement. CVent de Rinnai... -
Page 85: A14 Informations Du Constructeur Sur L'application
Constructeur de la cheminée, avec mention lisible du nom complet (ou tampon) et signature (Nom) (Adresse complète) (Signature) Identification du constructeur de matériel d’origine Ubbink/Centrotherm Centrotec Sustainable AG Verhuellweg 9 6984AA Doesburg, Pays-Bas Adresse électronique : rolux@ubbink.nl CVent de Rinnai... - Page 86 NOTES CVent de Rinnai...
- Page 87 NOTES CVent de Rinnai...
- Page 88 Toll-Free: 1-800-621-9419 • Phone: 678-829-1700 • www.rinnai.us ©2015 Rinnai America Corporation. Rinnai is continually updating and improving products; therefore, specifications are subject to change without prior notice. Local, state, provincial, federal and national fuel gas codes must be adhered to prior to and upon installation.
Need help?
Do you have a question about the RU98i and is the answer not in the manual?
Questions and answers