Spektrum DX8 Instruction Manual
8-channel dsm radio system with integrated telemetry for airplanes and helicopters
Hide thumbs
Also See for DX8:
- Instruction manual (208 pages) ,
- Setup (7 pages) ,
- Instruction manual (42 pages)
Table of Contents
Advertisement
Advertisement
Table of Contents

Related Manuals for Spektrum DX8


Summary of Contents for Spektrum DX8
- Page 2 A\ WARNING AGAINST COUNTERFEIT PRODUCTS Thank You for purchasing a genuine Spektrum Product. Always purchase products from a Horizon Hobby, Inc. authorized dealer to ensure authentic high-quality Spektrum product. Horizon Hobby, Inc. disclaims all support and warranty with regards, but not limited to, compatibility and performance of counterfeit products or products claiming compatibility with DSM2 or Spektrum.
-
Page 3: Table Of Contents
An easy-to-use rolling selector combined with intuitive software makes setting up Trainer........................... 20 models quick and easy. The DX8 is SD-card compatible allowing an infinite number of models System Settings........................20 to be stored and transferred. Plus firmware updates can be downloaded from the Transfer SD Card........................ - Page 4 •2048 resolution airplanes or mini and micro helicopters). Flying receivers designed for parkflyers in larger aircraft •Telemetry warning system could cause loss of connection. Note: The DX8 is NOT compatible with the original DSM AR600 •Sophisticated Airplane and Helicopter programming receiver.
-
Page 5: Charging Your Transmitter
12-volt AC to DC power supply in for 10 to 12 hours to fully charge the battery. A CAUTION: Never plug in a peak detection or fast charger into your DX8 as this could damage the internal charge circuit. Use only a 12V DC source. -
Page 6: Battery And Charging Precautions And Warnings
Always keep batteries and charger away from any material that could be affected by heat (such as ceramic and tile), as they can get hot. Always end the charging process if the charger or battery becomes hot to the touch or starts to change form (swell) during the charge process. SPEKTRUM DX8 • RADIO INSTRUCTION MANUAL... -
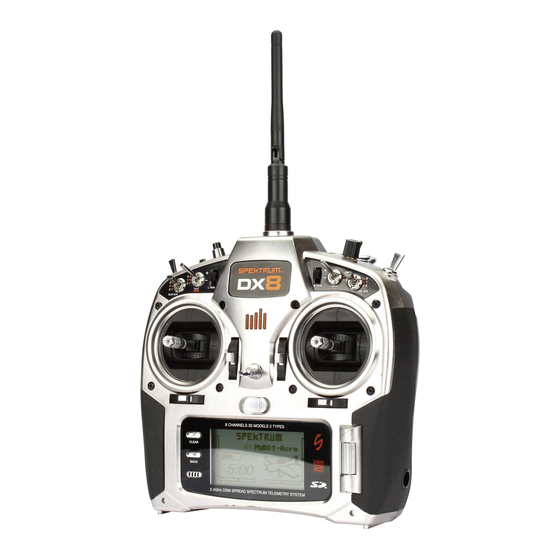
Page 7: Transmitter Identification Mode 2
If the transmitter antenna or related components become damaged the output strength can be severely impeded which could lead to a crash, injury, and property damage. Handle Trainer/Timer Bind Button SPEKTRUM DX8 • RADIO INSTRUCTION MANUAL... - Page 8 SPEKTRUM DX8 • RADIO INSTRUCTION MANUAL...
-
Page 9: Digital Trims
Charge Jack The DX8 utilizes a roller that can be rotated or pressed and two buttons, Back and ClearThe DX8 features a No RF output warning. If the 2.4GHz band is full, it's possible that the DX8 may Throttle Trim not be able to find open channels when the transmitter is first turned on. - Page 10 •8-channel full range receiver •MultiLink receiver technology •I ncl udes one i nternal and one remote receiver •SmartSafe™ failsafe system•hold Last Command failsafe •Preset Failsafe •QuickConnect™ with Brownout Detection •Flight Log compatible (optional) Aileron Trim Rolling Selector SPEKTRUM DX8 • RADIO INSTRUCTION MANUAL...
-
Page 11: Binding
Resolution: 2048 recommended current for a single heavy-duty servo/battery lead is 3 Frame Rate: 11ms when paired with the DX7se or DX8 Compatibility: All amps. Short-duration current spikes of up to 5 amps are acceptable. If DSM2 aircraft transmitters and module systems... -
Page 12: Failsafe
CAUTION: Make sure the aircraft is restrained on the ground. If failsafe is SmartSafe Failsafe SmartSafe Failsafe is always active in both hold last command failsafe and in preset failsafe. SmartSafe is a safety feature on the throttle channel only that offers the following benefits: SPEKTRUM DX8 • RADIO INSTRUCTION MANUAL... - Page 13 •Prevents electric motors from operating when the receiver only is turned on (no signal present) •Prevents the speed controller from arming until the throttle is moved to low throttle position after connection is made not set, your aircraft might advance to mid or full throttle. SPEKTRUM DX8 • RADIO INSTRUCTION MANUAL...
- Page 14 Functions Mode. The on and the main or System Setup Mode telemetry screen contains programming displayed, press the that is generally used roller. The Function when initially setting up a list displays. model, and seldom SPEKTRUM DX8 • RADIO INSTRUCTION MANUAL...
-
Page 15: Range Testing
You can turning on the transmitter. store up to 30 models in the DX8's model memory. You can access When System Setup appears the model select function through the System Setup mode or through on the screen, release the roller. - Page 16 System Setup Mode. Highlight Model Select then press the roller to To directly access the Model Select Screen any time from the Main access the function. Screen or the Telemetry screen, press the Clear and Back buttons SPEKTRUM DX8 • RADIO INSTRUCTION MANUAL...
-
Page 17: Model Select
You can return lo the System Setting screen at anytime by pressing the Back button on the transmitter once. To return to the Main screen press the Back button on the transmitter twice or press and hold the Roller lor more than three seconds. SPEKTRUM DX8 • RADIO INSTRUCTION MANUAL... - Page 18 (Heli to Acro or Acro to Heli) all current programming in the selected model memory will reset to the factory default settings. All Confirm Model TypelitiS previous settings will be lost. DATA MILL BE RESET NO lYESl SPEKTRUM DX8 • RADIO INSTRUCTION MANUAL...
-
Page 19: Model Name
The DX8 is now in System Setup MODEL Mode. Rotate the roller to highlight Wing Type then press to access the function. The following _________________screen appears:__________________ Rotate the roller to Rotate the roller to highlight Model Name then press to access the function. The... -
Page 20: Swash Type
Access the Wing Type Function Press and hold the roller while TrainerFlkp Aux1 turning on the transmitter. When System Setup appears on the Mode:iMixiTnFT screen, release the roller. The DX8 is now in System Setup Mode. Gear:Gear Aux2 Rotate the roller to select... - Page 21 CCPM. Select the correct swashplate type to match the specific helicopter before doing any other cyclic programming e.g., Pitch Curve, Travel Adjust, Sub- Trim, etc.). If in doubt consult your helicopter's manual for correct swashplate mixing. SPEKTRUM DX8 • RADIO INSTRUCTION MANUAL...
-
Page 22: F-Mode Setup
Flight Mode Switch, Hold and the Governor switch. To Access the F-Mode Setup Function Press and hold the roller while turning on the transmitter. When System Setup appears on the screen, release the roller. The DX8 is now in System Setup Mode. Aux 2,... -
Page 23: Model Reset
Trim Setup and cannot be recovered. To Access the Model Reset Function Press and hold the roller while turning on the transmitter. When System Setup appears on the screen, release the roller. The DX8 is ModejReset now in System Setup Mode. - Page 24 Verify that the current model displayed on this screen is the model you wish to copy. If not then see Spektrum's TM1000 telemetry module is compatible with all Spektrum and JR receivers that page 14 Model Select to access the desired model. Rotate the roller to select the model memory (1 - have a Data (Flight Log) port including: telemetry module.
- Page 25 So it's important to experiment with different positions. RPM (optional sensor sold separately) Two RPM sensors are available: SPMA9569 for nitro and gas engines, SPMA9558 for brushless electric motors. SPEKTRUM DX8 • RADIO INSTRUCTION MANUAL...
-
Page 26: Telemetry
RPM. Additionally, you can use this sensor as an RPM pickup on any rotating gear/ collar or shaft that has a steel setscrew or other SPEKTRUM DX8 • RADIO INSTRUCTION MANUAL... - Page 27 5 mm of the rotating steel object. SPEKTRUM DX8 • RADIO INSTRUCTION MANUAL...
-
Page 28: Frame Rate
Run the motor and the RPM should register on the screen. Use Slave mode when flying with the DX8 as a slave when the master radio has The RED LED on the TM1000 indicates the sensor is picking up properly. - Page 29 Press and hold the roller while turning on the transmitter. When System Setup appears on the John Adams screen, release the roller. The DX8 is now in System Setup Mode. To program a User Name In the Systems Settings screen rotate the roller to highlight User Name then press.
-
Page 30: Transfer Sd Card
CANCEL TRANSFER SD CARD The SD Card allows the following: •Importing (copying) a single model from one DX8 to another •Importing (copying) all models from one DX8 to another. •Exporting (transferring) a single model to another DX8 SPEKTRUM DX8 • RADIO INSTRUCTION MANUAL... -
Page 31: Function Mode
Moving the stick or switch in the FUNCTION MODE The DX8 organizes the programming screens in two separate categories: System Setup Mode and Functions Mode. Function Mode programming adjusts a model's flight characteristics at the field. - Page 32 Highlight the channel then press the roller. Rotate the roller to access the channel you wish Highlight the values at the bottom of the to adjust. Press to accept. screen. When you center the corresponding stick SPEKTRUM DX8 • RADIO INSTRUCTION MANUAL...
- Page 33 Dual Rates and exponentials are available on the aileron, elevator and rudder channels. You can assign them to numerous switches including the flight mode switch. Dual Rate Affects the overall travel which in turn affects SPEKTRUM DX8 • RADIO INSTRUCTION MANUAL...
- Page 34 Highlight the channel then press the roller. Rotate the roller to access the channel you wish to adjust. Press the roller to accept. control response sensitivity equally throughout the range of that channel. Reducing the dual rate reduces the maximum control rate as well as overall sensitivity. SPEKTRUM DX8 • RADIO INSTRUCTION MANUAL...
-
Page 35: Differential
F Mode - Flight Mode switch AUX 2 - Aux 2 switch Mix - Mix switch Press the roller Sw: F Mode to accept the desired switch. The differential adjustment screen displays. SPEKTRUM DX8 • RADIO INSTRUCTION MANUAL... -
Page 36: Throttle Cut
[Njj-1eftsjf.tie screen Curve (km High LOW 2S% EOK Expo Switch flil P/R Repeat this for all desired points. Note: if you select a switch position in Throttle Curve, move the switch to the SPEKTRUM DX8 • RADIO INSTRUCTION MANUAL... -
Page 37: Flap System
Highlight the desired flight mode at the top of the screen then press the roller to select. The selected flight mode will darken confirming your selection. N= Normal 1 = Stunt 1 2= Stunt 2 H= hold The DX8 flap system offers up to three programmable flap and elevator positions (normal, mid and land). You can assign them to a variety of switches. You can program a Speed function to slow flap and elevator compensation travel for a scale effect. -
Page 38: Swashplate
To achieve the correct travel direction for Aileron, Elevator and Pitch, first use the reversing function to set the servo values increase value, the direction on the aileron, elevator and pitch travel of all three SPEKTRUM DX8 • RADIO INSTRUCTION MANUAL... -
Page 39: Governor
You Function list can adjust Governor displays. values Rotate the roller to increments to allow highlight Governor precise then press to access adjustments. Also, that screen. you can program SPEKTRUM DX8 • RADIO INSTRUCTION MANUAL... - Page 40 Select the desired switch to control the governor then press the roller access Governor screen. Hold: Ch: Aux2 Sw:F Mode Assigning Channel- (Output) In this screen you can assign the receiver channel SPEKTRUM DX8 • RADIO INSTRUCTION MANUAL...
-
Page 41: Pitch Curve
Expo function is available that smooths out the curve. Program Pitch Curves With the transmitter on main telemetry screen displayed, press the roller. The Function list displays. ^Selecting a Flight Mode SPEKTRUM DX8 • RADIO INSTRUCTION MANUAL... - Page 42 SPEKTRUM DX8 • RADIO INSTRUCTION MANUAL...
- Page 43 SPEKTRUM DX8 • RADIO INSTRUCTION MANUAL...
- Page 44 Move the flight mode switch in the position you wish to adjust. Rotate the roller to highlight one of the five available pitch curve values (Low, 25%, 50%,75%, High). Press to access that value. SPEKTRUM DX8 • RADIO INSTRUCTION MANUAL...
- Page 45 Mix screen appears. Highlight EXPO then press the roller to access the Pitch Curve Expo function. Select Inh or Act to inhibit or SPEKTRUM ftjRAD rRU CTON activate the...
-
Page 46: Mixing (Air)
Rotate the roller to highlight Sw: at the rudder mix. If you select On, the mix will properly and in the correct direction by The DX8 offers eight mixes in airplane model bottom of the screen. Press the roller to always be on. - Page 47 Rotate the roller to highlight the right INH press the roller to accept that slave then press the roller to access the slave channel. channel. Rotate the roller to select the desired slave channel. When selected, SPEKTRUM DX8 • RADIO INSTRUCTION MANUAL...
- Page 48 Positive + and negative - values are aileron to rudder mix. If you select On, the available shifting the offset in either mix will always be on. direction. Press the roller to accept the offset value. SPEKTRUM DX8 • RADIO INSTRUCTION MANUAL...
-
Page 49: Tail Curve For Non-Heading Hold Gyro Use Only
Note: Only use tail curves when the gyro is in the conventional gain (non- heading hold) mode. To Program Tail Curves With the transmitter on and the main or telemetry screen displayed, press the roller. The Function list displays. SPEKTRUM DX8 • RADIO INSTRUCTION MANUAL... - Page 50 |MHIW Governor F'itoh Curve hail Curve Mixing Rotate the roller to highlight Tail Curve then press. I 00 o y. 2£jt High Expo Tail - i 00 I ^-SO Selecting a Flight Mode Highlight SPEKTRUM DX8 • RADIO INSTRUCTION MANUAL...
- Page 51 Rotate the roller to adjust the selected point to the desired output position. Note the position on the graph at the left of the screen. SPEKTRUM DX8 • RADIO INSTRUCTION MANUAL...
-
Page 52: Mixing (Heli)
MIXING The DX8 offers eight mixes in helicopter model type. You can program a cyclic- to-throttle mix to advance the throttle when aileron, elevator and or rudder inputs are given. This prevents rpm decay during cyclic and rudder inputs. A Swashplate Adjusting Cyclic Mix Rates Rotate the roller to highlight the SPEKTRUM DX8 •... - Page 53 Move the programmed cyclic or rudder channel noting the throttle position. The throttle position should increase. If it decreases then the opposite value (positive vs. negative) is needed. SPEKTRUM DX8 • RADIO INSTRUCTION MANUAL...
- Page 54 Adjust the rate for all desired Swashplate flX3 properly and in the correct direction by IT n—:——i values. placing the flight mode switch in one of N! IIEIH the active positions. Then, move the itself. With helicopters Programmable SPEKTRUM DX8 • RADIO INSTRUCTION MANUAL...
- Page 55 If no boxes are highlighted, the function is always off. N You should verify that the programmable mix is working properly and in the correct direction. Place the flight mode switch in one of the active positions. SPEKTRUM DX8 • RADIO INSTRUCTION MANUAL...
- Page 56 Rotate the roller to adjust the value. Positive + and Also, you can program the channel the negative - values shift the offset in either direction. gyro gain is controlling. The DX8 displays Press the roller to accept. gyro gain values as N for Normal gain Trim Include and a T for tail lock (heading hold).
- Page 57 With the transmitter on and the main or telemetry screen displayed, press the roller. The Function list displays. Activating Trim Include Rotate the roller to highlight Trim then press. Press the roller to toggle between INH and ACT. SPEKTRUM DX8 • RADIO INSTRUCTION MANUAL...
-
Page 58: Gyro
7 0 . 0 X 1 70. 0 X Ch: Gear________Su: Gyro TIMER The DX8 Timer function allows you to program a Count Down timer or Stop Watch (count up timer) to display on the main screen. An alarm sounds when the programmed time is reached. - Page 59 Timer DSl Internal: RESET 0:20:52 Select Inhibit, Count Down or Stop Watch. Press the roller to accept. To Select the Timer Start Method SPEKTRUM DX8 • RADIO INSTRUCTION MANUAL Rotate the roller to highlight Star SPEKTRUM DX8 • RADIO INSTRUCTION MANUAL...
- Page 61 Rotate the roller to select the desired press to access. You can highlight the Start method (Trainer, Throttle, Throttle seconds or minutes. Press the roller to 1-Time, L Trim, R Trim). Press to accept. SPEKTRUM DX8 • RADIO INSTRUCTION MANUAL...
- Page 62 Rotate the roller to highlight Stick then press to access the Stick values. You can adjust the value from 0 to 100%. This correlates to the actual T throttle stick position. SPEKTRUM DX8 • RADIO INSTRUCTION MANUAL...
- Page 63 SPEKTRUM DX8 • RADIO INSTRUCTION MANUAL...
- Page 64 SPEKTRUM DX8 • RADIO INSTRUCTION MANUAL...
- Page 65 To Reset the Internal Timer There are a couple of ways to reset the internal timer. Rotate the roller to highlight Internal: Reset then press the roller to reset the internal timer to 0:00:00 SPEKTRUM DX8 • RADIO INSTRUCTION MANUAL...
- Page 66 Internal: RESET I 0:09:40" SPEKTRUM DX8 • RADIO INSTRUCTION MANUAL...
-
Page 67: Monitor
Rotate the roller to highlight Monitor then press to access. MONITOR The Monitor screen To reset the Count Down or Stop Watch timer on displays the servo button. positions for each channel graphically numerically. This is useful to verify programming functions, trim settings,... - Page 68 Monitor). To Access Monitor screen With the transmitter on and the main or telemetry screen displayed, press the roller. The Function list will display. SPEKTRUM DX8 • RADIO INSTRUCTION MANUAL...
-
Page 69: Troubleshooting Guide
TROUBLE SHOOTIN G GUIDE... - Page 70 • Receiver quits responding during operation •Inadequate battery voltage •Charge batteries. Spektrum receivers require at least 3.5V to operate. An inadequate power supply can allow voltage to momentarily drop below 3.5V and cause the receiver to brown out and reconnect.
- Page 71 eral Note s__________________ Radio controlled models are a great source of pleasure. Unfortunately, they can also pose a potential hazard if not operated and maintained properly. It is imperative to install your radio control system correctly. Additionally, your level piloting competency must be high enough to...
- Page 72 Carefully follow the directions warnings for this and any optional support equipment (chargers, SPEKTRUM DX8 • RADIO INSTRUCTION MANUAL...
- Page 73 rechargeable battery packs, etc.) that you use. This model is controlled by a radio signal that is subject to interference from many sources outside your control. This interference cause momentary loss of control so it necessary to always keep safe distance directions around...
-
Page 74: General Information
SPEKTRUM DX8 • RADIO INSTRUCTION MANUAL•Avoid operating your model airports. in the street where injury or damage can occur. •Never operate the model out into e.Do not hesitate to ask for assistance in complying with these guidelines at the airport traffic the street or populated areas for any reason. - Page 75 SPEKTRUM DX8 • RADIO INSTRUCTION MANUAL CONTRACT, WARRANTY NEGLIGENCE, OR STRICT LIABILITY. Further, in no event shall the liability of Horizon exceed the individual price of the Product on which liability is asserted.
- Page 76 Antenna Separation Distance issue with a battery, please contact the appropriate When operating your Spektrum transmitter, please be sure to maintain a separation distance of Horizon Product Support office. at least 5 cm between your body (excluding fingers, hands, wrists, ankles and feet) and the antenna to meet RF exposure safety requirements as determined by FCC regulations.
- Page 77 Conformity with ISO'IEC 17050-1 odance MECHANICAL CONVERSION LV RO 8001FR Product(s) : Item Number(s) Equipmen t class: Spektrum Transmitter SPM8800EU, SPM88001F R Mechan ical conversi on is required SPEKTRUM DX8 • RADIO INSTRUCTION MANUAL...
- Page 78 2 or appropri gimbal throttle limiting wedges must be swappe Step 1. Carefully teri pull back the rear grips and spri side rubber panels and unscrew Step the six Phillips head screws shown. 2 SPEKTRUM DX8 • RADIO INSTRUCTION MANUAL...
- Page 79 SPEKTRUM DX8 • RADIO INSTRUCTION MANUAL...
- Page 80 SPEKTRUM DX8 • RADIO INSTRUCTION MANUAL...
- Page 81 Signed for and on behalf of: equipment Horizon Hobby, Inc. Champaign, IL USA Aug 02, recycling, 2010 please contact your local city office, your household waste disposal service or where you purchased SPEKTRUM DX8 • RADIO INSTRUCTION MANUAL...
- Page 82 Step 5. the opposite gimbal. disengages the elevator centering SPEKTRUM DX8 • RADIO INSTRUCTION MANUAL...
- Page 83 Press and hold the roller while turning on the transmitter. When System Setup appears on the screen, release the roller. The DX8 is now in System Setup Mode. Highlight System Settings then press the roller to access the System Settings function.
- Page 84 Step 2. Using a Phillips screwdriver, adjust the stick tension screw for the desired control. Clockwise to tighten and counterclockwise to loosen. Adjustable Stick Length The DX8 allows you to adjust the control stick's length. Use the included 2mm Allen wrench to loosen the setscrew by turning it counterclockwise. Then, turn the stick clockwise to shorten or counterclockwise to lengthen.
- Page 85 Frame Losses. Do this for 1 minute. The these receivers. timer on the DX8 can be used here. For Advanced Range Testing Using a Flight Log giant-scale aircraft, tip the airplane up on its...
- Page 86 On some models, the Flight Log can be plugged in, attached and left on the model using double-sided tape. It is common with helicopters to mount the Flight Log to the side frame. SPEKTRUM DX8 • RADIO INSTRUCTION MANUAL...
Need help?
Do you have a question about the DX8 and is the answer not in the manual?
Questions and answers