Advertisement
Quick Links
※ご使用前にこの説明書を良くお読みになり十分に理解してください。
Before beginning assembly, please read these instructions thoroughly.
THE FINEST RADIO CONTROL MODELS
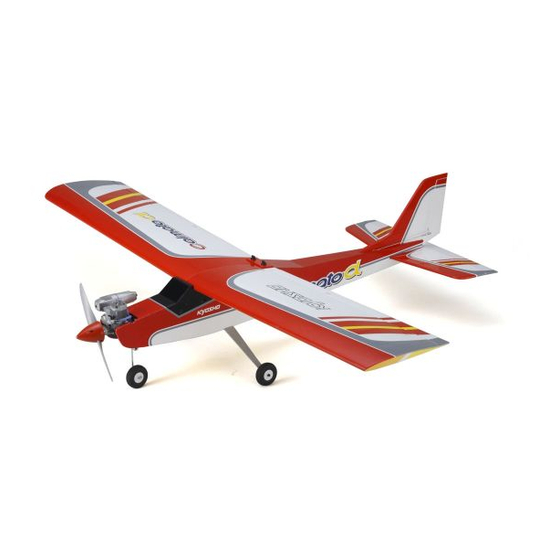
For Beginner &
Intermediate Flyers
初・中級者向
Wingspan: 1600mm (62.9")
RADIO CONTROLLED .40 CLASS ENGINE POWERED AIRCRAFT
目 次 INDEX
●キットの他にそろえる物/組立に必要な工具/組立て前の注意
REQUIRED FOR OPERATION / TOOLS REQUIRED / BEFORE YOU BEGIN
●セットに入っている物
KIT CONTENTS
●プロポの準備
RADIO PREPARATION
●本体の組立て
ASSEMBLY
●パーツリスト
PARTS LIST
●取扱いの注意
OPERATING YOUR MODEL SAFELY
安全のための注意事項
この無線操縦模型は玩具ではありません!
●この商品は高い性能を発揮するように設計されています。
組立てに不慣れな方は、模型を良く知っている人にアド
バイスを受け確実に組立ててください。
●小さい部品があるので、組立て作業は、幼児の手がとど
かない所で必ず行ってください。
●飛行して楽しむ場所は万一の事故を考えて、安全を確認
してから責任をもってお楽しみください。
●組立てた後も、説明書がいつでも見られるように大切に
保管してください。
※製品改良のため、予告なく仕様を変更する場合があります。*SPECIFICATIONS ARE SUBJECT TO BE CHANGED WITHOUT NOTICE.
© 2002 KYOSHO CORPORATION/禁無断転載複製
R
●First-time builders should seek the advice of experienced modellers
●Assemble this kit only in places out of childrenÕs reach!
●Take enough safety precautions prior to operating this model.
You are responsible for this modelÕs assembly and safe operation!
●Always keep this instruction manual ready at hand for quick
reference, even after completing the assembly.
INSTRUCTION MANUAL
KYOSHO トレーナー 40
UNDER SAFETY PRECAUTIONS
This radio control model is not a toy!
before beginning assembly and if they do not fully understand
any part of the construction.
組立/取扱説明書
カルマート
ARF
ALMOST-READY-TO-FLY
4~12
13 / 16
No.11211
2
3
4
13
Advertisement

Related Manuals for Kyosho Calmato TRAINER 40


Summary of Contents for Kyosho Calmato TRAINER 40
- Page 1 You are responsible for this modelÕs assembly and safe operation! してから責任をもってお楽しみください。 ●Always keep this instruction manual ready at hand for quick ●組立てた後も、説明書がいつでも見られるように大切に reference, even after completing the assembly. 保管してください。 No.11211 ※製品改良のため、予告なく仕様を変更する場合があります。*SPECIFICATIONS ARE SUBJECT TO BE CHANGED WITHOUT NOTICE. © 2002 KYOSHO CORPORATION/禁無断転載複製...
- Page 2 Read through the manual before you begin, so you will 当社「ユーザー相談室」までご連絡ください。 have an overall idea of what to do. Check all parts. If you find any defective or missing parts, contact your local dealer or our Kyosho Distributor. 説明書に使われているマーク Symbols used throughout this instruction manual, comprise: ●重要な注意事項があるマークです。...
- Page 3 KIT CONTENTS セットに入っているもの デカール Decal 4mmストッパー Stopper ノーズギヤホーン Nose Gear Horn タイヤシャフト Tire Shaft タイヤ Tire ノーズギヤ Nose Gear タイヤ Tire メインギヤ Main Gear 主翼(右) Main Wing (R) カンザシ Wing Joiner 主翼(左) Main Wing (L) タイヤ 水平尾翼 Tire Tail Wing 4mmストッパー...
- Page 4 RADIO PREPARATION プロポの準備 キットの組立てに入る前に、ニカドバッテリーを充電器の説明にしたがって充電しておきます。 A new Ni-Cd battery must charged before use. Refer to the charger instruction manual for directions. ●始める時 単3乾電池をセットする。(送信機) プロポを下の順序にしたがってセットします。 アンテナをのばす。(送信機) Set up the radio as explained below. ニカドをつなぐ。 アンテナをのばす。(受信機) トリムレバーを中央にセットする。 ▼サーボ スイッチを入れる。(送信機) 送信機 Servo Transmitter スイッチを入れる。(受信機) スティックを動かしてサーボが動くか確認する。...
- Page 5 サーボ付属のビス エルロンサーボ Supplied with the servo. Aileron Servo エルロンサーボ Aileron Servo サーボ付属のビス Supplied with the servo. 1.5mm 1.5mm エルロンロッド Aileron Rod 3 x 3mm セットビス Set Screw リンケージストッパー Linkage Stopper 約 2mm approx. 2mm エルロンロッド Aileron Rod 約11~12mm 20 E1.5 Eリング approx.
- Page 6 ノーズギヤ Nose Landing Gear 3 x 8mm ビス Screw ストッパー Stopper 3x8mm 3x8mm 3x8mm フイルムのみ。 Only cut the film. 3x8mm 40mm エンジン Engine 10mm 3 x 30mm キャップビス エンコンロッド Cap Screw Throttle Rod ワッシャー 上側のパイプ、マフラーへ Washer To Muffler 3x30mm ナット 下側のパイプ、キャブレターへ...
- Page 7 メインギヤ 3x16mm Main Landing Gear 3 x 16mm ビス Screw フイルムのみ。 Only cut the film. Do not cut into the wood. 水平尾翼 Horizontal Tail フイルムのみ。 Only cut the film. Do not cut into the wood. 3.2x45mm 確実に取り付ける。 水平尾翼 飛行中にはずれると操縦不能になり 2.5mm Horizontal Tail Warning! 事故につながります。...
- Page 8 サーボ エレベーターサーボ Servo Elevator Control Servo プロポに付属 プロポに付属 Supplied with Supplied with 後 the radio. the radio. Rear ラダーサーボ Rudder Control Servo エンコンサーボ Throttle Servo 前 Front ラダーロッド ラダーロッド Rudder Rod Rudder Rod 約 2mm approx. 2mm 10mm ヒシチューブに熱を加えて 収縮させる。 Apply heat to shrink the tube. この穴を使う。...
- Page 9 リンケージ Linkage 約13mm 約10mm approx. 13mm approx. 10mm 1.5mm 1.5mm 約13mm approx. 13mm サーボ付属のビス Supplied with the servo. リンケージストッパー Linkage Stopper サーボ付属のビス サーボ付属のビス Supplied with the servo. 20 E1.5 Eリング Supplied with E-ring the servo. ワッシャー Washer リンケージ Linkage 3x3mm 3x3mm 3 x 3mm セットビス...
- Page 10 バッテリー プロポの説明書を参考に、コネクターを 接続しアンテナを張る。 Battery Connect as per radio instruction manual. 受信機 Receiver ゴムバンド等で止める。 Secure foam padding with rubber スポンジ bands or tape as required. Foam Pad アンテナを張る。 バッテリー Antenna Battery セロテープ等で止める。 Tape. スイッチ Switch 受信機 Receiver スイッチに付属の バッテリー プレート Battery Included with the switch.
- Page 11 4x25mm 主翼 Main Wing 4 x 25mm キャップビス Cap Screw ワッシャー Washer Warning! エルロンサーボのコネクターを接続する。 Connect the aileron servo. 確実に取り付ける。 飛行中にはずれると操縦不能 になり事故につながります。 Securely glue together. If it comes off プロポの説明書を参考に、 during flights, you may lose control of コネクターを接続する。 your airplane, resulting in an accident ! Connect as per radio instruction manual.
- Page 12 図の様に各舵が動くように調整する。図の動作量は通常の飛行に適した舵角です。 蛇角調整 Adjust the travel of each control surface to the values in the diagrams. Adjustment < > < > < > エルロン エレベーター ラダー 蛇角 < Aileron > < Elevator > < Rudder > Angle 測定位置 Position for left diagram. 測定位置...
- Page 13 Warning! ●無線操縦飛行機が初めてという方は、調整等を経験者のアドバイスを受けながら確実に組立ててください。中途 半端な組上がりの機体を飛ばすのは大変危険です。 ●無線操縦飛行機が初めてという方には、単独飛行はできませんので、必ず経験者の指導を受けてください。 ●この機体は、2サイクルの40〜46エンジン用に設計されていますのでこれ以上のエンジンを使用し、過激な飛行 をおこなうと破損するだけでなく、大変危険ですので絶対におやめください。 ●この機体は、初心者の入門機として作られておりますので、アクロバット及び急降下から急上昇等は絶対にしな いでください。 ●First-time fliers should seek advice for hints in pre-flight adjustments and assembly from experienced fliers. Be reminded that flying a badly assembled or badly adjusted airplane is very dangerous! ●In the beginning, first-time fliers should always be assisted by an experienced flier and never fly alone! ●This model airplane is designed to be powered by a 2-cycle .40 engine.
- Page 14 "Kyosho Direct-Mail-Parts-Order-System" is available only for Japanese market. *発送手数料、消費税率は平成14年 9月 1日現在のものです。 京商スペアパーツ・オプションパーツの購入方法 これらの購入方法は日本国内に限らせていただきます 部品を こわしちゃった 購入方法による手数料、お届け日数のめやす。 ●部品をこわしたり、なくしてしまった場合で もスペアパーツ や オプションパーツを購入 購入方法 発送手数料 お届け予定日数 し、元どおりに直す事ができます。 お店に在庫がない場合は お店で 不要 3〜4 日 パーツ直送便 で ●パーツはお店で直接購入していただくか、お 円 6〜7 日 現金書留 で 店に行けない場合は、インターネットか郵便を お店に 円 郵便振込 10〜12 日...
- Page 15 お問い合わせ用紙 お問い合わせ用紙は、フ ァ ッ ク ス または郵便でお送りください。回答方法は、京商で検討のうえ考慮させて頂きます。 郵送の場合は、お問い合わせ用紙のコピーを保管してください。 11211 カルマート 品番 商品名 KYOSHO トレーナー 40 店名 ご購入 都 道 府 県 ご購入店 平成 年 月 日 年月日 ( ) 電...
Need help?
Do you have a question about the Calmato TRAINER 40 and is the answer not in the manual?
Questions and answers