Table of Contents
Advertisement
Quick Links
Intra - X
www.velopex.com
C
Automatic X-Ray Film Processor
USER GUIDE
Operation and
Maintenance manual
WARNING:
Do not plug into the electrical mains power supply before
reading this manual - or before filling the machine with
liquids
Register your machine by returning the Warranty Card
to enable full customer support.
Hi-Tech
Diagnostics
Service
MAKERS OF DENTAL, VETERINARY AND MEDICAL EQUIPMENT
Machine serial number to be
quoted on all correspondence:
US
I/LIT0040P Intra-X Manual English Iss.6
Issued: 23/04/11
Advertisement
Table of Contents

Related Manuals for Velopex Intra-X


Summary of Contents for Velopex Intra-X
- Page 1 Register your machine by returning the Warranty Card to enable full customer support. Hi-Tech Diagnostics Service www.velopex.com MAKERS OF DENTAL, VETERINARY AND MEDICAL EQUIPMENT Machine serial number to be quoted on all correspondence: I/LIT0040P Intra-X Manual English Iss.6 Issued: 23/04/11...
- Page 3 There are no operator serviceable parts inside the machine . This equipment can only be serviced by technically qualified engineers, trained on Velopex machines, and is not designed to be serviced by the end user other than as specified in this manual.
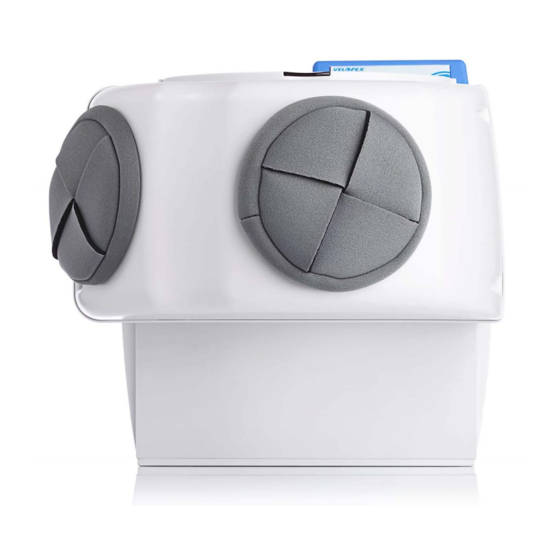
- Page 5 Velopex Processor - Exterior Velopex X-Ray Film Processor - Left Side Film Collector Viewer Cover Endo Slide Daylight Loader viewing Window Transport Module On/Off Power Switch Hand entry port/Glove Display Daylight Loader - Left Side Film Entry Guide Machine Accessories and Extras Supplied...
- Page 6 Table Of Symbols Table of Symbols Symbol Description Alternating Current Attention / Warning - Refer to Manual Attention / Warning - High Voltage Symbols used within Manual Attention / Warning Bleep / Attention Signal Attention / Biohazard...
- Page 7 Contents © April 2007...
- Page 8 Specification Water - should not exceed 28˚C (82.4˚F) 25˚C (77˚F) 27.5°C (81.5°F) Processing time*: Dry 4.5 min. approx. C-26 C (41 F-78.8 * in the unit’s first few cycles, processing time can vary between four and five minutes. Then the process time will stabilise around four and a half minutes.
- Page 9 VELOPEX INTRA-X User Guide Pre-Installation Instructions • Unpacking the VELOPEX NOTE: For unpacking and lifting the machine into position it is important to have assistance. Check contents of the box, see page ii. 1. Familiarise yourself with the layout of the machine by referring to the images as you progress through the manual.
- Page 10 VELOPEX INTRA-X User Guide Pre-Installation Instructions (Cont.) • Sitting of the VELOPEX When using the machine in daylight or a darkroom, avoid sources of intense light. Do not mount the unit under a window, fluorescent light or flood lamp. IMPORTANT NOTE: A well ventilated position is mandatory.
- Page 11 VELOPEX INTRA-X User Guide Daylight Loader Installation (if not installed) Bring the Lid to the upright position. When operating, indication of the opened lid is displayed as: “Lid” . Unscrew the retaining screw at the back of the machine above the plug and lift the Display Panel.
- Page 12 VELOPEX INTRA-X User Guide Daylight Loader Installation (Cont.) 3 b . WARNING: When removing the fixer and developer modules, slide tanks sideways until completely clear of the immersion heaters mounted on the machine internal wall. Unscrew the two retaining screws...
- Page 13 VELOPEX INTRA-X User Guide Daylight Loader Installation (Cont.) Slide Loader over Film Entry Guide. Press the Loader firmly against machine. Secure Loader with the two retaining screws. Return side panels and lid panel. Secure loader with black knob screwed onto the Stud now positioned inside the Loader.
- Page 14 Fill tanks with their respective 10 . chemical solutions or water, pouring in 1400ml of fluid. TIP: Use VELOPEX chemicals designed for your unit. If unobtainable use ONLY another proprietary chemical & always read and follow instructions on bottle. WARNING: DO NOT use chemistry or...
- Page 15 VELOPEX INTRA-X User Guide Filling with Chemicals (Cont.) Fill the tanks up to the lowest edge of the Sight Glass. 12 . Lower Transport Modules carefully into their respective tanks. Top up - the correct liquid level will show half way up the sight glass.
- Page 16 VELOPEX INTRA-X User Guide Filling with Chemicals (Cont.) To avoid spillage, carefully return tanks to the machine. Start with the Developer tank followed by the Fixer, Water and finally the Dryer tanks. Engage the module drive pins into the drive dogs, working from right to left.
- Page 17 TIP: The time taken to achieve the correct temperature depends on the room temperature (usually 10-15 min.) The Velopex is equipped with automatic stand-by mode. Touch the Film Entry Slot to initiate processing. WARNING: Before placing in the...
- Page 18 VELOPEX INTRA-X User Guide Operating the Processor (Cont.) Put hands through loading ports and place film inside Daylight Loader. WARNING: Always remove old film wrappers from the loader. Put hands through Loading Gloves and strip wrapping from film, insert film into Entry Slot. Touch the Film Entry Slot to initiate processing.
- Page 19 WARNING: The Endo Slide must be returned to the ‘UP’ position for normal processing. Remove film from ENDO slot. WARNING: Make sure film does not fall back into the Velopex - remove it as soon as it emerges.
- Page 20 VELOPEX INTRA-X User Guide Operating the Processor (Cont.) Film Feeding direction. TIP: Centre the film on the guide provided to post the film through the processor. WARNING: Make sure the film is fed in squarely, and in the centre of the entry slot, short edge leading.
- Page 21 VELOPEX INTRA-X User Guide Velopex Processor Changing Chemistry Operating the Processor (cont.) It is suggested that the VISCHECK Quality Manager be used to ensure consistent quality X-Rays. TIP: Regular use of this product will ensure that the quality of the film processing is maintained and reduce the risk of retakes.
- Page 22 VELOPEX INTRA-X User Guide Velopex Processor Changing Chemistry (Cont.) Add Velopex Cleaning Tablets, one per tank and leave for one hour. Rinse tanks thoroughly with fresh cold water. Fill up with Chemicals (See Installation sections 10-12, pages 6-7). For best results, use VELOPEX chemicals.
- Page 23 Biohazard. Dryer Module Cleaning - Place Module in container or sink filled with fresh cold water. Add one Velopex Cleaning Tablet and soak for at least 10 minutes. Rinse thoroughly with water to remove all cleaning solution. TIP: Add a little domestic fabric softener to the washing water to avoid ‘static’...
- Page 24 VELOPEX INTRA-X User Guide Velopex Processor Cleaning (Cont.) Drain Module over the tank before removing. Rinse thoroughly with cold water and lightly scrub gears and rollers. TIP: Use the turning tool; turn the gears and belts by hand to assist in thorough cleaning.
- Page 25 VELOPEX INTRA-X User Guide Display Error Codes Display Description Action Characters Dryer temperature sensor s/c Call for Service Dryer temperature sensor o/c Call for Service or connection to Main PCB Fixer temperature sensor s/c Call for Service Fixer temperature sensor o/c...
- Page 26 VELOPEX INTRA-X User Guide Troubleshooting (Cont.)
- Page 27 VELOPEX INTRA-X User Guide Troubleshooting (Cont.)
- Page 28 VELOPEX INTRA-X User Guide Troubleshooting (Cont.)
- Page 29 VELOPEX INTRA-X User Guide Troubleshooting (Cont.)
- Page 30 VELOPEX INTRA-X User Guide Troubleshooting (Cont.)
- Page 31 VELOPEX INTRA-X User Guide Service Log Machine Installation...
- Page 32 CAN/CSA-C22.2 No. 61010-1 SECOND EDITION INCLUDING AMENDMENT 1 OR A LATER VERSION OF THE SAME STANDARD INCORPORATING THE SAME LEVEL OF TESTING REQUIREMENTS. C No. 113778 ETL Testing Laboratories Hi-Tech Diagnostics Service www.velopex.com MAKERS OF DENTAL, VETERINARY AND MEDICAL EQUIPMENT...
Need help?
Do you have a question about the Intra-X and is the answer not in the manual?
Questions and answers