
Related Manuals for Yanmar neoTower


Summary of Contents for Yanmar neoTower
- Page 1 OperatiOn manual Combined heat and power unit neoTower ® CHP 5.0 - 30.0 Status 01.2020...
-
Page 2: Table Of Contents
Contents Contents Document information ....4 Assembly ......14 Validity . - Page 3 Contents Operating ......30 Cleaning ......31 Service repairs .
-
Page 4: Document Information
Document information Document information Supporting documents Additional documents belong to this operation manual and must be observed. System documentation The documentation valid for the delivered system (e.g. technical data, maintenance plan) is included in Validity the scope of delivery. Original operation manual. In this manual, the word “RMB/Control”... -
Page 5: Safety Instructions
Document information Safety instructions Explanation of symbols D DANGER! Text Information highlighted with the word HAZARD warns A Required action against a hazardous situation that will lead to death or severe injury. B List Cross reference to another point in this document D WARNING! Cross reference to other documents that must be Information highlighted with the word WARNING warns... -
Page 6: Safety Information
Safety information Safety information 2.2.2 Operator The operator is responsible for the building in which the product is installed. The operator has the following duties: B Fulfilling the requirements specified by the energy provider (e.g. registration, approval, compensation). B Meeting the installation location requirements. Intended use B Training the user. -
Page 7: General Safety Instructions
Safety information General safety instructions The manufacturer does not accept any liability or guarantee for damage or loss in the following cases: B Failing to observe this manual. D WARNING! B Contrary-to-intended use. B Improper handling. Hazard caused by failing to observe the manual! B Use by unauthorised target groups. -
Page 8: Product Information
product information Product information Modes of operation The system can be operated in five modes of operation (including shutdown). The modes of operation are set via the operational display. “RMB/Control” operating manual. Functional principle 3.3.1 Ready for e-car charging button The combustion of gas in an industrial gas engine Special mode for charging electric vehicles. -
Page 9: Safety Devices
product information Safety devices D WARNING! Risk of burns, pinching or electric shock! The safety devices are intended to ensure the system is handled safely. Missing or faulty safety devices can lead to hazardous situations. A Ensure that the protection devices are not removed. A Follow the safety instructions on the system. -
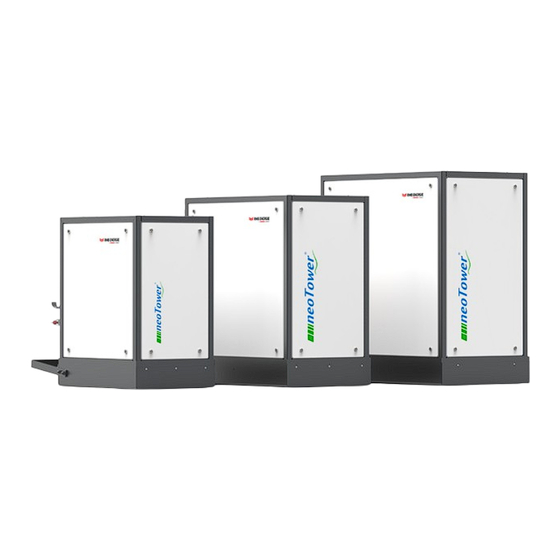
Page 10: Product Overview
product information Product overview 3.6.2 Generation unit CHP 11.0 - 20.0 The generation unit contains the actual combined heat and power unit with the combustion engine, the 3.6.1 Generation unit CHP 5.0 - 7.2 alternator unit and the heat exchangers. The generation unit is the core piece of equipment for The generation unit contains the actual combined producing the electricity and heat. -
Page 11: Generation Unit Chp 25.0 - 30.0
product information 3.6.3 Generation unit CHP 25.0 - 30.0 3.6.4 Control cabinet The generation unit contains the actual combined The control cabinet contains all the components heat and power unit with the combustion engine, the required to control the system. alternator unit and the heat exchangers. -
Page 12: Expansion Tank Connection Block
product information 3.6.6 Expansion tank connection block Scope of supply The expansion tank offsets temperature-related fluctuations in volume within the motor circuit (primary circuit). A Manometer B Cap valve C Expansion tank D Self-bleeding device E Pressure-relief valve F Fill-and-drain valve (connection for replenishing water-glycol mixture 60:40) G Connection to generation unit H Drain valve... -
Page 13: Storage
Storage Storage The system is prepared by the manufacturer for operation on delivery. The system must be put into operation within 5 months following delivery. If that is not possible, the system must be preserved. Storage of the system by the operator. “2.2.2 Operator”... -
Page 14: Assembly
assembly Assembly Installation location requirements D WARNING! Risk of suffocation, gas explosions or material damage caused by incorrectly installing the system! Failing to observe these requirements can lead to Safety instructions for assembly hazardous situations when handling electricity, gas or hot water. -
Page 15: Installation Room
assembly 5.2.2 Installation room Space requirement CHP 11.0 - 20.0 The installation room must meet the following requirements: B The installation room must comply with the effective applicable laws and regulations for boiler rooms (e.g. in Germany, the ordinance for heat-producing appliances (Feuerstättenverordnung)). -
Page 16: Heating System
assembly 5.2.3 Heating system 5.2.5 Exhaust air duct The structural elements of the building’s heating D WARNING! system primarily comprise the peak load boiler, the buffer tank, and the pipework system and radiators. Risk of suffocation due to improper use of exhaust air! The peak load boiler supplies the required residual The exhaust air must not be used for heating purposes. -
Page 17: Gas Supply
assembly 5.2.7 Gas supply 5.2.9 Condensate drain For the system to operate, a gas supply is required that For the system to operate, the building must have a must comply with the following requirements: condensate drain, which must comply with the following B The gas supply must comply with the established requirements: regulations (e.g. -
Page 18: Assembly Steps
assembly Assembly steps 5.3.2 Unpacking the system Brief overview: D ATTENTION! 5.3.1 Preparing for assembly 5.3.2 Unpacking the system Risk of damage caused by improper handling! 5.3.3 Positioning the generation unit The system may be damaged during unpacking or 5.3.4 Screwing the control cabinet in position transportation. -
Page 19: Positioning The Generation Unit
assembly 5.3.3 Positioning the generation unit D ATTENTION! Risk of damage to the generation unit caused by improper transportation! In narrow transportation routes, it may be necessary to disassemble parts of the generation unit in order to move the device into the installation location. Disassembly for transport may only be carried out by the manufacturer. -
Page 20: Screwing The Control Cabinet In Position
assembly 5.3.4 Screwing the control cabinet in position 5.3.6 Connecting the generation unit When connecting the system to the heating system it is necessary to follow the appropriate hydraulic diagram. “12.2 Hydraulic diagrams” (page 35). Always match the connections to the identifiers on the generation unit. - Page 21 assembly D ATTENTION! Buffer water return line Risk of damage caused by improper connection of lines! Fixed supply lines will transfer vibrations to the building. Vibrations may damage the supply lines. A Only use flexible lines for all the lines connected to the generation unit.
- Page 22 assembly Expansion tank Flue gas A Before connecting, ensure that the system pressure of the expansion tank connection block is 1.0 bar. A Connect the line to the “expansion tank” connection on the generation unit. A Connect the line to the expansion tank connection The line must be laid with a sufficient gradient to the block.
- Page 23 assembly Exhaust air Cover A Connect the line to the “exhaust air” connection on A Fit the cover. the generation unit. A Guide the line outside. A Secure the line. A Ensure that when the exhaust air duct is connected, the system is protected against frost and the elements.
-
Page 24: Connecting The Temperature Sensors
assembly 5.3.7 Connecting the temperature sensors 5.3.8 Connecting the modem A Attach four temperature sensors (T1-T4) to the When connecting the modem, the following points must buffer tank. When attaching, bear in mind the be observed: number of buffer tanks. B If the modem is subjected to high temperatures, it “12.2 Hydraulic diagrams”... -
Page 25: Connecting The Control Cabinet
assembly 5.3.9 Connecting the control cabinet The connection of additional components depends on the heating system. “12.2 Hydraulic diagrams” (page 35). D WARNING! A Connect any additional components (e.g. peak load Risk of injury from electric shock! boiler, equipment of the building control technology) The cables must be deenergised during assembly. -
Page 26: Test Run
assembly Test run 5.4.2 Preparing the expansion tank connection block Once the installation process has been successfully completed, it is necessary to perform a test run. The D ATTENTION! system must run for a minimum of 15 minutes. The factory setting of the system on delivery enables Risk of material damage to the generation unit! the test run to run for maximum one hour. -
Page 27: Starting The Test Run
assembly 5.4.4 Starting the test run 5.4.5 Checking the system To ensure the system is bled fully, perform the following A Check the gas and exhaust gas sealing within the in the correct order. generator unit. A Open the valves on the generation unit as follows: A Check the gas and exhaust gas sealing of the 1. -
Page 28: Stopping The Test Run
assembly 5.4.6 Stopping the test run 5.4.7 Closing the generation unit A Stop the test run via the operating display. “RMB/Control” operating manual. A Switch off the master switch. A Close the generation unit. The test run has been successful if the following conditions have been met: B The cooling system has been bled. -
Page 29: Commissioning
Commissioning Commissioning D WARNING! Hazard caused by improperly assembling the system! Improperly installed systems can cause serious injuries or material damage to the system or the building. A Ensure that the system is installed in accordance with the regulations and that the commissioning can be carried out. -
Page 30: Operating
Operating Operating D ATTENTION! Hazard caused by failing to observe the operating instructions! This chapter contains important information regarding the safe operation of the system. Incorrect settings in the control mechanism can damage the system or shorten its service life. A Read this chapter carefully before operating the system. -
Page 31: Cleaning
Cleaning Cleaning D WARNING! Risk of burns when cleaning hot system components! This chapter contains important information regarding the correct way to clean the system. The parts of the system that can become very hot (e.g. flue gas routing) must not be cleaned while the system is in operation. A Read this chapter carefully before cleaning the system. -
Page 32: Service Repairs
Service repairs Service repairs Fault resolution D WARNING! Hazard caused by failing to observe the error messages! Malfunctions indicate faults with the system or incorrect settings in the control mechanism. Malfunctions must Maintenance be rectified immediately to prevent further subsequent damage. -
Page 33: Disassembly
Disassembly 10. Disassembly D WARNING! Hazard caused by failing to observe the disassembly instructions! This chapter contains important information regarding the correct way to disassemble the system. Failing to observe such information can lead to severe injuries. A Read this chapter carefully before disassembling the system. -
Page 34: Disposal
Disposal 11. Disposal 11.1 Disposing of packaging D ATTENTION! Risk of environmental damage caused by failing to dispose of the packaging in the proper manner! A Do not dispose of the packaging in the normal domestic waste. A Send the packaging to the appropriate environmental recycling facility. -
Page 35: Appendix
appendix 12. Appendix 12.2 Hydraulic diagrams The following hydraulic diagrams illustrate examples for connecting the system to the heating system. These hydraulic diagrams do not replace the need to correctly design the technical aspects heating system. The hydraulic diagram applicable to the heating system must be checked for correctness and 12.1 Technical data completeness. -
Page 36: Chp, 1 Buffer Tank, Peak Load
appendix 12.2.1 Heating system variant 1 – 1 CHP, 1 buffer tank, peak load boiler connected directly to buffer tank Shut-off Shut-off Circulating pump Shut-off Shut-off Non-return valve Shut-off 3-way mixer Combination filter Circulating pump Shut-off Temperature sensor Drain Heating circuit consumers Safety valve Circulating pump Cap valve... -
Page 37: Tank
appendix 12.2.2 Heating system variant 2 – 1 CHP, 2 buffer tanks, peak load boiler connected directly to buffer tank Shut-off Ventilation Circulating pump Shut-off Shut-off 3-way mixer Shut-off Shut-off Combination filter Non-return valve Shut-off Circulating pump Drain Heating circuit consumers Safety valve Temperature sensor Cap valve... -
Page 38: Chp, 1 Buffer Tank, Peak Load Boiler Connected To Buffer Tank Via Hydraulic Separator
appendix 12.2.3 Heating system variant 3 – 1 CHP, 1 buffer tank, peak load boiler connected to buffer tank via hydraulic separator 11 9 Shut-off Circulating pump Circulating pump Heating circuit consumers Shut-off Temperature sensor Shut-off Ventilation Combination filter Hydr. switches Shut-off Circulating pump Buffer tank... -
Page 39: Chp, 2 Buffer Tanks, Peak Load Boiler Connected To Buffer Tank Via Hydraulic Separator
appendix 12.2.4 Heating system variant 4 – 1 CHP, 2 buffer tanks, peak load boiler connected to buffer tank via hydraulic separator Shut-off Ventilation Circulating pump Shut-off Shut-off 3-way mixer Shut-off Shut-off Combination filter Non-return valve Shut-off Circulating pump Drain Heating circuit consumers Safety valve Temperature sensor... -
Page 40: Chp, 2 Buffer Tanks, Peak Load Boiler Connected To Buffer Tank Via Hydraulic Separator
appendix 12.2.5 Heating system variant 5 – 2 CHP, 2 buffer tanks, peak load boiler connected to buffer tank via hydraulic separator 14 T Circulating pump 3-way mixer Shut-off Shut-off Combination filter Non-return valve Circulating pump Circulating pump Shut-off Heating circuit consumers Combination filter Temperature sensor Drain... -
Page 41: Ec Declaration Of Conformity
The manufacturer RMB/ENERGIE GmbH Hauptstraße 543a D – 26683 Saterland – Ramsloh, Germany hereby declares that the following product: neoTower ® 2.0 - 50.0 combined heat and power unit complies with all relevant provisions of the following directives: Machinery Directive (2006/42/EG) •... -
Page 42: Proof Of Conformity - Generation Unit
appendix 12.4 Proof of conformity - Generation unit 42 | RMB/ENERGIE GmbH Operation manual CHP 5.0 - 30.0 | Status 01.2020... - Page 43 appendix Operation manual CHP 5.0 - 30.0 | Status 01.2020 RMB/ENERGIE GmbH | 43...
- Page 44 rmB/enerGie GmbH Hauptstraße 543a Niederlassung Rosenheim Niederlassung Emmelshausen Prinzregentenstraße 16 26683 Saterland, Germany Liesenfelder Straße 79 83022 Rosenheim 56281 Emmelshausen Tel.: +49 4498 92288–0 Tel.: +49 8031 61991–0 Fax: +49 4498 92288–66 Tel.: +49 6747 95154–0 info@rmbenergie.com www.rmbenergie.com...
Need help?
Do you have a question about the neoTower and is the answer not in the manual?
Questions and answers