
Related Manuals for Termozeta TZAZC2


Summary of Contents for Termozeta TZAZC2
- Page 1 CONDIZIONATORE PORTATILE MODELLI: TZAZC2 MANUALE D’ISTRUZIONI Vi ringraziamo per la preferenza accordata avendo scelto un prodotto Lange distribution.
- Page 2 Vi preghiamo di leggere attentamente le informazioni contenute in questo manuale, in quanto Vi aiuteranno a sfruttare al meglio le caratteristiche di questo prodotto. Il presente libretto è parte integrante dell’apparecchio e deve essere letto attentamente prima dell’utilizzo perché fornisce importanti indicazioni riguardanti la sicurezza di installazione, d’uso e di manutenzione.
-
Page 3: Avvertenze Generali
Il gas refrigerante R290 usato in questo prodotto è ecologico, Questo refrigerante è privo di odore, e comparato con altri gas ha uno scarsissimo impatto ambientale. Leggere le istruzioni prima di utilizzare il prodotto. Le figure riportate sono indicative. I. AVVERTENZE GENERALI 1. - Page 4 7. Non immergere mai l’unità in acqua. Evitare il contatto diretto con qualsiasi liquido. 8. Non posizionare l’unità accanto ad elettrodomestici che erogano calore, oppure vicino a fiamme libere o ad oggetti infiammabili o pericolosi. 9. Non inserire mai dita o altri oggetti all’interno delle fessure delle prese d’aria.
- Page 5 25. Utilizzare solo all'interno, l'apparecchio non deve essere utilizzato all'esterno. 26. Non utilizzare prolunghe per alimentare il prodotto. 27. Non utilizzare l'apparecchio su superfici inclinate o instabili 28. Non utilizzare in luoghi ove siano presenti sostanze infiammabili o potenzialmente esplosive o in presenza di vapori corrosivi o sostanze pericolose, 29.
- Page 6 42. Non riparare il prodotto da soli. Non aprire l'apparecchio Per ogni problematica, contattare un centro assistenza qualificato. 43. Il prodotto non deve essere utilizzata in lavanderia. 44. Non utilizzare in caso di evidenti anomalie nel funzionamento. 45. Se il cavo di alimentazione è danneggiato, esso deve essere sostituito dal costruttore o dal suo servizio assistenza tecnica o comunque da una persona con qualifica similare, in modo da prevenire ogni rischio.
- Page 7 siano controllati o istruiti all'uso dell'apparecchio da una persona responsabile della loro sicurezza. 59. Non utilizzare il prodotto nelle seguenti condizioni: a) Vicino a sorgenti di calore; b) In aree dove olii o altri composti possono cadere o schizzare; c) In prossimità di bagni, docce o piscine d) In aree esposte direttamente alla luce solare;...
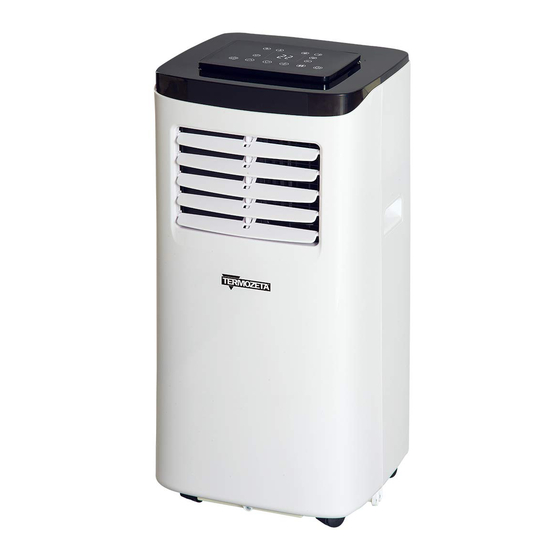
- Page 8 II. CARATTERISTICHE E COMPONENTI 1. Prodotto è dotato di : Funzione refrigerazione, deumidificazione, ventilazione e scarico continuo condensa. Interfaccia kit espulsione aria posta in alto sul prodotto in modo da facilitare il montaggio ed avere un flusso di aria più lineare. Pannello di controllo con display a LED e telecomando.
- Page 9 Kit finestra Assemblaggio kit espulsione...
-
Page 10: Modalità Di Funzionamento
III. MODALITÀ DI FUNZIONAMENTO 1. Pannello di controllo 1.Timer 5. Selezione delle velocità 2. Alto 6. Selezione modalità funzionamento 3. Basso 7. Tasto accensione/spegnimento 4. Display Quando il prodotto viene alimentato la prima volta, si udirà un suono e il prodotto entrerà... - Page 11 Il tempo può variare da 1 a 24 ore con intervalli di 1ora. Modalità sleep In modalità raffreddamento, premere il tasto “alto” ed il tasto “Ventilazione”. Il prodotto funzionerà in modo economico e silenzioso. Nota: Non è possibile attivare la modalità sleep in modalità deumidificazione o ventilazione.
-
Page 12: Installazione
Instruzioni per lo scarico alla fine di questo paragrafo). Dopo che l’acqua è stata evacuate la macchina ritornerà al funzionamento di prima. Sbrinamento automatico Il prodotto è dotato della funzione di sbrinamento automatico. Questa funzione si ottiene con l’inversione del flusso del refrigerante nella valvola 4 vie. Funzione di protezione del compressore Per aumentare la vta del compressore, esso si riavvierà... - Page 13 B) Allungare il tubo di espulsione dell’aria e collegarlo alla flangia del distanziale del kit finestra come mostrato in Fig.5 e Fig.6 Nota: Il tubo non deve essere distorto o piegato (limite 45°) Assicurarsi che il tubo di espulsione dell’aria non sia bloccato. Fig.6 Fig.5 Nota...
- Page 14 2. Montaggio del kit finestra Aprire leggermente la finestra e posizionare il kit finestra orizzontalmente o verticalmente come mostrato in Fig 2 e Fig3. Allargare il distanziale in modo da coprire l’intera apertura della finestra. VI. SCARICO DELLA CONSENSA Scarico manuale Quandi la macchina si ferma poichè...
-
Page 15: Pulizia E Manutenzione
Scarico continuo (Optional) (solo in modo raffreddamento e deumidificazione) 1) Svitare il coperchio e togliere il tappo dello scarico. 2) Montare il tubo sul foro di uscita dell’acqua 3) Scaricare l’acqua nella tanica predisposta. VII. PULIZIA E MANUTENZIONE Pulizia: prima di ogni operazione di manutenzione e pulizia disconntere il prodotto dalla alimentazione elettrica. -
Page 16: Conservazione Del Prodotto
2) Immergere il filtro EVA in acqua calda con detergente neutro (circa 40°C) e lasciarlo asciugare Viti fissaggio filtro VIII. CONSERVAZIONE DEL PRODOTTO Scaricare la macchina dall’acqua. Accendere il prodotto. Selezionare il modo di ventilazione bassa in modo da asciugare il tubo di scarico e scongiurare l’insorgenza di muffe. -
Page 17: Risoluzione Dei Problemi
IX. RISOLUZIONE DEI PROBLEMI Non riparare o smontare il prodotto. Per ogni evenienza o malfunzionamento rivolgersi al Centro Assistenza autorizzato. Problema Possibile motivo Soluzione Accendere il prodotto e assicirarsi che la Non c’è elettricità spina sia inserita correttamente nella presa. L’indicatore di livello mostra Scaricare l’acqua dal prodotto "FL". -
Page 18: Portable Air Conditioner
PORTABLE AIR CONDITIONER MODELS: TZAZC2 INSTRUCTION MANUAL Please READ and RETAIN for future reference. - Page 19 The refrigerant used in mobile air conditioners is the environmentally friendly hydrocarbon R290.This refrigerant is odorless, and compared to the alternative refrigerant, the R290 is an ozone-free refrigerant, and its effect is very low. Please read the instructions before use and repair. The drawings provided in this manual may not be the same as the physical objects.
- Page 20 personnel shall be carried out under the supervision of the person competent in the use of flammable refrigerants. 12. All working procedure that affects safety means shall only be carried by competent persons. 13. The air conditioning is only suitable for indoor use, and is not suitable for other applications.
- Page 21 b) Do not install and use the air conditioning in the bathroom or other humid environments. c) Do not pull the plug to turn off the machine. d) Do not place cups or other objects on the body to prevent water or other liquids from spilling into the air conditioning.
- Page 22 intact and firmly plugged into the power outlet, and place the power cord orderly to prevent someone from being tripped or pulling out the plug. 31. Do not put any object into the air inlet and outlet of the air conditioning.
-
Page 23: Features And Components
II. FEATURES AND COMPONENTS Features Brand new appearance, compact structure, smooth line, simple and generous shape. Functions of refrigeration, dehumidification, air supply and continuous drainage Outdoor interface is set high to facility assembly and keep the smooth flow of the heat pipe. LED displays the control panel, beautiful and fashionable, with high-quality remote control.It adopts a user-friendly remote control design. -
Page 25: Control Setting
II. CONTROL SETTING Control panel operation instructions 1) operation interface : 1. Timer Key 5. Fan Speed Selection Key 2. Up Key 6. Mode Selection Key 3. Down Key 7. Power Key 4. Display Window When the machine is powered on for the first time, the buzzer will play power-on sound, and then the machine will get into standby status. -
Page 26: Protection Function
Timing Key: In the case of power on, press the key to close timing; in the case of power off, press the key to open timing. Press the key, when the timing symbol flashes, press up and down key to select the required timing value. -
Page 27: Installation And Adjustment
Overflow Protection Function: When water in the water pan exceeds the warning level, the machine will automatically sound an alarm, and the "FULL" indicator light will flash. At this point, you need to move the drainage pipe connecting the machine or the water outlet to sewer or other drainage area to empty the water (details see Drainage Instructions at the end of this chapter). - Page 28 Half open the window , and mount the window sealing plate assembly to the window (as shown in Fig.2 and Fig.3). Components can be placed in horizontal and vertical direction. Pull various components of the window sealing plate assembly open, adjust their opening distance to bring both ends of the assembly into contact with the window frame, and fix various components of the assembly.
-
Page 29: Drainage Instructions
Notes :a). The flat end of the exhaust pipe joints must be snapped into place. b) . The pipe cannot be distorted nor has substantial turning (greater than 45 °) Keep the ventilation of the exhaust pipe not blocked. Figure 5 Figure6 Important Notice: The length of the exhaust hose shall be 280~1,500mm, and this length is based on the... -
Page 30: Maintenance
plug properly. 2)During drainage, the body can be tilted slightly backwards. 3)If the water container cannot hold all the water, before the water container is full, stuff the water outlet with the water plug as soon as possible to prevent water from flowing to the floor or the carpet. -
Page 31: Unit Storage
3.Clean the upper filter screen frame Unscrew one screw fixed by EVA filter net and back shell with screwdriver, and take out EVA filter net. Put the EVA filter screen into warm water with neutral detergent (about 40°C / 104℉) and dry it in the shade after rinsing clean. -
Page 32: Troubleshooting
IX. TROUBLESHOOTING Do not repair or disassemble the air conditioning by yourself. Unqualified repair will lead to failure of the warranty card, and may cause damage to users or their properties. Problems Reasons Solutions Turn it on after connecting it to a There is no electricity. - Page 33 Lange Distribution S.r.l. si riserva il diritto di apportare modifiche estetiche e/o tecniche senza preavviso al fine di migliorare i propri prodotti. Termozeta is an international trademark. Copyright © 1995. All rights reserved. Lange Distribution S.r.l. -Via Treviso,35-20127 Milano-Italy DISPOSAL Used electric household devices 1.
Need help?
Do you have a question about the TZAZC2 and is the answer not in the manual?
Questions and answers