Moxee K779HSDL User Manual
Hide thumbs
Also See for K779HSDL:
- User manual ,
- Service manual (12 pages) ,
- Quick start manual (9 pages)
Table of Contents
Advertisement
Advertisement
Table of Contents

Related Manuals for Moxee K779HSDL


Summary of Contents for Moxee K779HSDL
- Page 1 K779HSDL User Manual...
-
Page 2: Table Of Contents
Table of Contents Introduction ..................3 Device Overview .................. 3 Display Layout and icons ..............4 Hardware Installation ................. 5 Device configuration ................7 Login to your Device ................7 SMS ......................10 Internet ....................10 Wireless ....................11 Network ....................13 Port Forwarding ...................15 DMZ Settings ..................16 SNTP .......................16 Statistics ....................18 System Log ...................19... -
Page 3: Introduction
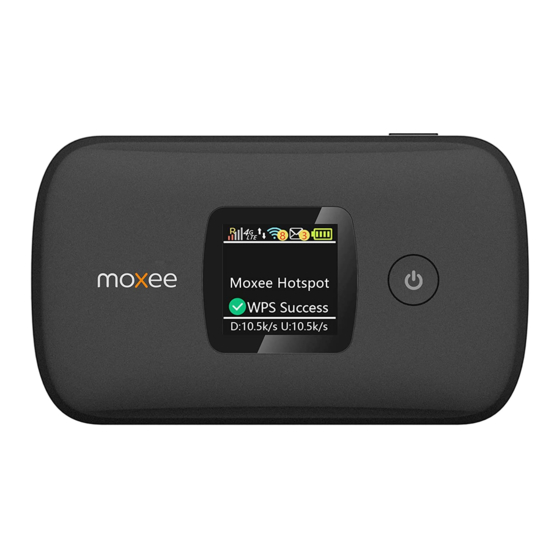
INTRODUCTION Device Overview 1. Menu button 5. Unread message 9. Battery cover icon 2. Signal and Roaming 10. The point of status icon 6. Battery icon removing the back cover 3. Network mode icon 7. Power Button 4. Wi-Fi signal icon 8. -
Page 4: Display Layout And Icons
Display Layout and icons Icon Description Signal and roaming status icon Network mode icon Data flow icon Wi-Fi signal and number of access users The number of unread messages, maximum is 100 Battery capacity icon, if battery capacity is lower than 25%, this icon is red Data Statistics, used/total WPS status indicator Download and upload data speed... -
Page 5: Hardware Installation
Hardware Installation Install SIM Card and Battery 1. Power off the device 2. Remove the back cover and battery 3. Insert the SIM card into card slot in the correct position 4. Install back cover and battery Note: DO NOT remove SIM card when the device is powered on since this may damage the card and the device. - Page 6 1. Enable your Wi-Fi application to allow your mobile device to establish a connection with your device. 2. Look for the network (SSID) named “Moxee HotspotXX_2.4G” or “Moxee HotspotXX_5G”. Where XX are the last two digits of the device IMEI. 3. Click Connect and enter the default username and password printed under the battery of your device.
-
Page 7: Device Configuration
Setting up your WPS If your terminal support WPS, you do not have to input the password manually once your WPS has been set up. To use WPS please follow these steps: 1. Enable WPS in the WebUI through Settings->Wireless->WLAN Settings->WPS 2. - Page 8 Congratulations! You have successfully logged in to your Hotspot. Once you have logged in to your Hotspot via your web browser, you can see the Home page for the hotspot. Home Page In this section you can select any of the three options to configure your device.
- Page 9 Wi-Fi Status Button: you can check the Wi-Fi information of the hotspot by clicking the icon , the 2.4GHz & 5GHz Wi-Fi status, SSID and password will be displayed. Clients Button: you can check the connected client information by clicking the icon the connected client’s device name, IP address and Mac address will be displayed.
-
Page 10: Sms
You can click “SMS” to see the SMS information. InBox: You can read, select, delete, refresh and select multiple SMS messages. Note: The device only receives SMS, and does not send SMS. Settings You can click “Settings” on the main page to configure the hotspot. Internet Mobile Connection In this section, you can configure your mobile data connection. -
Page 11: Wireless
Mobile Data: To Enable/Disable Mobile connection Data Roaming: To Enable/Disable Roaming connection Carrier Name: APN Profile Name Network Mode: 4G Network Operator: Auto/Manual, it is suggested to select “Auto” Wireless WLAN settings In this section you can configure the Wi-Fi settings for your Hotspot device. - Page 12 If you are unsure of Wi-Fi Channel and Channel Width, it is suggested to select “Auto”. WLAN MAC Filter MAC address filtering (also known as link-layer filtering) is a feature for IPv4 addresses that allows you to include or exclude computers and devices based on their MAC address.
-
Page 13: Network
• Disable will disable the WLAN MAC filter. • Whitelist will only allow devices with the selected MAC address connect. • Blacklist will only deny devices with the selected MAC address from connecting. Network DHCP In this section you can configure the DHCP settings. The Default values are: 1. - Page 14 Firewall Your hotspot’s high-performance firewall feature continuously monitors internet traffic, protecting your network and connected devices from malicious internet attacks. In this section you can “enable” or “Disable” for Firewall/IP Filter settings. Note: In order to enable IP Filter, the Firewall setting must be set to “Enable”...
-
Page 15: Port Forwarding
• The value range of LAN/WAN Port is 1-65535. • Settings will not take effect until the “Apply” button is clicked. Port Forwarding In this section you can enable external computers to access FTP or other services provided by the LAN. •... -
Page 16: Dmz Settings
Note: This will enable to provide access to others to your FTP server in your LAN through WAN. Step 1: Assign a static IP to your local computer that is hosting the FTP server. Step 2: Login to the Gateway and go to Settings / Features /Port forwarding Step 3: Enter WAN Port to 21;... - Page 17 PIN Management In this section you can enable or disable the PIN of SIM card. Please be aware you can only input 3 times the wrong PIN number, otherwise the SIM card will be locked. Note: You will need to request the PUK code to your carrier. Device Information In this section you can check the basic information of the device.
-
Page 18: Statistics
Device Name: Name of the Hotspot for identification purpose. Software Version: Software version currently loaded in the Hotspot. Hardware Version: Hardware version currently loaded in the Hotspot. IMEI: The unique identification number that is used to identify the 4G-LTE module. IMSI: The international mobile subscriber identity used to uniquely identify the 4G-LTE module. -
Page 19: System Log
Traffic configuration: Click to configure data traffic plan as below. System Log In this section, you can configure the system logs you want to check, such as main process, hotspot, wireless, dialup, Wi-Fi, web server, device control. Note: You can download the system log into an external file by selecting the Export option. - Page 20 Upgrade Your hotspot can automatically detect firmware updates. In this section you can manually check if there is new firmware for your hotspot and update. When there is a new version, it will display a “new” icon in the WebUI, and you can select the icon to proceed with the update.
-
Page 21: Reboot & Reset
Reboot & Reset In this section you can reboot your device or reset it to factory default settings. Reboot: Select to reboot your device. Reset: Select to reset your device. Logout Click logout to logout from your hotspot. Once you log out you will return to the login page. -
Page 22: Health And Safety Information
Q: What to do if there is no service? A: The possible reasons are an unstable network signal, or a hardware problem. You can try the following solutions: 1. If you are inside a building or near a structure that may be blocking the signal, change the position or location of the device. - Page 23 by your device if inadequately shielded. Please consult the manufacturer of your device before using if necessary. • Operating your device may interfere with medical devices like hearing aids and pacemakers. Please always keep them more than 20 centimeters away from such medical devices when they are turned on.
- Page 24 • Handle your device carefully. Do not drop, bend, or strike it; your device may get damaged. • Do not attempt to disassemble the device. • An operating temperature range of -10°C to +45 °C and humidity range of 5% to 95% are recommended. Battery Handling •...
- Page 25 vii. Any other cause beyond the range of normal usage intended for the Product. • End User shall have no right to reject or return the Product, or receive a refund for the Product from KonnectONE under the above-mentioned situations. •...
- Page 26 Grant section of http://www.fcc.gov/oet/ea/fccid/ after searching for: 2APQU-K779HSDL FCC Compliance FCC ID: 2APQU-K779HSDL This device complies with part 15 of the FCC Rules. Operation is subject to the following two conditions: (1) This device may not cause harmful interference, and (2) this device must accept any interference received, including interference that may cause undesired operation.
- Page 27 cause harmful interference to radio or television reception, which can be determined by turning the equipment off and on, the user is encouraged to try to correct the interference by one or more of the following measures: • Reorient or relocate the receiving antenna. •...
Need help?
Do you have a question about the K779HSDL and is the answer not in the manual?
Questions and answers
How to change network name
To change the network name (SSID) on a Moxee K779HSDL:
1. Log in to the device management page by entering http://192.168.1.1 or http://device.WebUI in a web browser.
2. Navigate to Settings > Wireless > WLAN Settings.
3. Locate the Wi-Fi Name (SSID) field and delete the old name.
4. Enter the new SSID as required.
5. Click Apply and wait for the confirmation message “Success”.
6. Log out and wait for the device to update the connection.
This answer is automatically generated