Table of Contents
Advertisement
Quick Links
Advertisement
Table of Contents

Related Manuals for Hitachi DV-P455E


Summary of Contents for Hitachi DV-P455E
- Page 1 Instruction Manual DV-P455E DVD Player...
-
Page 2: Table Of Contents
Contents Unpacking ..........................8 Product Overview .........................9 Front View ...............................9 Rear View .................................9 Remote Control ........................10 Battery Installation for the Remote Control ..............12 Remote Control Operation Range ..................13 Connections ........................13 Mains Power ..............................13 Connecting to a TV ........................... 14 Connecting to an External Audio Device ..................14 Compatible Disc Types .......................15 Supported Formats ........................... - Page 3 CD/MP3/WMA/JPEG Disc Operation .................19 Playing an Audio or a JPEG Picture CD ....................19 Pause Playback ............................19 Stop Playback ............................. 19 Volume Adjustment ..........................19 Previous and Next ............................. 19 Fast Forward and Fast Reverse ......................20 Zoom................................20 Repeat ................................
- Page 4 SOME DOS AND DON’TS ON THE SAFE USE OF EQUIPMENT This equipment has been designed and manufactured to meet international safety standards but, like any electrical equipment, care must be taken if you are to obtain the best results and safety is to be assured. read the operating instructions before you attempt to use the equipment.
- Page 5 Used correctly, domestic batteries are a safe and dependable source of portable power. Problems can occur if they are misused or abused – resulting in leakage or, in extreme cases, re or explosion. Here are some simple guidelines to safe battery use designed to eliminate any such problems.
- Page 6 Safety Warnings • Read all the instructions carefully before Ventilation using the unit and keep them for future • To prevent the risk of electric shock or reference. fire hazard due to overheating, ensure • Retain the manual. If you pass the unit that curtains and other materials do not obstruct the ventilation vents.
- Page 7 • Class 1 Laser Product This unit utilises a laser. Use CLASS 1 LASER PRODUCT of controls, adjustments or performance of procedures other than those specified herein may result in hazardous radiation exposure. • Before moving the unit, ensure the disc tray is empty.
-
Page 8: Unpacking
Thank you for purchasing your new HITACHI DVD Player. We recommend that you spend some time reading this instruction manual in order that you fully understand all the operational features it offers. You will also find some hints and tips to help you resolve any issues. -
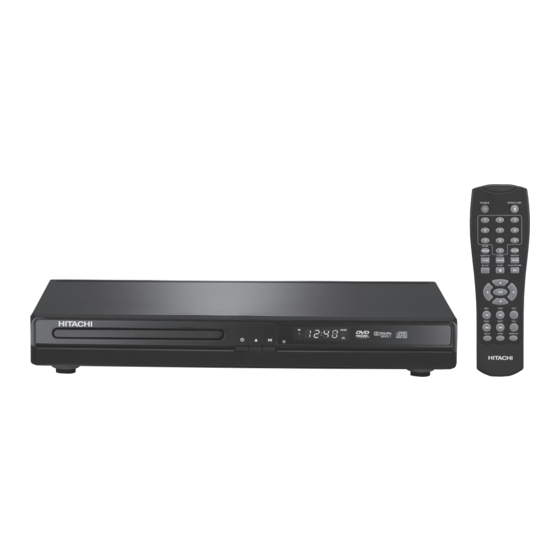
Page 9: Product Overview
Product Overview Front View CD Door Button Press to open/close the disc door. Remote Control Sensor Receives signals from the remote Button control. Press to start or resume playback of a disc. LED Display Button Press to switch the unit between ON and STANDBY mode. -
Page 10: Remote Control
Remote Control POWER Button Press to switch the unit between ON and STANDBY mode. POWER OPEN/CLOSE Number 0-9 Buttons Press to enter parental control password or locate a title/chapter/ track. ZOOM/MENU Button • Press to zoom in/out the displayed ZOOM MENU GOTO frame on DVD. - Page 11 10. PLAY/PAUSE Button Press to start or resume playback of a disc. 11. STOP Button Press to stop playing a disc. POWER OPEN/CLOSE Buttons Allows you to navigate the menu screen and adjust certain settings OK Button Press to confirm selections on the menu screen.
-
Page 12: Battery Installation For The Remote Control
Battery Installation for the Remote Control Press and lift the back cover to open the battery compartment of the remote control. Insert two AAA size batteries. Make sure to match the (+) and (–) ends of the batteries with the (+) and (–) ends indicated in the battery compartment. Close the battery compartment cover. -
Page 13: Remote Control Operation Range
Remote Control Operation Range Point the remote control at the unit no more than 3 metres from the remote control sensor and within 40° of the front of the unit. The operating distance may vary depending on the brightness of the room. -
Page 14: Connecting To A Tv
Connecting to a TV Use a SCART cable (not supplied) to connect between the DVD player’s SCART OUT socket and the TV’s SCART IN socket. COAXIAL SCART OUT SCART Cable (not included) Connecting to an External Audio Device Use a COAXIAL cable (not supplied) to connect between the DVD player’s COAXIAL OUT socket and the amplifier’s COAXIAL IN socket. -
Page 15: Compatible Disc Types
Compatible Disc Types Disc Types Disc Logo Recorded Content DVD-VIDEO (Digital Versatile Disc) AUDIO + VIDEO DVD±RW (Audio/Video format or JPEG files) AUDIO + VIDEO + JPEG DVD+ReWritable DVD±R (DVD Recordable - Audio/Video AUDIO + VIDEO + JPEG format or JPEG files) CD-R (CD Recordable - Audio/Video format or AUDIO + VIDEO + JPEG JPEG files) -
Page 16: Powering On/Off
Powering ON/OFF Connect the mains plug to the mains socket. The unit will enter STANDBY mode. “OFF” will show on the display. Press the POWER button on the unit or the remote control to switch the unit on. • “LOAD” will show on the display. Press the POWER button on the unit or the remote control to switch the unit back to •... -
Page 17: Stop Playback
Stop Playback Press the STOP button on the remote control to go to pre-stop mode, the TV screen Stop”. With some discs, the DVD player can recall the stopped location, will display “ such as on DVDs. Press the PLAY/PAUSE button to resume playback from the location where playback was stopped or from the beginning of the disc. -
Page 18: Audio Channel
Audio Channel Press the AUDIO/ANGLE button on the remote control repeatedly to select different audio languages. Subtitle Language Press the SUBTITLE/TITLE button on the remote control repeatedly to switch between different subtitle languages that are available in the disc. Goto During playing, press the GOTO button on the remote control to bring up “search”... -
Page 19: Cd/Mp3/Wma/Jpeg Disc Operation
CD/MP3/WMA/JPEG Disc Operation Playing an Audio or a JPEG Picture CD While in ON mode, press the OPEN/CLOSE button and the disc door will open. Place the CD/MP3/WMA/JPEG disc with the label side up into the CD compartment, and then press the OPEN/CLOSE button to close the disc door. -
Page 20: Fast Forward And Fast Reverse
Fast Forward and Fast Reverse Press the buttons on the remote control to fast reverse / fast forward through the disc. Each time the buttons on the remote control is pressed, the fast reverse / fast forward motion speed changes. There are 4 levels of speed available: x2, x4, x8 and x16. -
Page 21: The Playback Navigator And Settings
The Playback Navigator and Settings Current/Total Elapsed Remaining Files Number Time Time Playback Status 00:00:03 /00:04:57 Current selected File /02.---.MP3 Folder Name Filter Playback Settings ----- Repeat : Off 02.--- Mode : Normal Browser View 07.---- 10.---- DSC02692_---- Preview Music Playing File Type/Name DSC02693_---- ---------... -
Page 22: Program Playback
Program Playback Adding files to the Program List In full stop mode, press the button on the remote control to enter the right screen of playback setting of the navigator. buttons on the remote control to select Edit mode, then press the OK Press the button on the remote control to highlight the Edit mode. -
Page 23: Deleting Files From The Program List
Deleting files from the Program List Press the button on the remote control to skip to the right screen, then press the buttons on the remote control to select Program view and then press the OK button on the remote control to confirm. Press the button on the remote control to skip to the left screen in Browser view. -
Page 24: Customising The Language Settings
Customising the Language Settings Press the SETUP button on the remote OSD Language : English control to display the system setup menu. Language Subtitle : Off Press the buttons on the remote MPEG4 subtitle : Unicode Video Audio : English control to select Language and then press DVD menu : English... -
Page 25: Customising The Video Settings
Customising the Video Settings Press the SETUP button on the remote control to display the system setup menu. : 16:9 Aspect Ratio Language : PAL TV System Press the buttons on the remote : RGB Video Video out control to select Video and then press the button on the remote control. -
Page 26: Customising The Audio Settings
Customising the Audio Settings Press the SETUP button on the remote Digital Output : RAW control to display the system setup menu. Language Down sampling : On Press the buttons on the remote Video control to select Audio and then press the Audio button on the remote control. -
Page 27: Customising The Rating Settings
Customising the Rating Settings Parental control Press the SETUP button on the remote Parental control : 8. Adult control to display the system setup menu. Language Set Password Press the buttons on the remote Video control to select Rating and then press the button on the remote control. -
Page 28: Set Password
Set Password Press the SETUP button on the remote control to display the system setup menu. buttons on the remote control to select Rating and then press the Press the button on the remote control. buttons on the remote control to select Set Password, and then press Press the the OK button on the remote control, a password screen will appear on the display. -
Page 29: Maintenance
Maintenance Handling Discs • Do not touch the playback side of the disc. • Do not attach paper or tape to the disc. Playback side Cleaning Discs • Fingerprints and dust on the disc cause picture and sound deterioration. Wipe the disc from the centre outwards with a soft cloth. -
Page 30: Hints And Tips
Hints and Tips If a problem does occur, it may often be due to something very minor. The following table contains various tips. Menu Description No power. • Ensure the mains plug is connected. • Make sure that the unit is turned on. Make sure that you have selected ON mode. -
Page 31: Specifications
• Disconnect the unit from the mains supply for 30 seconds and when pressing then reconnect. any buttons Specifications Model DV-P455E Disc Format DVD, DVD±R, DVD±RW, CD, CD-R, CD-RW, JPEG Picture CD Video System PAL, NTSC Video Decompression MPEG-2/MPEG-4... - Page 32 Rovi Proprietary Rights This item incorporates copy protection technology that is protected by U.S. patents and other intellectual property rights of Rovi Corporation. Reverse engineering and disassembly are prohibited. Restriction on Use & Rovi Trade Mark Rights Use of the copyright protection technology contained in this product must be authorised by Rovi Corporation and is intended for home and other limited viewing uses only unless otherwise authorised by Rovi Corporation.
Need help?
Do you have a question about the DV-P455E and is the answer not in the manual?
Questions and answers