
Related Manuals for Mellanox Technologies ConnectX-6


Summary of Contents for Mellanox Technologies ConnectX-6
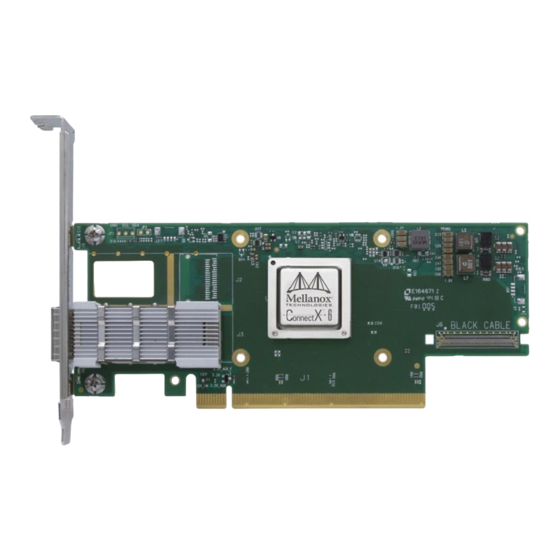
- Page 1 Mellanox ConnectX®-6 VPI Adapter Cards User Manual for Dell EMC PowerEdge Servers OPNs: Y1T43, 7TKND, 1GK7G, CY7GD Rev 1.1 www.mellanox.com Mellanox Technologies Confidential...
- Page 2 PRODUCT(S) AND ITS RELATED DOCUMENTATION ARE PROVIDED BY MELLANOX TECHNOLOGIES AS-IS WITH ALL FAULTS OF ANY KIND AND SOLELY FOR THE PURPOSE OF AIDING THE CUSTOMER IN TESTING APPLICATIONS THAT USE THE PRODUCTS IN DESIGNATED SOLUTIONS. THE CUSTOMER'S MANUFACTURING TEST ENVIRONMENT HAS NOT MET THE STANDARDS SET BY MELLANOX TECHNOLOGIES TO FULLY QUALIFY THE PRODUCT(S) AND/OR THE SYSTEM USING IT.
-
Page 3: Table Of Contents
ConnectX-6 SNAPI (Single-slot) Configuration ..............8 1.2.1 ConnectX-6 Dual-slot Socket Direct Cards 2x PCIe x16 ........9 1.2.2 ConnectX-6 SNAPI (Single-slot) PCIe 2 x8 in a Row ........10 Features and Benefits ...................... 11 1.3.1 Operating Systems/Distributions ................ 12 1.3.2 Connectivity ...................... - Page 4 Y1T43 and 7TKND Specifications ..................59 1GK7G and CY7GD Specifications .................. 60 Adapter Card and Bracket Mechanical Drawings and Dimensions ......... 61 7.3.1 ConnectX-6 Adapter Card Mechanical Drawing and Dimensions ..... 61 7.3.2 Auxiliary PCIe Connection Card ................. 61 7.3.3 ConnectX-6 Brackets Mechanical Drawing and Dimensions ......
- Page 5 • Feb. 2020 Renamed “Single-slot Configuration” to “SNAPI (Single-slot) Configuration.” • Updated ConnectX-6 SNAPI (Single-slot) PCIe 2 x8 in a Row. • Renamed section title to Installation Instructions for HDR100 Card. Aug. 2019 Added the following OPNs to relevant sections across the document: •...
- Page 6 The table below provides the ordering part numbers (OPN) for the available ConnectX-6 InfiniBand/VPI adapter cards. Initial release of ConnectX-6 cards is InfiniBand and PCIe Gen 3.0 only. VPI and PCIe Gen 4.0 functionality will be added in a future release.
- Page 7 When discussing memory sizes, MB and MBytes are used in this document to mean size in mega Bytes. The use of Mb or Mbits (small b) indicates size in mega bits. IB is used in this document to mean InfiniBand. In this document PCIe is used to mean PCI Express. Mellanox Technologies Confidential Rev 1.1...
-
Page 8: Introduction
PCI Express Gen 3.0/4.0 servers used in enterprise datacenters and high-performance computing environments. ConnectX-6 VPI adapter cards provide up to two ports of 100Gb/s for InfiniBand and Ethernet connectivity, sub-600ns latency and 215 million messages per second, enabling the highest performance and most flexible solution for the most demanding High- Performance Computing (HPC), storage, and datacenter applications. -
Page 9: Connectx-6 Dual-Slot Socket Direct Cards 2X Pcie X16
Silicom PCIe Auxiliary card and harness DPN: 2FR79 PCIe Auxiliary Connection card DPN: TFM86 In order to obtain 200Gb/s speed, Mellanox offers ConnectX-6 Socket Direct that enable 200Gb/s connectivity on servers with PCIe Gen 3.0 capability. The adapter’s 32-lane PCIe bus is split into two 16-lane buses, with one bus accessible through a PCIe x16 edge connector and the other bus through an x16 Auxiliary PCIe Connection card. -
Page 10: Connectx-6 Snapi (Single-Slot) Pcie 2 X8 In A Row
1.2.2 ConnectX-6 SNAPI (Single-slot) PCIe 2 x8 in a Row The PCIe x16 interface comprises two PCIe x8 in a row, such that each of the PCIe x8 lanes can be connected to a dedicated CPU in a dual-socket server. In such a configuration,... -
Page 11: Features And Benefits
ConnectX-6 effectively addresses this by providing advanced NVGRE and VXLAN hardware offloading engines that encapsulate and de-capsulate the overlay protocol. RDMA and RDMA over ConnectX-6, utilizing IBTA RDMA (Remote Data Memory Access) and RoCE (RDMA over Converged Ethernet Converged Ethernet) technology, delivers low-latency and high-performance over InfiniBand (RoCE) and Ethernet networks. -
Page 12: Operating Systems/Distributions
• Accelerations Adaptive Routing on Reliable Transport • Burst Buffer Offloads for Background Checkpointing 1.3.1 Operating Systems/Distributions ConnectX-6 Socket Direct cards 2x PCIe x16 (OPNs 1GK7G and CY7GD) are not supported in Windows and WinOF-2. • RHEL/CentOS • Windows •... -
Page 13: Interfaces
QSFP56 connector on the adapter card. PCI Express Interface Initial release of ConnectX-6 cards is InfiniBand and PCIe Gen 3.0 only. VPI and PCIe Gen 4.0 functionality will be added in a future release. ConnectX®-6 adapter cards support PCI Express Gen 3.0/4.0 (1.1 and 2.0 compatible) through x16 edge connectors. -
Page 14: Led Interface
1 Hz Blinking Amber occurs due to running a beacon command for locating the adapter card. Heat Sink Interface The heatsink is attached to the ConnectX-6 IC to dissipate the heat from the ConnectX-6 IC. It is attached either by using four spring-loaded push pins that insert into four mounting holes, or by screws. -
Page 15: Smbus Interface
SMBus Interface ConnectX-6 technology maintains support for manageability through a BMC. ConnectX-6 PCIe stand-up adapter can be connected to a BMC using MCTP over SMBus or MCTP over PCIe protocols as if it is a standard Mellanox PCIe stand-up adapter. For configuring the adapter for the specific manageability solution in use by the server, please contact Mellanox Support. -
Page 16: Hardware Installation
Hardware Installation Installation and initialization of ConnectX-6 adapter cards require attention to the mechanical attributes, power specification, and precautions for electronic equipment. Safety Warnings Safety warnings are provided here in the English language. For safety warnings in other languages, refer to the... -
Page 17: Installation Procedure Overview
Installation Procedure Overview The installation procedure of ConnectX-6 adapter cards involve the following steps: Step Procedure Direct Link Check the system’s hardware and software requirements. System Requirements Pay attention to the airflow consideration within the host Airflow Requirements system Follow the safety precautions... -
Page 18: Airflow Requirements
3.3.2 Airflow Requirements ConnectX-6 adapter cards are offered with two airflow patterns: from the heatsink to the network ports, and vice versa, as shown below. Please refer to the section for airflow numbers for each specific card model. Specifications Airflow from the heatsink to the network ports Airflow from the network ports to the heatsink All cards in the system should be planned with the same airflow direction. -
Page 19: Installation Instructions
Installation Instructions for HDR100 Card 7TKND Please note that the following figures are for illustration purposes only. Please make sure to install the ConnectX-6 cards in a PCIe slot that can supply the required power and airflow as stated in Specifications. Mellanox Technologies Confidential... -
Page 20: Installation Instructions For R740 Server
Repeat the step to install a second connector lock to other ends of the cable. WARNING: Orientation of cable and connector lock is important. 2. Carefully, open the connector cover on the “Main Cable” connector (White cable connector), as seen in the below figure. Rev 1.1 Mellanox Technologies Confidential... - Page 21 5. Slide the connector lock until the BOTTOM side is "under card", and tabs are through card slots. Press the top section of the connector lock down and lock in place. 6. Physically touch and verify that both connector lock tabs are completely seated. Mellanox Technologies Confidential Rev 1.1...
- Page 22 4. Install the PCIe Auxiliary card into the riser per riser installation instructions and slot matrix. Close and lock the blue card latch. 5. Pay attention to the cable routing for both cards. Rev 1.1 Mellanox Technologies Confidential...
-
Page 23: Installation Instructions For C6400 Server
Repeat the step to install a second connector lock to other ends of the cable. WARNING: Orientation of cable and connector lock is important. 3. Carefully, open the connector cover on the “Main Cable” connector (White cable connector), as seen in the below figure. Mellanox Technologies Confidential Rev 1.1... - Page 24 6. Slide the connector lock until the BOTTOM side is "under card", and tabs are through card slots. Press the top section of the connector lock down and lock in place. 7. Physically touch and verify that both connector lock tabs are completely seated. Rev 1.1 Mellanox Technologies Confidential...
- Page 25 10. Insert and press down to seat the PCIe Auxiliary card. Use a 4 in-lb. torque tool to tighten the screw to secure the card. 11. Make sure the cable is routed between the DIMM Slot and the chassis side. Mellanox Technologies Confidential Rev 1.1...
-
Page 26: Installation Instructions For C4140 Server
Cables labeled “Main White” and “Main Black” should be connected to the adapter card. 2. Open the plastic connector lock and insert both main and secondary cable through the slot. Repeat the step to install a second connector lock to other ends Rev 1.1 Mellanox Technologies Confidential... - Page 27 4. Align and insert the cable connector into the "White Cable" connector on the card. Close the connector lock, as seen in the below figure. 5. Repeat steps 1-3 to connect the Main Black cable to the “Black Cable” connector on the card. Mellanox Technologies Confidential Rev 1.1...
- Page 28 7. Physically touch and verify that both connector lock tabs are completely seated. 8. Install the Mellanox card into the riser per riser installation instructions and slot matrix. Close and lock the blue card latch. Rev 1.1 Mellanox Technologies Confidential...
- Page 29 10. Install the Mellanox Auxiliary card into the riser per slot Matrix and card installation instructions. 11. With cables routed under the riser; install the riser per riser installation instructions. 12. Make sure cable is routed as shown in the below figure. Mellanox Technologies Confidential Rev 1.1...
-
Page 30: Installation Instructions For Hdr100 Card
Do not use excessive force when seating the card, as this may damage the chassis. • Secure the adapter card to the chassis. Step 1: Secure the bracket to the chassis with the bracket screw. Rev 1.1 Mellanox Technologies Confidential... -
Page 31: Cables And Modules
LED indicator will turn off when the cable is unseated. Identifying the Card in Your System 3.8.1 On Linux Get the device location on the PCI bus by running lspci and locating lines with the string “Mellanox Technologies”: Mellanox Technologies Confidential Rev 1.1... -
Page 32: On Windows
In the display example above, notice the sub-string “PCI\VEN_15B3&DEV_1018”: VEN is equal to 0x15B3 – this is the Vendor ID of Mellanox Technologies; and DEV is equal to 1018 (for ConnectX-6) – this is a valid Mellanox Technologies PCI Device ID. -
Page 33: Driver Installation
Linux Driver Installation • Windows Driver Installation Linux Driver Installation This section describes how to install and test the Mellanox OFED for Linux package on a single server with a Mellanox ConnectX-6 adapter card installed. erequisit 4.1.1 Requirements Description Platforms A server platform with a ConnectX-6 InfiniBand/VPI adapter card installed. -
Page 34: Installing Mellanox Ofed
(such as pdsh). • If your kernel version does not match with any of the offered pre-built RPMs, you can add your kernel version by using the “mlnx_add_kernel_support.sh” script located inside the MLNX_OFED package. Rev 1.1 Mellanox Technologies Confidential... - Page 35 In this case, openibd service script will automatically unload them and load the new drivers that come with MLNX_OFED 4.1.3.2 Installation Procedure • Login to the installation machine as root. Mellanox Technologies Confidential Rev 1.1...
- Page 36 • If the installation script has performed a firmware update on your network adapter, complete the step relevant to your adapter card type to load the firmware: ConnectX-6 Socket Direct - perform a cold reboot (power cycle) Otherwise, restart the driver by running: /etc/init.d/openibd restart Rev 1.1...
- Page 37 Logs dir: /tmp/MLNX_OFED_LINUX-4.4-1.0.0.0.63414.logs 4.1.3.5 openibd Script As of MLNX_OFED v2.2-1.0.0 the openibd script supports pre/post start/stop scripts: This can be controlled by setting the variables below in the /etc/infiniband/openibd.conf file. OPENIBD_PRE_START OPENIBD_POST_START OPENIBD_PRE_STOP OPENIBD_POST_STOP Example: OPENIBD_POST_START=/sbin/openibd_post_start.sh Mellanox Technologies Confidential Rev 1.1...
-
Page 38: Installing Mlnx_Ofed Using Yum
RPM. 4.1.4 Installing MLNX_OFED Using YUM This type of installation is applicable to RedHat/OL, Fedora, XenServer Operating Systems. 4.1.4.1 Setting up MLNX_OFED YUM Repository • Log into the installation machine as root. Rev 1.1 Mellanox Technologies Confidential... - Page 39 # sudo rpm --import RPM-GPG-KEY-Mellanox warning: rpmts_HdrFromFdno: Header V3 DSA/SHA1 Signature, key ID 6224c050: NOKEY Retrieving key from file:///repos/MLNX_OFED/<MLNX_OFED file>/RPM-GPG-KEY-Mellanox Importing GPG key 0x6224C050: Userid: "Mellanox Technologies (Mellanox Technologies - Signing Key v2) <support@mellanox.com>" From : /repos/MLNX_OFED/<MLNX_OFED file>/RPM-GPG-KEY-Mellanox Is this ok [y/N]: •...
- Page 40 Please note that the resulting MLNX_OFED repository will contain unsigned RPMs, therefore, you should set 'gpgcheck=0' in the repository configuration file. • Install the desired group. # yum install mlnx-ofed-all Loaded plugins: langpacks, product-id, subscription-manager Resolving Dependencies Rev 1.1 Mellanox Technologies Confidential...
-
Page 41: Installing Mlnx_Ofed Using Apt-Get Tool
• Create an apt-get repository configuration file called "/etc/apt/sources.list.d/mlnx_ofed.list" with the following content: # deb file:/<path to extracted MLNX_OFED package>/DEBS ./ • Download and install Mellanox Technologies GPG-KEY. # wget -qO - http://www.mellanox.com/downloads/ofed/RPM-GPG-KEY-Mellanox | sudo apt-key add - • Check that the key was successfully imported. -
Page 42: Updating Firmware After Installation
Installing MLNX_OFED using the “apt-get” tool does not automatically update the firmware. To update the firmware to the version included in MLNX_OFED package, run: # apt-get install mlnx-fw-updater Or, update the firmware to the latest version available on Mellanox Technologies’ Web site as described in Updating Adapter Firmware. -
Page 43: Uefi Secure Boot
OEM card and now you wish to (manually) update firmware on your adapter card(s), you need to perform the steps below. The following steps are also appropriate in case that you wish to burn newer firmware that you have downloaded from Mellanox Technologies’ Web site ( > Support > Firmware http://www.mellanox.com Download). - Page 44 After the signature has been removed, a massage as the below will no longer be presented upon module loading: Request for unknown module key 'Mellanox Technologies signing key: 61feb074fc7292f958419386ffdd9d5ca999e403' err -11" However, please note that a similar message as the following will still be presented: "my_module: module verification failed: signature and/or required key missing - tainting kernel"...
-
Page 45: Performance Tuning
Depending on the application of the user's system, it may be necessary to modify the default configuration of network adapters based on the ConnectX® adapters. In case that tuning is required, please refer to the Performance Tuning Guide for Mellanox Network Adapters at https://community.mellanox.com/docs/DOC-2489 Mellanox Technologies Confidential Rev 1.1... -
Page 46: Windows Driver Installation
For example, if you install a 64-bit .exe on a 32-bit machine, the wizard will display the following (or a similar) error message: “The installation package is not supported by this processor type. Contact your vendor”. Rev 1.1 Mellanox Technologies Confidential... -
Page 47: Installing Mellanox Winof-2 Driver
• [Optional] If you do not want to upgrade your firmware version. (Note: MT_SKIPFWUPGRD default value is False.) MLNX_WinOF2-2_10_50000_All_x64.exe /v"/l*vx MyLog.txt=1" • Click Next in the Welcome screen. • Read and accept the license agreement and click Next. Mellanox Technologies Confidential Rev 1.1... - Page 48 If the user has a standard Mellanox card with an older firmware version, the firmware will be updated accordingly. However, if the user has both an OEM card and a Mellanox card, only the Mellanox card will be updated. Rev 1.1 Mellanox Technologies Confidential...
- Page 49 Documentation - contains the User Manual and Release Notes • Management tools - installation tools used for management, such as mlxstat • Diagnostic Tools - installation tools used for diagnostics, such as mlx5cmd b) Click Next to install the desired tools. Mellanox Technologies Confidential Rev 1.1...
- Page 50 • Click Install to start the installation. • In case firmware upgrade option was checked in , you will be notified if a Step 7 firmware upgrade is required (see • Click Finish to complete the installation. Rev 1.1 Mellanox Technologies Confidential...
- Page 51 Upon installation completion, you can verify the successful addition of the network card(s) through the Device Manager. The inf files can be located at: %ProgramFiles%\Mellanox\MLNX_WinOF2\Drivers\ To see the Mellanox network adapters, display the Device Manager and pull down the “Network adapters” menu. Mellanox Technologies Confidential Rev 1.1...
-
Page 52: Uninstalling Mellanox Winof-2 Driver
• Open a CMD console-> Click Start-> Task Manager-> File-> Run new task-> and enter CMD. • Extract the driver and the tools: MLNX_WinOF2-2_0_<revision_version>_All_x64 /a To extract only the driver file MLNX_WinOF2-2_0_<revision_version>_All_x64 /a /vMT_DRIVERS_ONLY=1 • Click Next to create a server image. Rev 1.1 Mellanox Technologies Confidential... - Page 53 • Click Change and specify the location in which the files are extracted to. • Click Install to extract this folder, or click Change to install to a different folder. Mellanox Technologies Confidential Rev 1.1...
-
Page 54: Firmware Upgrade
WinOF-2 package installation. For information on how to upgrade firmware manually, please refer to the MFT User Manual at >Products > Ethernet Drivers > Firmware Tools. www.mellanox.com Rev 1.1 Mellanox Technologies Confidential... -
Page 55: Updating Adapter Firmware
Current Available FW 20.24.xxxx 20.25.xxxx Status: Up to date Perform FW update? [y/N]: y Device #1: Up to date Device #2: Updating FW ... Done Restart needed for updates to take effect. Log File: /var/log/mlxup/mlxup-yyyymmdd.log Mellanox Technologies Confidential Rev 1.1... -
Page 56: Troubleshooting
• Check that the latest driver is loaded Link light is on, but with • Check that both the adapter and its link are set to the same speed no communication established and duplex settings Rev 1.1 Mellanox Technologies Confidential... -
Page 57: Linux Troubleshooting
-d <mst_device> q ibstat Ports Information ibv_devinfo To download the latest firmware version refer Firmware Version Upgrade http://www.mellanox.com/supportdownloader cat /var/log/messages dmesg >> system.log Collect Log File journalctl (Applicable on new operating systems) cat /var/log/syslog Mellanox Technologies Confidential Rev 1.1... -
Page 58: Windows Troubleshooting
–d <mst_device> –i <firmware_bin_file> b • Event log viewer • MST device logs: ▪ mst start Collect Log File ▪ mst status • flint –d <mst_device> dc > dump_configuration.log • mstdump <mst_device> dc > mstdump.log Rev 1.1 Mellanox Technologies Confidential... -
Page 59: Specifications
EMC: CE / FCC / VCCI / ICES / RCM / KC RoHS: RoHS Compliant Notes: a. The ConnectX-6 adapters supplement the IBTA auto-negotiation specification to get better bit error rates and longer cable reaches. This supplemental feature only initiates when connected to another Mellanox InfiniBand product. -
Page 60: 1Gk7G And Cy7Gd Specifications
EMC: CE / FCC / VCCI / ICES / RCM / KC RoHS: RoHS Compliant Notes: a. The ConnectX-6 adapters supplement the IBTA auto-negotiation specification to get better bit error rates and longer cable reaches. This supplemental feature only initiates when connected to another Mellanox InfiniBand product. -
Page 61: Adapter Card And Bracket Mechanical Drawings And Dimensions
Adapter Card and Bracket Mechanical Drawings and Dimensions All dimensions are in millimeters. The PCB mechanical tolerance is +/- 0.13mm. For the 3D Model of the card, please refer to http://www.mellanox.com/page/3d_models. 7.3.1 ConnectX-6 Adapter Card Mechanical Drawing and Dimensions 7.3.2 Auxiliary PCIe Connection Card Mellanox Technologies Confidential... -
Page 62: Connectx-6 Brackets Mechanical Drawing And Dimensions
7.3.3 ConnectX-6 Brackets Mechanical Drawing and Dimensions All dimensions are in millimeters. The bracket mechanical tolerance is +/- 0.25mm. 7.3.3.1 Tall Bracket 7.3.3.2 Short Bracket Rev 1.1 Mellanox Technologies Confidential... -
Page 63: Pcie Express Pinouts Description For Snapi
PCIe Express Pinouts Description for SNAPI ConnectX-6 SNAPI cards offer improved performance to dual-socket servers by enabling direct access from each CPU in a dual-socket server to the network through its dedicated PCIe interface. The PCIe x16 interface is split into two PCIe x8 in a row, such that each of the PCIe x8 lanes can be connected to a dedicated CPU in a dual-socket server. -
Page 64: Finding The Mac On The Adapter Card
MAC for the Ethernet protocol. The product revisions indicated on the labels in the following figures do not necessarily represent the latest revisions of the cards. Y1T43 Board Label 7TKND Board Label 1GK7G Board Label CY7GD Board Label Rev 1.1 Mellanox Technologies Confidential...
Need help?
Do you have a question about the ConnectX-6 and is the answer not in the manual?
Questions and answers