Table of Contents
Advertisement
Quick Links
2019
OD-S
NUTUBE OVERDRIVE KIT
E J 1
Table of Contents
Main features .............................................................2
Cautions Before Assembly.......................................5
Tools to prepare ......................................................................5
Checking the parts .................................................................5
Assembly Parts List .................................................6
Assembly ................................................................... 7
Adjusting and setting the main circuit board ...................9
Operation Check ........................................................9
Troubleshooting ......................................................................9
Part Names and Functions .................................... 10
Specifications .......................................................... 10
Recommended Settings........................................... 11
Normal OVERDRIVE .............................................................. 11
Tube OVERDRIVE ................................................................... 11
Hard Drive ................................................................................ 11
Mounting Diagram ....................................................13
List of mounted parts ............................................. 14
CIRCUIT DIAGRAM ................................................. 16
- 1 -
Advertisement
Table of Contents

Related Manuals for Korg Nu:Tekt OD-S


Summary of Contents for Korg Nu:Tekt OD-S
-
Page 1: Table Of Contents
Table of Contents OD-S Main features .............2 NUTUBE OVERDRIVE KIT Cautions Before Assembly........5 Tools to prepare ..............5 Checking the parts ..............5 Assembly Parts List ..........6 Assembly ..............7 Adjusting and setting the main circuit board ....9 Operation Check ............9 E J 1 Troubleshooting ..............9 Part Names and Functions ........ -
Page 2: Main Features
Main features • The Nu:Tekt OD-S is a kit used to assemble effectors that use the Nutube. • Use the Nutube on the OD-S to get an authentic tube overdrive sound. • This kit includes a TUBE GAIN knob, which allows you to easily change the distortion waveform. - Page 3 Be careful not to let metal objects get into the equipment. If something does slip into the equipment, unplug the AC adapter from the wall outlet. Then contact your nearest Korg dealer or the store where the equipment was pur- chased.
- Page 4 - 4 -...
-
Page 5: Cautions Before Assembly
Cautions Before Assembly Tools to prepare You will need the following tools in order to assemble this kit. Note: You will also need a battery and instrument cables. These items are Be careful of injury when handling parts not included, so please obtain them separately. Use caution not to injure yourself due to the protruding parts when •... -
Page 6: Assembly Parts List
Assembly Parts List Upper case Aluminum 2 Lower case Aluminum 3 Case screws Flat head screw, M3 x 12 4 Rubber feet Polyurethane 12.7 x 3.6 5 Volume knobs Includes set screws 6 Volume nuts M7, wide 10mm Volume washers 7.2 x 12 8 LED holder Washer... -
Page 7: Assembly
Assembly Attach the washer [7] onto the volume control, and then tighten the nut [6]. After you have finished tightening the Mount the LED holder [8] onto the upper case [1]. volume control nut, retighten the jack nuts Attach the LED holder [8], and then use the [17] that you temporarily tightened. - Page 8 Mount the Nutube circuit board unit [19]. 13. Adjust the main circuit board. The board comes preadjusted at the factory, but you can adjust it to Peel off the release paper on your liking by referring to the instructions on “Adjusting and setting the double-sided tape of the the main circuit board,”...
-
Page 9: Adjusting And Setting The Main Circuit Board
Operation Check Adjusting and setting the main circuit board The trimmer potentiometer on the main circuit board adjusts the Nutube When you have successfully finished assembling the unit, test its operation bias voltage. Normally, adjust this so that it produces maximum volume. while reading “Part Names and Functions”... -
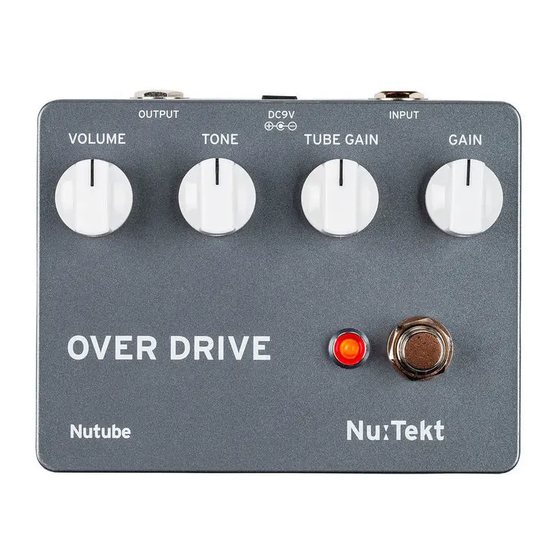
Page 10: Part Names And Functions
Part Names and Functions Specifications • Vacuum tube: Nutube 6P1 OUTPUT DC9V INPUT • Connectors and jacks: INPUT jack (monaural phone jack), OUTPUT jack (monaural phone jack), DC 9V jack ( • Power: 9V alkaline battery (6LF22/6LR61) (sold separately), or DC 9V AC adapter (sold separately) •... -
Page 11: Recommended Settings
Recommended Settings Normal OVERDRIVE This is a typical overdrive setting. If you want more of a vacuum tube sound (a milder sound), turn the TUBE GAIN knob to maximum, and adjust the distortion using the GAIN knob. If you want a harder sound, turn the GAIN knob to maximum, and adjust the distortion using the TUBE GAIN knob. - Page 12 - 12 -...
-
Page 13: Mounting Diagram
Mounting Diagram - 13 -... -
Page 14: List Of Mounted Parts
List of mounted parts 3-terminal regulator LP2950-33LPRE3 L1, L2 Inductor WBRH-3.5x5x0.8-U3.7x10 Operational amplifier TL072IP Resistor 0Ω Operational amplifier Resistor 10Ω 6pin Socket socket Resistor 100Ω Q1, Q2 J-FET 2SK303L-V3-T92-K Resistor 1kΩ Schottky barrier diode 1S30(R-1) R4, R5, Resistor 10kΩ R6, R16 Zener diode GDZJ4.7C Film capacitor... - Page 15 Nutube (vacuum tube) Nutube 6P1 VR1, VR5 Volume control 10K A Volume control 100K A Trimmer Potentiometer 10K B Volume control 500K B Battery snap Note: An electrolytic capacitor with a higher rated voltage than the voltage specified may have been used. - 15 -...
-
Page 16: Circuit Diagram
CIRCUIT DIAGRAM B8B-ZR-3.4 ( 9V ) [ WIDE ] [ LOW ][ GAIN ] [ TUBE GAIN ] SW2B [ ON ] R10B 100K VR4B [ OFF ] OPEN MS-22D10 B8B-ZR-3.4 82PF B OPEN VR4A 500K B R10A [ WIDE ] 150K [ ON ] 4.7K...
Need help?
Do you have a question about the Nu:Tekt OD-S and is the answer not in the manual?
Questions and answers