Table of Contents
Advertisement
Quick Links
*Before using the NTS-3 kaoss pad kit, please read the Assembly Instructions (PDF) carefully to
ensure proper use.
Supplementary contents
Assembly Instructions
NTS-3 kaoss pad kit video manual
NTS-3 software
logue SDK Custom Content Sound Librarian
Product website
Owner's Manual
Published 05/2024
©2024 KORG INC.
Advertisement
Table of Contents

Related Manuals for Korg Nu Tekt NTS-3 kaoss pad kit


Summary of Contents for Korg Nu Tekt NTS-3 kaoss pad kit
- Page 1 *Before using the NTS-3 kaoss pad kit, please read the Assembly Instructions (PDF) carefully to ensure proper use. Supplementary contents Assembly Instructions NTS-3 kaoss pad kit video manual NTS-3 software logue SDK Custom Content Sound Librarian Product website Published 05/2024 ©2024 KORG INC.
-
Page 2: Table Of Contents
NTS-3 kaoss pad kit - Table of contents Table of contents Introduction ........................4 Conventions in this manual ................5 Main features........................6 Connecting and getting ready to play ............... 7 Connecting and turning the power on/off ............8 Making connections and turning on the power..........8 Turning off the power .................. - Page 3 NTS-3 kaoss pad kit - Table of contents Changing the routing of an effect module..........25 Global parameters ..................... 27 Making the settings..................27 Factory reset ..................... 29 Restoring the factory default settings ............29 Appendices......................... 30 Troubleshooting....................31 Specifications ....................32 Operating requirements (for USB connection)..........33 MIDI implementation chart ................
-
Page 4: Introduction
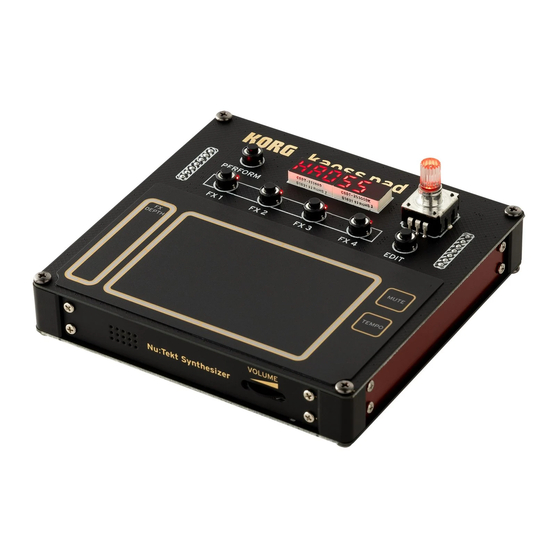
NTS-3 kaoss pad kit - Introduction Introduction Thank you for purchasing the Nu:Tekt programmable effect kit, the NTS-3 kaoss pad kit. The NTS-3 kaoss pad kit is a revolutionary effect unit that features a seamless integration of the XY pad touch interface that’s symbolic of the KAOSS with characteristic KAOSS effects—a compact yet powerful and customizable DIY kit. -
Page 5: Conventions In This Manual
NTS-3 kaoss pad kit - Introduction Conventions in this manual • The shape and displays shown by illustrations in this manual may differ in some ways from the actual product. • The parameter values shown in the example screens of this manual are only for explanatory purposes, and may not necessarily match the values that appear in the display of your instru- ment. -
Page 6: Main Features
NTS-3 kaoss pad kit - Main features Main features • The NTS-3 kaoss pad kit is a compact DIY effect kit that’s easy to assemble. • This unit has four effect modules that give you simultaneous access to four different effects, which can be combined as you see fit and controlled with your fingertips. -
Page 7: Connecting And Getting Ready To Play
NTS-3 kaoss pad kit - Connecting and getting ready to play Connecting and getting ready to play → Connecting and turning the power on/off → MIDI connectivity... -
Page 8: Connecting And Turning The Power On/Off
NTS-3 kaoss pad kit - Connecting and getting ready to play Connecting and turning the power on/off Before connecting external devices to this instrument, make sure that all devices are turned off. If you connect these devices while they are still on, this may cause your powered moni- tor speakers or other external devices to malfunction, or cause damage. -
Page 9: Auto Power-Off Function
NTS-3 kaoss pad kit - Connecting and getting ready to play Auto power-off function The NTS-3 kaoss pad kit has an auto power-off function that automatically turns the unit off after around three hours have elapsed without the knobs, buttons, touch pad or other controls being oper- ated. -
Page 10: Midi Connectivity
The NTS-3 kaoss pad kit uses the USB port to send and receive MIDI signals. Connect the USB port of the NTS-3 kaoss pad kit to your computer to exchange data with KORG KON- TROL EDITOR, as well as to transmit and receive MIDI data. -
Page 11: Part Names And Functions
NTS-3 kaoss pad kit - Part names and functions Part names and functions → Top panel → Front panel → Rear panel... -
Page 12: Features
NTS-3 kaoss pad kit - Part names and functions Features Top panel Touch pad Use your fingers to trace across the touch pad, to lightly tap the pad and to operate the effects. Press the PERFORM button while touching the touch pad to keep the touch pad in touch mode, which acts like a “hold”... -
Page 13: Front Panel
NTS-3 kaoss pad kit - Part names and functions PERFORM button → Playing Press this button to enter Perform mode. FX1–FX4 buttons → Perform mode You can individually select the four effect modules from FX1 to FX4. EDIT button → Program Edit mode Press this to enter Program Edit mode. - Page 14 NTS-3 kaoss pad kit - Part names and functions AUDIO IN jack Connect this to equipment such as a DJ mixer, a CD or MP3 player or an electronic musical instru- ment. Adjust the volume on the connected device. You can set the gain in the global parameters. →...
-
Page 15: Playing
NTS-3 kaoss pad kit - Playing Playing → Perform mode → Selecting programs → Playing the programs → Selecting an effect module → Effect types → Editing effects in detail → Saving the programs and editing the routings... -
Page 16: Perform Mode
NTS-3 kaoss pad kit - Playing Perform mode The NTS-3 kaoss pad kit launches in Perform mode when you turn on the power. This section shows you how to use Perform mode. In Perform mode, you can select a “program” that consists of up to four effect modules (FX1–FX4), and use the touch pad to alter the signal from the AUDIO INPUT jack with a maximum of four effect modules at the same time. -
Page 17: Selecting An Effect Module
NTS-3 kaoss pad kit - Playing Selecting an effect module You can individually select the effect modules (FX1–FX4) and change their effect types or switch them on/off. FX1–FX4 button: selects an effect module Press the buttons from FX1 to FX4 to select one of the effect modules. The effect name is shown on the display when the effect is on. -
Page 18: Editing Effects In Detail
NTS-3 kaoss pad kit - Playing Editing effects in detail EDIT button + FX1–FX4 buttons: selects the effect module to edit Press the FX1–FX4 buttons while holding down the EDIT button to select one of the effect modules. → Effect edit mode The unit enters Effect Edit mode. -
Page 19: Parameter Edit
NTS-3 kaoss pad kit - Parameter edit Parameter edit → Effect edit mode → Program Edit mode → Global parameters → Factory reset... -
Page 20: Effect Edit Mode
NTS-3 kaoss pad kit - Parameter edit Effect edit mode This section explains how to use Effect Edit mode. In Effect Edit mode, you can individually adjust how the effects of the FX1–FX4 effect modules are applied in response to the touch pad and FX DEPTH control. Editing the effect modules Select the effect module to edit. - Page 21 NTS-3 kaoss pad kit - Parameter edit VALUE (VALuE): the range depends on the parameter This sets the default values for the parameters. Parameters that are set to “none” using ASSIGN are set to a fixed value with this VALUE setting. MIN (MIn): the range depends on the parameter Sets the minimum value used when changing the parameter values.
-
Page 22: Curve Types And Polarities
NTS-3 kaoss pad kit - Parameter edit Curve types and polarities Editing module common parameters Selects the module common parameter. EDIT button + FX1–FX4 buttons (pressed twice): selects the module common parameters Press one of the FX1 through FX4 buttons twice while holding down the EDIT button to select a mod- ule common parameter. -
Page 23: Selecting The Module Common Parameter And Value
NTS-3 kaoss pad kit - Parameter edit MUTE button: shows the currently set value in the display Touch pad: sets the value FX DEPTH: sets the value Turn the knob: returns to step 2 (parameter selection) → Selecting the module common parameter and Use the touch pad or FX DEPTH to set the value. -
Page 24: Program Edit Mode
NTS-3 kaoss pad kit - Parameter edit Program Edit mode This section shows you how to use Program Edit mode. In Program Edit mode, you can save and initialize programs, as well as change the routing for the FX1– FX4 effect modules. Saving a program SAVE PROG (SAVE ProG): saves the program Here’s how to save the selected program. -
Page 25: Changing The Routing Of An Effect Module
NTS-3 kaoss pad kit - Parameter edit “CLEAr” blinks in the display. Press the knob again to initialize the program. You can cancel the operation by turning the knob, pressing the EDIT button or by pressing another Tip: button to enter a different mode. Changing the routing of an effect module ROUTING (routInG) : SErIAL, SErPAr, PArSEr, 1 PArA, 2 by 2, 3 to 1 This shows how to change the routing of the four effect modules for the selected program. - Page 26 NTS-3 kaoss pad kit - Parameter edit...
-
Page 27: Global Parameters
NTS-3 kaoss pad kit - Parameter edit Global parameters Use these parameters to configure the overall operations of the NTS-3 kaoss pad kit. Making the settings Turn on the power while holding down the EDIT button. Use the knob to select the global parameter to edit. Use the touch pad or FX DEPTH to edit the value. - Page 28 NTS-3 kaoss pad kit - Parameter edit 1*: Auto. Synchronizes to the external clock when there is external clock input from the USB port, and synchronizes to the internal clock when there is no input. If a cable is connected to the SYNC IN jack, the unit synchronizes to the SYNC IN input, regardless of the clock settings.
-
Page 29: Factory Reset
NTS-3 kaoss pad kit - Parameter edit Factory reset Restoring the factory default settings Turn on the power while holding down the FX4 button. The FX1 and FX4 buttons blink. Press the FX4 button to show what is targeted for factory reset in the display. Turn the knob to select which parameters are to be reset. -
Page 30: Appendices
NTS-3 kaoss pad kit - Appendices Appendices → Troubleshooting → Specifications → Operating requirements (for USB connection) → MIDI implementation chart... -
Page 31: Troubleshooting
NTS-3 kaoss pad kit - Appendices Troubleshooting Power does not turn on → Making con- • Make sure that the included USB cable is correctly plugged in and connected. nections and turning on the power • Either the AC adapter you’ve connected or the amount of power supply from your computer may be insufficient. -
Page 32: Specifications
NTS-3 kaoss pad kit - Appendices Specifications Controllers Touch pad, FX DEPTH slider, MUTE button, TEMPO button Effects Four assignable effect modules Six routings Total of 35 effects FILTER: 5 (LPF, BPF, HPF, EQ3, ISOLATOR) MODULATION: 6 (CHORUS, ENSEMBLE, FLANGER, PHASER, TREMOLO, AUTO PAN) DELAY: 4 (DELAY, PING PONG DELAY, HIGH PASS DELAY, TAPE ECHO) REVERB: 5 (HALL REVERB, ROOM REVERB, SPACE REVERB, RISER REVERB, SUBMARINE REVERB) -
Page 33: Operating Requirements (For Usb Connection)
NTS-3 kaoss pad kit - Appendices Operating requirements (for USB connection) See the Korg website for the latest information on OS support. https://www.korg.com/support/os/... -
Page 34: Midi Implementation Chart
MIDI implementation chart... -
Page 35: Preloaded Program List
NTS-3 kaoss pad kit - Appendices Preloaded program list... - Page 36 ©2024 KORG INC. Published 05/2024...
Need help?
Do you have a question about the Nu Tekt NTS-3 kaoss pad kit and is the answer not in the manual?
Questions and answers