Table of Contents
Advertisement
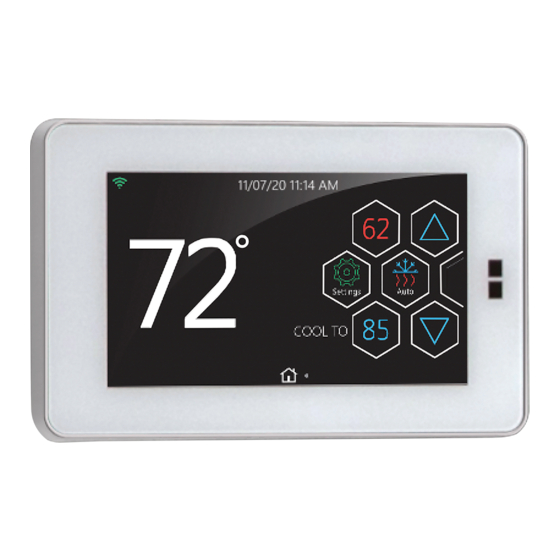
USER'S INFORMATION MANUAL
Hx3 TOUCH SCREEN THERMOSTAT
MODELS: S1-THXU430W
72
PRODUCT DESCRIPTION.................
Content...............................................
Features..............................................
THERMOSTAT CONTROLS..............
Home Screen.......................................
Secondary Home Screen.....................
Modes of Operation.............................
SETTINGS...........................................
Away Mode..........................................
Humidity Settings.................................
Fan Settings........................................
Lockout Settings..................................
Banner Information..............................
ADVANCED SETTINGS.....................
Schedule.............................................
Wi-Fi Network Status...........................
Hx THERMOSTAT APP......................
Registration and Login.........................
Wi-Fi Connectivity................................
Johnson Controls Ducted Systems
11/07/18 11:14AM
11/07/18 11:14AM
º
COOL TO
.
TABLE OF CONTENTS
2
Locations Screen.................................
2
4
Home Screens.....................................
5
MANAGING DEALER ACCESS.........
7
Using the Tips Screen.........................
8
Granting Dealer Access.......................
9
Revoking Dealer Access......................
11
APP SETTINGS..................................
12
Programmable.....................................
13
Schedule Management........................
14
Location, Room, and Dealer................
15
Away Mode..........................................
16
Notifications.........................................
17
AMAZON ALEXA SETUP...................
18
Using Alexa in Celsius.........................
24
Alexa Skill Voice Commands...............
25
APPLE WATCH SETUP......................
25
Warranty..............................................
27
62
Settings
Auto
85
30
34
35
36
37
38
38
39
39
41
41
43
44
44
44
46
47
Advertisement
Table of Contents

Related Manuals for Johnson Controls Hx3 S1-THXU430W


Summary of Contents for Johnson Controls Hx3 S1-THXU430W
-
Page 1: Table Of Contents
Lockout Settings........Away Mode.......... Banner Information......Notifications......... ADVANCED SETTINGS..... AMAZON ALEXA SETUP....Schedule..........Using Alexa in Celsius......Wi-Fi Network Status......Alexa Skill Voice Commands....Hx THERMOSTAT APP...... APPLE WATCH SETUP...... Registration and Login......Warranty..........Wi-Fi Connectivity........ Johnson Controls Ducted Systems 5407935-UUM-D-1119... -
Page 2: Product Description
Cancer and Reproductive Harm – www.P65Warnings.ca.gov PRODUCT DESCRIPTION Content The following figure shows the items in the Hx3™ Touch Screen Ther- mostat box: Thermostat User and Installer Manuals Thermostat Mounting Screws Drywall Anchors Retaining Screws A0975-001 Figure 1: Content Overvie Johnson Controls Ducted Systems... - Page 3 Figure 2 shows the tools required for installing the Hx3 Touch Screen Thermostat. It is best practice that a qualified technician performs the installation. Pencil Screwdriver Level Wire Strippers Drill Hammer 3/16” Drill Bit (Drywall) 7/32” Drill Bit (Plaster) A0976-001 Figure 2: Tools for Installation Johnson Controls Ducted Systems...
-
Page 4: Features
4.3 in. TFT 320x240 Enhanced 80° viewing angle in all directions QVGA color display RS-485 For modbus communication protocols communications bus Over the Air (OTA) Can reprogram the board functionality Wi-Fi functionality Johnson Controls Ducted Systems... -
Page 5: Thermostat Controls
Auto Away Filter Away Filter Backlight Heat Backlight Heat Home Banner Banner Home Cancel Humidity Cancel Humidity Clean Screen Clean Comfort MAX Cool Comfort Cool MAX Heat Cool Date Date Mode A1189-001 Figure 3: Thermostat Controls Johnson Controls Ducted Systems... - Page 6 Thermostat Controls NOTICE Do not spray any liquid directly on the thermostat. Spray liquids onto a cloth, and use the damp cloth to clean the screen. Use water or household glass cleaner. Do not use abrasive cleansers. Johnson Controls Ducted Systems...
-
Page 7: Home Screen
Swipe LEFT to reach the Secondary Home Screen A1191-001 Figure 5: Home Screen The Home and Secondary Home screens may differ slightly, depending on your heating and/or cooling system and the display settings of the thermostat. Johnson Controls Ducted Systems... -
Page 8: Secondary Home Screen
Figure 6. Max Heat Set Point Humidity 12/31/17 11:14AM º Humidity Settings Away Home Away Max Cool Home Set Point A1192-001 Figure 6: Secondary Home Screen To return to the Home screen, swipe right or tap Home. Johnson Controls Ducted Systems... -
Page 9: Modes Of Operation
• Off mode: In this mode, no heating or cooling operation occurs. • Heat mode: Use this mode for heating. • Cool mode: Use this mode for cooling. • Auto mode: Use this mode for automatic heating and cooling. Johnson Controls Ducted Systems... - Page 10 10 minutes or until the temperature increases or decreases by 10°F respectively. HEAT TO Settings Settings COOL TO Max Heat Cluster Max Cool Cluster (Max Heat selected from (Max Cool selected from secondary screen) secondary screen) A1195-001 Figure 9: Max Heat Mode and Max Cool Mode Johnson Controls Ducted Systems...
-
Page 11: Settings
2. Tap the relevant icons to view or edit settings. For example, tap the General icon and then tap the Time icon to change the time the ther- mostat displays. 3. To return to the Settings screen, swipe left or right. Johnson Controls Ducted Systems... -
Page 12: Away Mode
3. To disable, tap the Away icon on the thermostat or app. Alternatively, tap any setpoint, the Cancel Hold icon, or an Up/Down arrow. The setpoints change to the Home setpoints on the thermostat and the app, that is, the scheduled heating and cooling setpoints. Johnson Controls Ducted Systems... -
Page 13: Humidity Settings
• Auto mode automatically sets the DEHUM % Humidity setpoint based on indoor and outdoor temperatures. A1198-001 NOTICE Auto mode requires an outdoor sensor. If condensation appears on your windows, lower the Humidity setpoint or switch to Auto mode. Johnson Controls Ducted Systems... -
Page 14: Fan Settings
Systems Only The blue Up/Down arrows and CFM percentage only appear if the following apply: CFM % • The fan operation is NOT in Auto mode. • You are using communicating indoor equip- ment. A1200-001 Johnson Controls Ducted Systems... -
Page 15: Lockout Settings
6. To edit or disable the PIN, on the Lockout screen, tap the Edit PIN icon or the Disable icon. See Figure 16. A1229-001 A1230-001 Figure 15: Lockout Disabled Figure 16: Lockout Enabled Banner Settings Settings Cancel Cancel A1201-001 Figure 17: Set Pin Screen Johnson Controls Ducted Systems... -
Page 16: Banner Information
2. On the Banner screen, use the yellow scroll bar to view all of the available options. 3. Tap the buttons to enable or disable banner information. When a set- ting is enabled, a check mark is displayed. Johnson Controls Ducted Systems... -
Page 17: Advanced Settings
Figure 20. When you select an entry from the list of advanced settings, a selection screen similar to the one shown in Figure 21 displays. A1204-001 Figure 20: Advanced Settings Cancel Save A1205-001 Figure 21: Advanced Settings - Sound Johnson Controls Ducted Systems... -
Page 18: Schedule
OFF, CLICK, or BEEP. The default option is CLICK. See Fig- ure 21. Schedule To access the Schedule functionality, go to the Settings screen, and tap the Schedule icon. You have the option to select one of the following: Schedule Settings Edit Schedule Settings Edit Johnson Controls Ducted Systems... - Page 19 You can change the mode you have selected if required. To do so, go to the Schedule Settings screen and tap the button for the required mode. Scroll Bar OVERRIDE SETTINGS PROGRAMMABLE NON-PROGRAMMABLE A1206-001 Figure 22: Schedule Settings Screen Johnson Controls Ducted Systems...
- Page 20 • Hours (1–12): Overrides the schedule for the number of hours specified Scroll Bar OVERRIDE SETTINGS UNTIL CANCELLED NEXT EVENT A1207-001 Figure 23: Schedule Settings Screen OVERRIDE SETTINGS HOURS 2 HOURS A1208-001 Figure 24: Schedule Settings Screen Johnson Controls Ducted Systems...
- Page 21 º º Events 06:00am 08:00am 06:00pm 10:00pm Return Sleep Awake Leave Default º º º º A1209-001 Figure 25: Schedule Screen - Default Schedule MONDAY AWAKE Save º º Cancel A1210-001 Figure 26: Edit Schedule Screen Johnson Controls Ducted Systems...
- Page 22 2 day parts. The default is 4 day parts. See Figures 28 and 29. • Default: Allows you to reset the schedule to the default schedule. See Figure 25. COPY MONDAY TO Save Cancel A1211-001 Figure 27: Copy Screen Johnson Controls Ducted Systems...
- Page 23 5407935-UUM-D-1119 EVENTS - MONDAY Save Part Cancel A1212-001 Figure 28: Events Screen MONDAY Copy º º Events 06:00am 08:00am Awake Leave Default º º A1213-001 Figure 29: Schedule Screen - 2 Day Part Johnson Controls Ducted Systems...
-
Page 24: Wi-Fi Network Status
Wi-Fi connectivity information. You can also disconnect from a Wi-Fi net- work if required. To do so, tap Disconnect. NOTICE Your HVAC system and thermostat will operate if the Wi-Fi connection is lost. Only Hx Thermostat app usage and software updates are affected when offline. Johnson Controls Ducted Systems... -
Page 25: Hx Thermostat App
3. In the email verification dialog box, tap OK. 4. Check your smart device email inbox for the confirmation email. See Figure 33. 5. Review and follow the link. Tap OK to confirm your email. Johnson Controls Ducted Systems... - Page 26 PC, laptop or Mac. Figure 33: Verification Link Email NOTICE You will NOT be able to confirm your Hx Thermostat app account if you open the confirmation email link from your PC, laptop, or Mac. Johnson Controls Ducted Systems...
-
Page 27: Wi-Fi Connectivity
You must complete wireless setup to connect the thermostat to a Wi-Fi network. Part 1: Prepare for Wireless Setup 1. Ensure that your smart device is connected to Wi-Fi. 2. Ensure that the Locations screen is visible on your smart device. See Figure 35. Johnson Controls Ducted Systems... - Page 28 1. Tap Or Enter Code Manually at the bottom of the app. 2. Enter the 12-digit alphanumeric SSID displayed on the thermostat Wireless Status screen. The SSID is case-sensitive. See the SSID example highlighted in Figure 37. Johnson Controls Ducted Systems...
- Page 29 Home and Secondary Home screens. Wireless setup is now complete. You can navigate through the tutorial provided, or tap the three-bar menu icon to return to the Locations screen. Johnson Controls Ducted Systems...
-
Page 30: Locations Screen
See Figure 39. As shown in Figure 40, the following menu options are available: • Locations: Brings you to the Locations screen • Tutorial: Provides information about app icons, the Home and Secondary Home screens, settings, and the display of faults Johnson Controls Ducted Systems... - Page 31 Enter a location name. The location name is displayed on the Locations screen. b. Select an existing location and enter the location name. A Second- ary Locations screen that displays the location name is enabled. Enter a distinct location name to distinguish between thermostats. Johnson Controls Ducted Systems...
- Page 32 Wi-Fi network. • Access the app Home screens for the thermostats displayed. To do so, tap the location name of a thermostat. • Edit the location name • Delete the location Johnson Controls Ducted Systems...
- Page 33 4. Tap Yes, Delete this Location to confirm you want to delete the location. The location is removed from the Locations screen. Note: When you delete a location from the Locations screen, any loca- tions grouped under the location are also deleted. Johnson Controls Ducted Systems...
-
Page 34: App Home And Secondary Home Screens
Geo-Fencing setting. Other settings such as Away mode work in a similar way in the app and the thermostat. See the App Settings section for more information. Johnson Controls Ducted Systems... -
Page 35: Managing Dealer Access
Dealer Access screen is populated with this information. See Figure Tips icon A1017-001 Figure 44: Manage Dealer Access Manage Dealer Access Select thermostats to revoke dealer access ∞ TSTAT 2 Revoke Access Revoke Access A1018-001 Figure 45: Revoke Dealer Access Johnson Controls Ducted Systems... -
Page 36: Using The Tips Screen
Tips screen. See Figure 44. The Tips screen helps you to understand: • Installer, Diagnostic, and Status role permissions • Access duration (permanent and temporary) • The icons relating to specific roles and access durations A1019-001 Figure 46: Tips Screen Johnson Controls Ducted Systems... -
Page 37: Granting Dealer Access
Grant Dealer Access screen appears. On this screen, you can change the role type, duration, and locations as needed, and grant access to the dealer. Tips Icon (Refer to the Tips Screen page) Installer Diagnostic Status A1218-001 Figure 47: Grant Dealer Access Johnson Controls Ducted Systems... -
Page 38: Revoking Dealer Access
Temperature Threshold Select On or Off Select to Change Temp Humidity Threshold Humidity Threshold Select On or Off Select to Change % Delete Thermostat Software Version: XX zz.000 X Hx Thermostat A1221-001 Figure 48: App Settings Johnson Controls Ducted Systems... -
Page 39: Programmable
Figure 49. The Edit Schedule screen appears. 4. Tap the setpoint, time (hour and minute), period (AM/PM), or fan for editing. See Figure 50. 5. Repeat steps 2–4 to edit the day parts in each day as required. Johnson Controls Ducted Systems... - Page 40 2 day parts. The default is 4 day parts. See Figure 51. • Copy: Allows you to copy the scheduled day to any other day of the week. See Figure 52. Save Save Save Save Figure 51: 4 Day Part Option Figure 52: Copy Option Johnson Controls Ducted Systems...
-
Page 41: Location, Room, And Dealer
Settings Away Setpoints ° ° Heat Cool Reset Reset Cancel Home Away Hold Save Save Figure 53: Setpoints Figure 54: Figure 55: Figure 56: Away Icon Home Icon Cancel Hold Icon Johnson Controls Ducted Systems... - Page 42 In order for Geo-Fencing to operate, ensure “Notifications” is enabled and “Location” access is set to “Always” under your smart device Settings. Tap here to check your Settings Region Diameter in Miles Thermostat Home A1226-001 Figure 57: Geo-Fencing Johnson Controls Ducted Systems...
-
Page 43: Notifications
° ° ° ° Reset Reset Reset Reset Reset Reset Humidity Threshold Temp Threshold A1227-001 Figure 60: Min and Max Setpoints Johnson Controls Ducted Systems... -
Page 44: Amazon Alexa Setup
“Alexa, set {Room Name} to {number} degrees" "Alexa, set {Room Name} to {number}" "Alexa, set the {Room Name} temperature to {number} degrees" Set device temperature "Alexa, change the {Room Name} to {number} degrees" "Alexa, turn {Room Name} temperature to {number} degrees" Johnson Controls Ducted Systems... - Page 45 Turn device "Alexa, turn on {room Name fan}" fan on "Alexa, turn {Room Name} to Cool" "Alexa, turn {Room Name} to Heat" Change mode "Alexa, turn {Room Name} to Auto" "Alexa, turn {Room Name} Off" Johnson Controls Ducted Systems...
-
Page 46: Apple Watch Setup
• Multiple Locations: In the app, tap and hold the face of the watch. A Devices screen appears. Tap the Devices screen and the list of thermostats appears for editing. Third-Party Trademarks Notice: For information about third-party trademarks, refer to the relevant company websites. Johnson Controls Ducted Systems... -
Page 47: Warranty
Limited Warranty Residential Thermostats WARRANTY TERMS: Johnson Controls Unitary Products (hereinafter “Company”) warrants this product to be free from defects in factory workmanship and material under normal use and service and will, at its option, repair or replace any parts, without charge, subject to the exclusions below, that prove to have such defects according to the terms outlined in this warranty. -
Page 48: 5407935-Uum-D-1119
You may also have other rights which vary from state to state. Subject to change without notice. Published in U.S.A. 5407935-UUM-D-1119 Copyright © 2019 by Johnson Controls. All rights reserved. Supersedes: 5407935-UUM-C-0819 York International Corp. 5005 York Drive...
Need help?
Do you have a question about the Hx3 S1-THXU430W and is the answer not in the manual?
Questions and answers