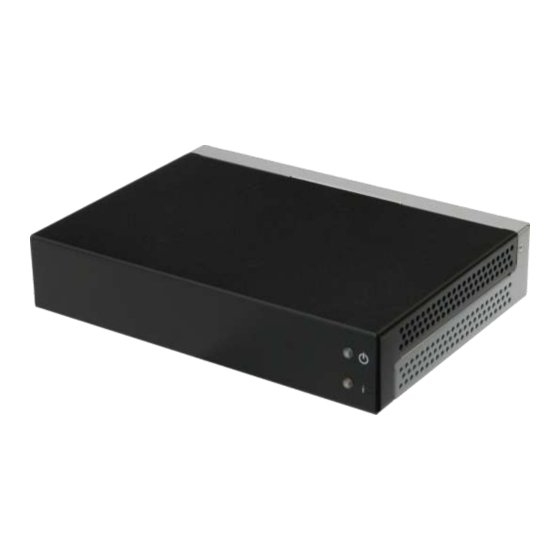
Summary of Contents for ViewSonic NMP-550
-
Page 1: Media Player
NMP-550 Media Player User’s Manual Revised September 2009 © 2009 ViewSonic Corporation. -
Page 2: Table Of Contents
Troubleshooting Tips 1.8. Mounting provisions CONFIGURING THE NMP-550 MEDIA PLAYER 2.1. Attach a USB keyboard to the NMP-550 2.2. Connect the NMP-550 to your network 1) DHCP – Automatically assign network IP address 2) Static – Manually assign network IP address 2.3. -
Page 3: Introduction
Signage Manager Express software. 1.1. Hardware Features The NMP-550 Media Player is a Full-HD 1080p high definition digital signage player featuring a reliable embedded hardware design and versatile open-standard SMIL programmability. Full-HD 1080p hardware decoding of MPEG, H.264, and VC-1 media formats... -
Page 4: Package Contents
1.3. Package Contents NMP-550 Player Unit AC Adapter and Cord Ethernet cable RCA to 1/8” mini-jack audio adapter INCLUDED: A USB keyboard is required for system setup 1.4. Front Panel Indicators 1.5. Rear Panel I/O Connections 1. Ethernet port for network content update 2. -
Page 5: System Set-Up
When using the VGA connection, your monitor should support XGA (1024x768) resolution or greater. For audio output, you will also need to connect a stereo RCA cable from the NMP-550 to your monitor. When using an HDMI connection, audio is sent along with video over the HDMI cable, so no additional cables are required. -
Page 6: Mounting Provisions
1.8. Mounting provisions The HMP-500S/505S is supplied with a pair of mounting plates for physical installation. 1. Attach the mounting plates to the bottom side of the player with 2 screws (supplied) on each side. 2. The player with the mounting plates attached can be mounted using 4 screws (not supplied) at 76mm X 228mm (2.99”... -
Page 7: Configuring The Nmp-550 Media Player
Use the keyboard arrow keys to highlight menu items, press the space bar to move the star (cursor), and then press enter to confirm (<OK>) or reject (<Cancel>) any changes. NOTE: If you plan to use your NMP-550 as a standalone media player without a connection to your network, please proceed to Section 2.3 to complete configuration. -
Page 8: Static - Manually Assign Network Ip Address
b. To identify the assigned IP address, highlight “Device information” from the “Main Menu” and press “Enter to select. The following “Device information” dialog box will be displayed: The “Device information” dialog box lets you confirm the firmware version, IP address, and current time on the device’s clock. -
Page 9: Clock And Calendar Settings
2.4. Clock and Calendar Settings Set the correct time zone, time, and date. Daylight Saving (DST) rules can be configured in Set time zone. Highlight “Time setting” from the “Main Menu” and press “Enter” to select. The following menu will be displayed: 2.5. -
Page 10: Content Management
3. Content Management For testing videos and player connectivity, please see the Signage Manager Express Software Manual for operating instructions. For setting up the player on a Scala Content Manager Network, please see the IAdea HD Player Scala Setup Guide... -
Page 11: Working With Smil
SMIL directory will be copied to the player and the sample contents will begin to play. 4.3. Advanced Customization via SMIL The NMP-550 utilizes W3C SMIL as the underlying scripting language, which lends well to customization to your project management needs. For resources and community support, please visit www.a-smil.org. -
Page 12: Technical Data
5. Technical Data 5.1. Specifications Video format support Image format support Audio codec support Playback control Content management method Physical I/O connectors Local storage Accessories Power requirement Power consumption Environmental Dimensions POPAI Screen Media Standards S6 (MPEG-1 SIF, 3Mbps CBR) S7 (MPEG-1 480p, 10Mbps CBR) S8 (MPEG-1 720p, 15Mbps CBR) S9 (MPEG-2 480p, 6Mbps CBR) -
Page 13: Mechanical Drawings
Weight Safety Certifications Warranty *typical usage when playing 1080P full resolution video 5.2. Mechanical Drawings Drawing shown with included mounting plate accessory, used for attaching the player via 4 screws with 76mm X 228mm (2.99” X 8.98”) spacing. 8.3 X 6 X 1.7 (inches) (excluding projections) 1.14kg 2.5lbs UL-approved AC adapters... -
Page 14: Appendix: Faq
What is the maximum file size for a single video file? The maximum video file size for the ViewSonic NMP-550 Media Player is 2GB. We recommend reserving a safety margin to avoid exceeding the limit (i.e. limiting files to 1850MB). - Page 15 To avoid this distorted look, adding black bars are a common technique. The Network Media Player can be configured to automatically add black bars for certain types of displays. You can set the output resolution in NMP-550 ’s configuration menu to match the native resolution of your display.
- Page 16 the play list and restart player. The player should loop through all media files, indicating a fault with the play list. If the playback is scheduled to play at specific time, check to see if the device is set to the right time zone on the world clock.
-
Page 17: L Imited W Arranty
11. ViewSonic will not be responsible for any damage to, loss of, or consequential loss from the inability to use, any programs, data or other information stored on any media or any part of any Product serviced hereunder. ViewSonic makes no representations or warranties whatsoever to keep confidential or secure any data stored on any media or any part of any Product serviced hereunder. - Page 18 ViewSonic access to the device for the performance of warranty service. 3. Bring or ship the product prepaid in the original container, with the associated accessories, to ViewSonic or any ViewSonic authorized service center. 4. For additional information or the name of the nearest ViewSonic service center, contact your ViewSonic dealer/ reseller or ViewSonic.


Need help?
Do you have a question about the NMP-550 and is the answer not in the manual?
Questions and answers