Advertisement
Advertisement
Table of Contents

Related Manuals for Laser PJT-DVD01-BLK


Summary of Contents for Laser PJT-DVD01-BLK
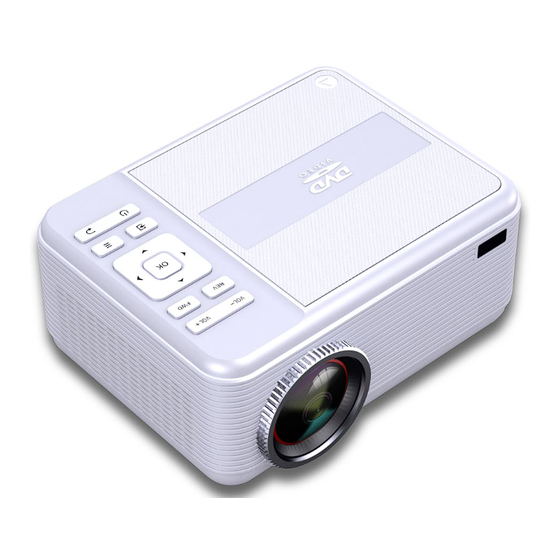
- Page 1 Laser Bluetooth DVD Projector -PJT-DVD01-BLK...
-
Page 2: Precautions Before Use
CAUTION: This unit should only be opened or repaired by qualified personnel. Please contact Laser for more information. PRECAUTIONS BEFORE USE KEEP THESE INSTRUCTIONS IN MIND: Do not use this device near water. Clean with a slightly damp cloth. Do not cover or block any ventilation openings. When placing the device on a shelf, leave 5 cm (2”) free space around the whole device. - Page 3 Avoid placing the device on any surfaces that may be subject to vibrations or shocks. To clean the device, use a soft dry cloth. Do not use solvents or petrol-based fluids. To remove severe stains, you may use a damp cloth with dilute detergent. The supplier is not responsible for damage or lost data caused by malfunction, misuse, modification of the device or battery replacement.
-
Page 4: Installation
spilled or objects have fallen into the apparatus, when the apparatus has been exposed to rain or moisture, does not operate normally, or has been dropped. Do not use a damaged power cord or plug or a loose outlet. Doing so may result in fire or electric shock. - Page 5 Removing the Lens Cover Remove the lens cover before using the unit Close the lens cover when unit is not in use. Installing your Projector Your projector can be installed in various configurations (see picture below). Front Table: The projector can be placed on a table in front of the screen. This is the most common way to position the projector for quick setup and portability.
- Page 6 Rear Ceiling: The projector mounted upside-down from the ceiling behind the screen. NOTE: A projector mount is required to install the projector (not included). A special rear projection screen is required (not included). To Reduce Image Distortion, it is recommended to move the projector as close to centre of screen. Distance Between Projector and Screen Measure the distance between the projector and the position of the screen.
- Page 7 Mounting your Projector to the Ceiling When mounting the projector to the ceiling, please purchase a projector mount recommended by an installation professional and follow the instructions of the mount. Before mounting the projector to the ceiling, please check to ensure the ceiling structure can support the weight of the projector and the mount.
- Page 8 Vertical adjustment Please follow the below diagram for vertical adjustment. Adjust Focus and Keystone Follow below picture to adjust the focus and trapezoidal screen. Adjust the focus by turning the knob while observing the image near the centre of the screen. Optimal focus is obtained when the pixels are clearly visible and sharp.
- Page 9 The keystone image is created when the projector image is projected to the screen at an angle. The keystone correction will restore the distorted image to a rectangular or square shape.
- Page 10 Remote Control POWER Press to power unit ON / OFF. Mute Mutes all audio from the projector. RANDOM Press to random playing for the loaded disc. OSD Press to display information of the current video/ audio. Angle On supported DVDs, press and hold to view alternate angles. Subtitle Press to change subtitle mode.
- Page 11 0-9 Number Keypad Enter chapter/title to play. Go to a specific chapter or track numbers. Use play button to begin playing. Zoom For the movie/video, press to access the zoom function, select from 2x, 3x, 4x, 1/2, 1/3, 1/4. Install / Remove batteries for Remote Control Remove the battery compartment cover on the back of your remote by carefully sliding to open.
-
Page 12: Menu Button
Controls of Projector VOLUME – EARPHONE JACK VOLUME + AV JACK PLAY/PAUSE MICRO SD CARD SLOT STOP HDMI PORT 1 NAVIGATOR BUTTONS HDMI PORT 2 USB PORT (MEDIA PLAYER) SOURCE BUTTON DC IN JACK MENU BUTTON LENS RETURN BUTTON IR WINDOW (FRONT) POWER ON INDICATOR VGA PORT POWER OFF INDICATOR... - Page 13 ANGLE ADJ. KNOB Vol -: Adjust the volume down. Vol +: Adjust the volume up. Play/Pause: Press here to play or pause the audio / movie playback. Stop: Stop the audio/ video /photo playback. 5-6. Arrows (UP/DOWN/LEFT/RIGHT)/ OK: Press to navigate on-screen menus and make selection.
- Page 14 Installing the power adapter Follow below picture to connect power adapter Connect the small pin into the port marked DC on the unit. Connect the plug end to the mains outlet. Connecting HDMI Follow below picture to connect a HDMI cable and supported device. Turn off...
- Page 15 Turn off the unit before connect an AV cable, as shown below. Once connected, press the button to turn on unit and power indicator will be lit GREEN Press the / SOURCE button to select AV mode and the video of AV device will shown on projector screen Connecting VGA Follow below picture to connect a VGA cable and device.
- Page 16 Please refer to the following table for supported resolutions. Connect Audio Output (Aux Out / Line Out / Earphones) Follow below picture to connect audio cable and device. Press the button to turn off the power of your projector before connection. Use an audio cable to connect as shown in the below figure.
- Page 17 Once connected, turn on the projector. The sound should output from your external device. USB Device and Micro Sd Card “TF” Follow below picture to connect a USB and TF card. Turn off the unit before connecting a USB / TF card.
- Page 18 Using TF Card and USB Playback (Media Player) Connect a USB / TF device: 1. Turn off the unit before connecting a USB / TF card. 2. Plug the USB device into the USB port. 3. After connecting, press the button to turn on the unit and the power indicator light will be lit GREEN.
- Page 19 Using Bluetooth Playback Pairing a Bluetooth Wireless Speaker or Sound Bar NOTE: Bluetooth is OFF by default when the projector powers ON. Bluetooth can be turned ON or OFF from the OPTIONS Menu. Enable Bluetooth on the receiver (external speakers, sound bar…etc) to which you wish to connect.
-
Page 20: Dvd Setup
DVD SETUP TV Display: Sets the aspect ratio of the playback image when using an external television display. 4:3 Panscan - a 4:3 aspect ratio that will trim the left and right sides from a widescreen source. Also known as Fullscreen. 4:3 Letterbox - select this if you have a standard 'square' television (4:3 aspect ratio). - Page 21 Audio Setup: This option you are able to change the audio settings for the DVD player LT/RT - Select this option if your DVD player is connected to a Dolby Pro Logic decoder. Stereo - Select this option when output delivers sound from only the two front speakers. Dual Mono: L Mono/R Mono /Mix Mono/Stereo these four audio modes select for VCD/Mp3 audio output Dynamic:...
- Page 22 Audio Setup: These are settings for the video quality of the DVD output to display: Sharp, BRIGHTNESS, CONTRAST, HUE, SATURATION for Sharp setting, there are three options: High, Medium, Low. Enter these items respectively. Other Setting Use direction key LEFT/RIGHT to adjust the value. Then press OK Preferences...
- Page 23 This DVD player is compatible with both NTSC and PAL televisions. Choose either NTSC (US/Americas/Japan) or PAL (Europe/Asia) TV output settings to correspond your television. Use to select the TV types, include PAL/AUTO/NTSC. NTSC - Select this option when connected to an NTSC television. The output of PAL discs will automatically be converted to NTSC format.
-
Page 24: Troubleshooting
TROUBLESHOOTING Before resorting the maintenance service, please kindly check by yourself with the following chart. Power light is on. If it is not on, check the projector is plugged into the mains, that the socket is switched on, and then press the power button on the projector. - Page 25 Step 1: Find your receipt which proves the date of purchase. Where the date of purchase cannot be verified, your place of purchase or Laser will make an assessment based on the date of manufacture, the condition of the Laser Product and the type of defect.
Need help?
Do you have a question about the PJT-DVD01-BLK and is the answer not in the manual?
Questions and answers