Table of Contents
Advertisement
Quick Links
Advertisement
Table of Contents

Subscribe to Our Youtube Channel
Related Manuals for Laser PJ-220FHD-699


Summary of Contents for Laser PJ-220FHD-699
- Page 1 User Manual Movie & Gaming Projector PJ-220FHD-699...
-
Page 2: Safety Precautions
SAFETY PRECAUTIONS • Please read this manual thoroughly before using the projector. • Only qualified personnel should open or repair this device. • Adhering to safety precautions reduces the risk of fire, electric shock, or injury. • This device is not intended for use by individuals with reduced physical, sensory, or mental capabilities, unless given proper instructions by someone responsible for their... - Page 3 SAFETY PRECAUTIONS continued... only the supplied one. • Do not place the power cable under the projector or heavy objects, and avoid heating the cable. • Handle the power adaptor with dry hands and always unplug by gripping the plug, not the cord.
-
Page 4: What's In The Box
WHAT’S IN THE BOX • LED projector • Remote control • AC power adaptor • 120” fold-able projector screen • Accessory pack to install the screen • User manual... - Page 5 SETTING UP THE PROJECTOR SCREEN...
-
Page 6: Setting Up The Screen
SETTING UP THE SCREEN continued... -
Page 7: Setting Up The Projector
SETTING UP THE PROJECTOR Remove the lens cover Close the lens cover before using. when not using. DISTANCE FROM THE PROJECTOR AND SCREEN... - Page 8 SETTING UP... continued... To reduce image distortion, it is recommended to move the projector as close to centre of screen. If you cannot install the projector squarely facing the screen, correct any resulting keystone distortion using the keystone adjustment control. VERTICAL ADJUSTMENT Please follow the below diagram for vertical adjustment.
- Page 9 SETTING UP... continued... ADJUST FOCUS AND KEYSTONE Adjust the focus by turning the knob while observing the image near the centre of the screen. Optimal focus is obtained when the image is visible and sharp. Depending on the projected screen size, the focus near the screen edges may be less sharp than the screen centre.
-
Page 10: Remote Control
REMOTE CONTROL MENU POWER ON HOME MENU NAVIGATOR BUTTONS MUTE VOLUME- VOLUME+ FLIP RETURN FLIP PLAY/PAUSE Power: Press to power Return/Exit: Press to exit ON. Press twice to power the projector menu. OFF. Flip: Press to flip display Mute: Press to mute image 180 degrees. - Page 11 REMOTE CONTROL continued... INSTALLING/REMOVING BATTERIES FOR REMOTE CONTROL Remove the battery compartment cover on the back of your remote by carefully sliding to open. The battery cover can then be lifted away. Fit the correct batteries (2x AAA, not included), referring to the polarity markings.
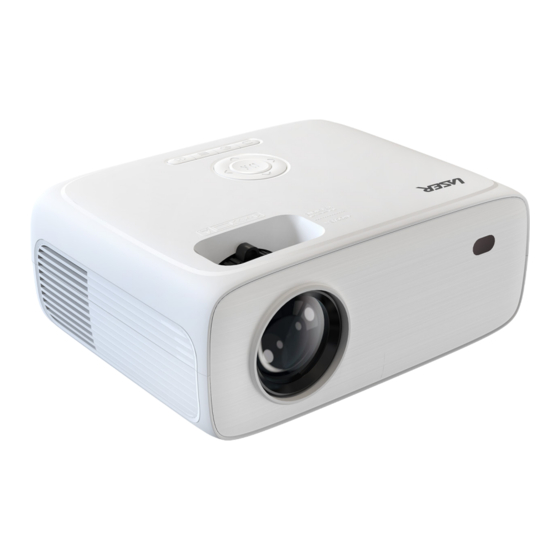
- Page 12 OVERVIEW 9 10 11 12 13 14 15 2 5 4 1 1. POWER 12. HDMI Port 1 Button 2. RETURN Button 13. HDMI Port 2 3. NAVIGATION 14. USB Port 4. MENU Button 15. POWER INPUT 5. SOURCE 16. Vertical adjustment knob Button 6.
- Page 13 OVERVIEW continued... Arrows/OK Press to navigate on screen menus and make selections Back Power Press to return to Press to power on a previous page or the projector. Press setting in the twice to power off on-screen menus the unit Source Menu Press to change...
-
Page 14: Operation
OPERATION TURN ON • Plug the projector into a power source. • Indicator light: Red • Press the power button. • Indicator light: White • The projector will turn on after 5 seconds. TURN OFF • Press the power button twice. - Page 15 OPERATION continued... HDMI CONNECTION • Turn off the unit before connecting the HDMI cable (not included). • After connecting, press the Power button to turn on unit and power indicator will light GREEN. • Press the Source button to switch to HDMI mode and the video of HDMI device will show on the projector screen.
- Page 16 OPERATION continued... AV CONNECTION • Turn off the unit before connecting the AV cable. • Use AV cable to connect as shown in the below illustration. • After connecting, press the Power button to turn on unit and power indicator will light GREEN.
- Page 17 OPERATION continued... CONNECT A USB/MICRO SD DEVICE • Turn off the unit before connecting a USB flash drive or Micro SD card. • After connecting, press the Power button to turn on the unit and the power indicator light will be lit GREEN. •...
- Page 18 OPERATION continued... correct title and press the button of unit or remote button to start playback. Press button of unit or button or remote to start playback. • Press buttons to fast search forward and rewind. • Press button to search next or previous title.
- Page 19 OPERATION continued... AUDIO CONNECTION - HEADPHONES • Turn off the projector before connecting the cables. • Connect a 3.5mm audio cable (not included) to the Headphones socket in the projector. Connect the other end to an external speaker. • After connecting the cable, turn on both units. If required, switch to correct input source on the external speaker.
- Page 20 OPERATION continued... AUDIO CONNECTION - BLUETOOTH This projector allows you to output all sound to a connected Bluetooth speaker or audio device. • Enable Bluetooth mode on the speaker you wish to output the projector audio to. • On the projector menu, select the SETUP option.
-
Page 21: Menu Settings
MENU SETTINGS PICTURE Picture Mode Standard Contrast AUDIO Brightness Color OPTION Tint TIME Sharpness ColorT emperature Medium Noise Reduction Middle SelectM enuA djust PICTURE • Press button to enter projector menu. • Use the buttons to navigate the menu. • Press button to go back previous menu level. - Page 22 MENU SETTINGS continued... PICTURE Sound Mode Standard Treble AUDIO Bass Auto Volume OPTION TIME Select Menu Adjust AUDIO • Press button to enter projector menu. • Use the buttons to navigate the menu. • Press button to go back previous menu level.
- Page 23 MENU SETTINGS continued... PICTURE OSD Language English Aspect Ratio 16:9 AUDIO Bluetooth Projection mode Front OPTION Reset TIME Info Select Menu Adjust OPTION • Press button to enter projector menu. • Use the buttons to navigate the menu. • Press button to go back previous menu level.
- Page 24 MENU SETTINGS continued... PICTURE Clock OffT ime SOUND On Time Sleep Timer OPTION Auto Sleep TIME Select Menu Adjust TIME • Press button to enter projector menu. • Use the buttons to navigate the menu. • Press button to go back previous menu level.
-
Page 25: Troubleshooting
TROUBLESHOOTING NO IMAGE IS PROJECTED OR A “NO SIGNAL” MESSAGE IS DISPLAYED • Check the power light next to the power button is on and green. If it’s red, then press the power button to take the device out of standby. - Page 26 TROUBLESHOOTING continued... THE LAMP (BULB) SWITCHES OFF AFTER A PERIOD OF TIME. IS THE WARNING LIGHT INDICATOR RED? IF SO, THE PROJECTOR IS OVERHEATING WHICH TURNS THE LIGHT OFF AUTOMATICALLY. • Leave the projector to cool for a few minutes. •...
-
Page 27: Specifications
SPECIFICATIONS Light Source Type Display Native 1920 x 1080 Resolution 1080p, 1080i, 720p, 576i, HDMI Input Supported 480p, and 480i Operating: 72W Power Consumption Standby: 0.8W Power adaptor - input AC 100-240V 50/60Hz Power adaptor - output DC 30V 2.4A Supports USB flash drives up to 1TB USB Port... - Page 28 Thank you for your purchase! Laser Corporation is 100% Australian owned & operated. To get the most out of your product please read the user manual carefully and keep for future use. For specific information relating to your product such as Spare Parts, FAQs, Warranty claims, and...
- Page 29 Visit our website www.laserco.com.au Check us out at www.youtube.com/lasercoau...
Need help?
Do you have a question about the PJ-220FHD-699 and is the answer not in the manual?
Questions and answers