Advertisement
Quick Links
** SEE OUR WEBSITE FOR STEP BY STEP ASSEMBLY VIDEOS **
https://vegepod.com.au/pages/assembly-videos
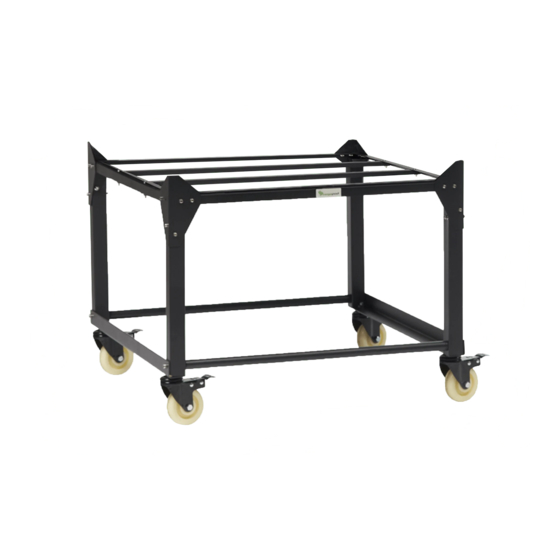
Stand/Trolley Assembly Instructions
Medium 1m x 1m
Component Checklist
rounded head
Legs
Angle cross braces
With holes
Angle cross braces
No holes
Cross brace tube
Corner brace
Long Bolts
M6*55
Medium Bolts
M6*45
Short Bolts
M6*16
Nuts
Large Bolts
Angle trolley
support
Tube for Trolley
base
Castor wheels
+ rubber caps
Allen keys
4
2
2
2
4
8
4
16
28
4
2
2
4
2
Advertisement

Related Manuals for Vegepod Medium Trolley Stand


Summary of Contents for Vegepod Medium Trolley Stand
- Page 1 ** SEE OUR WEBSITE FOR STEP BY STEP ASSEMBLY VIDEOS ** https://vegepod.com.au/pages/assembly-videos Stand/Trolley Assembly Instructions Medium 1m x 1m Component Checklist Legs Angle cross braces With holes Angle cross braces No holes Cross brace tube Corner brace Long Bolts M6*55...
- Page 2 Assembly IMPORTANT ***** ENSURE STAND TROLLEYS ARE ONLY USED ON FLAT, HARD LEVEL GROUND The wheels will not work on soft areas. Once filled with soil the Vegepods are very heavy. So please ensure the wheels are locked and secure. Select the 2 ‘angle cross braces with holes’( that have 2 holes in the middle of them).
- Page 3 4. When you have bolted both the 2 long angle cross braces with holes to the corner braces then slide the last 2 angle cross braces in(on top of other cross braces) and bolt those to the corner braces. 5. Bolt legs to the Corner Brace using the LONG bolts and tighten. Rotate the legs to line the holes up.
- Page 4 6. Place angle trolley support piece on legs lining up holes. Rest there while you pick up a trolley tube. Now get a large bolt and push through angle trolley support and leg and then twist on the trolley tube. Do the same to the other end and tighten with the largest allen key.