
Subscribe to Our Youtube Channel
Related Manuals for SCHUNK PW V6


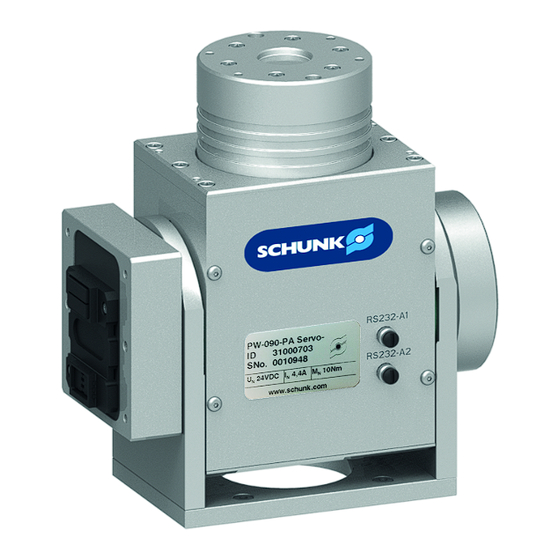
Summary of Contents for SCHUNK PW V6
- Page 1 Translation of the original operating manual Assembly and operating manual PW V6 Servo-electric rotary pan-tilt actuator...
- Page 2 Imprint Copyright: This manual is protected by copyright. The author is SCHUNK GmbH & Co. KG. All rights reserved. Any reproduction, processing, distribution (making available to third parties), translation or other usage - even excerpts - of the manual is especially prohibited and requires our written approval.
-
Page 3: Table Of Contents
Design and description.................... 18 Design ......................... 18 Description ...................... 18 Connection board .................... 19 LED........................ 21 Assembly and installation .................. 22 Mechanical connection .................. 22 Electrical connection .................. 24 02.00 | PW V6 | Assembly and operating manual | en | 389670... - Page 4 Product stops abruptly .................. 47 Maintenance ...................... 48 Maintenance intervals.................. 48 Disassembly and assembling ................ 48 Translation of original declaration of incorporation .......... 49 Annex to Declaration of Incorporation .............. 50 02.00 | PW V6 | Assembly and operating manual | en | 389670...
-
Page 5: General
Dangers for persons! Non-observance can lead to irreversible injury and even death. CAUTION Dangers for persons! Non-observance can cause minor injuries. NOTICE Material damage! Information about avoiding material damage. 02.00 | PW V6 | Assembly and operating manual | en | 389670... -
Page 6: Applicable Documents
A wide range of accessories are available for this product For information regarding which accessory articles can be used with the corresponding product variants, see catalog data sheet. 02.00 | PW V6 | Assembly and operating manual | en | 389670... -
Page 7: Basic Safety Notes
• Make sure that the product is used only in the context of its defined application parameters, Technical data 16]. 02.00 | PW V6 | Assembly and operating manual | en | 389670... -
Page 8: Personnel Qualification
• Wear protective gloves and safety goggles when handling hazardous substances. • Wear close-fitting protective clothing and also wear long hair in a hairnet when dealing with moving components. 02.00 | PW V6 | Assembly and operating manual | en | 389670... -
Page 9: Notes On Safe Operation
• Do not recommission the product until the malfunction has been rectified. • Test the product after a malfunction to establish whether it still functions properly and no increased risks have arisen. 02.00 | PW V6 | Assembly and operating manual | en | 389670... -
Page 10: Disposal
• Stand clear of suspended loads and do not step into their swiveling range. • Never move loads without supervision. • Do not leave suspended loads unattended. 02.00 | PW V6 | Assembly and operating manual | en | 389670... -
Page 11: Protection During Commissioning And Operation
Before starting up the machine or automated system, check that the EMERGENCY STOP system is working. Prevent operation of the machine if this protective equipment does not function correctly. 02.00 | PW V6 | Assembly and operating manual | en | 389670... -
Page 12: Protection Against Electric Shock
• The effectiveness of the potential equalisation must be verified by executing regular safety measurements. 02.00 | PW V6 | Assembly and operating manual | en | 389670... -
Page 13: Protection Against Magnetic And Electromagnetic Fields
A special additional EMC test may be necessary if the system has a high risk potential. 02.00 | PW V6 | Assembly and operating manual | en | 389670... -
Page 14: Notes On Particular Risks
Before starting any work on the product: Switch off the power • supply and secure against restarting. Make sure, that no residual energy remains in the system. • 02.00 | PW V6 | Assembly and operating manual | en | 389670... - Page 15 In case of an energy supply failure, it is the user's • responsibility to revert the drive into a safe state. 02.00 | PW V6 | Assembly and operating manual | en | 389670...
-
Page 16: Technical Data
CAN bus [up to 1 MBit/s] PROFIBUS DP [1.5 MBit/s] RS232, parameterization interface More technical data is included in the catalog data sheet. Whichever is the latest version. 02.00 | PW V6 | Assembly and operating manual | en | 389670... -
Page 17: Electrical Operating Data
Connection of the logic supply of the product to a 24V power Ø supply unit. Connection of the power supply of the product to a transformer Ø power supply unit or to a switching power supply unit. 02.00 | PW V6 | Assembly and operating manual | en | 389670... -
Page 18: Design And Description
The PROFIBUS address range is between 0 and 127 and the CAN bus range is between 0 and 255. The RS232 interfaces are used to parameterize the axes of the rotary pan-tilt actuator. 02.00 | PW V6 | Assembly and operating manual | en | 389670... -
Page 19: Connection Board
DIP switches for Boot and termination and CAN bus Default termination X1/X2 Marking Function PB_A PROFIBUS_A PB_B PROFIBUS_B CAN_H CAN bus_H CAN_L CAN bus_L +24 V Logic supply Functional earth (optional) 02.00 | PW V6 | Assembly and operating manual | en | 389670... - Page 20 ON position. If the product is not the last device on the CAN bus, the CAN termination DIP switch must be in the OFF position. 02.00 | PW V6 | Assembly and operating manual | en | 389670...
-
Page 21: Led
Green Motor voltage Indicates whether the motor voltage is connected. • Lights up as long as voltage is present in the product. • Does not light up if there is no voltage in the product. 02.00 | PW V6 | Assembly and operating manual | en | 389670... -
Page 22: Assembly And Installation
Connect the product to the machine/system with screws. Ø Use suitable connecting elements (adapter plates) if ✓ necessary. Observe the permissible depth of engagement. ✓ Observe the tightening torque for the mounting screws. ✓ 02.00 | PW V6 | Assembly and operating manual | en | 389670... - Page 23 Base Axis 2 plate plate Centering sleeve [Ø] Mounting screws Minimum depth of engagement [mm] Maximum depth of engagement [mm] Tightening torque [Nm] 5.87 5.87 11.7 11.7 02.00 | PW V6 | Assembly and operating manual | en | 389670...
-
Page 24: Electrical Connection
For 24 V operation: set the brake chopper to 28 V or "0" NOTE The cable color throughout this chapter refers to the use of a SCHUNK connection cable. 02.00 | PW V6 | Assembly and operating manual | en | 389670... -
Page 25: Rs232 Interface
The tilt axis (Axis 1) and the swivel axis (Axis 2) can be parameterized via the respective RS232 interfaces, Commissioning the product 34]. RS232 interface Color Designation Brown n. c. White Blue Black 02.00 | PW V6 | Assembly and operating manual | en | 389670... -
Page 26: Can Bus Interface
CAN L CAN H +24 V +24 V CAN L CAN H Superordinate control system (PC, PLC) Power voltage supply Logic voltage supply CAN bus circuit diagram 02.00 | PW V6 | Assembly and operating manual | en | 389670... - Page 27 0.25 mm² Blue 0.25 mm² Power voltage supply +24V 2.5 mm² Blue 2.5 mm² CAN assignment of the 9-pin D-sub socket D-sub socket solder side Terminal CAN_L CAN_H 02.00 | PW V6 | Assembly and operating manual | en | 389670...
-
Page 28: Profibus Dp Interface
+24 V +24 V PB_B PB_A +24 V +24 V PB_B PB_A Superordinate control system (PC, PLC) Power voltage supply Logic voltage supply PROFIBUS DP circuit diagram 02.00 | PW V6 | Assembly and operating manual | en | 389670... - Page 29 Blue 0.25 mm² Power voltage supply +24V 2.5 mm² Blue 2.5 mm² PROFIBUS DP assignment of 9-pin D-sub plug D-sub plug solder side Terminal X1 PB_B PB_A 02.00 | PW V6 | Assembly and operating manual | en | 389670...
-
Page 30: Installing And Connecting
26] and PROFIBUS DP interface 28]. Start up the product, Commissioning the product 34]. Ø Logic voltage LED lights up. ✓ Motor voltage LED lights up. ✓ 02.00 | PW V6 | Assembly and operating manual | en | 389670... -
Page 31: Connecting Ground Cable
Always use all components to screw in the ground cable and install them in this order: toothed lock washer, cable lug, washer and bolt. See "Ground connection" diagram. Observe the tightening torque. 02.00 | PW V6 | Assembly and operating manual | en | 389670... -
Page 32: Installing Connection Cap
Pull the connection cable through the cover (4) or the Ø connection cap (2) and connect it to the adapter board (3). 02.00 | PW V6 | Assembly and operating manual | en | 389670... -
Page 33: Combination Of Multiple Products
X2 of the product are clamped in Terminal X1 of Product n+1. The terminating resistor for CAN bus or PROFIBUS must be set on the last product, CAN bus interface 26] and PROFIBUS DP interface 28]. 02.00 | PW V6 | Assembly and operating manual | en | 389670... -
Page 34: Commissioning The Product
35]. Open Motion Tool Schunk (MTS) via mts.exe, Open Motion Tool Ø Schunk (MTS) 36]. Perform initial commissioning via Motion Tool Schunk (MTS), Ø Performing initial commissioning 39]. 02.00 | PW V6 | Assembly and operating manual | en | 389670... -
Page 35: Connect The Product To The Computer
The power supply of the product is connected ■ Connect the USB parameterization cables on the computer and Ø the product to the respective RS232 interfaces. 02.00 | PW V6 | Assembly and operating manual | en | 389670... -
Page 36: Open Motion Tool Schunk (Mts)
Open Motion Tool Schunk (MTS) by using mts.exe. Ø The program window is displayed. ✓ Go to Settings and choose Open Communication… from the Ø menu. 02.00 | PW V6 | Assembly and operating manual | en | 389670... - Page 37 Select the Serial Generic interface and the customer-specific Ø channel, set the baud rate, and press the Select button. Go to Module and select Search Bus. Ø 02.00 | PW V6 | Assembly and operating manual | en | 389670...
- Page 38 NOTE In the product window, you can view the status of the product, change parameters, and test Schunk Motion Protocol (SMP) commands; see the Motion Control document. 02.00 | PW V6 | Assembly and operating manual | en | 389670...
-
Page 39: Performing Initial Commissioning
Additional control elements for motion commands are ✓ displayed. Click the Move button. Ø The product moves in the defined cycle. ✓ To test further SMP commands, choose the Module option. Ø 02.00 | PW V6 | Assembly and operating manual | en | 389670... - Page 40 Assembly and installation To set parameters, select the Parameters option. Ø 02.00 | PW V6 | Assembly and operating manual | en | 389670...
-
Page 41: Set The Product To Its Factory Settings
✔ 5.9 Updating firmware NOTICE Risk of damaging the adapter board! Faulty updating of the firmware can cause damage to the adapter board. Contact SCHUNK service. • 02.00 | PW V6 | Assembly and operating manual | en | 389670... -
Page 42: Systemintegration
NOTE The number of connected products depends on the used bus system. A maximum of 255 IDs can be assigned. For more information, see Motion Control document. 02.00 | PW V6 | Assembly and operating manual | en | 389670... -
Page 43: Schunk Motion Protocol
"0x02". If the request fails, D-Len will have the value "0x02". NOTE For specific features of the different bus systems, please consult the software manual Motion control. 02.00 | PW V6 | Assembly and operating manual | en | 389670... -
Page 44: Important Commands
• Velocity (optional) • Acceleration (optional) • Current (optional) • Jerk (optional) Response (Slave -> Master): If possible, the time that the module needs for the movement is returned. 02.00 | PW V6 | Assembly and operating manual | en | 389670... - Page 45 The motor phases are short-circuited. Parameter (Master -> Slave): None. Response (Slave -> Master):Error message "ERROR EMERGENCY STOP" is triggered. Others: Can only be reset by "CMD ACK." 02.00 | PW V6 | Assembly and operating manual | en | 389670...
- Page 46 "INFO NO ERROR“ info message is sent after sending "OK“ (0x4F4B). Example for CMD ACK D-Len Param Meaning M -> S 0x01 0x8B S -> M 0x03 0x8B 0x4F 0x4B 02.00 | PW V6 | Assembly and operating manual | en | 389670...
-
Page 47: Troubleshooting
ERROR_CABLE_BREAK (0x76) parameter. Possible cause Corrective action Bus cable fault (connection interrupted). Check bus cable for damage and replace if necessary. Further troubleshooting, see document. Motion Control. 02.00 | PW V6 | Assembly and operating manual | en | 389670... -
Page 48: Disassembly And Assembling
Incorrect works can cause damage to the mechanics and internal electronics. Disassembly or opening of the product is not permitted. • Only allow SCHUNK to repair the product. • 02.00 | PW V6 | Assembly and operating manual | en | 389670... -
Page 49: Translation Of Original Declaration Of Incorporation
Person authorized to compile the technical documentation: Robert Leuthner, Address: see manufacturer's address Lauffen/Neckar, April 2019 p.p. Ralf Winkler, Manager for development of gripping system components 02.00 | PW V6 | Assembly and operating manual | en | 389670... -
Page 50: Annex To Declaration Of Incorporation
Risk of break-up during operation 1.3.3 Risks due to falling or ejected objects 1.3.4 Risks due to surfaces, edges or angles 1.3.5 Risks related to combined machinery 02.00 | PW V6 | Assembly and operating manual | en | 389670... - Page 51 1.5.16 Lightning Maintenance 1.6.1 Machinery maintenance 1.6.2 Access to operating positions and servicing points 1.6.3 Isolation of energy sources 1.6.4 Operator intervention 1.6.5 Cleaning of internal parts 02.00 | PW V6 | Assembly and operating manual | en | 389670...
- Page 52 Supplementary essential health and safety requirements for machinery intended for underground work Supplementary essential health and safety requirements for machinery presenting particular hazards due to the lifting of persons 02.00 | PW V6 | Assembly and operating manual | en | 389670...
Need help?
Do you have a question about the PW V6 and is the answer not in the manual?
Questions and answers