Table of Contents
Advertisement
Advertisement
Table of Contents

Related Manuals for COFFEtek VITRO X3


Summary of Contents for COFFEtek VITRO X3
- Page 1 VITRO X3 BEVERAGE MACHINE TECHNICAL MANUAL...
-
Page 2: Table Of Contents
COFFEtek LTD VITRO X3 TECHNICAL MANUAL FOREWORD ..........................4 SECTION 1 TECHNICAL INFORMATION ..................6 INTRODUCTION ..............................6 SPECIFICATIONS .............................. 7 SERVICES REQUIRED............................8 Electrical Supply ............................. 8 Water Supply ..............................8 GENERAL DESCRIPTION..........................9 Cabinet Front ..............................9 Cabinet Rear ..............................9 Cabinet Interior ............................... - Page 3 Cleaning (Espresso) ............................. 55 Cleaning (Instant) ............................56 Filling Procedure (Instant & Tea)........................57 Filling Procedure (Espresso) ........................58 FAULT FINDING GUIDE ......................59 SECTION 4 EXPLODED PARTS DIAGRAM ................61 BUTTON BARISTA APP* ......................67 23/02/17 Issue 1 VITRO X3...
-
Page 4: Foreword
The manufacturer reserves the right to make changes, without notice, to the design of the beverage machine, which may affect the information, contained in this manual. The Vitro X3 Beverage Machine is designed for indoor use, in an environment with an ambient temperature range of between 1ºC and 40ºC. - Page 5 COFFEtek LTD This page is intentionally blank. 23/02/17 Issue 1 VITRO X3...
-
Page 6: Section 1 Technical Information
The Vitro X3 Beverage Machine has a feature, which heats the water in the boiler very quickly, with one heater connected to the instant boiler and another to the espresso boiler, from the same 230V~, 16A single-phase supply. -
Page 7: Specifications
DISPENSE TIME PER CUP INST 15 Seconds DISPENSE TIME PER CUP ESP 40 Seconds POWER (Instant) 2.8KW POWER (Espresso) 1.1KW CUP SERVING/HOUR MAINS WATER/PORTABLE YES/YES MIN/MAX PRESSURE-MPa MIN-0.08/MAX-1 ILLUMINATED BUTTONS BACK PANEL SELF CLEANING BUTTON 23/02/17 Issue 1 VITRO X3... -
Page 8: Services Required
15mm dia. Water mains supply, terminating at a convenient stop tap located within 1m of the beverage machine. Water pressure : 0.08MPa minimum, 1MPa maximum A 15mm double backcheck valve, with inspection port, should be fitted prior to the flexible hose. VITRO X3 Issue 1 23/02/17... -
Page 9: General Description
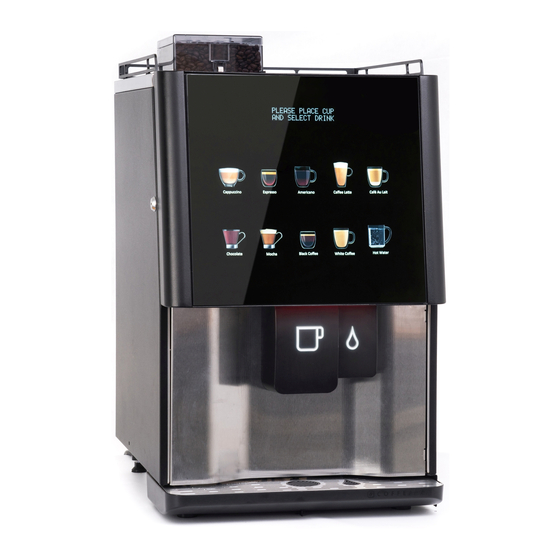
COFFEtek LTD GENERAL DESCRIPTION The Vitro X3 Beverage Machine is a table top unit which may be mounted on a secured table, bench, cabinet or food and drink counter. Cabinet Front The cabinet front door has a large glass panel and located within this panel are 10 capacitive touch switches. -
Page 10: Water System
If the temperature is 50 more than the DESIRED TEMPERATURE, set in the CHANGE SETTING MENU (see Section 2 paragraph 24) all boosting operations are disabled. If the actual temperature is between 0 – 35 less than the DESIRED TEMPERATURE one SSR VITRO X3 Issue 1 23/02/17... - Page 11 TIME the next coffee based vend produced from the machine will heat the Espresso boiler to the specified GRP OVRDRVE TEMP from the CHANGE SETTINGS MENU to ensure a cooler vend is not to be produced 23/02/17 Issue 1 VITRO X3...
-
Page 12: Tank Filling & Overflow Protection
Inlet Valve Valves Header Tank Valves Instant Boiler Espresso Boiler Overtemp Overtemp Cutout 1 Cutout 2 HOT WATER ESPRESSO Overflow BREWER BREWER GROUP Mixer FIG 1.2 WATER SYSTEM – FUNCTIONAL DIAGRAM VITRO X3 Issue 1 23/02/17... -
Page 13: Electrical And Electronic System
Controller’s microprocessor circuit to the current drive necessary to operate output devices, i.e. motors, whippers and inlet valve. PUSHBUTTONS WATER LEVEL MOTORS/FAN CONTROLLER TEMP SENSOR VALVES BOARD KEYPAD HEATER SSR'S DISPLAY FIG 1.3 ELECTRICAL & ELECTRONIC SYSTEM – FUNCTIONAL DIAGRAM 23/02/17 Issue 1 VITRO X3... -
Page 14: Circuit Description
MPU Controller to operate the relevant output devices in the correct sequence and for the specified duration. Operator data information is sent in parallel form to the (LCD) Display. VITRO X3 Issue 1 23/02/17... -
Page 15: Section 2 Programming
P r o g r a m m i n g INTRODUCTION The Vitro X3 Beverage Machine provides two discrete user programs: The Operator’s program and the Engineer’s Program. The Operator’s Program is available to both the Operator and the Service engineer, but the Engineer’s Program is only available to the SERVICE ENGINEER. -
Page 16: Internal Keypad Layout
Key (PROG) used to access the operators program, then used to change menu functions. ARROWS UP (), DOWN (), LEFT (), RIGHT () are used for adjustments when in program mode. key is used for selecting option when in output test mode. VITRO X3 Issue 1 23/02/17... -
Page 17: Operator Program
DISABLE VENDS is displayed. This will then disable all of the vends selections until they are re enabled. NGREDIENT OUNTERS Access the View Ingredient Counters option by using PROG key. Press ENTER to display the first counter, then press the UP arrow to scroll through the others. 23/02/17 Issue 1 VITRO X3... - Page 18 MDB F UBES This allows you to fill the MDB coin mech. This option is only visible when a coin mech is connected and the correct cash system has been set (see payment system settings) VITRO X3 Issue 1 23/02/17...
-
Page 19: Engineer Program
BLUETOOTH MENU USB ACTIVITIES SET MACHINE SERIAL No (Inhibited by default only appears when enabled) I2C STATUS SET DATE AND TIME TIMED EVENTS TANK STATUS CHANGE SETTINGS 23/02/17 Issue 1 VITRO X3... - Page 20 The first entry in the SELECT DRINK TO MODIFY menu allows the drink name to be changed. In general, on Coffetek equipment the drink name has no effect on the behavior of the selection button. Choosing a drinks name on some competitor’s equipment actually configures the selection, so this point should be noted.
- Page 21 <ING B> Typically ingredient B is ingredient B motor starts in tenth of a 000 (Start) Chocolate second. <ING B> Time for which ingredient B motor runs in tenths of a second. 000 (Duration) 23/02/17 Issue 1 VITRO X3...
- Page 22 These parameters control the timing of this FLUSH BOWL A shot of water. 010 (Duration) Note. Only occurs on last cycle of multi-cycle drinks. VITRO X3 Issue 1 23/02/17...
- Page 23 Three options are available. SWAP DRINKS – the drinks on the selected buttons are swapped over. COPY DRINK – the selected drink is copied to the destination button but remains at the original button also. 23/02/17 Issue 1 VITRO X3...
- Page 24 GO LARGE key has not been asserted. UTPUT (UP), The OUTPUT TEST option allows an output device to be operated. The (DOWN), keys are used to move through the list of output devices. When the desired VITRO X3 Issue 1 23/02/17...
- Page 25 To change the value of the Espresso throw rate, press ENTER again. The display will show: INGREDIENT A (GRAMS PER SECOND) VAL = 00001.05 Press (UP) to increase the value or (DOWN) to decrease it. Having set the new throw rate, press ENTER to enter the new value. 23/02/17 Issue 1 VITRO X3...
- Page 26 Takes the machine drinks settings, configuration settings, canister information, CONFIG payment settings and timed events. It does not take audit data. SAVE RECIPES Takes only the drink settings (which includes drink prices). SAVE TIMED Takes only the timed event data. EVENTS VITRO X3 Issue 1 23/02/17...
- Page 27 Press ENTER again and the user will be asked whether to save to the default file. (See below for the procedure for inputting a custom filename). The display will show, DEFAULT FILE? Press ENTER to confirm. If the file already exists the display will show, FILE EXISTS OVERWRITE? 23/02/17 Issue 1 VITRO X3...
- Page 28 Press (DOWN) to move the cursor back to the bottom line and then press the * (STAR) key to select the correct character. The display will show… FILE :- AB 34567890 ABCDEFG (FLASHING DIGIT) VITRO X3 Issue 1 23/02/17...
- Page 29 Shuts down all I²C communication with other devices. Continues communication TEST with the device under test and feeds back real time ACKS or NAKS. The SET DATE AND TIME menu configures the Real time clock facility now available on 23/02/17 Issue 1 VITRO X3...
- Page 30 The timed events menu allows you to use the time and date previously set up to activate activities such as free vend periods for machines with payment systems, machine inhibit periods or to perform periodic flushes. Press ENTER on the TIMED EVENTS menu and the Display will show, VITRO X3 Issue 1 23/02/17...
- Page 31 Press ENTER to display the tank status. The display will show: WET 92°C 0447 G: WER 92 °C 0577 The top row refers to the Instant boiler, showing either WET or Dry, the temperature i.e. 23/02/17 Issue 1 VITRO X3...
- Page 32 60°C (0230) ECON TEMP Allows setting of the Economy mode the Instant boiler will lower to if set in the TIMED ACTIVITIES CUP BOOST Allows increase/decrease of temperature boost per cup dispense. RESERVED 1 RESERVED 2 VITRO X3 Issue 1 23/02/17...
- Page 33 LCD display. By default this facility is disabled. Status Display, STANDARD being the default. BEHAVIOUR 1 – Debug setting for Coffetek Software engineers only. FLUSH TIME OUT – The machine will function normally until the number of hours set in the FLUSH TIME HRS setting passes then the machine will inhibit all the vends until the machine has been flushed.
- Page 34 When set to 1, the machine does multiple fills of the doser. Requires barista BARISTA MODE brewer. DOSER This is the doser capacity in grams. This is used when you have a Barista brewer CAPACITY for calculating how long to run the second grind operation. GRAMS AINTENANCE ETTINGS VITRO X3 Issue 1 23/02/17...
- Page 35 This menu is broken down into a further three submenus. GENERAL SETTINGS Settings Description Choose which type of credit device is attached to the machine. If no credit RES CREDIT DEVICE device use FREE COINAGE TYPE Pounds 23/02/17 Issue 1 VITRO X3...
- Page 36 EXACT CHANGE LIMIT Limit of how much change it will pay out MAX CREDIT The maximum credit that can be accepted NORMAL COINS The coins accepted in normal mode. 0 is not accepted, 1 is accepted VITRO X3 Issue 1 23/02/17...
- Page 37 ACCEPTOR SETTINGS - Settings Description LEAST COIN VALUE £0.05 EDIT COIN TYPE 1 £1 EDIT COIN TYPE 2 £2 EDIT COIN TYPE 3 EDIT COIN TYPE 4 23/02/17 Issue 1 VITRO X3...
- Page 38 COFFEtek LTD EDIT COIN TYPE 5 EDIT COIN TYPE 6 How much extra credit the acceptor has taken as it doesn’t give change. OVERPAY CREDIT VITRO X3 Issue 1 23/02/17...
- Page 39 EVADTS ASSET NUM Set this to give a unique number for the machine. IMED VENT ETTINGS Settings Description DAYLIGHT SAVING If daylight saving applies to clock IGNORE RTC Ignore real time clock for timed events ECONOMY DELAY 23/02/17 Issue 1 VITRO X3...
- Page 40 RGB LIGHT ERROR On (white), off, custom , cycle. CUSTOM This is the custom colour to use when the RGB light behaviour is set to COLOUR custom. It is defined by Red Green and Blue values. VITRO X3 Issue 1 23/02/17...
- Page 41 To allow this to occur each ZMCU contains two software components namely the bootloader and the firmware. To run the bootloader it is necessary to fit the jumper labelled ENG_LK and restart the machine. Once the machine starts up the display will show: … OOTING (001) 23/02/17 Issue 1 VITRO X3...
- Page 42 All firmware must be stored in “.\COFFETEK\ZMCU\FIRMWARE” on the USB flash drive. On an operational machine any USB activity which saves data to the flash drive will create this directory automatically.
- Page 43 It is not guaranteed to trigger on each programming of the board so it’s important to remember to set the defaults regardless to ensure the machine works as expected. Quit Engineer Program Press ENTER. 23/02/17 Issue 1 VITRO X3...
-
Page 44: Section 3 Installation And Maintenance
INTRODUCTION The information given in this Section covers installation, commissioning and maintenance procedures for the Vitro X3 Beverage Machine. These procedures must be carried out by authorised personnel who are fully conversant with the equipment, using only manufacturer's approved parts. -
Page 45: Safety Warnings
Care must be taken to protect the beverage machine from frost. Do not attempt to operate the machine if it becomes frozen. Contact the nearest service agent immediately. Do not restore the machine to operational use until it has been checked and approved for use by the service agent. 23/02/17 Issue 1 VITRO X3... -
Page 46: Installation
The unit must be mounted within 10º of the vertical for safe operation. Securing The Vitro X3 Beverage Machine is a free-standing unit which can be mounted on a secure table, bench, cabinet or food and drink counter. VITRO X3... -
Page 47: Connecting The Water Services
Connect the machine hose to the mains outlet using the seals supplied and ensure that all fittings are tight. Turn on the water supply at the stopcock and check for leaks, both behind and inside the machine. 23/02/17 Issue 1 VITRO X3... -
Page 48: Connecting The Electrical Services
Preferably, the isolator switch should be located behind the machine to prevent accidental damage or misuse. The number of heaters which can be connected in circuit depends on the supply available. The supply requirements are as follows. VITRO X3 Issue 1 23/02/17... - Page 49 Where a beverage machine is to be connected to a 13A domestic socket outlet, a 3-core power cable capable of carrying a minimum current of 13A, Part No. 54416, must be used. This cable is fitted as standard. 23/02/17 Issue 1 VITRO X3...
-
Page 50: Descaling The Tank
Restore the electrical supply to the machine and carry out a test of the quality of each beverage before returning the machine to operational use. VITRO X3 Issue 1 23/02/17... -
Page 51: Commissioning
Select the Engineer's Program and run through the Output Test to check that all components are functioning correctly. Fill the ingredient canisters. Check the complete range of machine operations. If required, select the Engineer's Program and change the pre-set values to suit customer requirements. 23/02/17 Issue 1 VITRO X3... - Page 52 Restore the electrical supply to the machine. Set the On/Off switch on the machine to ON. Operate the machine through the complete range of dispense operations and check that each one is correct. VITRO X3 Issue 1 23/02/17...
-
Page 53: Daily Hygiene
This process will clean any residual product that has been left in any of the systems. Once again remove the coffee grouts bucket. Empty the contents of the bucket and wash and dry it then refit into the machine. 23/02/17 Issue 1 VITRO X3... -
Page 54: Weekly Hygiene
Once the carriage is removed slide the tea chamber towards the front of the machine to remove. Wash and dry the carriage and tea chamber. Check the filter belt for signs of wear or damage and if necessary replace. VITRO X3 Issue 1 23/02/17... -
Page 55: Cleaning (Espresso)
Unlock the body of the group from the machine by turning the white clips (A & B) to the unlock position (A already in unlocked position) then pull the while group towards the front of the machine to remove (C) 23/02/17 Issue 1 VITRO X3... -
Page 56: Cleaning (Instant)
Rotate the canister nozzles then remove the ingredient canisters. Wipe clean the exterior surfaces of the canister assembly and dry thoroughly. Disconnect the pipes from the mixing bowls and remove the dispense nozzles from the dispense head. Wash and dry these items. VITRO X3 Issue 1 23/02/17... -
Page 57: Filling Procedure (Instant & Tea)
Check that the auger at the rear of the canister is correctly aligned with the cogs at the back of the machine. 23/02/17 Issue 1 VITRO X3... -
Page 58: Filling Procedure (Espresso)
Dry the canister with a clean dry cloth or paper towel. Return the canister lid to the closed position and push the canister lock back into position. Close the door of machine and lock with key provided. VITRO X3 Issue 1 23/02/17... -
Page 59: Fault Finding Guide
Temperature probe wet Dry probe and check for leaks. No motor operation Jammed motor Check motor operation Power Supply failure Reset power safety trip Machine inoperable; Power Supply failure Replace Power Supply no display Board 23/02/17 Issue 1 VITRO X3... - Page 60 Check seals Overflow pipe incorrectly Refit overflow pipe fitted No display Display connector loose Refit connector TEMP LOW Thermal cut-out tripped Reset cut-out displayed Heater fuse blown Check fuse Incorrect temperature Check program setting setting VITRO X3 Issue 1 23/02/17...
-
Page 61: Section 4 Exploded Parts Diagram
COFFEtek LTD S e c t i o n 4 E x p l o d e d P a r ts D i a g r a m 23/02/17 Issue 1 VITRO X3... - Page 62 COFFEtek LTD VITRO X3 Issue 1 23/02/17...
- Page 63 COFFEtek LTD 23/02/17 Issue 1 VITRO X3...
- Page 64 COFFEtek LTD VITRO X3 Issue 1 23/02/17...
- Page 65 COFFEtek LTD 23/02/17 Issue 1 VITRO X3...
- Page 66 COFFEtek LTD VITRO X3 Issue 1 23/02/17...
-
Page 67: Button Barista App
(Figure 1 – illustrating the virtual keyboard for large and app drinks). NOTE: That the actual number of drinks available on the app depends on the machines 23/02/17 Issue 1 VITRO X3... - Page 68 Drink 3 for the Application. CHG APP X DRNK 4 Modify the drink settings related to Extra Drink 4 of the Application. CHG APP X DRNK 5 Modify the drink settings related to Extra Drink 5 of the Application. VITRO X3 Issue 1 23/02/17...
Need help?
Do you have a question about the VITRO X3 and is the answer not in the manual?
Questions and answers
hi what size hole and where does it need to be positioned for pipes and cables?