Table of Contents
Advertisement
Quick Links
Advertisement
Table of Contents

Related Manuals for COFFEtek BEAN TO CUP


Summary of Contents for COFFEtek BEAN TO CUP
- Page 1 BEAN TO CUP BEVERAGE MACHINE TECHNICAL MANUAL...
-
Page 2: Table Of Contents
COFFEtek LTD BEAN TO CUP BEVERAGE MACHINE TECHNICAL MANUAL FOREWORD............................4 SECTION 1 TECHNICAL INFORMATION ..................6 INTRODUCTION ..............................6 SPECIFICATIONS..............................7 SERVICES REQUIRED............................8 Electrical Supply.............................8 Water Supply ..............................8 GENERAL DESCRIPTION ..........................9 Cabinet Front..............................9 Cabinet Interior ...............................9 WATER SYSTEM.............................10 Heater Control and Boosting ........................10 Tank Filling &... - Page 3 COFFEtek LTD DAILY HYGIENE..............................35 Cleaning ...............................35 Filling ................................37 Flushing ................................37 WEEKLY HYGIENE ............................38 Cleaning ...............................38 Filling Procedure ............................39 FAULT FINDING GUIDE .........................40 SECTION 4 EXPLODED PARTS DIAGRAM ..................42 01/12/2005 Issue 1 BEAN TO CUP...
-
Page 4: Foreword
The manufacturer reserves the right to make changes, without notice, to the design of the beverage machine, which may affect the information, contained in this manual. The Bean To Cup Beverage Machine is designed for indoor use, in an environment with an ambient temperature range of between 0ºC and 40ºC. - Page 5 COFFEtek LTD This page is intentionally blank. 01/12/2005 Issue 1 BEAN TO CUP...
-
Page 6: Introduction
The program offers a menu of options; each consisting of a number of sub-options which can be altered. The Bean To Cup Beverage Machine has a feature, which heats the water in the boiler very quickly, with one heater connected, from a 230V, 16A single-phase supply. -
Page 7: Specifications
CANISTER CAPACITY - GRAM DETAILS FRESH COFFEE BEANS 1.5Kg CHOCOLATE 1500g TOPPING 1000g MENU OPTIONS/SELECTIONS DISPENSE TIME PER CUP/SEC POWER CUP SERVING/HOUR MAINS WATER/PORTABLE YES/YES MAX/MIN PRESSURE-BAR MIN-1/MAX-8 ILLUMINATED BUTTONS BACK PANEL SELF CLEANING BUTTON 01/12/2005 Issue 1 BEAN TO CUP... -
Page 8: Services Required
15mm dia. Water mains supply, terminating at a convenient stop tap located within 1m of the beverage machine. Water pressure : 1 bar minimum, 8 bar maximum A 15mm double backcheck valve, with inspection port, should be fitted prior to the flexible hose. BEAN TO CUP Issue 1 01/12/2005... -
Page 9: General Description
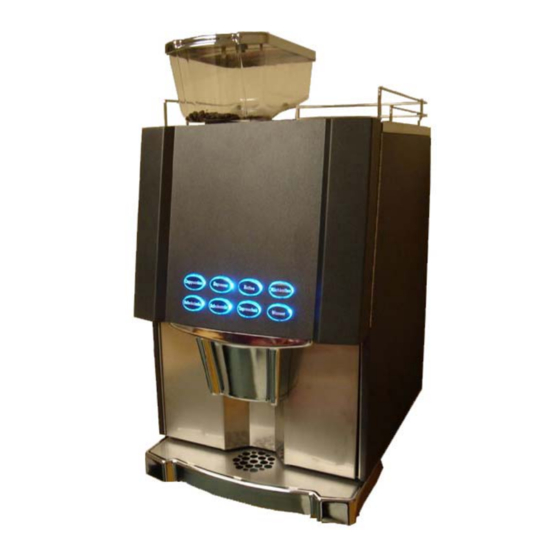
COFFEtek LTD GENERAL DESCRIPTION The Bean To Cup Beverage Machine is a free-standing unit which may be mounted on a secured table, bench, cabinet or food and drink counter. Cabinet Front The cabinet front door has a large picture panel area and located beneath this are 8 pushbuttons, which have removable front covers to enable fitting of individual selection labels. -
Page 10: Water System
If the actual temperature is between 35 - & 50 less than the desired temperature one SSR is ON and the other is OFF. Boost operations are as above. If the actual temperature is more than 50 below the desired temperature both SSR’s are ON. BEAN TO CUP Issue 1 01/12/2005... -
Page 11: Tank Filling & Overflow Protection
20 tank top ups have been made, if no selections have been taken in the meantime. Inlet Valve Valves Boiler Overtemp Cutout 1 HOT WATER Overflow COFFEE BREWER Mixer FIG 1.2 WATER SYSTEM – FUNCTIONAL DIAGRAM 01/12/2005 Issue 1 BEAN TO CUP... -
Page 12: Electrical And Electronic System
Controller’s microprocessor circuit to the current drive necessary to operate output devices, i.e. motors, whippers and inlet valve. PUSHBUTTONS WATER LEVEL MOTORS/FAN CONTROLLER TEMP SENSOR VALVES BOARD KEYPAD HEATER SSR'S DISPLAY FIG 1.3 ELECTRICAL & ELECTRONIC SYSTEM – FUNCTIONAL DIAGRAM BEAN TO CUP Issue 1 01/12/2005... -
Page 13: Circuit Description
MPU Controller to operate the relevant output devices in the correct sequence and for the specified duration. Operator data information is sent in parallel form to the (LCD) Display. 01/12/2005 Issue 1 BEAN TO CUP... -
Page 15: Introduction
P r o g r a m m i n g INTRODUCTION The Bean To Cup Beverage Machine provides two discrete user programs: The Operator’s program and the Engineer’s Program. The Operator’s Program is available to both the Operator and the Service engineer, but the Engineer’s Program is only available to the SERVICE ENGINEER. -
Page 16: Internal Keypad Layout
Key (PROG) used to access the operators program, then used to change menu functions. ARROWS UP ( ), DOWN ( ), LEFT ( ), RIGHT ( ) are used for adjustments when in program mode. key is used for selecting option when in output test mode. 01/12/2005 Issue 1 BEAN TO CUP... -
Page 17: Operator Program
UP arrow to scroll through the others. ESET OUNTERS Access Reset Counters by using PROG key, to clear drink counters press ENTER. The display will show: ARE YOU SURE ENTER (Y) ESC (N) BEAN TO CUP Issue 1 01/12/2005... -
Page 18: Engineer Program
Gain access to the Operator mode. Press the PROG key until the display shows ‘TOTAL VENDS’. At this point, on the external keypad, press the bottom left hand key. The machine is now in engineer’s mode. 01/12/2005 Issue 1 BEAN TO CUP... -
Page 19: Program Options
Repeated pressing of PROG key causes the program to scroll through the options in the above sequence. Therefore a specific option is accessed by pressing PROG key until that option is displayed. To access any program press ENTER. BEAN TO CUP Issue 1 01/12/2005... - Page 20 The time delay in starting the air for the third time. i.e. The time for which the air pump is active. PUMP 3 DURATION DRAIN TIME i.e. The time taken for the brewer to drain,3 seconds. 01/12/2005 Issue 1 BEAN TO CUP...
- Page 21 ENTER to select the device then press switch the motor ON. * Due to continuous program intervention these components will not respond to OUTPUT TEST control. BEAN TO CUP Issue 1 01/12/2005...
- Page 22 Operators Program. Press ENTER. The display will show: INGREDIENT A (GRAMS PER SECOND) 00001.05 To change the value of the Espresso throw rate, press ENTER again. The display will show: 01/12/2005 Issue 1 BEAN TO CUP...
- Page 23 Press ENTER to initialise the machine or PROG to access the next Engineer's Program option. HANGE ETTINGS CHANGE SETTINGS allows alteration of the following machine settings: DESIRED TEMP 90°C (380) Allows setting of normal operating temperature. TEMPERATURE LOW 77°C (0027) Allows setting of low cut-out point. BEAN TO CUP Issue 1 01/12/2005...
- Page 24 The brewer is prevented from opening until the pressure subsides. This variable controls the length of time after the brewer should have depressurized, but has not, that a ‘Change Belt’ warning is displayed. 01/12/2005 Issue 1 BEAN TO CUP...
- Page 25 To disable the CREDIT LOCK after it has been set, proceed as follows: Enter CHANGE SETTINGS and set the Dry Vend Flag to 42. Exit from CHANGE SETTINGS. Enter CHANGE SETTINGS and set the Dry Vend Flag to 0. BEAN TO CUP Issue 1 01/12/2005...
- Page 26 Press the drink selection key on the keypad. Press prog to exit from the PRESS DRINK FOR FIXED COUNTERS option and access the next Engineer's Program option. Quit Engineer Program Press ENTER. 01/12/2005 Issue 1 BEAN TO CUP...
-
Page 27: Introduction
INTRODUCTION The information given in this Section covers installation, commissioning and maintenance procedures for the Bean To Cup Beverage Machine. These procedures must be carried out by authorised personnel who are fully conversant with the equipment, using only manufacturer's approved parts. -
Page 28: Safety Warnings
Contact the nearest service agent immediately. Do not restore the machine to operational use until it has been checked and approved for use by the service agent. 01/12/2005 Issue 1 BEAN TO CUP... -
Page 29: Installation
The unit must be mounted within 10º of the vertical for safe operation. Securing The Bean To Cup Beverage Machine is a free-standing unit which can be mounted on a secure table, bench, cabinet or food and drink counter. BEAN TO CUP... -
Page 30: Connecting The Water Services
Connect the machine hose to the mains outlet using the seals supplied and ensure that all fittings are tight. Turn on the water supply at the stopcock and check for leaks, both behind and inside the machine. 01/12/2005 Issue 1 BEAN TO CUP... -
Page 31: Connecting The Electrical Services
The number of heaters which can be connected in circuit depends on the supply available. The supply requirements are as follows. • 1 heater operation (3kW): 230V, 10A/16A single phase, 50Hz BEAN TO CUP Issue 1 01/12/2005... - Page 32 Where a beverage machine is to be connected to a 13A domestic socket outlet, a 3-core power cable capable of carrying a minimum current of 13A, Part No. 54416, must be used. This cable is fitted as standard. 01/12/2005 Issue 1 BEAN TO CUP...
-
Page 33: Descaling The Tank
Restore the electrical supply to the machine and carry out a test of the quality of each beverage before returning the machine to operational use. BEAN TO CUP Issue 1 01/12/2005... -
Page 34: Commissioning
Select the Engineer's Program and run through the Output Test to check that all components are functioning correctly. (10) Fill the ingredient canisters. (11) Check the complete range of machine operations. (12) If required, select the Engineer's Program and change the pre-set values to suit customer requirements. 01/12/2005 Issue 1 BEAN TO CUP... - Page 35 (17) Restore the electrical supply to the machine. (18) Set the On/Off switch on the machine to ON. (19) Operate the machine through the complete range of dispense operations and check that each one is correct. BEAN TO CUP Issue 1 01/12/2005...
-
Page 36: Daily Hygiene
Remove the carriage assembly by pulling it gently towards the front of the machine. Disconnect the ball and socket coupling visible inside the coffee brewer extract chamber. This is accomplished by pulling the lower vertical rod towards the front of the machine. 01/12/2005 Issue 1 BEAN TO CUP... - Page 37 Disconnect the pipes from the mixing bowls and dispense head. Remove the mixing bowls, tubes and dispense nozzles, and also the whipper paddle and whipper base. Wash and dry these items. (10) Wash and dry the dispense area. BEAN TO CUP Issue 1 01/12/2005...
-
Page 38: Filling
Scroll through the Operator's Program options by repeatedly the PROG button until the flush option is displayed. Press key 5 (ENTER) to start the flush cycle. Press any key to stop the cycle. Press PROG repeatedly until the operators program exits. 01/12/2005 Issue 1 BEAN TO CUP... -
Page 39: Weekly Hygiene
Remove the whipper impellor by pulling toward you. Finally turn the whipper base to the right and pull off. Clean all the whipper parts in hot water using the recommended sterilising agent and dry them thoroughly. BEAN TO CUP Issue 1 01/12/2005... -
Page 40: Filling Procedure
Check that the auger at the rear of the canister is correctly aligned with the cogs at the back of the machine. 01/12/2005 Issue 1 BEAN TO CUP... -
Page 41: Fault Finding Guide
Temperature probe wet Dry probe and check for leaks. No motor operation Jammed motor Check motor operation Power Supply failure Reset power safety trip Machine inoperable; Power Supply failure Replace Power Supply no display Board BEAN TO CUP Issue 1 01/12/2005... - Page 42 Check seals Overflow pipe incorrectly Refit overflow pipe fitted No display Display connector loose Refit connector TEMP LOW Thermal cut-out tripped Reset cut-out displayed Heater fuse blown Check fuse Incorrect temperature Check program setting setting 01/12/2005 Issue 1 BEAN TO CUP...
- Page 43 COFFEtek LTD S e c t i o n 4 E x p l o d e d P a r ts D i a g r a m BEAN TO CUP Issue 1 01/12/2005...
- Page 44 ...\wittern\88734_btc_but_6.dgn 27/01/2009 11:51:10...
Need help?
Do you have a question about the BEAN TO CUP and is the answer not in the manual?
Questions and answers