Table of Contents
Advertisement
Quick Links
Instructions for Assembly, Testing, Operation, Servicing, and Storage
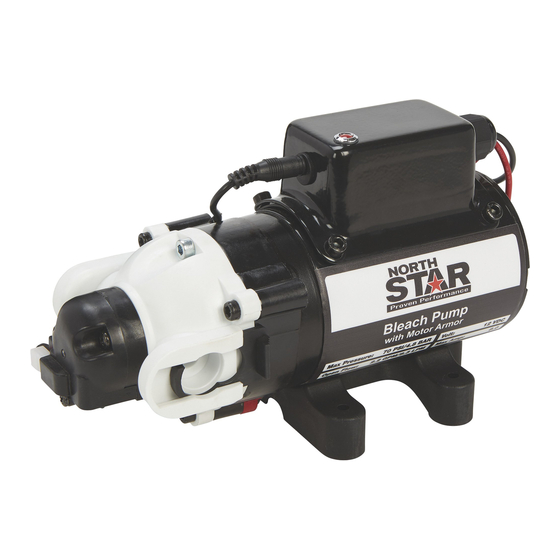
Bleach Pump with Motor Armor: For use with bleach**
READ and UNDERSTAND the Owner's Manual completely before using this pump.
Assemble, test, and use only in accordance with the Owner's Manual instructions.
EXERCISE CAUTION when mixing chemicals, as incorrect ratios or mixtures could
release harmful gases.
READ and FOLLOW chemical safety instructions.
KNOW emergency procedures BEFORE handling chemicals. Pump leaks, bodily chemical
contact, poisoning, and spills require immediate response.
AVOID inhaling, ingesting, or coming into contact with any chemicals.
WEAR personal protective gear when operating, cleaning, and servicing the pump.
KEEP pump and spray materials away from children and pets. Some chemicals are
especially toxic to them.
DO NOT TURN ON POWER to pump until ready to spray in order to avoid unintentional
spray release.
SOAK vegetation well in the area surrounding the work zone prior to and after spraying
bleach. Bleach can kill vegetation if not soaked thoroughly.
ALWAYS keep a fire extinguisher rated "ABC" nearby.
Improper use of the pump or handling of chemicals could result in serious injury, illness
to the operator or nearby persons/animals, or could cause damage to the environment.
**This pump is recommended for use in spraying bleach. The pump will be damaged, and warranty
voided if used to apply any petroleum-based product (gasoline, diesel, kerosene, or oil). The pump
should not be used to transfer any product intended for human consumption. WE RECOMMEND
THAT THE PUMP NOT BE USED FOR OTHER PURPOSES ONCE IT HAS BEEN USED FOR
SPRAYING BLEACH. Any chemical will leave some residual in the pump components, even after
the pump has been properly cleaned. These residual chemicals can have unexpected effects on future
uses. This pump should not be used by people with reduced physical, sensory, or mental capabilities
or by those who lack experience or knowledge of product use.
Any Questions, Comments, Problems, or Parts Orders
Call NorthStar Product Support at 1-800-270-0810
Owner's Manual
WARNING
M157145A.1
ITEM NUMBER: 157145, 157147,
157153
SERIAL NUMBER: __________
1
Advertisement
Table of Contents

Related Manuals for North Star 157145


Summary of Contents for North Star 157145
- Page 1 M157145A.1 ITEM NUMBER: 157145, 157147, 157153 SERIAL NUMBER: __________ Owner’s Manual Instructions for Assembly, Testing, Operation, Servicing, and Storage Bleach Pump with Motor Armor: For use with bleach** WARNING READ and UNDERSTAND the Owner’s Manual completely before using this pump.
- Page 2 Hazard Signal Word Definitions...
-
Page 3: Table Of Contents
Table of Contents Intended Use ............................ 4 Summary of Important Safety Information ..................5 During Assembly During Operation • General Chemical Safety • Chemical Applicator Safety • Chemical Accident Procedures Warning Label Location ........................7 Installation Step One: Mounting ........................8 Step Two: Plumbing ........................ -
Page 4: Intended Use
Intended Use The pump is intended for use in spraying bleach concentrations of 3% or less. SPRAYING CHEMICALS: Hazardous chemicals must be handled with caution as directed throughout this manual and on the chemical label. The pump is intended for use in spraying chemical in liquid form only. The pump is NOT intended for use in spraying chemicals in dry or aerosolized form, or for use with fumigants. -
Page 5: Summary Of Important Safety Information
Summary of Important Information WARNING Read and understand this owner’s manual completely before using the pump. Read each chemical label’s instructions before handling the chemical. Improper use of the pump or handling of chemicals could result in serious injury or illness for the operator or nearby persons/animals, or cause damage to the environment. -
Page 6: Chemical Accident Procedures
Summary of Important Information During Spraying • DO NOT OVER-APPLY chemicals. Apply at rate recommended by chemical manufacturer. Excess chemicals can be dangerous to humans/animals, damage desirable plants, and contaminate soil and water sources. • DO NOT EAT, DRINK, SMOKE, RUB YOUR EYES, or TOUCH YOUR BARE SKIN while handling chemicals and spraying. -
Page 7: Warning Label Location
Warning Label Location Part# Description Model 793288 Pump warning decal Always make sure safety labels are in place and in good condition. If a safety label is missing or not legible, order new labels or unsafe operation could result. To order replacement safety labels, call NorthStar Product Support at 1-800-270-0810. -
Page 8: Installation
To insert quick connect fittings, lubricate O-ring with water and twist fitting while inserting into pump port. Pump model Ports Minimum inlet hose size Minimum outlet hose size 157145 3/4" Quick Connect 1/2" (13mm) Inside diameter 3/8" (9.5mm) Inside diameter 157147 3/4" Quick Connect 1/2"... -
Page 9: Step Three: Connect Pump To Vehicle Battery
Fuse Wire Size Voltage Model Wire Leads (amp) (Stranded MTW) RED (positive +) #14 AWG (2.5mm 12V DC 157145 15.0 BLACK (negative -) (or heavier) RED (positive +) #14 AWG (2.5mm 12V DC 157147 15.0 BLACK (negative -) (or heavier) RED (positive +) #14 AWG (2.5mm... - Page 10 Installation (continued) 3. Connect pump Connect the pump to a 12V DC battery using the following procedure: to battery Disconnect the vehicle battery ground wire. Connect the pump’s red wire to the positive (+) terminal of the battery. Connect the pump’s black wire to the negative (-) terminal of the battery.
-
Page 11: Step Four: Check And Test Completed Assembly
Installation (continued) Step Four: Check and test completed assembly. WARNING Check and test completed assembly Serious injury could result from chemical leaks if pump is improperly assembled or the design of the pump is modified. Follow the steps below to ensure the pump is properly assembled. Never modify the pump design. -
Page 12: Features
Features Motor Armor System. This system will shut the pump off in the event of a leak inside the pump cartridge to prevent damage to the motor. ON/OFF Switch. Allows the operator to turn the pump on and off. LED. Turns on when there is a fluid leak inside the pump cartridge. Pressure Switch. -
Page 13: Important Safety Information - Operation
Operation – Important Safety Information Now that you have completed and tested your assembly, there is some important safety and health information you need to know with regard to handling and spraying chemicals. WARNING Carefully read and make sure you understand the following safety information before using the pump. -
Page 14: Chemical Applicator Safety
Operation – Important Safety Information (continued) Chemical Application Safety: WARNING Caution must be used when spraying chemicals to avoid unsafe exposure to humans and the environment. Heed the warnings below and follow all instructions carefully. Before Spraying • Soak. ALWAYS soak vegetation in the area surrounding the work zone before spraying bleach. Bleach will kill vegetation if not soaked thoroughly. -
Page 15: Chemical Accident Procedures
Operation – Important Safety Information (continued) Chemical accident procedures: WARNING Before you use the pump, review the following information with regard to handling accidents. Chemical spills, pump leaks, personal contamination, and poisoning are accident situations which you may encounter. All require an immediate response – See instructions below. Pump leak In the event that the pump develops a leak while spraying chemicals, you must immediately stop spraying. - Page 16 Operation – Important Safety Information (continued) Chemical spills Chemical spills must be quickly contained and properly cleaned up. Refer to the chemical label for any specific clean-up instructions with regard to the chemical spilled. General procedures include: 1. Control the spill by stopping the source of the spill. If the source of the spill is a container leak, place the leaking container in a larger, watertight container.
-
Page 17: Preparing The Pump For Each Use
Operation – Preparing the Pump for Each Use If the pump has been used previously, it must be prepared BEFORE EACH SUBSEQUENT USE. WARNING Read instructions below carefully for inspecting and preparing the pump. Damaged or clogged equipment could result in leaks or uncontrolled spray. Leaks could result in injury to the operator or bystanders from chemical exposure, or cause damage to the environment. -
Page 18: Step One: Assess Wind Conditions And Clear Work Area
Operation – Using the Pump Step One: Assess wind conditions and clear work area. Before you decide to spray, you must determine whether wind conditions are suitable. You must also restrict access to the work area to ensure the safety of bystanders. WARNING Do not spray if wind speeds are greater than 5 MPH or if there are bystanders in the intended spray area. - Page 19 Operation – Using the Pump (continued) 4. Pressure The pressure switch reacts to outlet pressure, and interrupts power at the switch preset shut-off pressure indicated on the pump label. When outlet pressure operation drops below a predetermined limit the switch will close and the pump operates until the shut-off pressure is achieved.
- Page 20 Operation – Using the Pump (continued) 7a. Spraying Follow the steps below for spraying a roof: roofs with Using a 3% mix (see table), spray roofs from top to bottom. soft wash Spray in 10-foot-wide sections, only applying enough to get the surface wet.
- Page 21 Operation – Using the Pump (continued) 8. Rinsing After spraying, rinse all surfaces and vegetation. Using fresh water from a garden hose, rinse any vegetation that may have come into contact with soft wash mix. Rinse surfaces from top to bottom. Rinse until there are no visible suds on the cleaned surface.
-
Page 22: Step Three: Clean Pump And Decontaminate After Use
Operation – Using the Pump (continued) Step Three: Clean pump and decontaminate after use. When done using the pump, it is important to clean the pump and decontaminate yourself. Do not store the pump when saturated with chemicals, as it is unsafe and could also result in damage to the equipment. -
Page 23: Storage
Storage When not in use, store the pump indoors. For long term or winter storage, prepare the pump by running RV antifreeze (DO NOT use automotive antifreeze) through the system. This will keep internal parts lubricated, protect against corrosion, and keep the unit from freezing. CAUTION The pump will be damaged if it freezes. -
Page 24: Troubleshooting
Troubleshooting WARNING Before troubleshooting or attempting to service, read the following safety rules to avoid accidental exposure to chemical and also risk of electric shock. Note: A reserve, clean container capable of holding at least the volume of the entire pump system should be kept for use when the pump system needs to be emptied temporarily for repairs. - Page 25 Troubleshooting (continued) PROBLEM CAUSE SOLUTION Bad electrical connection Check battery connections Short in wires Check condition of wires Pump will not turn on Fuse blown Replace fuse Faulty pressure switch Replace pressure switch assembly Incorrect voltage Check voltage (±10%) Pump will not turn on Leak inside pump cartridge Replace pump cartridge and LED light is on...
-
Page 26: Maintenance
Maintenance In the event of an internal pump cartridge leak, the pump will shut off to protect the motor and the LED light will turn on to indicate the problem. - Review the instructions in the service section of the manual before servicing. - To repair the pump, use replacement pump cartridge A157145 (for 2.2 GPM pump), A157147 (for 4.0 GPM pump), or A157153 (for 5.5 GPM pump). -
Page 27: Specifications
9" x 4" x 5" 2.2 GPM 70 PSI 3/4" Quick 5.26 lbs. 157145 12V DC 8 Amps [230mm x 102mm [8.3 LPM] [4.8 bar] connect [2.39 kg] x 127mm] 9" x 5.5" x 5"... -
Page 28: Accessories
Accessories Model #s 157145, 157147, 157153 Quick Connect x 3/4" Hose Barb Quick Connect x 3/8" Hose Barb Quick Connect x 1/2" Hose Barb Part # 787210 Part # 787208 Part # 787209 Quick Connect x 1/2" MNPT Quick Connect x 1/2" Hose Quick Connect x 3/8"... -
Page 29: Exploded Views
Exploded View – 157145 – Rev A.1 Ref # Part # Description 799619 Motor Assembly A157145 Pump Cartridge 800428 Base Plate Assembly 784449 Quick Connect Clip, Black 800088 Decal, Pump Branding 787381 Replacement Fuse, 15A... - Page 30 Exploded View – 157147 & 157153 – Rev A.1 Ref # Part # Description Model 799641 157147 Motor Assembly 799648 157153 A157147 157147 Pump Cartridge A157153 157153 800428 Base Plate Assembly 784449 Quick Connect Clip, Black 800090 Decal, Pump Branding 157147 800092 Decal, Pump Branding...
-
Page 31: Limited Warranty
Limited Warranty Dear Valued Customer: The NorthStar product you just purchased is built with the finest material and craftsmanship. Use this product properly and enjoy the benefits from its high performance. By purchasing a NorthStar product, you show a desire for quality and durability. Like all mechanical equipment this unit requires a due amount of care. - Page 32 Manufactured by Northern Tool & Equipment Company, Inc. Burnsville, Minnesota 55306 www.northerntool.com Made in China...
Need help?
Do you have a question about the 157145 and is the answer not in the manual?
Questions and answers