Table of Contents
Advertisement
Available languages
Available languages
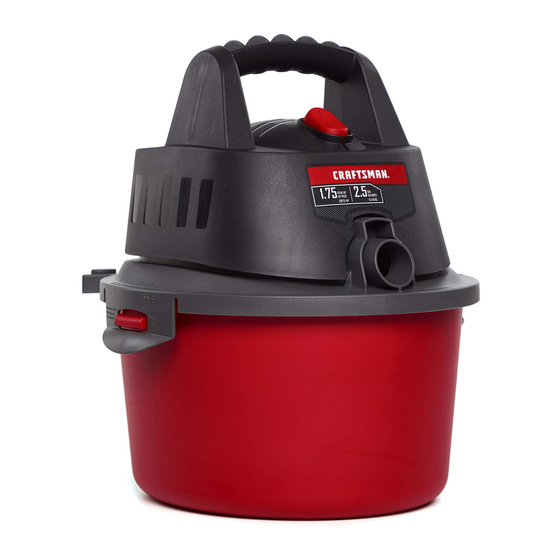
2.5 GALLON (9.5 Liter) WET/DRY VAC
ASPIRATEUR DE LIQUIDES ET DE POUSSIÈRES
DE 9,5 Litres (2,5 GALLONS)
ASPIRADORA PARA SECO/MOJADO
DE 9,5 Litros (2,5 GALONES)
IF YOU HAVE QUESTIONS OR COMMENTS, CONTACT US.
POUR TOUTE QUESTION OU TOUT COMMENTAIRE, NOUS CONTACTER.
SI TIENE DUDAS O COMENTARIOS, CONTÁCTENOS.
1-888-331-4569
Part No. SP7097
SP7097-1 CMXEVBE172500.indb 1
INSTRUCTION MANUAL | GUIDE D'UTILISATION | MANUAL DE INSTRUCCIONES
CMXEVBE172500
WWW.CRAFTSMAN.COM
Printed in Mexico
6/25/19 9:03 AM
Advertisement
Chapters
Table of Contents

Related Manuals for Craftsman CMXEVBE172500


Summary of Contents for Craftsman CMXEVBE172500
- Page 1 DE 9,5 Litros (2,5 GALONES) CMXEVBE172500 IF YOU HAVE QUESTIONS OR COMMENTS, CONTACT US. POUR TOUTE QUESTION OU TOUT COMMENTAIRE, NOUS CONTACTER. SI TIENE DUDAS O COMENTARIOS, CONTÁCTENOS. 1-888-331-4569 WWW.CRAFTSMAN.COM Part No. SP7097 Printed in Mexico SP7097-1 CMXEVBE172500.indb 1 6/25/19 9:03 AM...
- Page 2 To reduce the risk of Power Cord injury, read the instruction manual. Accessory Holder If you have any questions or comments about this or Blowing Port any product, call CRAFTSMAN toll free at: 1-888-331-4569. SP7097-1 CMXEVBE172500.indb 2 6/25/19 9:03 AM...
-
Page 3: Important Safety Instructions
Use a fine dust filter instead. • To reduce the risk of personal injury or damage to Vac, use only CRAFTSMAN recommended accessories. • To reduce the risk of inhaling toxic vapors, do not vacuum or • When using as a blower: use near toxic or hazardous materials. -
Page 4: Table Of Contents
Blowing Feature....... . .11 SP7097-1 CMXEVBE172500.indb 4 6/25/19 9:03 AM... -
Page 5: Grounding Instructions
Do not modify the plug provided with the appliance - if it will not fit the outlet, have a proper outlet installed by a qualified Adapter electrician. 3-Prong Plug SP7097-1 CMXEVBE172500.indb 5 6/25/19 9:03 AM... -
Page 6: Carton Contents
Key Description (9.5 Liter) Customer Service at 1-888-331-4569. Vac Assembly Hose Assembly Fig. D Utility Nozzle Crevice Tool Instruction Manual Filter Bag and Retainer Band (already assembled). Filter Bag is sold by Stock No. CMXZVBE38737. SP7097-1 CMXEVBE172500.indb 6 6/25/19 9:03 AM... -
Page 7: Installation
Then pull out and lift up on the Powerhead Assembly Latches to remove from Drum Tabs. Fig. F Powerhead Assembly Hose Assembly Drum Tabs (2) Latches (2) Pull Out and Lift Up on Powerhead Assembly Latches to Disengage the Drum Tabs SP7097-1 CMXEVBE172500.indb 7 6/25/19 9:03 AM... -
Page 8: Accessory Storage
Holders, located on the back of the Powerhead Assembly. Snap the Cord Clip onto the Power Cord, to secure in place. Fig. J Hose Assembly Powerhead Assembly Accessory Holders (2) Power Cord & Cord Clip SP7097-1 CMXEVBE172500.indb 8 6/25/19 9:03 AM... -
Page 9: Operation
Do not allow the connection to come into contact with liquid. CAUTION: To reduce the risk of hearing damage, wear ear protectors when using the Vac/Blower for extended time or in a noisy area. SP7097-1 CMXEVBE172500.indb 9 6/25/19 9:03 AM... -
Page 10: Vacuuming Dry Materials
IMPORTANT: To reduce the risk of damage to the Vac Fig. M do not run Motor with Float in raised position. Filter Fig. N Float In Retainer Raised Band Position SP7097-1 CMXEVBE172500.indb 10 6/25/19 9:03 AM... -
Page 11: Emptying The Drum
Up on Powerhead protectors when using the Vac / Blower for extended Assembly Latches time or in a noisy area. to Disengage the Drum Tabs Fig. P Powerhead Assembly Vac Blowing Port TWIST Hose Assembly SP7097-1 CMXEVBE172500.indb 11 6/25/19 9:03 AM... -
Page 12: Maintenance
Filter Bag. If the Filter Bag is clean and not damaged, replace it on the Filter Cage. If it cannot be reused, place a new Filter Bag over the Filter Cage. SP7097-1 CMXEVBE172500.indb 12 6/25/19 9:03 AM... -
Page 13: Cleaning And Disinfecting The Wet/Dry Vac
Drum. 3. Empty Drum after 20 minutes. Rinse with water until bleach smell is gone. Allow Drum to dry completely before sealing the Motor on the Drum. SP7097-1 CMXEVBE172500.indb 13 6/25/19 9:03 AM... -
Page 14: Service / Repair Parts
To reduce the risk of injury, unplug power cord before servicing the Wet/Dry Vac. WARNING: All disassembly and repairs should be performed by qualified personnel. Contact your Authorized Craftsman Dealer for Available Wet/Dry Vac Accessories SP7097-1 CMXEVBE172500.indb 14 6/25/19 9:03 AM... -
Page 15: Warranty
If we are unable to provide You with a suitable repaired or replacement CRAFTSMAN Product, we will provide you with a refund equal to the purchase price of your CRAFTSMAN Product or a credit to be used toward the purchase of a new CRAFTSMAN Product. - Page 16 Producto fabricado por: 8100 W. Florissant • St. Louis, MO 63136 Produit fabriqué par : U.S. & Canada Only • É.-U. et Canada seulement Part No. SP7097 Form No. SP7097 -1 Printed in Mexico 05/2019 SP7097-1 CMXEVBE172500.indb 16 6/25/19 9:03 AM...
-
Page 17: Instructions Importantes Relatives À La Sécurité
Guide d’utilisation. 9 Cordon d’alimentation En cas de questions ou de commentaires au sujet de ce produit ou de tout autre produit, téléphonez à CRAFTSMAN 10 Porte-accessoires au numéro suivant (appel gratuit) : 11 Orifice de soufflerie 1-888-331-4569. - Page 18 à proximité de tels matériaux. accessoires compatibles avec la marque CRAFTSMAN. • Cet aspirateur de liquides et de poussières n’est pas conçu pour • Lors d’une utilisation comme souffleuse : emploi par des personnes (y compris des enfants) ayant des –...
-
Page 19: Introduction
Vidage du tambour ......26 Fonction de soufflante ......26 SP7097-1 CMXEVBE172500.indb 19 6/25/19 9:03 AM... -
Page 20: Instructions Relatives À La Mise À La Terre
– si elle ne tient pas dans la prise de Adapter Adaptateur courant, demandez à un électricien professionnel 3-Prong Plug Fiche à 3 broches d’installer une prise de courant avec mise à la terre conforme aux stipulations du code. SP7097-1 CMXEVBE172500.indb 20 6/25/19 9:03 AM... -
Page 21: Contenu De La Boîte En Carton
1-888-331-4569. C Suceur à usages multiples Fig. D D Suceur plat E Guide d’utilisation Sac filtrant et bande de retenue élastique (déjà assemblés) Le sac filtrant est vendu sous le numéro de référence CMXZVBE38737. SP7097-1 CMXEVBE172500.indb 21 6/25/19 9:03 AM... -
Page 22: Installation
Pull Out and Lift Tirez sur les loquets verrouillage (2) Up on Powerhead de verrouillage de l’ensemble de bloc-moteur Assembly Latches et soulevez-le pour le to Disengage the détacher des languettes Drum Tabs du tambour. SP7097-1 CMXEVBE172500.indb 22 6/25/19 9:03 AM... -
Page 23: Rangement Des Accessoires
électrique pour le sécuriser. Hose Ensemble de Fig. J Assembly tuyau flexible Powerhead Ensemble Assembly de bloc-moteur Accessory Porte- Holders (2) accessoires (2) Power Cord & Cordon d’alimentation Cord Clip électrique et pince de fixation du cordon SP7097-1 CMXEVBE172500.indb 23 6/25/19 9:03 AM... -
Page 24: Fonctionnement
1-888-331-4569. • Lorsque vous utilisez un cordon de rallonge, n’utilisez qu’un cordon prévu pour emploi à l’extérieur et en bon état. Ne laissez pas la connexion entrer en contact avec des liquides. SP7097-1 CMXEVBE172500.indb 24 6/25/19 9:03 AM... -
Page 25: Aspiration De Matériaux Secs
IMPORTANT : Pour réduire les risques d’en dommager l’aspirateur, ne faites pas fonctionner le moteur quand le filtrant flotteur est dans la position élevée. Fig. N Retainer Bande de Band retenue élastique Float In Flotteur Raised en position Position élevée SP7097-1 CMXEVBE172500.indb 25 6/25/19 9:03 AM... -
Page 26: Vidage Du Tambour
Drum Tabs engager celui-ci sur les languettes du Fig. P tambour. Powerhead Ensemble de Assembly bloc-moteur Orifice de soufflerie de Vac Blowing l’aspirateur Port TWIST TOURNER Hose Ensemble de tuyau flexible Assembly SP7097-1 CMXEVBE172500.indb 26 6/25/19 9:03 AM... -
Page 27: Entretien
Si le sac filtrant est propre et n’est pas endommagé, remettez- le sur la cage du filtre. S’il ne peut pas être réutilisé, placez un nouveau sac filtrant en dessus de la cage du filtre. SP7097-1 CMXEVBE172500.indb 27 6/25/19 9:03 AM... -
Page 28: Nettoyage Et Désinfection De L'aspirateur De Liquides Et De Poussières
3. Videz le tambour au bout de 20 minutes. Rincez à l’eau jusqu’à ce que l’odeur d’eau de javel ait disparu. Laissez sécher le tambour complètement avant de sceller le moteur sur le tambour. SP7097-1 CMXEVBE172500.indb 28 6/25/19 9:03 AM... -
Page 29: Service Après-Vente / Pièces De Rechange
Toutes les opérations de démontage et de réparation doivent être effectuées par des techniciens compétents Contactez votre distributeur de produits Craftsman agréé afin d’obtenir la liste des accessoires disponibles pour les aspirateurs de liquides et de poussières. SP7097-1 CMXEVBE172500.indb 29... -
Page 30: Garantie
La présente garantie limitée est accordée par Emerson Tool Company, une division d’Emerson Electric Co. (« Nous » ou « Notre » ou « Nos »), au consommateur propriétaire d’origine (« Client » ou « Vous » ou « Votre » ou « Vos ») du produit CRAFTSMAN avec lequel cette garantie limitée est accordée (le «... - Page 31 Producto fabricado por: 8100 W. Florissant • St. Louis, MO 63136 Produit fabriqué par : U.S. & Canada Only • É.-U. et Canada seulement Pièce N° SP7097 Imprimé N° SP7097-1 Imprimé au Mexique 05/2019 SP7097-1 CMXEVBE172500.indb 31 6/25/19 9:03 AM...
- Page 32 9 Cable de alimentación riesgo de lesiones, lea el manual de instrucciones. 10 Portaaccesorios Si tiene preguntas o comentarios sobre este o cualquier 11 Orificio de soplado otro producto, llame gratis a CRAFTSMAN al: 1-888-331-4569. SP7097-1 CMXEVBE172500.indb 32 6/25/19 9:03 AM...
-
Page 33: Instrucciones De Seguridad Importantes
La utilización de cualquier aspiradora utilitaria o niños o cerca de éstos. soplador utilitario puede hacer que se soplen objetos extraños hacia los ojos, lo cual puede causar daños graves en los ojos. SP7097-1 CMXEVBE172500.indb 33 6/25/19 9:03 AM... -
Page 34: Introducción
Vaciado del tambor ......41 Dispositivo de soplado ......41 SP7097-1 CMXEVBE172500.indb 34 6/25/19 9:03 AM... -
Page 35: Instrucciones De Conexión A Tierra
Grounding Lug el enchufe suministrado con el electrodoméstico. Si el enchufe no cabe en el tomacorriente, haga que un electricista calificado instale un tomacorriente apropiado. Adapter Adaptador 3-Prong Plug Enchufe de 3 terminales SP7097-1 CMXEVBE172500.indb 35 6/25/19 9:03 AM... -
Page 36: Contenido De La Caja De Cartón
1-888-331-4569. Ensamblaje de la manguera Fig. D Boquilla utilitaria Boquilla rinconera Manual de instrucciones Bolsa de filtro y banda retenedora (ya ensambladas). La bolsa de filtro se vende con el núm. de existencias CMXZVBE38737. SP7097-1 CMXEVBE172500.indb 36 6/25/19 9:03 AM... -
Page 37: Instalación
Pestillos (2) Jale hacia fuera y Pull Out and Lift levante los pestillos del Up on Powerhead ensamblaje de la cabeza Assembly Latches motriz para desacoplar to Disengage the las lengüetas del tambor Drum Tabs SP7097-1 CMXEVBE172500.indb 37 6/25/19 9:03 AM... -
Page 38: Almacenamiento De Accesorios
Hose Ensamblaje de Fig. J Assembly la manguera Powerhead Ensamblaje de la Assembly cabeza motriz Accessory Porta Holders (2) accesorios (2) Cable de Power Cord & alimentación y clip Cord Clip para cable SP7097-1 CMXEVBE172500.indb 38 6/25/19 9:03 AM... -
Page 39: Funcionamiento
1-888-331-4569 . • Cuando utilice un cordón de extensión, utilice únicamente cordones con capacidad nominal para uso a la intemperie que estén en buenas condiciones. No deje que la conexión entre en contacto con líquido. SP7097-1 CMXEVBE172500.indb 39 6/25/19 9:03 AM... -
Page 40: Recogida De Materiales Secos Con La Aspiradora
IMPORTANTE: Para reducir el riesgo de daños a la Fig. M aspiradora, no haga funcionar el motor con el flotador en Filter la posición subida. Bolsa de filtro Fig. N Retainer Banda Float In Band Flotador retenedora Raised en posición Position elevada SP7097-1 CMXEVBE172500.indb 40 6/25/19 9:03 AM... -
Page 41: Vaciado Del Tambor
área ruidosa. Fig. P Powerhead Ensamblaje de la Assembly cabeza motriz Orifico de Vac Blowing soplado de la Port aspiradora TWIST GIRE Hose Ensamblaje de Assembly la manguera SP7097-1 CMXEVBE172500.indb 41 6/25/19 9:03 AM... -
Page 42: Mantenimiento
Si la bolsa de filtro está limpia y no está dañada, reinstálela sobre la jaula del filtro. Si no se puede reutilizar, coloque una bolsa de filtro nueva sobre la jaula del filtro. SP7097-1 CMXEVBE172500.indb 42 6/25/19 9:03 AM... -
Page 43: Limpieza Y Desinfección De La Aspiradora Para Mojado/Seco
3. Vacíe el tambor después de 20 minutos. Enjuáguelo con agua hasta que el olor a blanqueador desaparezca. Deje que el tambor se seque completamente antes de sellar el motor sobre el tambor. SP7097-1 CMXEVBE172500.indb 43 6/25/19 9:03 AM... -
Page 44: Servicio / Piezas De Repuesto
ADVERTENCIA: Todo el desmontaje y todas las reparaciones deberán ser realizados por personal calificado. Contacte a su distribuidor Craftsman autorizado para informarse sobre los accesorios disponibles para aspiradoras para seco/mojado SP7097-1 CMXEVBE172500.indb 44 6/25/19 9:03 AM... -
Page 45: Garantía
Manual de Instrucciones que se le proporcione a Usted con el Producto CRAFTSMAN, sujeto a las exclusiones que se describen a continuación, por un período de tres años a partir de la fecha de compra por Usted (el “Período de Garantía”). - Page 46 NOTES SP7097-1 CMXEVBE172500.indb 46 6/25/19 9:03 AM...
- Page 47 NOTES SP7097-1 CMXEVBE172500.indb 47 6/25/19 9:03 AM...
- Page 48 *Para México: Para obtener partes, componentes, accesorios y cobertura de garantía: Visite la tienda donde compró su aspiradora CRAFTSMAN o cualquier otra tienda Sears en México, o contacte a Servicio Técnico de Sears: Poniente 146 No. 669, Col. Industrial Vallejo, Azcapotzalco, Ciudad de México, C.P.
Need help?
Do you have a question about the CMXEVBE172500 and is the answer not in the manual?
Questions and answers