
Related Manuals for dirna Bergstrom TRR Bycool Green Line SLIM COOL


Summary of Contents for dirna Bergstrom TRR Bycool Green Line SLIM COOL
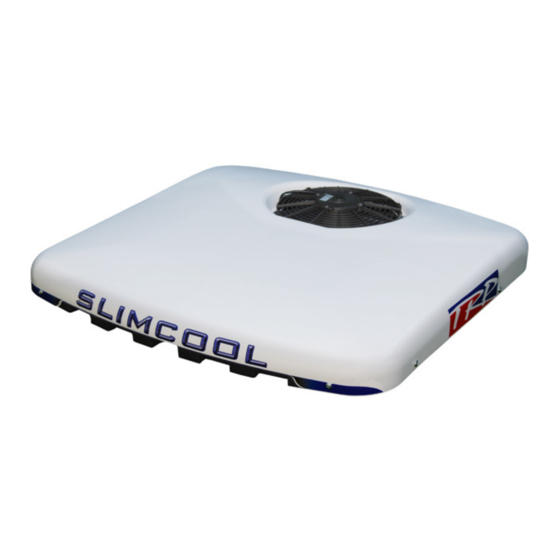
- Page 1 ® SLIM COOL Instrucciones de Montaje Spanish Mounting Instructions English Instructions de Montage French 220AA35290...
- Page 2 ó manta protectora para evitar posibles arañazos. Al instalar Slim Cool en el techo hay que tener en Dirna Bergstrom queda exenta de responsabilidad cuenta que, normalmente, las cabinas que vienen si se producen averías que procedan de una inadecuada manipulación ó...
- Page 3 SLIM COOL ® IMPORTANTE: Este documento contiene las instrucciones de montaje para los modelos: DAF XF 105 SPACE CAB EURO 5 (SPOILER NO REGULABLE) DAF XF 105 SPACE CAB EURO 5 (SPOILER REGULABLE)
- Page 4 SLIM COOL ® DAF XF SUPER SPACE CAB EURO 5 Y EURO 6 EURO 5 EURO 6 DAF XF SPACE CAB EURO 6...
- Page 5 SLIM COOL ® DAF XF 105 Space Cab EURO 5 y EURO 6 Desmontar tapa escotilla, los elementos de fijación y entregar éstos al cliente (*). Quitar los residuos sobrantes adheridas al techo antes de pegar la junta EPDM.
- Page 6 SLIM COOL ® DAF XF 105 Super Space Cab EURO 5 y EURO 6 Desmontar embellecedores laterales (*) tirando de ellos y desplazándolos hacia la parte trasera de la cabina. Desmontar embellecedor delantero (*) tirando de el hacia abajo y desconectar clemas de luces.
- Page 7 SLIM COOL ® DAF XF 105 Super Space Cab EURO 5 y EURO 6 Desplazando tapizado hacia abajo, desmontar tornillos delanteros de sujeción del riel de cortinilla de la escotilla y desmontar éste. Desmontar marco interior de escotilla (*). Desmontar escotilla quitando tornillos de sujeción y desconectando conector.
-
Page 8: Todos Los Modelos
SLIM COOL ® TODOS LOS MODELOS Pegue la junta EPDM alrededor del hueco de escotilla (mirar el detalle para cortar los bordes finales de unión de la junta). - DAF XF 105 SPACE CAB. EURO 5 SPOILER NO AJUSTABLE - junta 25 x 25. - DAF XF 105 SPACE CAB. - Page 9 SLIM COOL ® SÓLO PARA MODELOS: DAF XF 105 Super Space Cab EURO 5 y EURO 6 Poner el equipo Slim Cool en posición vertical, aflojar tornillos de centradores sólo para permitir el desplazamiento de los mismos. Desplazar centradores hacia la parte trasera del equipo hasta que los tornillos hagan tope en las correderas de los centradores y volver a apretar tornillos.
- Page 10 SLIM COOL ® TODOS LOS MODELOS EXTERIOR CABINA: Posicionar el Slim Cool en el hueco de la escotilla, encajando centradores en el mismo. Escotilla ¡Atención!!! Al colocar el equipo en hueco escotilla, verificar que las salidas de desagüe no queden obstruidas por la junta EPDM.
- Page 11 SLIM COOL ® DAF XF 105 Space Cab (EURO 5 spoiler ajustable) Tapizado Colocar (2) soportes de fijación como se Hexágono H-M Ø 8 indica en el esquema, colocar (4) separadores Ø 25x9x10; (4) tornillos M8/125x55 y apretar hasta hacer tope. (ver esquema página 12). Refuerzo Refuerzo Separador Ø...
- Page 12 SLIM COOL ® Vista explosionada hasta la fijación de los soportes DAF XF 105 Space Cab Euro 6 DAF XF 105 Space Cab Euro 5 spoiler no ajustable Junta EPDM 25x25 Techo cabina Tapizado Soporte fijación 8/125x45 DAF XF 105 Space Cab EURO 5 spoiler ajustable Junta EPDM 25x15 Techo cabina Separador...
- Page 13 SLIM COOL ® Vista explosionada hasta la fijación de los soportes DAF XF 105 Super Space Cab EURO 5 y EURO 6 Junta EPDM 25x25 Techo cabina Hexágono M-H (L=32) Tapizado Soporte fijación 8/125x45 Instrucciones detalladas sobre la conexión del cableado con toma original en escotilla Conectar clema del equipo con clema original situada en el entorno de la escotilla.
- Page 14 SLIM COOL ® TODOS LOS MODELOS EXCEPTO EURO 6 Instrucciones detalladas sobre la instalación del cableado de alimentación con acceso por guantera superior derecha Abra la cubierta de la guantera superior dere- cha y quite los dos tornillos del lado inferior. (A) Separe ligeramente la guantera e introduzca la mano a través del lado inferior para recoger el cableado...
- Page 15 SLIM COOL ® TODOS LOS MODELOS EXCEPTO EURO 6 Instrucciones detalladas sobre la instalación del cableado de alimentación sin acceso por guantera superior derecha Desmontar barras de desplazamiento de cortinas delanteras aflojando tornillos con llave allen. Desmontar tornillos superiores de guanteras y bascular éstas.
- Page 16 SLIM COOL ® TODOS LOS MODELOS EXCEPTO EURO 6 Instrucciones detalladas sobre la instalación del cableado de alimentación En parte central está ubicado el cable original de alimentación (A); hacer conexión con cable suministrado. Abrir tapa de fusibles y colocar maxifusible de 40 A en lugar del indicado.
- Page 17 SLIM COOL ® Instrucciones detalladas sobre instalación del cableado modelo Euro 6 Por el interior de la cabina desmontar tapas indicadas. Desmontar caja de fusibles. Pasar el extremo del cable azul con caja suministrado acompañado a cables originales hasta punto A y conectar.
- Page 18 SLIM COOL ® Instrucciones detalladas sobre instalación del cableado modelo Euro 6 Colocar fusible de 25A en (B). Pasar el extremo del cable marrón con caja suministrado acompañado a cables originales hasta punto C y conectar.
- Page 19 SLIM COOL ® Instrucciones detalladas sobre instalación del cableado modelo Euro 6 Abrir guantera superior derecha (D) y desmontar tapa (E). Por tubo corrugado ubicado en parte inferior lado pasajero, introducir cable Az y M y sacarlo por el extremo del tubo que sale por la guantera superior derecha.
- Page 20 SLIM COOL ® Instrucciones detalladas sobre instalación del cableado modelo Euro 6 Conectar cajas de cableados y llevar cableado por detrás de las guanteras originales y el tapizado hasta el equipo y conectar con el mismo. Para vehículos DAF XF 105 Space Cab fabricados desde el 10/09/2012 en adelante se deben sustituir los hexágonos M-H M6 L78 y L36 roscados en la base del equipo...
- Page 21 SLIM COOL ® DAF XF 105 Super Space Cab EURO 5 y EURO 6 Vista explosionada lateral hasta la fijación de las consolas Hexágono Hexágono Junta EPDM 25x25 M-H (L=36) M-H (L=78) Techo cabina Tapizado Soporte fijación Consola Vista explosionada frontal hasta la fijación de las consolas M-H L=78 Tapizado Consola...
- Page 22 SLIM COOL ® DAF XF 105 Space Cab EURO 5 spoiler no ajustable DAF XF 105 Space Cab EURO 6 Vista explosionada lateral hasta la fijación de las consolas hexágono Hexágono Junta EPDM 25x25 M-H L 36 M-H (L=78) Techo cabina Tapizado Soporte fijación Consola...
- Page 23 SLIM COOL ® DAF XF 105 Space Cab EURO 5 spoiler ajustable Vista explosionada lateral hasta la fijación de las consolas hexágono Hexágono Junta EPDM 25x15 M-H L 26 M-H (L=68) Techo cabina Tapizado Soporte fijación Consola Vista explosionada frontal hasta la fijación de las consolas Separador 10 mm Hexágono M-H 68mm Tapizado...
- Page 24 SLIM COOL ® TODOS LOS MODELOS Volver a montar embellecedores originales en su posición. Montar consola sobre hexágonos H-H con (4) tornillos 6/100x15 allen, posicionando la parte más corta de la consola, en la parte delantera de la cabina. Cubrir los (4) tornillos M6/100x15 allen con los embellecedores redondos de M6 de plástico.
-
Page 25: Esquema Eléctrico
SLIM COOL ® TODOS LOS MODELOS CON TOMA ORIGINAL EN ESCOTILLA Esquema eléctrico AVISO IMPORTANTE! ¡ Precaución de no invertir las polaridades al conectar la alimentación en el equipo el display no se enciende y el equipo no funciona. Sensor aire de retorno Soplador centrífugo... - Page 26 SLIM COOL ® TODOS LOS MODELOS EURO 5 DETRÁS DE LAS GUANTERAS Esquema eléctrico AVISO IMPORTANTE! ¡ Precaución de no invertir las polaridades al conectar el equipo. Si esto sucediera, la placa de mandos no se enciende y el equipo no funciona. Sensor aire de retorno Soplador...
- Page 27 SLIM COOL ® MODELOS EURO 6 SIN TOMA ORIGINAL EN ESCOTILLA Esquema eléctrico AVISO IMPORTANTE! ¡ Precaución de no invertir las polaridades al conectar el equipo. Si esto sucediera, la placa de mandos no se enciende y el equipo no funciona. Sensor aire de retorno Soplador...
-
Page 28: Assembly Recommendations
When installing air conditioning equipment on roof, the training in vehicles air conditioning. upper cabin part must be protected with a cloth or a Dirna Bergstrom shall not be responsible for protective blanket to avoid possible scratches. When breakdowns or damages coming from an inadequate... - Page 29 SLIM COOL ® IMPORTANT: This document contains assembly instructions for the following models: DAF XF 105 SPACE CAB EURO 5 (NON-ADJUSTABLE SPOILER) DAF XF 105 SPACE CAB EURO 5 (ADJUSTABLE SPOILER)
- Page 30 SLIM COOL ® DAF XF SUPER SPACE CAB EURO 5 AND EURO 6 EURO 5 EURO 6 DAF XF SPACE CAB EURO 6...
- Page 31 SLIM COOL ® DAF XF 105 Space Cab EURO 5 and EURO 6 Take down the hatch cover and the attachment elements, and hand them over to the customer (*). Remove any excess from the roof before attaching the EPDM seal.
- Page 32 SLIM COOL ® DAF XF 105 Super Space Cab EURO 5 and EURO 6 Remove the side decorative pieces (*) by pulling on them and moving them to the back of the cab. Remove the front decorative piece (*) by pulling it downwards, and disconnect the light terminals.
- Page 33 SLIM COOL ® DAF XF 105 Super Space Cab EURO 5 and EURO 6 Move the upholstery downwards and remove the front screws which support the hatch curtain rail, and remove it. Take down the inside hatch frame (*). Take down the hatch by removing the support screws and disconnecting the connector.
-
Page 34: All Models
SLIM COOL ® ALL MODELS Attach the EPDM seal around the hatch gap (see the details to cut the ends of the seal joint). - DAF XF 105 SPACE CAB. EURO 5 NON- ADJUSTABLE SPOILER - 25 x 25 seal. - DAF XF 105 SPACE CAB. - Page 35 SLIM COOL ® ONLY FOR MODELS: DAF XF 105 Super Space Cab EURO 5 and EURO 6 Place the Slim Cool unit in upright position and slightly loosen the screws of the aligners so they can be moved. Move the aligners to the back of the unit, until the screws come up against the aligner slides, and retighten the screws.
- Page 36 SLIM COOL ® ALL MODELS CABIN EXTERIOR: Position the Slim Cool unit in the hatch gap and fit the aligners. Hatch Caution! When positioning the unit above the hatch gap, check that the wastewater run-offs are not blocked by the EPDM seal. DAF XF 105 Space Cab EURO 5 non-adjustable spoiler DAF XF 105 Super Space Cab EURO 5 and EURO 6 Introduce fastening supports underneath the...
- Page 37 SLIM COOL ® DAF XF 105 Space Cab (EURO 5 adjustable spoiler) Upholstery Position (2) attachment supports as indicated Ø8 F-M Hexagon in the diagram, (4) Ø25x9x10 spacers; (4) M8/125x55 screws and tighten as much as possible. (see diagram page 37). Reinforcement Reinforcement Spacer Ø25x9x10...
- Page 38 SLIM COOL ® Exploded view through to the support attachment DAF XF 105 Space Cab Euro 6 DAF XF 105 Space Cab EURO 5 non-adjustable spoiler EPDM Seal 25x25 Cabin roof Upholstery Attachment support 8/125x45 DAF XF 105 Space Cab (EURO 5 adjustable spoiler) EPDM seal 25x15 Cabin roof Spacer...
- Page 39 SLIM COOL ® Exploded view through to the support attachment DAF XF 105 Super Space Cab EURO 5 and EURO 6 EPDM Seal 25x25 Cabin roof Hexagon (L=32) Upholstery Attachment support 8/125x45 Detailed instructions on cable installation with original connection in hatch Connect the unit’s wire clamp to the original wire clamp in the hatch area.
- Page 40 SLIM COOL ® ALL MODELS EXCEPT EURO 6 Detailed instructions on the installation of power cables with access through the top right glove compartment Open the top right glove compartment cover and remove the two screws from the bottom section. (A) Slightly separate the glove box and gather in the original wiring by inserting your hand through the lower side.
- Page 41 SLIM COOL ® ALL MODELS EXCEPT EURO 6 Detailed instructions on the installation of power cables without access through the top right glove compartment Take down the front curtain rails by releasing the screws with an Allen key. Remove the top glove compartment screws and tilt.
- Page 42 SLIM COOL ® ALL MODELS EXCEPT EURO 6 Detailed instructions on the installation of power cables The original power cable (A) is located in the central section; connect using the supplied cable. Open the fuse cover and position 40 A maxi- fuse in the indicated place.
- Page 43 SLIM COOL ® Detailed instructions on the installation of Euro 6 model cables Take down the indicated covers on the inside of the cabin. Remove the fuse box. Pass the end of the blue wire with the supplied box along with the original wires to point A and connect.
- Page 44 SLIM COOL ® Detailed instructions on the installation of Euro 6 model cables Position 25A fuse in (B). Pass the end of the brown wire with the supplied box along with the original wires to point C and connect.
- Page 45 SLIM COOL ® Detailed instructions on the installation of Euro 6 model cables Open the top right glove compartment (D) and remove the cover (E). Insert Az and M wire through the corrugated pipe located at the bottom of the passenger side, and remove it through the end of the pipe in the top right glove compartment.
- Page 46 SLIM COOL ® Detailed instructions on the installation of Euro 6 model cables Connect the wiring boxes and run the wiring behind the original glove compartments and the upholstery through to the unit and connect. For DAF XF 105 Space Cab vehicles manufactured since 10/09/2012, replace the M-F M6 L78 and L36 threaded hexagons on the base of the unit with M-F M6 L68 and L26...
- Page 47 SLIM COOL ® DAF XF 105 Super Space Cab EURO 5 and EURO 6 Exploded side view through to console attachment M-F Hexagon EPDM seal 25x25 Hexagon (L=78) (L=36) Cabin roof Upholstery Attachment support Console Exploded frontal view to consoles fastening M-H L=78 Upholstery Console...
- Page 48 SLIM COOL ® DAF XF 105 Space Cab EURO 5 non-adjustable spoiler DAF XF 105 Space Cab EURO 6 Exploded side view through to console attachment M-F Hexagon EPDM seal 25x25 hexagon (L=78) (L=36) Cabin roof Upholstery Attachment support Console Exploded frontal view to consoles fastening M-F Hexagon 78 mm Upholstery...
- Page 49 SLIM COOL ® DAF XF 105 Space Cab (EURO 5 adjustable spoiler) Exploded side view through to console attachment M-F Hexagon EPDM seal 25x15 hexagon (L=68) (L=26) Cabin roof Front Upholstery Attachment support Console Exploded frontal view to consoles fastening Spacer 10 mm M-F Hexagon 68 mm Upholstery...
- Page 50 SLIM COOL ® ALL MODELS Return the original decorative pieces to their position. Mount the console on F-F hexagons with (4) 6/100x15 Allen screws, positioning the shortest part of the console in the front of the cabin. Cover the (4) M6/100x15 Allen screws with the M6 round plastic decorative pieces.
-
Page 51: Wiring Diagram
SLIM COOL ® ALL MODELS WITH ORIGINAL CONNECTION IN HATCH Wiring Diagram IMPORTANT NOTE! Take care not to invert polarities when connecting the unit. If this were to happen, the control plate will not come on, the unit will not work. Return air sensor Centrifugal... - Page 52 SLIM COOL ® ALL EURO 5 MODELS BEHIND THE GLOVE COMPARTMENT Wiring Diagram IMPORTANT NOTE! Take care not to invert polarities when connecting the unit. If this were to happen, the control plate will not come on, the unit will not work. Return air sensor Centrifugal...
- Page 53 SLIM COOL ® ALL MODELS EURO 6 WITHOUT ORIGINAL CONNECTION IN HATCH Wiring Diagram IMPORTANT NOTE! Take care not to invert polarities when connecting the unit. If this were to happen, the control plate will not come on, the unit will not work. Return air sensor Centrifugal...
- Page 54 Durant l’installation du , tenir compte du fait Slim Cool Dirna Bergstrom, ne sera pas responsable des que normalement les cabines pourvues d’écoutille dommages ou des bris dérivés d’une installation ou possède une structure suffisamment solide pour d’une manipulation incorrecte ni des modifications...
- Page 55 SLIM COOL ® IMPORTANT : Ce document reprend les instructions de montage pour les modèles : DAF XF 105 SPACE CAB EURO 5 (SPOILER NON RÉGLABLE) DAF XF 105 SPACE CAB EURO 5 (SPOILER RÉGLABLE)
- Page 56 SLIM COOL ® DAF XF SUPER SPACE CAB EURO 5 ET EURO 6 EURO 5 EURO 6 DAF XF SPACE CAB EURO 6...
- Page 57 SLIM COOL ® DAF XF 105 Space Cab EURO 5 et EURO 6 Démonter le couvercle de l’écoutille et les éléments de fixation et remettre ces derniers au client (*). Retirer les résidus adhérés au plafond avant de coller le joint EPDM.
- Page 58 SLIM COOL ® DAF XF 105 Super Space Cab EURO 5 et EURO 6 Démonter les enjoliveurs latéraux (*) en les tirant et en les déplaçant vers la partie arrière de la cabine. Démonter l’enjoliveur avant (*) en le tirant vers le bas et déconnecter les bornes des lumières.
- Page 59 SLIM COOL ® DAF XF 105 Super Space Cab EURO 5 et EURO 6 En déplaçant la tapisserie vers le bas, démonter les vis frontales de fixation du rail du rideau de l’écoutille et le démonter. Démonter le cadre intérieur de l’écoutille (*). Démonter l’écoutille en retirant les vis de fixation et en débranchant le connecteur.
-
Page 60: Tous Les Modèles
SLIM COOL ® TOUS LES MODÈLES Collez le joint EPDM autour du creux de l’écoutille (suivre le détail pour couper les bords finaux d’union du joint). - DAF XF 105 SPACE CAB. EURO 5 SPOILER NON AJUSTABLE - joint 25 x 25. - DAF XF 105 SPACE CAB. - Page 61 SLIM COOL ® UNIQUEMENT POUR LES MODÈLES : DAF XF 105 Super Space Cab EURO 5 et EURO 6 Placer l’équipement Slim Cool sur la position verticale, desserrer les vis des centreurs uniquement pour permettre leur déplacement. Les déplacer ensuite vers la partie arrière de l’équipement, jusqu’à...
- Page 62 SLIM COOL ® TOUS LES MODÈLES EXTÉRIEUR CABINE : Placer le Slim Cool dans le creux de l’écoutille en emboîtant les centreurs dans ce dernier. Écoutille Attention ! Avant de placer l’équipement sur le creux de l’écoutille, vérifier que les sorties d’écoulement ne soient pas bouchées par le joint EPDM.
- Page 63 SLIM COOL ® DAF XF 105 Space Cab (depuis date fabrication véhicule : 10/09/2012) Tapisserie Placer (2) supports de fixation tel que cela est Hexagone H-M Ø 8 indiqué sur le schéma, placer (4) séparateurs Ø 25x9x10 ; (4) vis M8/125x55 et serrer jusqu’à atteindre la limite (voir schéma page 64).
- Page 64 SLIM COOL ® Vue décomposée jusqu’à la fixation des supports DAF XF 105 Space Cab Euro 6 DAF XF 105 Space Cab Euro 5 spoiler non ajustable Joint EPDM 25x25 Plafond cabine Tapisserie Support fixation 8/125x45 DAF XF 105 Space Cab EURO 5 spoiler ajustable Joint EPDM 25x15 Plafond cabine Séparateur...
- Page 65 SLIM COOL ® Vue décomposée jusqu’à la fixation des supports DAF XF 105 Super Space Cab EURO 5 et EURO 6 Joint EPDM 25x25 Plafond cabine Hexagone M-H (L=32) Tapisserie Support fixation 8/125x45 Instructions détaillées sur la connexion du câblage avec prise originale dans écoutille Connecter la borne de l’équipement à...
- Page 66 SLIM COOL ® TOUS LES MODÈLES SAUF EURO 6 Instructions détaillées sur l’installation du câblage d’alimentation avec accès par la boîte à gants supérieure droite Ouvrez le couvercle de la boîte à gants supérieure droite et retirez les deux vis du côté inférieur (A) Séparez légèrement la boîte à...
- Page 67 SLIM COOL ® TOUS LES MODÈLES SAUF EURO 6 Instructions détaillées sur l’installation du câblage d’alimentation sans accès par la boîte à gants supérieure droite Démonter les barres de déplacement des rideaux de la partie frontale en desserrant les vis avec une clé allen. Démonter les vis supérieures des boîtes à...
- Page 68 SLIM COOL ® TOUS LES MODÈLES SAUF EURO 6 Instructions détaillées sur l’installation du câblage d’alimentation Le câble d’origine d’alimentation (A) est situé sur la partie centrale ; connectez-le au câble fourni. Ouvrir le couvercle des fusibles et placer un maxi-fusible de 40A au lieu de celui indiqué.
- Page 69 SLIM COOL ® Instructions détaillées sur l’installation du câblage modèle Euro 6 À l’intérieur de la cabine, démonter les couvercles indiqués. Démonter la boîte à fusibles. Passer l’extrémité du câble bleu avec boîte fourni en accompagnant les câbles d’origine jusqu’au point A et connecter.
- Page 70 SLIM COOL ® Instructions détaillées sur l’installation du câblage Modèle Euro 6 Placer un fusible de 25A sur (B). Passer l’extrémité du câble marron avec boîte fourni en accompagnant les câbles d’origine jusqu’au point C et connecter.
- Page 71 SLIM COOL ® Instructions détaillées sur l’installation du câblage Modèle Euro 6 Ouvrir la boîte à gants supérieure droite (D) et démonter le couvercle (E). À travers le tube cannelé placé sur la partie inférieure du côté du passager, introduire le câble Az et M et le sortir par l’extrémité...
- Page 72 SLIM COOL ® Instructions détaillées sur l’installation du câblage Modèle Euro 6 Connecter les boîtes de câblage et porter le câblage derrière les boîtes à gants d’origine et la tapisserie jusqu’à l’équipement et effectuer une connexion avec ce dernier. Dans le cas des véhicules DAF XF 105 Space Cab fabriqués depuis le 10/09/2012, il est nécessaire de remplacer les hexagones M-H M6 L78 et L36 filetés à...
- Page 73 SLIM COOL ® DAF XF 105 Super Space Cab EURO 5 et EURO 6 Vue décomposée latérale jusqu’à la fixation des consoles Hexagone Hexagone M-H Joint EPDM 25x25 (L=78) (L=36) Plafond cabine Tapisserie Support fixation Console Vue décomposée frontale jusqu’à la fixation des consoles M-H L=78 Tapisserie Console...
- Page 74 SLIM COOL ® DAF XF 105 Space Cab Euro 5 spoiler non ajustable DAF XF 105 Space Cab EURO 6 Vue décomposée latérale jusqu’à la fixation des consoles Hexagone Hexagone Joint EPDM 25x25 M-H (L=78) (L=36) Plafond cabine Tapisserie Support fixation Console Vue décomposée frontale jusqu’à...
- Page 75 SLIM COOL ® DAF XF 105 Space Cab EURO 5 spoiler ajustable Vue décomposée frontale jusqu’à la fixation des consoles Hexagone Hexagone M-H Joint EPDM 25x15 (L=68) (L=26) Plafond cabine Tapisserie Support fixation Console Vue décomposée frontale jusqu’à la fixation des consoles Séparateur 10 mm Hexagone M-H 68mm Tapisserie...
- Page 76 SLIM COOL ® TOUS LES MODÈLES Monter à nouveau les enjoliveurs d’origine à leur place. Monter la console sur les hexagones H-H avec (4) vis 6/100x15 allen, en plaçant la partie la plus courte de la console sur la partie avant de la cabine.
-
Page 77: Schéma Électrique
SLIM COOL ® TOUS LES MODÈLES AVEC PRISE ORIGINALE DANS ÉCOUTILLE Schéma électrique AVIS IMPORTANT ! Précaution: ne pas inverser les polarités lors du branchement de l’appareil. Dans ce cas, la plaque de commandes ne s’allume pas et l’appareil ne fonctionne pas. Capteur air de retour Souffleur... - Page 78 SLIM COOL ® TOUS LES MODÈLES EURO 5 DERRIÈRE LA BOÎTE À GANTS Schéma électrique AVIS IMPORTANT ! Précaution: ne pas inverser les polarités lors du branchement de l’appareil. Dans ce cas, la plaque de commandes ne s’allume pas et l’appareil ne fonctionne pas. Capteur air de retour Souffleur...
- Page 79 SLIM COOL ® TOUS LES MODÈLES EURO 6 SANS PRISE ORIGINALE DANS ÉCOUTILLE - Schéma électrique AVIS IMPORTANT ! Précaution: ne pas inverser les polarités lors du branchement de l’appareil. Dans ce cas, la plaque de commandes ne s’allume pas et l’appareil ne fonctionne pas. Capteur air de retour Souffleur...
- Page 80 Dirna Bergstrom behält sich vor, aus technischen oder kaufmännischen Gründen jederzeit Änderungen HIWEIS: der Angaben dieser Veröffentlichung vorzunehmen. Dirna Bergstrom si riserva il diritto di effettuare modifiche in qualsiasi momento ai dati contenuti in questa ATTENZIONE: pubblicazione, per motivi tecnici o commerciali.
Need help?
Do you have a question about the TRR Bycool Green Line SLIM COOL and is the answer not in the manual?
Questions and answers