Table of Contents
Advertisement
TUNZE
ALL-IN-ONE
HIGH PRECISION
SOLUTION
MEASUREMENT
Contents
General information / scope of delivery
Technical data / accessories / spare parts / delivery state
valve / Y-cable / combinations
2
Safety instructions / safety instructions for the magnet holder of the pH / mV electrode holder
®
SmartController 7070.000 (setting using the touch panel)
2
Temperature SmartController 7028.000 / pumps, lamps (setting using the touch panel)
Integration into an existing WiFi network in the Access Point Mode
Reset of the Client Mode / important notice in case of incorrect depiction
Connecting multiple SmartControllers in the Access Point Mode / Client Mode
Access to the SmartController via the Internet / menu "Pumps"
Warranty / disposal
TUNZE
TUNZE
WEB
INTERFACE
power supplies / wall mounting of the SmartController
Instructions for use
SmartController
7000
®
info@tunze.com
www.tunze.com
x7000.8888_E
01/2017
English
Page
2
3
4
5
6
7
8
9
10
11
11
12
13
14
15
16
17 - 19
20
21
22 - 23
24
1
Advertisement
Table of Contents

Related Manuals for Tunze SmartController 7000


Summary of Contents for Tunze SmartController 7000
-
Page 1: Table Of Contents
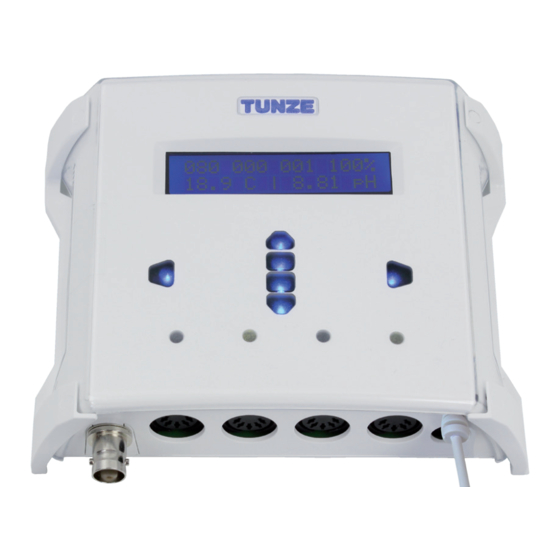
Switching socket / CO valve / Y-cable / combinations Safety instructions / safety instructions for the magnet holder of the pH / mV electrode holder Safety instructions for TUNZE power supplies / wall mounting of the SmartController ® Care and cleaning of the electrode Basic settings with the touch panel –... - Page 2 The Moonlight Turbelle 7097.050 (6) can also be ® controlled by the SmartController 7000 according to the cycle. nanostream ® In addition, it measures and regulates the temperature, the pH 6095 value and Redox values.
- Page 3 ® disconnect the power supply from the mains socket and switch it off (14)! The SmartController 7000 is supplied with 4 cables 7092.300 (15). One CO valve (9) from the Valve Set 7070.200, one switching socket outlet 7070.120 (10), one TUNZE LED 8850 ®...
-
Page 4: Switching Socket / Co
Indoor use of lead starter batteries for cars is inadmissible! Never connect the SmartController 7000 directly to a battery or other DC power source or without a fuse! The maximum DC voltage is 18 volts (switch-off limit) - if exceeded, the electronics will be destroyed! - Page 5 The switching socket 7070.120 may only be opened only by an electrician (5). The SmartController 7000 and power supply must be protected from moisture (6). Keep the instruction manual in a safe place. Safety instructions...
-
Page 6: Safety Instructions For Tunze
The connection to devices, such as electronic switches or speed controllers, of other makes is not permissible (2)! The SmartController 7000 on the pump cable is susceptible to water and may be destroyed in case of water damage! The operation of the SmartController 7000 is permissible only with the original TUNZE power supply unit. -
Page 7: Care And Cleaning Of The Electrode
(2). Cleaning in intervals of 1 - 3 months The electrode should be cleaned to avoid faulty measurements. Please clean using the TUNZE cleaning solution 7040.200 in ® intervals of 1 to 3 months. -
Page 8: Basic Settings With The Touch Panel - Initial Start-Up
The SmartController 7000 can be quickly adjusted without a WiFi-capable device using the touch panel. This option is especially interesting for the SmartController 7000 as a pH/CO controller (7070.000) or temperature controller (7028.000). Not all settings can be performed the touch panel. Some functions can only be performed through the web interface. -
Page 9: Ph/Co
Perform the same procedure with the “7 / 9 calibration” for the pH buffer 7 and 9. When the SmartController 7000 is connected to a smart phone or a PC, the history of the pH value of the last 22 hours will be... - Page 10 However, please observe: Do not exceed the maximum power rating of the switching sockets! When the SmartController 7000 is connected to a smart phone or a PC, the history of the temperature of the last 22 hours will be depicted in a graphic.
-
Page 11: Settings For Smart Phone, Tablet Or Pc With Wifi
After the successful connection has been established, open the browser of the smart phone, tablet or PC, and enter the address 192.168.2.1. The website of the SmartController 7000 (2) will now open and allow the performance of settings (4). The first connection can take several minutes! First, select one of the available languages (3), then click on the “Settings”... -
Page 12: Integration Into An Existing Wifi Network In The Client Mode
If necessary, make a bookmark entry for this address after the language selection. Should it not be possible to find the assigned IP address in the router of the network, the SmartController 7000 can be found on the network with the help of a utility software. If the Bonjour service from Apple is installed, ®... - Page 13 7000 By entering the assigned IP address in the browser, the SmartController 7000 will now be found from now on (1c). If necessary, make a bookmark entry for this address after the language selection. At the end, press “Take over”.
- Page 14 IP address 192.168.2.2 can be used for the second device. Before you confirm the setting for the Client Mode, the first SmartController 7000 must now also be switched on (2). It will then work as master. For additional SmartControllers which are to be operated simultaneously in the Access Point Mode, the procedure is the same as with the second SmartController 7000.
- Page 15 SmartController via the Internet (web interface) In order to reach the SmartController 7000 outside of the in- house WiFi network, an external access to the router must be enabled. For example, this can be performed through a secure VPN connection. This may, however, entail security risks and thus requires advanced computer skills.
-
Page 16: Pulse Mode - Wave Motion Simulation
Connect the SmartController 7000 to the mains adapter 5012.010 as the power supply, and then connect to the power grid (3). Open the SmartController 7000 page in the browser and select a language (4). When you click on the menu item “Pumps” (5), the black button “Pulse mode” (6) will be displayed during the first opening. -
Page 17: Interval Mode - High And Low Tide Simulation
Connect the SmartController 7000 to the mains adapter 5012.010 as the power supply, and then connect to the power grid (3). Open the SmartController 7000 page in the browser and select a language (4). When you click on the menu item “Pumps” (5), the black button “Pulse mode”... - Page 18 SmartController 7000 interval Field “Interval settings” (1): Here, it is possible to continue the operation of the other non- controlled pumps with a minimum circulation performance with the help of the top regulator “Operation of deactivated pumps with minimal capacity” (2). With the lower regulator “Interval time”...
- Page 19 3 and 4 will continue to operate and vary their Connect a pump to each socket of the performance between 40% and 100%. SmartController 7000 outputs. After 6 further hours, the pumps 1 and 2 will switch on again, etc.
-
Page 20: Menu "Lamps" - Lamp
Connect the SmartController 7000 to the mains adapter 5012.010 as the power supply, and then connect to the power grid (1). Open the SmartController 7000 page in the browser and select a language (2a). After clicking on the menu item “Lights” and “Light1” (2b) the menu “Lamps channel 1”... -
Page 21: Menu "Lamps" - Season
Connect the SmartController 7000 to the mains adapter 5012.010 as the power supply, and then connect to the power grid (1). Open the SmartController 7000 page in the browser and select a language (2a). After clicking on the menu item “Lights” (2b) and “Season” (3) the menu “Seasonal settings”... -
Page 22: Menu "Measurement
Connect the SmartController 7000 to the mains adapter 5012.010 as the power supply, and then connect to the power grid (1). Open the SmartController 7000 page in the browser and select a language (2a). After clicking on the menu item “Measurement” (2b) the menu “Measuring and switching sockets”... - Page 23 (5): The current temperature will be shown (5a). By activating the function (16), channel of the SmartController 7000 (8) will be activated as an output for the switching socket 7070.120 (17) for heating, whereas The function of each channel is shown here with the option to adjust the switching point.
-
Page 24: Tunze ® Aquarientechnik Gmbh
Within the framework of the corresponding laws, your remedies in case of a violation of the guarantee obligation shall be limited to returning the unit manufactured by TUNZE ®...
Need help?
Do you have a question about the SmartController 7000 and is the answer not in the manual?
Questions and answers