Table of Contents
Advertisement
Operators Manual / Manuel D'utilisation
EN p. 2
FR p. 37
* Maximum initial battery workload voltage
(measured without a workload) is 60 volts.
Nominal voltage is 54 volts
* Tension batterie de la charge de travail initiale
maximale (mesurée sans charge de travail)
est de 60 volts.
Tension nominale est de 54 volts
MNL_CLMFT6018A_V1
Read all safety rules and instructions carefully before operating this tool.
Distributed By Cleva North America 601 Regent Park Court Greenville, SC 29607 (866)-384-8432
Lisez attentivement toutes les consignes de sécurité ainsi que les instructions avant de faire fonctionner cet outil.
Distribué par Cleva North America 601 Regent Park Court Greenville, SC 29607 (866)-384-8432
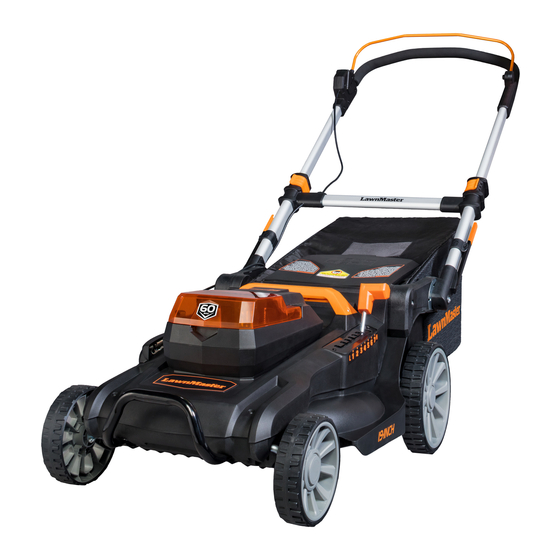
19" 60V MAX* Lithium-Ion Cordless Mower CLMFT6018A
Tondeuse Sans Fil CLMFT6018A 60V MAX* 480mm (19 po)
Advertisement
Table of Contents

Related Manuals for LawnMaster CLMFT6018A


Summary of Contents for LawnMaster CLMFT6018A
- Page 1 EN p. 2 19" 60V MAX* Lithium-Ion Cordless Mower CLMFT6018A FR p. 37 Tondeuse Sans Fil CLMFT6018A 60V MAX* 480mm (19 po) * Maximum initial battery workload voltage (measured without a workload) is 60 volts. Nominal voltage is 54 volts * Tension batterie de la charge de travail initiale maximale (mesurée sans charge de travail)
-
Page 2: Table Of Contents
FEATURES 11-13 ASSEMBLY 13-20 OPERATION 21-23 BATTERY PACK AND CHARGER MAINTENANCE 24-30 ENVIRONMENTAL SAFE BATTERY DISPOSAL TROUBLESHOOTING LawnMaster 60V WARRANTY ® EXPLODED VIEW / PARTS LIST 34-35 NOTES SPECIFICATIONS 60V CORDLESS MOWER Battery Type 60V MAX* Lithium-Ion, 5.0Ah No-load Speed... -
Page 3: Introduction
INTRODUCTION This product has many features for making its use more pleasant and enjoyable. Safety, performance, and dependability have been given top priority in the design of this product making it easy to maintain and operate. GENERAL SAFETY RULES WARNING This symbol indicates important safety instructions. - Page 4 GENERAL SAFETY RULES ■ Plan your mowing pattern in such a way as to avoid discharging material toward roads, sidewalks, bystanders, etc. Do not discharge material against a wall or obstruction. Doing so may cause the discharged material to ricochet back toward the operator. ■...
- Page 5 ■ Use extreme care when approaching blind corners, doorways, shrubs, trees, or other objects that may obscure your view of a child who may run into the path of the mower. CAUTION USE ONLY LawnMaster APPROVED REPLACEMENT BATTERIES, OTHER BATTERIES ®...
- Page 6 SPECIFIC SAFETY RULES BATTERY SAFETY RULES ■ Battery tools do not have to be plugged into an electrical outlet; therefore, they are always in operating condition. Be aware of possible hazards when not using your battery tool or when changing accessories. Following this rule will reduce the risk of electric shock, fire, or serious personal injury.
- Page 7 USE ONLY LawnMaster APPROVED REPLACEMENT BATTERIES, OTHER BATTERIES MAY ® CAUSE INJURY OR DAMAGE TO THE MOWER. Use with LawnMaster 60V Lithium-lon battery. ® Ensure that the device is switched off before inserting the battery. Inserting a battery into a power tool that is switched on may result in accidents.
-
Page 8: Specific Safety Rules
SPECIFIC SAFETY RULES Do not operate the charger on a combustible surface (e.g. paper, textiles). Risk of fire due to heating during charging. If the power cord for this equipment is damaged, it must be replaced by the manufacturer, a customer service agent of the same or qualified person in order to prevent hazards. -
Page 9: Symbols
SYMBOLS Some of the following symbols may be used on this product. Please study them and learn their meaning. Proper interpretation of these symbols will allow you to operate the product better and safer. Volts Voltage Direct Current Type or a characteristic of current Amperes Current Hertz... - Page 10 SYMBOLS Lithium-Ion Battery Designates that this tool is in compliance with Recycling Lithium-Ion battery recycling program requirements Do not dispose of battery packs in rivers or Keep Away From Water immerse in water Do not dispose of battery packs in fire. Keep Away From Fire They will explode or leak and cause injury.
-
Page 11: Features
FEATURES Fig. 1... - Page 12 FEATURES KNOW YOUR LAWN MOWER (See Fig 1) The safe use of this product requires an understanding of the information on the product and in this operator’s manual as well as a knowledge of the project you are attempting. Before use of this product, familiarize yourself with all operating features and safety rules. 1.
-
Page 13: Assembly
FEATURES PACKING LIST Mower Safety Key (Attached inside the Battery Pack Compartment of Mower) Mulching Plug - Comes installed from factory at rear of mower Grass Collection Bag Assembly (Bag & Metal Frame) Side Discharge Chute Battery Charger 60V Lithium-Ion Battery Operator’s Manual Handle Operation Card (Attached to the Mower) NOTE:... - Page 14 ASSEMBLY ASSEMBLING THE COLLECTION BAG (See Figs. 2-3) Your LawnMaster mower comes with a tool-less collection bag. ® To assemble: ■ Check the collection bag before assembling to make sure there is no damage. ■ Pull the collection bag over the steel frame as shown.
- Page 15 ASSEMBLY INTENDED USE This cordless lawnmower is designated with LawnMaster 60V Lithium-Ion batteries. ® The product is intended for mowing and mulching grass in domestic yards only. It must not be used for mowing unusually high, dry or wet grass, e.g. pasture grass, or for shredding leaves.
- Page 16 ASSEMBLY HANDLE BAR HEIGHT ADJUSTMENT (See Figs. 8-9) To adjust height for working: ■ Rotate handle bar into working position. ■ This mower has 2 working positions for different operation height. Choose the position more comfortable for you. Adjust handle bar to the desired position by pulling it up, then close the locking clips (4).
- Page 17 ASSEMBLY Fig. 10 COLLECTION BAG VIEW WINDOW (See Fig. 11) ■ The collection bag (15) is equipped with a clear view window through which user can observe the filling condition during the mowing process. ■ Empty the collection bag in time when there is a sign that collection bag is full or nearly full by observing the view window.
- Page 18 ASSEMBLY NOTE: Mulch plug MUST be removed if collection bag is used during mowing operation. The mulching plug (17) prevents grass from being collected by blocking the collection chute. This allows the grass clippings to be deposited back on the lawn during cutting. ■...
- Page 19 ASSEMBLY INSTALLING / REMOVING THE BATTERY PACK (See Figs. 16-17) WARNING If any parts are broken or missing, do not attempt to attach the battery pack to the mower or operate the mower until the broken or missing parts are replaced. Failure to do so could result in serious injury. Do not connect the battery and/or the safety key before the product is completely assembled.
- Page 20 ASSEMBLY iPOWER MOWER MODE INDICATOR (20a) (See Fig. 18) Located on upper mower handle ■ By default, the motor power is set to “AUTO” and will automatically adjust to your lawn. ■ Push the press button repeatedly to cycle through the different motor power levels.
-
Page 21: Operation
OPERATION STARTING / STOPPING (See Figs. 19-22) ■ To switch on, insert the safety key (19), press and hold the safety switch button (2) and gently pull the start/stop bale switch (1) (Fig. 19-21). Once started, release the safety switch button (2). ■... - Page 22 ■ Check, clean and store the product as described below. Fig. 23 BATTERY PACK AND CHARGER BATTERY CHARGING ■ Use only with 60V LawnMaster battery chargers. The battery charger supplied is specifically ® designed for the Lithium-Ion battery used in this garden appliance.
-
Page 23: Battery Pack And Charger
OPERATION - If the temperature range and charging current are correct and flashing red LED light continues, then remove and reinstall the battery pack. If the LED status repeats a second time, try to charge another identical battery. If the battery charges normally, dispose of the defective battery pack (see Environmental Safe Battery Disposal section). -
Page 24: Maintenance
MAINTENANCE WARNING When servicing, use only identical replacement parts. Use of any other parts may create a hazard or cause product damage. WARNING Always wear safety goggles or safety glasses with side shields during power tool operation or when blowing dust. If operation is dusty, also wear a dust mask. GENERAL MAINTENANCE Avoid using solvents when cleaning plastic parts. - Page 25 Failure to heed this warning could result in serious personal injury. REPLACING THE MOWER BLADE (See Figs. 24-25) NOTE: Remove safety key and battery before performing any maintenance! NOTE: Only use identical replacement blades. LawnMaster mower blade replacement part #RMB6018A. ®...
- Page 26 MAINTENANCE SHARPENING THE BLADE (See Fig. 26) For best mowing performance, the mower blade must be kept sharp. A dull blade does not cut grass evenly and overloads the motor. Under normal circumstances, sharpening the blade twice during the mowing season is usually sufficient. However, if your lawn has sandy soil, more frequent sharpening may be required.
- Page 27 MAINTENANCE REPLACING WHEELS (See Fig. 28) To replace a wheel (10 or 14): NOTE: before replacing a rear wheel (14), set the mower at the highest position. ■ Remove safety key (19) and battery (21) at first before replacing the wheel. ■...
- Page 28 MAINTENANCE STORING THE MOWER (See Figs. 29-34) ■ Remove mower safety key (19) and battery. ■ Turn mower on its side and clean grass clippings that have accumulated on the underside of the mower deck (12). ■ Wipe the mower clean with a dry cloth. ■...
- Page 29 MAINTENANCE ■ Press and hold the locking levers (6) on both sides of handle bar with both hands to release handle bar from locked position, then rotate the handle bar all the way to storage position. Gently pivot the handle until you hear and feel the locking pin engage in storage position. Fig.
- Page 30 MAINTENANCE CHARGER MAINTENANCE ■ Keep the charger clean and clear of debris. Do not allow foreign material into the recessed cavity or on the contacts. Wipe with a dry cloth. Do not use solvents, water, or place in wet conditions. ■...
-
Page 31: Environmental Safe Battery Disposal
ENVIRONMENTAL SAFE BATTERY DISPOSAL The following toxic and corrosive materials are in the batteries used in this battery pack: Lithium-Ion, a toxic material. WARNING All toxic materials must be disposed of in a specified manner to prevent contamination of the environment. -
Page 32: Troubleshooting
TROUBLESHOOTING PROBLEM POSSIBLE CAUSE SOLUTION Key not installed. Check the key installation. Battery not attached or not Check connection of battery to mower. attached securely. No power or power is too low. Charge the battery. Mower fails to start. Defective switch. Replace the switch (call the toll free helpline, at 866-384-8432). -
Page 33: Lawnmaster ® 60V Warranty
® LawnMaster 60V LIMITED WARRANTY ® We take pride in producing a high quality, durable product. This LawnMaster product carries a ® limited four (4) year warranty against defects in workmanship and materials from date of purchase under normal household use. This warranty is void if this product is ever used while providing commercial services or if rented to another person. -
Page 34: Exploded View / Parts List
EXPLODED VIEW / PARTS LIST... - Page 35 EXPLODED VIEW / PARTS LIST CLMFT6018A MANUAL PARTS LIST Key Number Part Number Description Quantity 111198101 Upper Motor Cover Assembly 111198139 Battery Cover Housing 111198102 Motor Cover Handle Assembly 111198103 Motor Cover Assembly 111198104 Battery Holder Assembly 111198105 Safety Key...
-
Page 36: Notes
NOTES...
Need help?
Do you have a question about the CLMFT6018A and is the answer not in the manual?
Questions and answers