
Related Manuals for Detecto APEX Series


Summary of Contents for Detecto APEX Series
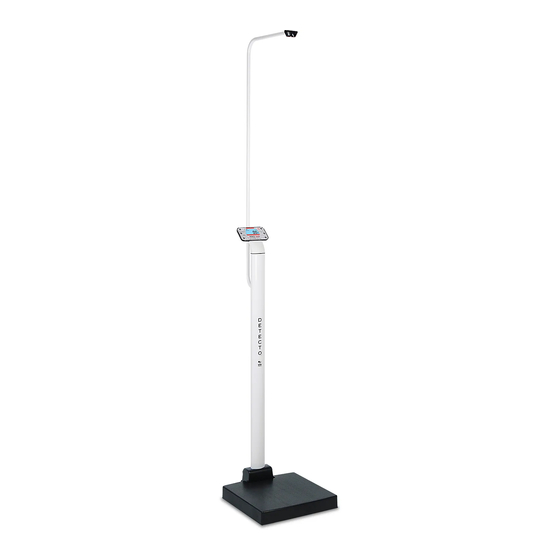
- Page 1 Digital Clinical Scale Owner’s Manual Model apex-sh Model apex With Sonar Height Rod With Inline Height Rod 3300-0188-0M Rev L apex Digital Scale Owner’s...
- Page 2 3300-0188-0M Rev L apex Digital Scale Owner’s...
- Page 3 INTRODUCTION Thank you for purchasing our Detecto apex® Digital Clinical Scale. It has been manufactured with quality and reliability and has been tested before leaving our factory to ensure accuracy and dependability for years to come. This manual is provided to guide you through installation and operation of your scale. Please read it thoroughly before attempting to install or operate your scale and keep it available for future reference.
- Page 4 PROPER DISPOSAL When this device reaches the end of its useful life, it must be properly disposed of. It must not be disposed of as unsorted municipal waste. Within the European Union, this device should be returned to the distributor from where it was purchased for proper disposal. This is in accordance with EU Directive 2002/96/EC.
-
Page 5: Table Of Contents
TABLE OF CONTENTS SPECIFICATIONS ........... Page 1 Standard Features . -
Page 7: Specifications
SPECIFICATIONS Models: apex® apex®-sh (with Inline Height Rod) (with Sonar Height Rod) Height Rod Type: Inline Height Rod Sonar Height Rod Height Rod Measures: 24” (2’) – 86” (7’2”) x 0.125 in 24” (2’) – 86” (7’2”) x 0.2 in (60 cm –... -
Page 8: Site Preparation Requirements
SITE PREPARATION REQUIREMENTS The apex® Digital Clinical Scale is a precision weight indicating instrument. As with any precision instrument, it requires an acceptable environment to operate at peak performance and reliability. This section is provided to assist you in obtaining such an environment. Environmental For indoor use only. -
Page 9: Unpacking
UNPACKING Carefully remove the apex® Digital Clinical Scale from the shipping carton and inspect it for any damage that may have taken place during shipment. Keep and use the original carton and packing material for return shipment if it should become necessary. The purchaser is responsible for filing all claims for any damages or loss incurred during transit. - Page 10 4. Position the column over the opening in the scale base and then insert the column into the scale base making sure the cable from the column goes out of the scale base and under the axle for the wheels. 5.
- Page 11 8. Slide the column cover down onto the base. Note that you may have to pull the cover out slightly to clear the AC power jack. 9. Place the scale base cover on the scale base and press down on both sides of the cover.
-
Page 12: Apex-Sh (With Sonar Height Rod) Assembly
APEX-SH (with Sonar Height Rod) ASSEMBLY TOOLS REQUIRED: 3/16” Allen wrench 1. Place the scale base on a level floor. 2. Locate the scale base cable and pull it out of the base and under the wheel’s axle. 3. Install the column cover onto the column. Step 1 Step 2 Step 3... - Page 13 7. Using the 3/16” Allen wrench, evenly tighten the (4) Allen head screws on the back of the scale base to secure column to scale base. NOTE: The nuts on the front of the column opening in the scale base may turn as you are tightening the Allen head screws.
- Page 14 12. Place the bracket over the sonar tube making sure the tube is completely down in the bracket. 13. Next, insert the cable and connector into the hole on the back of the column. 14. Aligning the large end of the slotted holes in the bracket with the screws in the column, (see Step 12 and Step 13) place the sonar tube on the back of the column and pull down to secure the sonar bracket to the column.
-
Page 15: Weighing Units Selection
WEIGHING UNITS SELECTION NOTE: The following instructions apply to all models of the apex® Digital Clinical Scale, the apex with the Inline Height Rod, and the apex-sh with the Sonar Height Rod. When the scale is turned on for the first time, it will display a prompt to select the weighing units to use for your operation, lb (pounds) or kg (kilograms). -
Page 16: Interconnections
In order to use the port, an apex to PC serial cable can be purchased from the Cardinal/Detecto Parts Department at (800) 641-2045 or parts@cardet.com. The part number is 3300-0271-0A, APEX TO PC SERIAL CABLE (9-pin, D-Sub, Female Connector). -
Page 17: Batteries
BATTERIES The scale can use twelve "AA” size Alkaline, Ni-Cad, or NiMH batteries (not included). You must first obtain and install batteries before operations can begin. Batteries are contained in two battery holders (six batteries in each holder) inside the scale base. Remove the scale platform cover to access the battery holders in the scale base. -
Page 18: Battery Installation/Replacement
Battery Installation/Replacement To install or remove the batteries, the following steps should be followed: 1. Remove the platform cover from the scale base. 2. Referring to Figure No. 1, locate the two battery holders in the scale base. 3. If installing new batteries, proceed to step 4. If replacing the batteries, remove all twelve batteries (six in each holder) from the battery holders, and then proceed to step 4. -
Page 19: Keypad Functions
KEYPAD FUNCTIONS DO NOT operate the keys with pointed objects (pencils, pens, etc.). Damage to keys resulting from this practice is NOT covered under warranty. This is the Power key. With the scale off, pressing this key will apply power to the scale and turn on the display. - Page 20 This is the MOTHER/BABY key. It is used with the Mother/Baby Weighing feature to determine the weight of infants and toddlers held by an adult. This feature allows the adult to be weighed first, and then the adult and infant/child weighed with only the weight of the infant/child displayed.
-
Page 21: Annunciators
ANNUNCIATORS The annunciators are displayed on the Weight screen to show that the scale is in the mode corresponding to the annunciator label or that the status indicated by the label is active. The low battery annunciator is located in the upper left corner of the display. It is used to indicate the battery status. -
Page 22: Apex (With Inline Height Rod) Operation
APEX (with Inline Height Rod) OPERATION ALWAYS assist the patient in stepping on and off the scale platform to ensure they do not fall. NEVER leave a patient unattended while they are on the scale platform. Failure to maintain control of the patient at all times can result in serious injury to the patient and/or you. -
Page 23: Inline Height Rod Operation
INLINE HEIGHT ROD OPERATION If the patient is 47" (120 cm) or taller: 1. Lift spoon on height rod to horizontal position. 2. Referring to the illustration to the right, raise spoon, and inner height rod well above estimated height of patient’s head. -
Page 24: Apex-Sh (With Sonar Height Rod) Operation
APEX-SH (with sonar height rod) OPERATION ALWAYS assist the patient in stepping on and off the scale platform to ensure they do not fall. NEVER leave a patient unattended while they are on the scale platform. Failure to maintain control of the patient at all times can result in serious injury to the patient and/or you. -
Page 25: Body Mass Index (Bmi) Operation, Using Previously Measured Height
Body Mass Index (BMI) Operation ( Using Previously Measured Height) 1. Press key to turn scale on. 2. If required, press key to zero weight display. 3. Assist patient onto scale. 4. When weight is stable, the (STABLE) annunciator will turn. 5. -
Page 26: Mother/Baby Weighing
MOTHER/BABY WEIGHING ALWAYS assist the mother alone, and when holding the baby/child in stepping on and off the scale platform to ensure they do not fall. NEVER leave the mother or mother holding the baby/child unattended while they are on the scale platform. Failure to maintain control of the mother or mother holding the baby/child at all times can result in serious injury to the mother or mother holding the baby/child and/or you. -
Page 27: Scale Setup
SCALE SETUP Your apex® Digital Clinical Scale has been pre-configured at the factory and should not require changes for use in most applications. However, if the factory settings do not meet the requirements of your operation, the following describes the setup process for your scale. NOTE: The keys are not to be operated with pointed objects (pencils, pens, fingernails, etc.). - Page 28 (SCALE CAPACITY) The display will show and the current setting. If the value displayed is acceptable, press the key. Otherwise, press the keys to select a new value and then press key to save it and proceed to the next prompt. This is the maximum allowed weight of the scale.
- Page 29 (OIML) This setting controls the OIML (European) specific requirements. The display will show and the current setting. If the value displayed is acceptable, press the key. Otherwise, press the keys to toggle the OIML selection between and then press the key to save it and proceed to the next prompt.
- Page 30 Welch Allyn CVSM Device when the weight on the scale stabilizes and the (STABLE) annunciator turns on. (Requires device to have an activated license. Must purchase Detecto WACONNECT) (SMA, Weight-On-Demand) was selected for USB, and the scale is connected to a...
-
Page 31: (Sonar Height Rod Calibration)
(HOUR) The display will show and the current setting. If the value displayed is acceptable, press the key. Otherwise, press the keys to select a new value and then press key to save it and proceed to the next prompt. This is the current hour setting of the real time clock. - Page 32 (HOLD TIME) This setting is used by the scale to hold a stable patient weight for a desired amount of time. For example, if a value of 5 seconds is used, then when the scale locks onto a stable patient weight, it will remain locked for 5 seconds before automatically releasing the weight. The display will show and the current setting.
- Page 33 (Gravity Compensation) Gravity compensation accounts for latitudes and elevations that are different from where the scale was calibrated. In order to calculate the value for this parameter, use the gravitational constant of the location where the scale was calibrated divided by the gravitational constant of where the scale will be installed: Gravitational Constant (Calibration location) ---------------------------------------------------------- = value...
-
Page 34: Data Formats
DATA FORMAT (Continuous Output) (continuous output) was selected, the scale will continuously transmit weight data in SMA format (see below). (Weight-On-Demand) (Weight-On-Demand) was selected and the scale is connected to a host device (computer) for transmission of weight data to a PC-based EMR (electronic medical record) software program, it will transmit a single set of weight data each time the host device (computer) sends a SMA weight request “W”... -
Page 35: Event Counter
EVENT COUNTER Your apex® Digital Clinical Scale has been designed with an Event Counter type of security seal. When selected, the scale will display two numbers representing the Calibration and Configuration counters. Calibration Counter ( The calibration counter is incremented when a value in the calibration part of setup is changed ( ). -
Page 36: Error And Operation Messages
ERROR AND OPERATION MESSAGES The apex® scale is equipped with diagnostic software that tests various portions of the scale's circuitry and verifies proper operation. Should a problem be detected, an error or status message will be displayed. The following lists these messages and their meaning. Display Meaning This symbol appears when the scale weight reading is at center of zero. -
Page 37: Care And Cleaning
CARE AND CLEANING NOTE: The scale contains no user-serviceable parts and maintenance should be limited to an occasional cleaning and battery replacement as required. Do not submerge the scale in water, pour, or spray water directly on it to clean. The scale is not waterproof and covering it with water will damage it and void the warranty. -
Page 38: Parts Identification
PARTS IDENTIFICATION APEX (with Inline Height Rod) FINAL ASSEMBLY Item Qty. Part Number Description 3300-0142-0A SUB-ASSY, APEX COLUMN, MHR 3300-0145-0A SUB-ASSY, APEX BASE SCW FLAT-HEAD THREAD CUTTING TYPE 25, 6021-1293 #4-24 X 1/4, PHIL. DR. Z-PLATE SUB-ASSY, DISPLAY, APEX 3300-0153-0A 6800-1045 OPTIONAL AC ADAPTER 100-240VAC/12VDC @ 1 AMP NOT SHOWN... - Page 39 PARTS IDENTIFICATION APEX (with Inline Height Rod) COLUMN SUB-ASSEMBLY Item Qty. Part Number Description 3300-0067-08 THROAT REAR 3300-0069-08 THROAT FRONT, MHR 3300-0087-18 COLUMN, DRILLED 3300-0146-0A SUB-ASSY, MHR 3300-0278-0A APEX COLUMN CABLE MHR SCW FLAT-HEAD THREAD CUTTING TYPE 25, 6021-1293 #4-24 X 1/4, PHIL. DR. Z-PLATE 6021-1509 SCW PAN-HEAD, SHEET METAL #8X.75 6650-1114...
-
Page 40: Apex-Sh (With Sonar Height Rod)
PARTS IDENTIFICATION APEX-SH (with sonar height rod) FINAL ASSEMBLY Item Qty. Part Number Description 3300-0140-0A SUB-ASSY, SONAR HR 3300-0143-0A SUB-ASSY, APEX COLUMN, SONAR 3300-0145-0A SUB-ASSY, APEX BASE SONAR BRACKET 3300-0265-08 6013-0049 NUT 1/4-20 HEX JAM SCW FLAT-HEAD THREAD CUTTING TYPE 25, 6021-1293 #4-24 X 1/4, PHIL. - Page 41 PARTS IDENTIFICATION APEX-SH (with sonar height rod) COLUMN SUB-ASSEMBLY Item Qty. Part Number Description 3300-0067-08 THROAT REAR 3300-0068-08 THROAT FRONT 3300-0087-08 COLUMN, DRILLED & SONAR 3300-0278-1A CABLE, APEX COLUMN, SONAR SCW FLAT-HEAD THREAD CUTTING TYPE 25, 6021-1293 #4-24 X 1/4, PHIL. DR. Z-PLATE 6021-1509 SCW PAN-HEAD, SHEET METAL #8X.75 6650-1114...
- Page 42 PARTS IDENTIFICATION SONAR HEIGHT ROD SUB-ASSEMBLY Item Qty. Part Number Description 3300-0022-08 HEIGHT SENSOR TUBE 3300-0060-08 SONAR FRONT ENCLOSURE 3300-0061-08 SONAR REAR ENCLOSURE 3300-0135-0A CABLE, ICON/APEX SONAR SCW FLAT-HEAD THREAD CUTTING TYPE 25, 6021-1293 #4-24 X 1/4, PHIL. DR. Z-PLATE SCW PAN HEAD PHILIPS #1-32X3/8”...
-
Page 43: Display Sub-Assembly
PARTS IDENTIFICATION DISPLAY SUB-ASSEMBLY Item Qty. Part Number Description 3300-0042-0A PCB ASS’Y 755 CONTROLLER/DISPLAY 3300-0050-08 DISPLAY ENCLOSURE 3300-0382-0A DISPLAY FRONT, APEX, WITH IMAGE 3300-0072-08 APEX BUTTONS 3300-0089-08 UNDERLAY FOAM, APEX 3300-0150-08 UNDERLAY, APEX 3300-0149-08 UNDERLAY, APEX-SH 3300-0154-08 UNDERLAY BACKING, APEX SCW PAN-HEAD THREAD CUTTINT TYPE 25, #4X1/4, 6021-1286 PHIL. -
Page 44: Base Sub-Assembly
PARTS IDENTIFICATION BASE SUB-ASSEMBLY Item Qty. Part Number Description 3300-0053-08 COLUMN CLAMP 3300-0058-28 SOCKET COVER, APEX 3300-0059-08 WHEELS 3300-0082-08 LOAD CELL SPACER 3300-0086-0A APEX WEIGHBRIDGE 3300-0094-0A APEX BASE WELDMENT 3300-0136-1A CABLE, APEX BATTERY 3300-0138-1A CABLE, APEX LOAD CELL 3300-0147-0A SUB-ASSY, PLATFORM COVER, APEX 6013-0049 NUT 1/4-20 HEX JAM 6013-2006... - Page 45 PARTS IDENTIFICATION BASE SUB-ASSEMBLY 3300-0188-0M Rev L apex Digital Scale Owner’s...
- Page 46 (2) years from date of shipment. Detecto shall be the sole judge of what constitutes a defect.
- Page 47 This warranty sets forth the extent of our liability for breach of any warranty or deficiency in connection with the sale or use of the product. Detecto will not be liable for consequential damages of any nature, including but not limited to, loss of profit, delays, or expenses, whether based on tort or contract.
- Page 48 Printed in USA 3300-0188-0M Rev L 02/20 3300-0188-0M Rev L apex Digital Scale Owner’s...
Need help?
Do you have a question about the APEX Series and is the answer not in the manual?
Questions and answers